
:max_bytes(150000):strip_icc():format(webp)/african-american-woman-opening-packages-of-shoes-on-sofa-580503483-5a735094d8fdd50036b63f8a.jpg)
Updated Top Tips for Integrating Auditory Elements with Visual Images for 2024
Top Tips for Integrating Auditory Elements with Visual Images
Almost everyone shoots videos and photos now. But sometimes, it’s hard to record videos while boring to capture images. What if a hybrid mingles still images with an audio file? You can add audio to photo easily.
Images with a soundtrack are simpler to create and more interactive than video; they naturally improve the project without time commitment or complexity. The question that appears is; how to add audio to a photo/image and create great multimedia photography?
In this post, we will describe and clear all your queries on how to add audio to photo. Whether you wish to combine audio and image on the computer or add audio to iPhone pictures, you can all find the answer.
In this article
01 [Can I add audio to the photo?](#Part 1)
02 [How to add audio to a photo?](#Part 2)
03 [Secret about adding audio to the photo?](#Part 3)
Part 1 Can I add audio to the photo?

Yes, it’s possible to add audio to photo, and we have various methods to do this. One of the simplest methods is arranging images into slideshows and adding audio.
Yes, there are different ways by which you can add audio to photo online or offline, including both the easiest and most brutal ways. Let’s list out some general courses as follows!
● The first and common way is by making a slideshow or photo collage like a video and adding background music as audio.
● You can use an image collage app or add audio to a photo app for Android or iPhone devices.
● Lastly, you can add audio to the photo online editor or online video editing program and include voiceover or background music.
All in all, it’s possible to add audio to photo provided you’ve to look straightforward and quick ways of doing so.
Part 2 How to add audio to a photo?
ACDSee supports images with embedded audio and photos with associated audio files. Images with embedded audio are JPEG or TIFF images saved inside the photo folder. You can embed audio inside the folder of photos by adding audio to the photo online.
Images with associated audio are photos are merged with individual WAV audio files. The photo folders and their associated audio files contain the same file name and are placed within the same folder.
You can associate any WAV file with a photo by assigning them the same name and locating them in the same folder or adding audio to the photo.
Note: If you rename or move either an audio file or an image file associated with it, you must rename both the folders or they will not associate for longer. It does not apply to photos with embedded audio.
Steps to add audio to photo via ACDSee
Do one of the following:
● Select an image in Manage mode.
● Open an image in View mode.
Step1 Click Tools | Image Audio | Edit
Step2 In the Edit Audio dialog box, click the Browse button
Step3 Select a WAV file and click Save
Step4 If you would like to truncate or clip the audio file, select the Use markers checkbox and drag the Start marker and End marker sliders. Do one of the following
● Click the Truncate button to remove the beginning and end of the audio file (the sections outside of the start and end markers).
● Click the Clip button to remove the audio file section inside the start and end markers.
Step5 To hear a preview of the file, click the Play button
Step6 Click OK
Part 3 Secret about adding audio to the photo?
If you’re looking to add audio to a photo in a straightforward manner, here’s a tip for you than going complex. It’s because the software or programs available are highly problematic when it comes to better understanding. Thus, using the ideal program is the best way out (and a secret)!
We have to admit that customization is quite trendy among the young generation. Customizing a unique album is a cool thing, too.
A professional editing tool would be an ideal helper to do this (hence, the reason you’re here). While a great variety of music management software and video editors support adding audio to images, Wondershare Filmora stands out for its efficiency, simplicity, and robust capability.
To get started, consider a free trial copy of Wondershare Filmora
Step1 Import Media
Hit the “Import” tab to load your songs from ripped CDs or downloaded from the internet.
Then drag and drop your image in a format like JPEG, JPG, JPE, GIF, BMP, DIB, PNG, JFIF, TIFF, TIF to the media library panel. Now you’ll consider using all the imported files displayed as thumbnails in the Media library.
Step2 Drag and Drop to add photos to audio
Drag songs and photos from the Media Library to the Timeline accordingly.
Filmora assists you in adding various photos to the audio. You can highlight the image and hover your mouse to the last section.
Click the “set duration” icon on the toolbar and set it to fit your music file’s length.
Tips: You can zoom-out or zoom-in on the Timeline in the top right corner by dragging the timeline slider to find the ideal position easily.
Check the effect in the preview window after this. If possible, you can ramp up your creation, e.g., add captions, apply special effects, transitions, and even create a picture-in-picture effect.

Step3 Save Music with Photos
When you’re satisfied with the outcomes, hit the Export tab.
Then, select MP4 under the format tab in the output window, or if you want to play the media on your phone, you can choose the device in the Export window and choose target devices among iPad, iPhone, or Apple TV, etc. Filmora will create a proper setting for phone device saving.

Bonus tips
Rip audio from video: If you wish to extract audio from a movie trailer, film, comedy, TV show, etc., highlight the video file in the Timeline tab, right-click it and choose the “Audio Detach” tab, then you can eliminate the original video stream and save in a new MP3 format, and now you can freely add your images to the ripped music.
Or, you can delete the original audio file and add a new one.
Conclusion
So, that’s all you had to know about adding audio to photo. We’ve discussed all the questions you’re wandering on how to add audio to photo online and mentioned the different ways by which you can do the same.
As the uploading speed is slow, we highly suggest using Filmora to add audio to photos. Besides, Filmora provides 50 plus sounds that you can use. Try it now!
02 [How to add audio to a photo?](#Part 2)
03 [Secret about adding audio to the photo?](#Part 3)
Part 1 Can I add audio to the photo?
Yes, it’s possible to add audio to photo, and we have various methods to do this. One of the simplest methods is arranging images into slideshows and adding audio.
Yes, there are different ways by which you can add audio to photo online or offline, including both the easiest and most brutal ways. Let’s list out some general courses as follows!
● The first and common way is by making a slideshow or photo collage like a video and adding background music as audio.
● You can use an image collage app or add audio to a photo app for Android or iPhone devices.
● Lastly, you can add audio to the photo online editor or online video editing program and include voiceover or background music.
All in all, it’s possible to add audio to photo provided you’ve to look straightforward and quick ways of doing so.
Part 2 How to add audio to a photo?
ACDSee supports images with embedded audio and photos with associated audio files. Images with embedded audio are JPEG or TIFF images saved inside the photo folder. You can embed audio inside the folder of photos by adding audio to the photo online.
Images with associated audio are photos are merged with individual WAV audio files. The photo folders and their associated audio files contain the same file name and are placed within the same folder.
You can associate any WAV file with a photo by assigning them the same name and locating them in the same folder or adding audio to the photo.
Note: If you rename or move either an audio file or an image file associated with it, you must rename both the folders or they will not associate for longer. It does not apply to photos with embedded audio.
Steps to add audio to photo via ACDSee
Do one of the following:
● Select an image in Manage mode.
● Open an image in View mode.
Step1 Click Tools | Image Audio | Edit
Step2 In the Edit Audio dialog box, click the Browse button
Step3 Select a WAV file and click Save
Step4 If you would like to truncate or clip the audio file, select the Use markers checkbox and drag the Start marker and End marker sliders. Do one of the following
● Click the Truncate button to remove the beginning and end of the audio file (the sections outside of the start and end markers).
● Click the Clip button to remove the audio file section inside the start and end markers.
Step5 To hear a preview of the file, click the Play button
Step6 Click OK
Part 3 Secret about adding audio to the photo?
If you’re looking to add audio to a photo in a straightforward manner, here’s a tip for you than going complex. It’s because the software or programs available are highly problematic when it comes to better understanding. Thus, using the ideal program is the best way out (and a secret)!
We have to admit that customization is quite trendy among the young generation. Customizing a unique album is a cool thing, too.
A professional editing tool would be an ideal helper to do this (hence, the reason you’re here). While a great variety of music management software and video editors support adding audio to images, Wondershare Filmora stands out for its efficiency, simplicity, and robust capability.
To get started, consider a free trial copy of Wondershare Filmora
Step1 Import Media
Hit the “Import” tab to load your songs from ripped CDs or downloaded from the internet.
Then drag and drop your image in a format like JPEG, JPG, JPE, GIF, BMP, DIB, PNG, JFIF, TIFF, TIF to the media library panel. Now you’ll consider using all the imported files displayed as thumbnails in the Media library.
Step2 Drag and Drop to add photos to audio
Drag songs and photos from the Media Library to the Timeline accordingly.
Filmora assists you in adding various photos to the audio. You can highlight the image and hover your mouse to the last section.
Click the “set duration” icon on the toolbar and set it to fit your music file’s length.
Tips: You can zoom-out or zoom-in on the Timeline in the top right corner by dragging the timeline slider to find the ideal position easily.
Check the effect in the preview window after this. If possible, you can ramp up your creation, e.g., add captions, apply special effects, transitions, and even create a picture-in-picture effect.
Step3 Save Music with Photos
When you’re satisfied with the outcomes, hit the Export tab.
Then, select MP4 under the format tab in the output window, or if you want to play the media on your phone, you can choose the device in the Export window and choose target devices among iPad, iPhone, or Apple TV, etc. Filmora will create a proper setting for phone device saving.
Bonus tips
Rip audio from video: If you wish to extract audio from a movie trailer, film, comedy, TV show, etc., highlight the video file in the Timeline tab, right-click it and choose the “Audio Detach” tab, then you can eliminate the original video stream and save in a new MP3 format, and now you can freely add your images to the ripped music.
Or, you can delete the original audio file and add a new one.
Conclusion
So, that’s all you had to know about adding audio to photo. We’ve discussed all the questions you’re wandering on how to add audio to photo online and mentioned the different ways by which you can do the same.
As the uploading speed is slow, we highly suggest using Filmora to add audio to photos. Besides, Filmora provides 50 plus sounds that you can use. Try it now!
Audiophile’s Guide to MP3 Enhancement: Fundamental Strategies
Music lovers usually have a collection of MP3 songs. Some like to collect songs, and some like to listen to new songs, whereas some people are very much interested in simply editing MP3 songs. For doing this, a good MP3 editor is essential.
How to find a good audio MP3 editor? The article understudy will introduce an amazing audio editor along with its steps so that you get to know how to edit MP3 files. If you are ready to learn more about MP3 editing, then let’s get started without any further delay.
In this article
02 3 Popular Free MP3 Editor for Windows
Part 1 How to Edit MP3 Files?
As we have mentioned earlier, to edit MP3 files, a good audio editor is essential. Do you know any good Audio Editor? Although there are various editors, Wondershare Filmora is unbeatable. It offers a whole editing world to its users. Filmora is hands down the best software when it comes to audio editing. Its intuitive interface is easy to understand and work with that even beginners can use it.
What else does Filmora have to offer? It provides various editing elements. You name anything, and Filmora has it. The editor has a wide variety of Transitions, Effects, Filters, and other elements. Interestingly, Filmora also has a media library, Filmstock, that is full of amazing things.
Features of Filmora That Will Amaze You
As we are talking about MP3 editing so, let’s shed light on Filmora Audio Editor. The editor has some mind-blowing features that you should know.
- Audio Split is a key feature that good Audio Editors must have. Filmora lets you split audio, and additionally, you can also Trim Audio with this editor.
- A very highlighting feature that you get from Filmora Audio Editor is ‘Detach Audio from Video.’ With this feature, you can detach and remove audio from video.
- Features like Audio Denoise, Audio Mixer, Audio Equalizer are also offered by Wondershare Filmora Audio Editor.
- Ready to know a fun feature? Not only can you add Voiceover, Filmora easily replaces the original audio of the video.
For Win 7 or later (64-bit)
For macOS 10.12 or later
Step-by-Step Guideline to use Filmora Audio Editor
Are you ready to use Filmora Audio Editor, but do you know how to edit an MP3 file? Don’t worry if you have never done this before because we are about to share its step-by-step guideline.
Step 1: Importing Audio
To edit the MP3 file with Filmora Audio Editor, you firstly need to create a new project. After the project has been created, let’s import the media file. For that, go to ‘Import Media’ from the Files tab and select ‘Import Media Files.’

Step 2: Audio Editing Panel
Once the file has been imported, drag it onto the timeline so that you can start editing the audio. You have to double click on the audio file to open the ‘Audio Editing Panel.’

Step 3: Let’s Start Editing
With the Audio Editing Panel, you can completely edit and customize the MP3 file. It offers the ‘Fade In’ and ‘Fade Out’ options. You can also remove background noise from the ‘Denoise’ option. Moreover, you can use the Equalizer, set the Pitch, etc.

Step 4: Export the File
Lastly, once the editing is complete and you are satisfied, you can export the file. For that, hit the ‘Export’ button to open the export window. There, head over to the ‘Local’ section to select ‘MP3’ as the output format and ‘Export’ it to your device.

Part 2 3 Popular Free MP3 Editor for Windows
Now that we have discussed in detail Wondershare Filmora, should we talk a little about free MP3 editors? You can get a variety of free MP3 editors for Windows on the internet, but how do you know that yours is the best? If you want to know about the 3 best MP3 editors that are famous for their features, then this section is for you.
01 Audacity
Audacity is a fantastic audio editing software that is perfect for music trimming, sound effects, and dialogue. The tool offers a free version to its users. Audacity is open-source, a multi-track audio editor that makes editing easy.
The plus point for this editing software is that it supports a wide range of file formats like FLAC, WAV, MP3, and others. What attracts the users? Well, the easy and simple interface of Audacity attracts a lot of users. Another thing that matters a lot is the installation process, and in Audacity’s case, the installation is pretty easy.

- For endless audio editing and merging audio files, nothing is better than Audacity. Also, the software supports 16-bit, 24-bit, and 32-bit sound quality.
- Audacity provides support to various plug-ins, for instance, LV2, Nyquist, VST, LADSPA, and also Audio Unit Effect.
- Another interesting thing about Audacity is that it records live audio from Mic or Mixer. You can also combine files and export them in different formats.
02 Ocenaudio
Can you name a great audio editor for home musicians and podcasters? Yes, Ocenaudio Audio Editor is the perfect, free audio editing platform for podcasters and home musicians. The audio editor has a very clear interface that everyone can use easily, without any complications. Editing MP3 files and analyzing them is made easy with Ocenaudio.
The audio editing software is famous because of its efficiency as it can edit large files. Do you want to know the fascinating thing about Ocenaudio? Well, the software uses advanced memory management, which means it opens files without wasting your PC’s memory.

- The audio editor is the best option for everyday audio editing. Also, the software offers great filter selection with precise selection tools.
- What attracts the most users is its powerful and complete spectrogram view. Along with the waveform view, Ocenaudio also features a spectrogram view of the audio files.
- The software offers uniform features and the same graphics on all versions. Moreover, it supports various platforms like Windows, Mac OS X, and Linux.
03 WavePad Audio Editor
Are you ready to talk about WavePad Audio Editor? The software is very famous because of the wide range of features it offers. What can you do with this audio editor? Let’s start sharing!
With WavePad Audio Editor, you can edit audio by trimming, cutting, joining, splitting, etc. In addition to editing, you can also add different effects to your audio. For instance, effects like to normalize, amplify, equalize, etc. The audio editor also supports extracting audio from CDs and removing audio noise.
Do you know what else it can do? You can easily edit and export the audio file in different formats from WavePad Audio Editor.

- The most amazing thing about WavePad Audio Editor is that it supports batch processing. You no longer have to wait as the software works very efficiently.
- Want to know something interesting about WavePad Audio Editor? It is compatible with different file formats and holds strong editing capabilities.
- Which audio editor can compress files? With WavePad, you can compress files with great ease and load files with just two mouse clicks.
Bottom Line
As we promised earlier that we would help you and guide you on how to edit MP3 files so, this article has everything you need. We shared how you can edit MP3 files with the best audio MP3 editor, Wondershare Filmora. Along with that, we also shared 3 popular and free audio MP3 editors.
Wondershare Filmora
Get started easily with Filmora’s powerful performance, intuitive interface, and countless effects!
Try It Free Try It Free Try It Free Learn More >

02 3 Popular Free MP3 Editor for Windows
Part 1 How to Edit MP3 Files?
As we have mentioned earlier, to edit MP3 files, a good audio editor is essential. Do you know any good Audio Editor? Although there are various editors, Wondershare Filmora is unbeatable. It offers a whole editing world to its users. Filmora is hands down the best software when it comes to audio editing. Its intuitive interface is easy to understand and work with that even beginners can use it.
What else does Filmora have to offer? It provides various editing elements. You name anything, and Filmora has it. The editor has a wide variety of Transitions, Effects, Filters, and other elements. Interestingly, Filmora also has a media library, Filmstock, that is full of amazing things.
Features of Filmora That Will Amaze You
As we are talking about MP3 editing so, let’s shed light on Filmora Audio Editor. The editor has some mind-blowing features that you should know.
- Audio Split is a key feature that good Audio Editors must have. Filmora lets you split audio, and additionally, you can also Trim Audio with this editor.
- A very highlighting feature that you get from Filmora Audio Editor is ‘Detach Audio from Video.’ With this feature, you can detach and remove audio from video.
- Features like Audio Denoise, Audio Mixer, Audio Equalizer are also offered by Wondershare Filmora Audio Editor.
- Ready to know a fun feature? Not only can you add Voiceover, Filmora easily replaces the original audio of the video.
For Win 7 or later (64-bit)
For macOS 10.12 or later
Step-by-Step Guideline to use Filmora Audio Editor
Are you ready to use Filmora Audio Editor, but do you know how to edit an MP3 file? Don’t worry if you have never done this before because we are about to share its step-by-step guideline.
Step 1: Importing Audio
To edit the MP3 file with Filmora Audio Editor, you firstly need to create a new project. After the project has been created, let’s import the media file. For that, go to ‘Import Media’ from the Files tab and select ‘Import Media Files.’
Step 2: Audio Editing Panel
Once the file has been imported, drag it onto the timeline so that you can start editing the audio. You have to double click on the audio file to open the ‘Audio Editing Panel.’
Step 3: Let’s Start Editing
With the Audio Editing Panel, you can completely edit and customize the MP3 file. It offers the ‘Fade In’ and ‘Fade Out’ options. You can also remove background noise from the ‘Denoise’ option. Moreover, you can use the Equalizer, set the Pitch, etc.
Step 4: Export the File
Lastly, once the editing is complete and you are satisfied, you can export the file. For that, hit the ‘Export’ button to open the export window. There, head over to the ‘Local’ section to select ‘MP3’ as the output format and ‘Export’ it to your device.
Part 2 3 Popular Free MP3 Editor for Windows
Now that we have discussed in detail Wondershare Filmora, should we talk a little about free MP3 editors? You can get a variety of free MP3 editors for Windows on the internet, but how do you know that yours is the best? If you want to know about the 3 best MP3 editors that are famous for their features, then this section is for you.
01 Audacity
Audacity is a fantastic audio editing software that is perfect for music trimming, sound effects, and dialogue. The tool offers a free version to its users. Audacity is open-source, a multi-track audio editor that makes editing easy.
The plus point for this editing software is that it supports a wide range of file formats like FLAC, WAV, MP3, and others. What attracts the users? Well, the easy and simple interface of Audacity attracts a lot of users. Another thing that matters a lot is the installation process, and in Audacity’s case, the installation is pretty easy.
- For endless audio editing and merging audio files, nothing is better than Audacity. Also, the software supports 16-bit, 24-bit, and 32-bit sound quality.
- Audacity provides support to various plug-ins, for instance, LV2, Nyquist, VST, LADSPA, and also Audio Unit Effect.
- Another interesting thing about Audacity is that it records live audio from Mic or Mixer. You can also combine files and export them in different formats.
02 Ocenaudio
Can you name a great audio editor for home musicians and podcasters? Yes, Ocenaudio Audio Editor is the perfect, free audio editing platform for podcasters and home musicians. The audio editor has a very clear interface that everyone can use easily, without any complications. Editing MP3 files and analyzing them is made easy with Ocenaudio.
The audio editing software is famous because of its efficiency as it can edit large files. Do you want to know the fascinating thing about Ocenaudio? Well, the software uses advanced memory management, which means it opens files without wasting your PC’s memory.
- The audio editor is the best option for everyday audio editing. Also, the software offers great filter selection with precise selection tools.
- What attracts the most users is its powerful and complete spectrogram view. Along with the waveform view, Ocenaudio also features a spectrogram view of the audio files.
- The software offers uniform features and the same graphics on all versions. Moreover, it supports various platforms like Windows, Mac OS X, and Linux.
03 WavePad Audio Editor
Are you ready to talk about WavePad Audio Editor? The software is very famous because of the wide range of features it offers. What can you do with this audio editor? Let’s start sharing!
With WavePad Audio Editor, you can edit audio by trimming, cutting, joining, splitting, etc. In addition to editing, you can also add different effects to your audio. For instance, effects like to normalize, amplify, equalize, etc. The audio editor also supports extracting audio from CDs and removing audio noise.
Do you know what else it can do? You can easily edit and export the audio file in different formats from WavePad Audio Editor.
- The most amazing thing about WavePad Audio Editor is that it supports batch processing. You no longer have to wait as the software works very efficiently.
- Want to know something interesting about WavePad Audio Editor? It is compatible with different file formats and holds strong editing capabilities.
- Which audio editor can compress files? With WavePad, you can compress files with great ease and load files with just two mouse clicks.
Bottom Line
As we promised earlier that we would help you and guide you on how to edit MP3 files so, this article has everything you need. We shared how you can edit MP3 files with the best audio MP3 editor, Wondershare Filmora. Along with that, we also shared 3 popular and free audio MP3 editors.
Wondershare Filmora
Get started easily with Filmora’s powerful performance, intuitive interface, and countless effects!
Try It Free Try It Free Try It Free Learn More >
“Creative Freedom at No Cost: Top Free Audio Engineering Tools of the Year “
Top 10 Best Audio Mixer Software for FREE

Benjamin Arango
Mar 27, 2024• Proven solutions
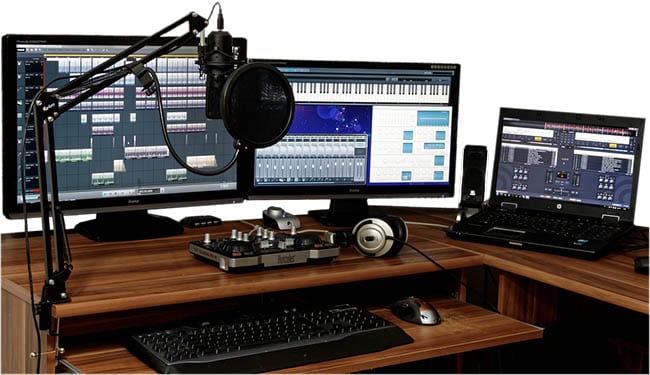
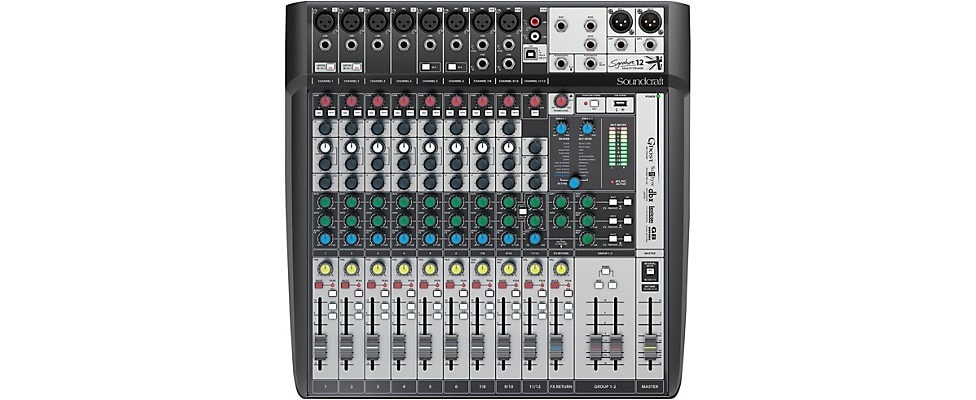
You may be a musician who wants to record their music, or just a person wanting to develop his custom ringtone. In either case, a physical or virtual audio mixer is required, whether it be analog or a dedicated audio mixer software.
But you need to have some technical knowledge to make optimal use and funk up your music/sound.
Here we are to give you the knowledge you need and some amazing audio mixer software that could be perfect for you. So buckle up, and get ready to level up the harmoniousness of your creativity!
You will Learn :
- Part 1. 10 Best Sound/Audio Mixer Software - [Video Guide]
- Part 2. All You Know About Audio Mixer
- Part 3. What to Consider While Choosing an Audio Mixer Software?
- Part 4. Basic Audio Mixer Settings You Should Know
- Part 5. Why Audio Mixer Software?
Part 1. 10 Best Sound/Audio Mixer Software
Whether you are pursuing a music career, making a video for a movie clip, or merely creating some hard-core beats for fun, you’ll be needing good sound mixing software.
Selecting an audio mixer software perfect for your requirements and available resources is not an easy task.
Some of them are for free while some charge for it, some offer limited features. At the same time, some are specific to a certain operating system, the options and availabilities are endless, and choosing among them is a hell of a daunting task.
But no need to stress out because we are here to take your burden on our shoulders and help you choose exactly what you want! So sit back and relax!
| 1 - Wondershare Filmora | 2 - Adobe Audition |
|---|---|
| 3 - Logic Pro X | 4 - Audacity |
| 5 - Reaper | 6 - Fl Studio |
| 7 - SoundAtion | 8 - HyaWave |
| 9 - Twisted Wave Online | 10 - Bear Audio Tool |
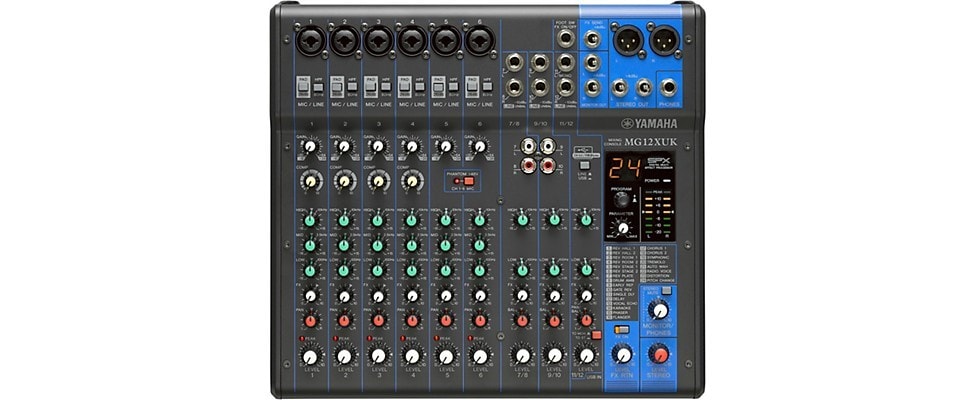
1. Wondershare Filmora
Filmora Audio Mixer is professional in audio mixing and video editing. This is used for mixing, balancing, and combining different sounds, and audio signals, sources like microphones, instruments, and synthesizers, or previously recorded audio.


Pros
- Imports audio file in the original format and mix the audio with built-in tools.
- Split, rearrange, and apply remix effects on added audio clips.
- Auto remix music to change audio length with high quality.
- Export audio files in MP3, FLAC, M4A, OGG, etc…
- Audio sync option while editing.
- Audio ducking features to lowers the background volume.
Audio formats support: all (import/export and audio/video) file formats.
Compatibility: Windows 7 to windows 10 sound mixer and mac OS.
Price: free and paid.
If you are facing any trouble regarding audio mixing through an audio mixer software, then here’s a video tutorial for Filmora software.
You can download it for free and follow the video guide step by step. Check the below video:
2. Adobe Audition

It is primarily designed for professional users having several features like multi-track editing and mixing, Auto Ducking, clip editing.
Pros:
- Availability of a vast range of features.
- Attractive user interface.
- Good for video sounds or voice-over editing overall, including sound mixing.
Cons:
- A little too complex for a newbie to understand.
- Not good enough for music productions.
- This software is subscription-based.
Audio formats support: MP3, WMA, WAV, AIFF, AC-3, PCM, AIFC, and more.
Compatibility: Mac OS, Windows.
Price: free and paid for both.
3. Logic Pro X

This software is suitable for both professional users and beginners. It combines all the basic and advanced features, including Flex Time, automatic time matching of different tracks, Flex Pitch, arpeggiator, etc.
Pros
- Works wonderfully on Mac.
- Rich Featured software and several plugins.
- Singular notes control.
- Tutorial easily available.
Cons:
- Mac only.
- Expensive.
Audio formats support: WAV, AIFF, CAF, PCM, ALAC, MP3, and more.
Compatibility: macOS.
Price: Paid
4. Audacity

A free, open-source, and features rich software perfect for both professional and beginner users. Its offers multiple effects and tolls like analysis, envelope, time-shift tools, etc.
Pros
- Free.
- Cross-platform.
- Easy to use.
- Features for beginner and pro-level, both.
- Online community available for help.
Cons:
- Not very appealing UI.
- May face crashes on Mac.
Audio formats support: MP3, MP4, AIFF, PCM, WMA, AC3, AMR, and more.
Compatibility: Linux, Windows, and macOS.
Price : free.
Filmora Audio Mixer
Wondershare Filmora - Audio Mixer
• Easily mix audio, sound, music or song as your need
• Edit audio files like denoise, crop, audio ducking, audio auto synchronization, etc…
• Cross-platform supported - (Windows, Mac, iOS, Android)
Mix Your Audio Now Mix Your Audio Now Mix Your Audio Now Learn More >
5. Reaper

This is one of the few software facilities with a bunch of features at such an affordable price. It has multiple tracks, multichannel support, real-time, non-destructive effect application, pitch-shifting, and time-shifting features.
Pros
- Feature-rich.
- More affordable than other audio mixer software.
- Detailed tutorials are available online.
Cons:
- Not very appealing UI as of LPX or Audition.
- Not suitable for beginners.
Audio formats support ACID, AIFF, MP3, MPEG WMV, and more.
Compatibility: Linux, Windows, and macOS.
Price: free and paid.
6. Fl Studio
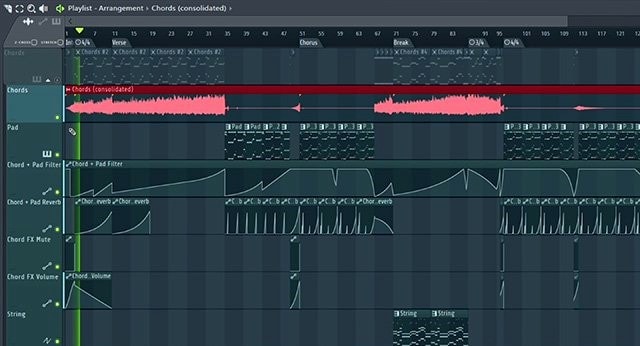
It is one of the top-notch software used for sound mixer and editing purposes. It supports pitch shifting, time stretching and multi-track recording, 80 plugins, VST standards, delay compensation, etc.
Pros
- Comes with abundant Features.
- Works great for music productions.
- Supports 3rd party plugin.
Cons:
- Not very appealing UI.
- May be intimidating for beginners.
Audio formats support: AIFF, DS, MP3, OGG, WAV and more.
Compatibility : Windows and macOS.
Price: free and paid.
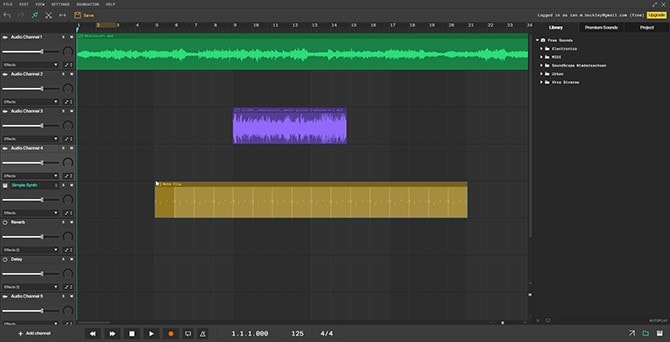
7. SoundAtion
It is a browser-based software that facilitates non-destructive Multi-track audio editing, dynamic mixing, several effects selection, and EQ across multiple tracks.
Pros
- Free digital audio Workstation (DAW).
- Works wonderfully for sound effects, podcasting, and general-purpose sound task.
- Supports 3rd party plugin.
Cons:
- Automation not featured in a free trial.
- Limited audio quality in a trial version.
Audio Formats Support: MP3 and WAV.
Compatibility: any operating system.
Price : free and paid.
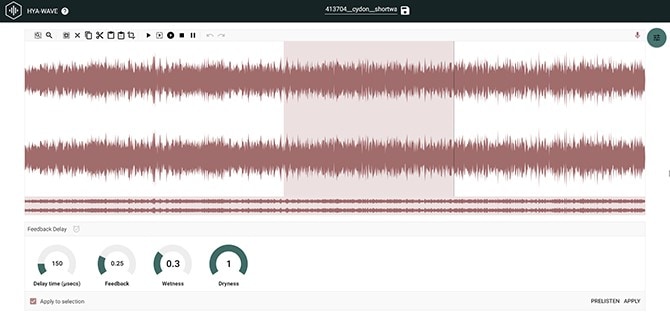
8. HyaWave
It offers functions like cutting with an online audio cutter, paste and trim audio, and supports 18 filters, effects, and publication through URL and social media with the minimalistic user interface.
Pros
- Easy and simple user interface.
- Audio filter customization.
- Has a built-in audio player, recorder, and editor.
Audio formats support: MP3, WAV, and more.
Compatibility : any operating system.
Price : free.
9. Twisted Wave Online

It is an online software almost equally compatible with many paid sound mixer and editing tools. It also supports uncompressed audio recording, VST effects, and several core effects.
Pros
- Cloud storage of edited audio, saving the disk space.
- Sampling rate conversation.
- Online and free.
Cons:
- Upload file in mono in a trial version.
- Supports 5 minutes audio clip in a trial version.
Audio formats support : MP3.
Compatibility: any operating system.
Price: free and paid.
10. Bear Audio Tool
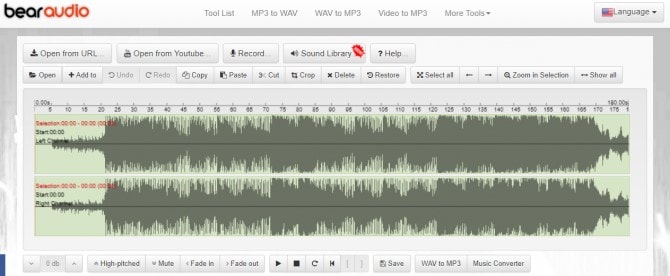
This is online browser-based software that can edit the files from our local storage, and you don’t have to upload the audio to their server. It can cut, apply effects, trim, etc. It has ample own music library, effects and import options.
Pros
- Copyright-free.
- Import audio directly from URL or social media domains.
- Features rich.
Cons:
- Not suitable for very advanced usage.
Audio formats support : MP3, OGG, WAV, WMA, M4R and OGG.
Compatibility : any operating system.
Price: free and paid.
Part 2. All You Know About Audio Mixer
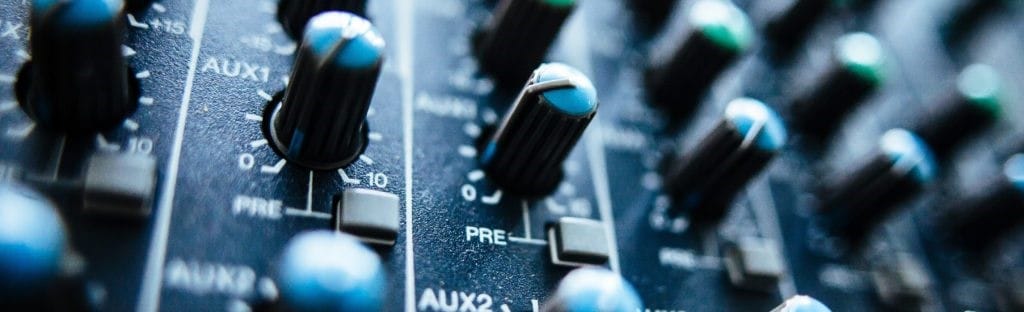
[1] What is an audio mixer?
An audio mixer is used for several significant purposes. It is known with several names. Whether a mixing desk, soundboard, mixing board, audio mixer, or mixing console, all have a coherent purpose. The sole purpose of an audio mixer is to manage either the live or recorded event.
As the name suggests, audio mixing is the process of mixing multiple sounds and consolidating them into one or more channels.
This process is performed in a way that manipulates or enhances the dynamics, source’s volume level, panoramic position, and frequency content. The end moto of this creative and aesthetic treatment is to present the audio appealing to the listeners.
[2] What does an audio mixer do?
As mentioned above, the primary function of an audio mixer is to mix more than one audio signal and combine them into one or more output signals.
As an example, you may think of an audio mixing engineer, let’s say, orchestra conductor, who ensures that all the segregated sound sources mix into one harmonious soundtrack.
For this, they will use an audio mixer for filtering and optimizing sound by level adjusting, developing monitor feeds, using equalization and effects for sound enhancement.
This process is performed by a mixing engineer who operates either a digital audio workstation or a mixing console .
[3] What is audio mixing used for?
Audio mixing can be used in many fields, and it’s very common in our daily life, such as:
- 1. Music
- 2. Live sound
- 3. Film
- 4. Television
Filmora Audio Mixer
Wondershare Filmora - Audio Mixer
• Easily mix audio, sound, music or song as your need
• Edit audio files like denoise, crop, audio ducking, audio auto synchronization, etc…
• Cross-platform supported - (Windows, Mac, iOS, Android)
Mix Your Audio Now Mix Your Audio Now Mix Your Audio Now Learn More >
Part 3. What to consider while choosing an audio mixer software?
Before starting off with the audio mixing activity itself, one must be able to determine which audio mixer software is best for them with respect to their availability of resources or usability. Here are some of the factors to consider while opting for an audio mixer software:
- Check whether the software is paid or free.
- Check whether the limited features offered in a trial/free audio mixer software are enough to satisfy all your needs.
- Choose the paid or the free one depending on the extent of audio mixing quality you want.
- Look for an easy user interface.
- Look for software compatibility with your existing operating system.
- Check for the availability of tutorials related to the use of audio mixer software that you want to opt for better guidance.
- Look for the basic or advanced functions support in the audio mixer software that you choose depending upon your usability.
- Whether the software is available online or you need to install the version.
Part 4. Basic audio mixer settings you should know
It is necessary to know at least somewhat about the fundamental terminologies to decipher the specifications and features of an audio mixer. Here you’ll get to know what it takes to be able to distinguish among different audio mixers and their respective software.
Channel:
It is a signal path. Channels are made to accept microphones, preamps, amplifiers, and signal processors. A mixer with several channels integrated with it allows several things to be integrated and routed through it.
Channel Strip:
It is a cluster of controls and circuits that works together on a specified mixing channel to manipulate the audio that passes through it. Some of which includes the following:
Input jack:
It is the jack where any external instrument, like guitar, microphone etc., integrates with the mixer. The noise and interface are minimized to maximum extent by balancing the XLR inputs. A quarter-inch TRS connector or RCA are connected to other inputs.
Microphone preamp:
It produces weak mic signals by the raise of line-level strength for processing.
Equalization:
Often abbreviated as “EQ”, is used to adjust the frequency response of a signal.
Dynamics:
This process is used to perform grating and compressing.
Routing:
It directs the incoming signals to external devices or mixer circuitry.
Fader:
Its fundamental objective is to control the inputs and outputs of a channel.
Meter:
Kind of a gauge or interface that presents the channel output.
I/O:
I/O is abbreviated as inputs/outputs on a mixer in this regards. The number and category of I/O will depend on the use of a mixer.
Now, let’s understand the scenario of live mixing.
Such a mixer is needed which is enough to handle the outputs needed to connect the mains, microphones, other devices that connect to it and monitor speakers. The devices that are a part of a recording process or signal chain must also be included while calculating I/O for studio mixers.
Such inputs/outputs include headphones, effects processors, monitor speakers, signal processors and other instruments as well that uses direct injection (DI) boxes to connect to the mixer.
Buses:
It can be understood as a circuit intersection where the outputs from different channels meet. The signal channels are routed to a specific bus or set of busses. The main mixer output to a recorder or a speaker by the master mix bus.
Auxiliary buses, often known as aux buses or aux sends, are usually fed by the channel’s volume controls with which they are connected and then send those signals through their own output jacks. This is called as post-fader sends which are used to send the mixes of monitor speakers, signals to headphones or effects processors.
Groups:
Several channels in a mixer often offer a group function that allows one to simultaneously process and control various channels. Its works are similar to that of sub-mixer that shares the coherent signal routing and processing and provides the ease in controlling master bus since a single fader is used to control all the channels.
Inserts:
External and add-on sound processors, such as equalizers and compressors, are connected with the help of a channel insert.
Direct Output:
These feed mixer’s preamplifiers output to recording systems and external sound interfaces.
Cue System:
Cue systems allow listening on the specified channels without affecting the mixer’s output. This usually allows the signal to listen either before fading manipulation or after.
Part 5. Why audio mixer software?
In the early days, analog audio mixers were the only option available to perform sounding mixing. But the rise of the era of the 21st century brings more opportunities for easy and optimized audio mixing by sound mixer software.
All you need is a configured laptop, audio mixer software, and merely a control surface to jump into this world while being within the budget!
This audio mixer software is easily available to do everything or even more than what a physical mixer could have done. Several sound mixer applications are available to start with basic sound mixing using your smartphones or even tablets.
For the sake of recording, software-based mixers allow easy integration with the virtual instruments, drum loops, samples, and several other additions in your productions. The use of advanced MIDI functions with a digital audio workstation (DAW) lets you enlighten with a whole new world of possibilities to elevate your sounds/music to the next level.
Final verdict: Have you decided on your audio mixer software?
The usability and optimality of a sound mixer online software depend solely on the extent of application, available resources, and OS compatibility.
But, it can be said without a doubt that Wondershare Filmora is the most user-friendly, with immense flexibility in terms of uses and compatibility. Its broad-scale usability and promising results make it outshine the most among other audio mixing software.
Benjamin Arango
Benjamin Arango is a writer and a lover of all things video.
Follow @Benjamin Arango
Benjamin Arango
Mar 27, 2024• Proven solutions
You may be a musician who wants to record their music, or just a person wanting to develop his custom ringtone. In either case, a physical or virtual audio mixer is required, whether it be analog or a dedicated audio mixer software.
But you need to have some technical knowledge to make optimal use and funk up your music/sound.
Here we are to give you the knowledge you need and some amazing audio mixer software that could be perfect for you. So buckle up, and get ready to level up the harmoniousness of your creativity!
You will Learn :
- Part 1. 10 Best Sound/Audio Mixer Software - [Video Guide]
- Part 2. All You Know About Audio Mixer
- Part 3. What to Consider While Choosing an Audio Mixer Software?
- Part 4. Basic Audio Mixer Settings You Should Know
- Part 5. Why Audio Mixer Software?
Part 1. 10 Best Sound/Audio Mixer Software
Whether you are pursuing a music career, making a video for a movie clip, or merely creating some hard-core beats for fun, you’ll be needing good sound mixing software.
Selecting an audio mixer software perfect for your requirements and available resources is not an easy task.
Some of them are for free while some charge for it, some offer limited features. At the same time, some are specific to a certain operating system, the options and availabilities are endless, and choosing among them is a hell of a daunting task.
But no need to stress out because we are here to take your burden on our shoulders and help you choose exactly what you want! So sit back and relax!
| 1 - Wondershare Filmora | 2 - Adobe Audition |
|---|---|
| 3 - Logic Pro X | 4 - Audacity |
| 5 - Reaper | 6 - Fl Studio |
| 7 - SoundAtion | 8 - HyaWave |
| 9 - Twisted Wave Online | 10 - Bear Audio Tool |
1. Wondershare Filmora
Filmora Audio Mixer is professional in audio mixing and video editing. This is used for mixing, balancing, and combining different sounds, and audio signals, sources like microphones, instruments, and synthesizers, or previously recorded audio.
Pros
- Imports audio file in the original format and mix the audio with built-in tools.
- Split, rearrange, and apply remix effects on added audio clips.
- Auto remix music to change audio length with high quality.
- Export audio files in MP3, FLAC, M4A, OGG, etc…
- Audio sync option while editing.
- Audio ducking features to lowers the background volume.
Audio formats support: all (import/export and audio/video) file formats.
Compatibility: Windows 7 to windows 10 sound mixer and mac OS.
Price: free and paid.
If you are facing any trouble regarding audio mixing through an audio mixer software, then here’s a video tutorial for Filmora software.
You can download it for free and follow the video guide step by step. Check the below video:
2. Adobe Audition
It is primarily designed for professional users having several features like multi-track editing and mixing, Auto Ducking, clip editing.
Pros:
- Availability of a vast range of features.
- Attractive user interface.
- Good for video sounds or voice-over editing overall, including sound mixing.
Cons:
- A little too complex for a newbie to understand.
- Not good enough for music productions.
- This software is subscription-based.
Audio formats support: MP3, WMA, WAV, AIFF, AC-3, PCM, AIFC, and more.
Compatibility: Mac OS, Windows.
Price: free and paid for both.
3. Logic Pro X
This software is suitable for both professional users and beginners. It combines all the basic and advanced features, including Flex Time, automatic time matching of different tracks, Flex Pitch, arpeggiator, etc.
Pros
- Works wonderfully on Mac.
- Rich Featured software and several plugins.
- Singular notes control.
- Tutorial easily available.
Cons:
- Mac only.
- Expensive.
Audio formats support: WAV, AIFF, CAF, PCM, ALAC, MP3, and more.
Compatibility: macOS.
Price: Paid
4. Audacity
A free, open-source, and features rich software perfect for both professional and beginner users. Its offers multiple effects and tolls like analysis, envelope, time-shift tools, etc.
Pros
- Free.
- Cross-platform.
- Easy to use.
- Features for beginner and pro-level, both.
- Online community available for help.
Cons:
- Not very appealing UI.
- May face crashes on Mac.
Audio formats support: MP3, MP4, AIFF, PCM, WMA, AC3, AMR, and more.
Compatibility: Linux, Windows, and macOS.
Price : free.
Filmora Audio Mixer
Wondershare Filmora - Audio Mixer
• Easily mix audio, sound, music or song as your need
• Edit audio files like denoise, crop, audio ducking, audio auto synchronization, etc…
• Cross-platform supported - (Windows, Mac, iOS, Android)
Mix Your Audio Now Mix Your Audio Now Mix Your Audio Now Learn More >
5. Reaper
This is one of the few software facilities with a bunch of features at such an affordable price. It has multiple tracks, multichannel support, real-time, non-destructive effect application, pitch-shifting, and time-shifting features.
Pros
- Feature-rich.
- More affordable than other audio mixer software.
- Detailed tutorials are available online.
Cons:
- Not very appealing UI as of LPX or Audition.
- Not suitable for beginners.
Audio formats support ACID, AIFF, MP3, MPEG WMV, and more.
Compatibility: Linux, Windows, and macOS.
Price: free and paid.
6. Fl Studio
It is one of the top-notch software used for sound mixer and editing purposes. It supports pitch shifting, time stretching and multi-track recording, 80 plugins, VST standards, delay compensation, etc.
Pros
- Comes with abundant Features.
- Works great for music productions.
- Supports 3rd party plugin.
Cons:
- Not very appealing UI.
- May be intimidating for beginners.
Audio formats support: AIFF, DS, MP3, OGG, WAV and more.
Compatibility : Windows and macOS.
Price: free and paid.
7. SoundAtion
It is a browser-based software that facilitates non-destructive Multi-track audio editing, dynamic mixing, several effects selection, and EQ across multiple tracks.
Pros
- Free digital audio Workstation (DAW).
- Works wonderfully for sound effects, podcasting, and general-purpose sound task.
- Supports 3rd party plugin.
Cons:
- Automation not featured in a free trial.
- Limited audio quality in a trial version.
Audio Formats Support: MP3 and WAV.
Compatibility: any operating system.
Price : free and paid.
8. HyaWave
It offers functions like cutting with an online audio cutter, paste and trim audio, and supports 18 filters, effects, and publication through URL and social media with the minimalistic user interface.
Pros
- Easy and simple user interface.
- Audio filter customization.
- Has a built-in audio player, recorder, and editor.
Audio formats support: MP3, WAV, and more.
Compatibility : any operating system.
Price : free.
9. Twisted Wave Online
It is an online software almost equally compatible with many paid sound mixer and editing tools. It also supports uncompressed audio recording, VST effects, and several core effects.
Pros
- Cloud storage of edited audio, saving the disk space.
- Sampling rate conversation.
- Online and free.
Cons:
- Upload file in mono in a trial version.
- Supports 5 minutes audio clip in a trial version.
Audio formats support : MP3.
Compatibility: any operating system.
Price: free and paid.
10. Bear Audio Tool
This is online browser-based software that can edit the files from our local storage, and you don’t have to upload the audio to their server. It can cut, apply effects, trim, etc. It has ample own music library, effects and import options.
Pros
- Copyright-free.
- Import audio directly from URL or social media domains.
- Features rich.
Cons:
- Not suitable for very advanced usage.
Audio formats support : MP3, OGG, WAV, WMA, M4R and OGG.
Compatibility : any operating system.
Price: free and paid.
Part 2. All You Know About Audio Mixer
[1] What is an audio mixer?
An audio mixer is used for several significant purposes. It is known with several names. Whether a mixing desk, soundboard, mixing board, audio mixer, or mixing console, all have a coherent purpose. The sole purpose of an audio mixer is to manage either the live or recorded event.
As the name suggests, audio mixing is the process of mixing multiple sounds and consolidating them into one or more channels.
This process is performed in a way that manipulates or enhances the dynamics, source’s volume level, panoramic position, and frequency content. The end moto of this creative and aesthetic treatment is to present the audio appealing to the listeners.
[2] What does an audio mixer do?
As mentioned above, the primary function of an audio mixer is to mix more than one audio signal and combine them into one or more output signals.
As an example, you may think of an audio mixing engineer, let’s say, orchestra conductor, who ensures that all the segregated sound sources mix into one harmonious soundtrack.
For this, they will use an audio mixer for filtering and optimizing sound by level adjusting, developing monitor feeds, using equalization and effects for sound enhancement.
This process is performed by a mixing engineer who operates either a digital audio workstation or a mixing console .
[3] What is audio mixing used for?
Audio mixing can be used in many fields, and it’s very common in our daily life, such as:
- 1. Music
- 2. Live sound
- 3. Film
- 4. Television
Filmora Audio Mixer
Wondershare Filmora - Audio Mixer
• Easily mix audio, sound, music or song as your need
• Edit audio files like denoise, crop, audio ducking, audio auto synchronization, etc…
• Cross-platform supported - (Windows, Mac, iOS, Android)
Mix Your Audio Now Mix Your Audio Now Mix Your Audio Now Learn More >
Part 3. What to consider while choosing an audio mixer software?
Before starting off with the audio mixing activity itself, one must be able to determine which audio mixer software is best for them with respect to their availability of resources or usability. Here are some of the factors to consider while opting for an audio mixer software:
- Check whether the software is paid or free.
- Check whether the limited features offered in a trial/free audio mixer software are enough to satisfy all your needs.
- Choose the paid or the free one depending on the extent of audio mixing quality you want.
- Look for an easy user interface.
- Look for software compatibility with your existing operating system.
- Check for the availability of tutorials related to the use of audio mixer software that you want to opt for better guidance.
- Look for the basic or advanced functions support in the audio mixer software that you choose depending upon your usability.
- Whether the software is available online or you need to install the version.
Part 4. Basic audio mixer settings you should know
It is necessary to know at least somewhat about the fundamental terminologies to decipher the specifications and features of an audio mixer. Here you’ll get to know what it takes to be able to distinguish among different audio mixers and their respective software.
Channel:
It is a signal path. Channels are made to accept microphones, preamps, amplifiers, and signal processors. A mixer with several channels integrated with it allows several things to be integrated and routed through it.
Channel Strip:
It is a cluster of controls and circuits that works together on a specified mixing channel to manipulate the audio that passes through it. Some of which includes the following:
Input jack:
It is the jack where any external instrument, like guitar, microphone etc., integrates with the mixer. The noise and interface are minimized to maximum extent by balancing the XLR inputs. A quarter-inch TRS connector or RCA are connected to other inputs.
Microphone preamp:
It produces weak mic signals by the raise of line-level strength for processing.
Equalization:
Often abbreviated as “EQ”, is used to adjust the frequency response of a signal.
Dynamics:
This process is used to perform grating and compressing.
Routing:
It directs the incoming signals to external devices or mixer circuitry.
Fader:
Its fundamental objective is to control the inputs and outputs of a channel.
Meter:
Kind of a gauge or interface that presents the channel output.
I/O:
I/O is abbreviated as inputs/outputs on a mixer in this regards. The number and category of I/O will depend on the use of a mixer.
Now, let’s understand the scenario of live mixing.
Such a mixer is needed which is enough to handle the outputs needed to connect the mains, microphones, other devices that connect to it and monitor speakers. The devices that are a part of a recording process or signal chain must also be included while calculating I/O for studio mixers.
Such inputs/outputs include headphones, effects processors, monitor speakers, signal processors and other instruments as well that uses direct injection (DI) boxes to connect to the mixer.
Buses:
It can be understood as a circuit intersection where the outputs from different channels meet. The signal channels are routed to a specific bus or set of busses. The main mixer output to a recorder or a speaker by the master mix bus.
Auxiliary buses, often known as aux buses or aux sends, are usually fed by the channel’s volume controls with which they are connected and then send those signals through their own output jacks. This is called as post-fader sends which are used to send the mixes of monitor speakers, signals to headphones or effects processors.
Groups:
Several channels in a mixer often offer a group function that allows one to simultaneously process and control various channels. Its works are similar to that of sub-mixer that shares the coherent signal routing and processing and provides the ease in controlling master bus since a single fader is used to control all the channels.
Inserts:
External and add-on sound processors, such as equalizers and compressors, are connected with the help of a channel insert.
Direct Output:
These feed mixer’s preamplifiers output to recording systems and external sound interfaces.
Cue System:
Cue systems allow listening on the specified channels without affecting the mixer’s output. This usually allows the signal to listen either before fading manipulation or after.
Part 5. Why audio mixer software?
In the early days, analog audio mixers were the only option available to perform sounding mixing. But the rise of the era of the 21st century brings more opportunities for easy and optimized audio mixing by sound mixer software.
All you need is a configured laptop, audio mixer software, and merely a control surface to jump into this world while being within the budget!
This audio mixer software is easily available to do everything or even more than what a physical mixer could have done. Several sound mixer applications are available to start with basic sound mixing using your smartphones or even tablets.
For the sake of recording, software-based mixers allow easy integration with the virtual instruments, drum loops, samples, and several other additions in your productions. The use of advanced MIDI functions with a digital audio workstation (DAW) lets you enlighten with a whole new world of possibilities to elevate your sounds/music to the next level.
Final verdict: Have you decided on your audio mixer software?
The usability and optimality of a sound mixer online software depend solely on the extent of application, available resources, and OS compatibility.
But, it can be said without a doubt that Wondershare Filmora is the most user-friendly, with immense flexibility in terms of uses and compatibility. Its broad-scale usability and promising results make it outshine the most among other audio mixing software.
Benjamin Arango
Benjamin Arango is a writer and a lover of all things video.
Follow @Benjamin Arango
Also read:
- New In 2024, Essential List The Best Song Editing Apps for Windows/Mac Devices
- Updated Omegle Resurgence Overcoming a Profile Ban and Reconnecting with Others for 2024
- In 2024, Exploring the Best Dawn and Rise of Browser-Based DAWs Top 10 Selection
- 2024 Approved Cutting-Edge Audio to Text Transcription Software of the Year, 2023 Edition
- Best Chat Apps for Video Conversations The Top Virtual Community Platforms for 2024
- 2024 Approved Choosing a Pinnacle of Auditory Experience A Modern Approach
- New In 2024, Streamlining Sound Rate Controls A Guide to Faster Tempo Tweaks
- 2024 Approved Windows 10/7 Users Guide to Dawnbreakers Discovering Top 8 Audio Workstations
- Updated In 2024, Audiovisual Voice Changer Breakthroughs New Product Showcases, Critical Appraisals, and Substitutes
- 10 Best Podcasting Audio to Text Transcription Software FREE&PAID for 2024
- Updated 2024 Approved Crescendo of Creativity The Best Matched Music for Every Video Format
- 2024 Approved Mastering Sound Silence in iMovie on macOS A Step-by-Step Tutorial
- Updated Voicing with Vocaroo Detailed Instructions and Backup Paths for 2024
- MP3 Editor for Mac Free & Cheap for 2024
- Updated Achieving High-Quality Frequency Modulation in Audacity
- 2024 Approved Voice Cloning Simplified Two Approaches to Achieve Consistent AI Voices
- Updated In 2024, Digital Dating Defense Adequate Measures for a Harmless Hangout
- Innovative Strategies for Enhancing Your Music Videos for 2024
- In 2024, Revolutionizing Virtual Conferences The Top 5 Voice Altering Apps for Google Meet Users
- Updated Track Burping Symphony Sample for 2024
- How To Do Infinix Smart 8 Pro Screen Sharing | Dr.fone
- How to Remove Apple ID from iPhone 6 Plus without Password?
- In 2024, iPogo will be the new iSpoofer On Poco C50? | Dr.fone
- In 2024, New Guide How To Check iCloud Activation Lock Status From Your iPhone 14 Pro
- In 2024, How to Transfer Data from Nokia C22 to Any iOS Devices | Dr.fone
- How To Fix iPhone 13 Pro Max Unavailable Issue With Ease
- In 2024, TikTok Video Reversal Made Easy A Beginners Guide 2023 Edition
- How to Cast Xiaomi Redmi Note 12T Pro Screen to PC Using WiFi | Dr.fone
- Play Store Not Working On Oppo A1 5G? 8 Solutions Inside | Dr.fone
- Updated 2024 Approved Tips for Perfecting Your Talking Face Content A Complete Guide
- New Optimize Your Facebook Videos A Beginners Guide to Aspect Ratios for 2024
- New 2024 Approved Stunning Ideas About Creating Personalised WhatsApp GIF Sticker
- Updated Detailed Tutorial to Crop Videos Using Openshot, In 2024
- How to Fix Honor Magic V2 Find My Friends No Location Found? | Dr.fone
- In 2024, Ways To Find Unlocking Codes For HTC U23 Phones
- How can I get more stardust in pokemon go On Samsung Galaxy A05s? | Dr.fone
- 11 Best Location Changers for Realme 11 Pro+ | Dr.fone
- How to Change GPS Location on Vivo Y02T Easily & Safely | Dr.fone
- Updated Resize Images Quickly and Easily with These Online Tools
- Title: Updated Top Tips for Integrating Auditory Elements with Visual Images for 2024
- Author: Kate
- Created at : 2024-05-05 08:12:22
- Updated at : 2024-05-06 08:12:22
- Link: https://audio-editing.techidaily.com/updated-top-tips-for-integrating-auditory-elements-with-visual-images-for-2024/
- License: This work is licensed under CC BY-NC-SA 4.0.
