

Updated In 2024, Unlocking Audio Potential A User-Friendly Approach to Track Combining in Premiere Pro
Unlocking Audio Potential: A User-Friendly Approach to Track Combining in Premiere Pro
How to Easily Use Audio Track Mixer in Premiere Pro

Benjamin Arango
Mar 27, 2024• Proven solutions
If you are the type of person who loves mixing audio, then you’ll need to use this little-known function in Adobe Premiere Pro. While you might know about the Audio Clip Mixer, which lets you take on the audio between clips, the Audio Track Mixer allows you to control a whole track, which can be beneficial in its own way. Sometimes you need to make big sweeping changes that affect everything, and no one wants to change their all sounds clip by clip, which is where the track mixer comes in handy.
So how do you use the audio track mixer to manage your audio inside of a video? Well keep reading and we’ll show you!
- Part 1: How Does the Audio Track Mixer Work
- Part 2: How to Change the Audio Track Mixer Settings
- Part 3: Using Audio Track Mixer for Your next Project
Part 1: How Does the Audio Track Mixer Work
Mixing tracks is when audio is blended and mixed together in a sequence, and you have multiple sounds over one channel. For instance, when you watch a TV show and have music cut over two characters talking, that’s an example of mixed tracks. You can mix music, dialogue, sound effects, voiceovers, and other things to create a seamless finished product. You can even have different types of audio, or have different tracks play in different earphones of the headset if you want to.

With audio track mixer, you can see each track being played in real time, not just on the timeline but also on its own screen. Then you can do a few things to each track such as:
- listen to tracks separately or together
- rename them
- control the volume and type of audio that each track is producing

You can even look at meters while the main window is closed, which is helpful if you need to free up some space or organize your sounds while other data is shown.
You can see the sequence in real time as it is being played, see the peaks and valleys of the sound, and ensure that you can control the volume for every track. You’ll have total control over the sound, and the playback.
Part 2: How to Change the Audio Track Mixer Settings
If you are the type of person that likes to work with the sound as it happens, then you can. Recording and mixing on the fly is easy if you can avoid some mistakes .
Using mono tracks allows you to alter the sound for left and right settings, while stereo tracks produce two different signals for two different speakers. So, if you want to control where the sounds are coming from, then you can do so with a simple adjustment.

The audio files are edited both in the audio interface and in a timeline, where it is either imported or directly recorded. Then their waveforms can be viewed, the volume and sounds can be adjusted, and larger audio mixes can be divided into sub-mixes .
All your changes will happen on the timeline, and you’ll be able to listen to the new track instantly.
Part 3: Using Audio Track Mixer for Your next Project
If you are an aspiring filmmaker, working on a project, or just putting some clips and music together for fun, you need to use Audio Track Mixer to gain control over your sounds. Dealing with tracks, especially when you have several of them running on top of one another, can be a frustrating process of clicking and straining your ears to ensure that everything is just perfect.
Instead of wasting hours staring at the computer screen, using the Audio Track Mixer in Premiere Pro is a great way to cut down on the micromanagement and instead focus on what’s really important - getting a good quality sound out of your video and audio.
Use the track mixer to manage and customize your sounds, see the volume and base of each individual track in real time, and set when tracks come in and fade out. Using the mixer will allow you to have picture perfect sound quality, every single time.
Conclusion
If you want to edit audio in an easier way, here we recommend using Filmora . It is a video editor designed for people who want to enter a higher level of video editing. You can use FilmoraPro to do automatic audio sync. Equalize the highs and lows of your audio to normalize the volume of your clips and Reduce unwanted background sounds, like crowds or wind with this feature. It is a powerful audio editor for you. Download it now to have a try!
Benjamin Arango
Benjamin Arango is a writer and a lover of all things video.
Follow @Benjamin Arango
Benjamin Arango
Mar 27, 2024• Proven solutions
If you are the type of person who loves mixing audio, then you’ll need to use this little-known function in Adobe Premiere Pro. While you might know about the Audio Clip Mixer, which lets you take on the audio between clips, the Audio Track Mixer allows you to control a whole track, which can be beneficial in its own way. Sometimes you need to make big sweeping changes that affect everything, and no one wants to change their all sounds clip by clip, which is where the track mixer comes in handy.
So how do you use the audio track mixer to manage your audio inside of a video? Well keep reading and we’ll show you!
- Part 1: How Does the Audio Track Mixer Work
- Part 2: How to Change the Audio Track Mixer Settings
- Part 3: Using Audio Track Mixer for Your next Project
Part 1: How Does the Audio Track Mixer Work
Mixing tracks is when audio is blended and mixed together in a sequence, and you have multiple sounds over one channel. For instance, when you watch a TV show and have music cut over two characters talking, that’s an example of mixed tracks. You can mix music, dialogue, sound effects, voiceovers, and other things to create a seamless finished product. You can even have different types of audio, or have different tracks play in different earphones of the headset if you want to.
With audio track mixer, you can see each track being played in real time, not just on the timeline but also on its own screen. Then you can do a few things to each track such as:
- listen to tracks separately or together
- rename them
- control the volume and type of audio that each track is producing
You can even look at meters while the main window is closed, which is helpful if you need to free up some space or organize your sounds while other data is shown.
You can see the sequence in real time as it is being played, see the peaks and valleys of the sound, and ensure that you can control the volume for every track. You’ll have total control over the sound, and the playback.
Part 2: How to Change the Audio Track Mixer Settings
If you are the type of person that likes to work with the sound as it happens, then you can. Recording and mixing on the fly is easy if you can avoid some mistakes .
Using mono tracks allows you to alter the sound for left and right settings, while stereo tracks produce two different signals for two different speakers. So, if you want to control where the sounds are coming from, then you can do so with a simple adjustment.
The audio files are edited both in the audio interface and in a timeline, where it is either imported or directly recorded. Then their waveforms can be viewed, the volume and sounds can be adjusted, and larger audio mixes can be divided into sub-mixes .
All your changes will happen on the timeline, and you’ll be able to listen to the new track instantly.
Part 3: Using Audio Track Mixer for Your next Project
If you are an aspiring filmmaker, working on a project, or just putting some clips and music together for fun, you need to use Audio Track Mixer to gain control over your sounds. Dealing with tracks, especially when you have several of them running on top of one another, can be a frustrating process of clicking and straining your ears to ensure that everything is just perfect.
Instead of wasting hours staring at the computer screen, using the Audio Track Mixer in Premiere Pro is a great way to cut down on the micromanagement and instead focus on what’s really important - getting a good quality sound out of your video and audio.
Use the track mixer to manage and customize your sounds, see the volume and base of each individual track in real time, and set when tracks come in and fade out. Using the mixer will allow you to have picture perfect sound quality, every single time.
Conclusion
If you want to edit audio in an easier way, here we recommend using Filmora . It is a video editor designed for people who want to enter a higher level of video editing. You can use FilmoraPro to do automatic audio sync. Equalize the highs and lows of your audio to normalize the volume of your clips and Reduce unwanted background sounds, like crowds or wind with this feature. It is a powerful audio editor for you. Download it now to have a try!
Benjamin Arango
Benjamin Arango is a writer and a lover of all things video.
Follow @Benjamin Arango
Fine-Tuning Film Soundtracks: Strategies for Precise Audio Timing with Keyframes in Final Cut Pro X
How to Add and Modify Audio Keyframes in Final Cut Pro X
Benjamin Arango
Aug 18, 2022• Proven solutions
Are you familiar with audio keyframing? So, what is this audio keyframing? Does this term appear new for you? It won’t anymore as we are here to explain. In the world of animation, knowing about keyframes is more critical. Have you ever noticed certain scenes while watching a movie that would reflect different audio volume in other video clips? It is all because of this process of keyframing that allows you to change the parameter values in a video clip. A keyframe on the clip specifies the start and end of the changes that occur in the frames, images, or drawings.
Filmmaking, hand-drawn animation, and short movies are critical applications where keyframing finds the place, especially in changing positions, scaling subjects, and customizing opacity. Although the concept might seem in-depth and confusing, implementing such keyframes isn’t a hassle as you think if you have a handy video editor. Today, let’s look at one such software, Final Cut Pro X, which is the popular tool for Mac at present in keyframing. With no delay, scroll down to add and edit audio keyframes in FCPX at ease.
Part 1: How to Add Audio Keyframes in Final Cut Pro X?
So, how to precisely add the Final Cut Pro keyframes? This session will reveal the answer as we have given a step-by-step guide.
Step 1: Launch and open the Final Cut Pro X software on your Mac device. Select the video clip in the timeline or select a video from the location.
Now, choose “Clip > Show Audio Animation”, or you can also press Ctrl + A.
Step 2: You will now see various automation options to change the audio of the clips.
To add keyframes, you have to hold or press option-K to create a keyframe on the horizontal effect control that will result in a white diamond depicting the created keyframes.
Step 3: Apart from the Audio Animator tool, you can create a Final Cut Pro audio keyframe with the range selection tool. To do so, on the video timeline, you need to sue the keyframe shortcut Final Cut Pro, which is to hold down R.
Hold the R key down, and on the timeline, click the spot where you need to begin the keyframing, drag the mouse pointer to the area where the keyframing should end. It will mark a range with a diamond.
That is the way you can add a fcpx audio keyframe, and is it easy?
Part 2: How to Modify Audio Keyframes in Final Cut Pro X?
Now that you have successfully created or added audio keyframes fcpx, do you wish to adjust or modify them, like changing the volume or any other enhancements? Yes, Final Cut Pro X offers adjustments. Learn how to do it from here.
Step 1: Usually, users follow the same way in the keyframe to change the volume per your requirement on the “Volume and Pan” segment.
You can slide the volume pointer as needed, or from the inverted triangle next to the option, you can choose the “Reset Parameter” option to reset the changes.
Step 2: You can configure the Pan option of the keyframe and FCPX that offers multiples ones like stereo left/right, basic surround, create space, and so on.
Step 3: To adjust the audio animation editor’s keyframes, you can drag the diamond to the left/right to change the keyframe position.
If you want to alter the effect’s parameter value, you can drag the keyframe up or down.
There is one more option by which you can edit the final cut pro audio keyframe. If you click the “Final Cut Pro” option on the top and choose the editing option, it will show you various options to adjust the keyframes like reference waveforms, transitions, etc.
With access to the in-built options offered by Final Cut Pro X, you can easily adjust the created or added fcpx audio keyframe at ease.
Part 3: FAQs about Audio Keyframing in Final Cut Pro X?
1. Will changing the “Show reference waveform” checkbox on the editing window’s audio aspect affect the fcpx audio keyframe?
No. A tick over the “Shoe reference waveforms” checkbox will only make changes over the timeline waveform representation. However, no change will occur on the keyframe unless the duration or still images get altered.
2. Can I add keyframes across a selected area automatically?
Yes, with the Range Selection tool’s assistance, you can add keyframes over a selected range automatically. To do so, execute the “Clip > Audio Animation > select an effect > disclosure button.” From the tools pop-up menu with the mouse icon, choose the option, “Range Selection.”
3. Despite Audio animation, is there any other option to adjust the fcpx keyframe?
Yes. To access many different effects in the Final Cut Pro X software, you can change the parameter values of sole keyframes using Audio Inspector.
4. Is viewing a single effect at a time in the Audio Animation editor is possible in FCPX?
Yes. If you have applied multiple effects to a clip and need to preserve a screen space, you can collapse the Audio Animation editor to view one impact at a time. Tapping the “Solo Animation” option from the Click Menu can execute this task.
5. Can I delete the created Final Cut Pro audio keyframe?
Sure. To delete an audio keyframe, select the keyframe, and press the “Shift + Delete” option. Now, navigate to the Audio Inspector, and hit the “Keyframe” button.
Conclusion
I am sure you are excited to know that working with the Final Cut Pro keyframe is easier than you have imagined. Yes, it is, and I hope with the ultimate guide on how to add keyframe Final Cut Pro X along with specific FAQs regarding fcpx audio keyframe, we have put a full-stop to your queries. So, with no delay, get started to make your video by audio keyframes on Final Cut Pro X!
Benjamin Arango
Benjamin Arango is a writer and a lover of all things video.
Follow @Benjamin Arango
Benjamin Arango
Aug 18, 2022• Proven solutions
Are you familiar with audio keyframing? So, what is this audio keyframing? Does this term appear new for you? It won’t anymore as we are here to explain. In the world of animation, knowing about keyframes is more critical. Have you ever noticed certain scenes while watching a movie that would reflect different audio volume in other video clips? It is all because of this process of keyframing that allows you to change the parameter values in a video clip. A keyframe on the clip specifies the start and end of the changes that occur in the frames, images, or drawings.
Filmmaking, hand-drawn animation, and short movies are critical applications where keyframing finds the place, especially in changing positions, scaling subjects, and customizing opacity. Although the concept might seem in-depth and confusing, implementing such keyframes isn’t a hassle as you think if you have a handy video editor. Today, let’s look at one such software, Final Cut Pro X, which is the popular tool for Mac at present in keyframing. With no delay, scroll down to add and edit audio keyframes in FCPX at ease.
Part 1: How to Add Audio Keyframes in Final Cut Pro X?
So, how to precisely add the Final Cut Pro keyframes? This session will reveal the answer as we have given a step-by-step guide.
Step 1: Launch and open the Final Cut Pro X software on your Mac device. Select the video clip in the timeline or select a video from the location.
Now, choose “Clip > Show Audio Animation”, or you can also press Ctrl + A.
Step 2: You will now see various automation options to change the audio of the clips.
To add keyframes, you have to hold or press option-K to create a keyframe on the horizontal effect control that will result in a white diamond depicting the created keyframes.
Step 3: Apart from the Audio Animator tool, you can create a Final Cut Pro audio keyframe with the range selection tool. To do so, on the video timeline, you need to sue the keyframe shortcut Final Cut Pro, which is to hold down R.
Hold the R key down, and on the timeline, click the spot where you need to begin the keyframing, drag the mouse pointer to the area where the keyframing should end. It will mark a range with a diamond.
That is the way you can add a fcpx audio keyframe, and is it easy?
Part 2: How to Modify Audio Keyframes in Final Cut Pro X?
Now that you have successfully created or added audio keyframes fcpx, do you wish to adjust or modify them, like changing the volume or any other enhancements? Yes, Final Cut Pro X offers adjustments. Learn how to do it from here.
Step 1: Usually, users follow the same way in the keyframe to change the volume per your requirement on the “Volume and Pan” segment.
You can slide the volume pointer as needed, or from the inverted triangle next to the option, you can choose the “Reset Parameter” option to reset the changes.
Step 2: You can configure the Pan option of the keyframe and FCPX that offers multiples ones like stereo left/right, basic surround, create space, and so on.
Step 3: To adjust the audio animation editor’s keyframes, you can drag the diamond to the left/right to change the keyframe position.
If you want to alter the effect’s parameter value, you can drag the keyframe up or down.
There is one more option by which you can edit the final cut pro audio keyframe. If you click the “Final Cut Pro” option on the top and choose the editing option, it will show you various options to adjust the keyframes like reference waveforms, transitions, etc.
With access to the in-built options offered by Final Cut Pro X, you can easily adjust the created or added fcpx audio keyframe at ease.
Part 3: FAQs about Audio Keyframing in Final Cut Pro X?
1. Will changing the “Show reference waveform” checkbox on the editing window’s audio aspect affect the fcpx audio keyframe?
No. A tick over the “Shoe reference waveforms” checkbox will only make changes over the timeline waveform representation. However, no change will occur on the keyframe unless the duration or still images get altered.
2. Can I add keyframes across a selected area automatically?
Yes, with the Range Selection tool’s assistance, you can add keyframes over a selected range automatically. To do so, execute the “Clip > Audio Animation > select an effect > disclosure button.” From the tools pop-up menu with the mouse icon, choose the option, “Range Selection.”
3. Despite Audio animation, is there any other option to adjust the fcpx keyframe?
Yes. To access many different effects in the Final Cut Pro X software, you can change the parameter values of sole keyframes using Audio Inspector.
4. Is viewing a single effect at a time in the Audio Animation editor is possible in FCPX?
Yes. If you have applied multiple effects to a clip and need to preserve a screen space, you can collapse the Audio Animation editor to view one impact at a time. Tapping the “Solo Animation” option from the Click Menu can execute this task.
5. Can I delete the created Final Cut Pro audio keyframe?
Sure. To delete an audio keyframe, select the keyframe, and press the “Shift + Delete” option. Now, navigate to the Audio Inspector, and hit the “Keyframe” button.
Conclusion
I am sure you are excited to know that working with the Final Cut Pro keyframe is easier than you have imagined. Yes, it is, and I hope with the ultimate guide on how to add keyframe Final Cut Pro X along with specific FAQs regarding fcpx audio keyframe, we have put a full-stop to your queries. So, with no delay, get started to make your video by audio keyframes on Final Cut Pro X!
Benjamin Arango
Benjamin Arango is a writer and a lover of all things video.
Follow @Benjamin Arango
Top Best 10 AI Music Composers
Top Best 10 AI Music Composers in 2024
Benjamin Arango
Mar 27, 2024• Proven solutions
Robots can’t be creative, right? A number of startups that focus on the development of artificial intelligence that is capable of composing music have proved this statement wrong. AI music composers generate original, copyright-free music you can use in your latest YouTube video or social media video ad. You don’t even have to be a sound designer or a musician to produce soundtracks for your videos with AI Music Composers, because you can upload the music that has already been recorded and create variations of it. So, let’s take a look at what AI music composers have to offer in 2024.
| 1 - Amper Music | 2 - AIVA |
|---|---|
| 3 - Jukedeck | 4 - Ecrett Music |
| 5 - Melodrive | 6 - ORB Composer |
| 7 - Amadeus Code | 8 - Humtap |
| 9 - Muzeek | 10 - Brain.fm |
Ten Best AI Music Composers You Should Know About
The AI technologies that can compose music are still relatively novel, and as time passes, they can only develop and grow further. Consequently, each of the AI music composers we featured in this article offers a different range of possibilities. Here are the ten best AI music composers you shouldn’t miss out on in 2024.

Filmora AI Music Editor
Edit Audio with AI Music Editor
Experience the power of Filmora’s AI tools and make your audio or music stand out like never before! Audio Denoise, Audio Ducking, Audio Synchronization, Audio Stretch, etc…
Try It Free Try It Free Try It Free Learn More >
1. Amper Music
Price: Available upon request
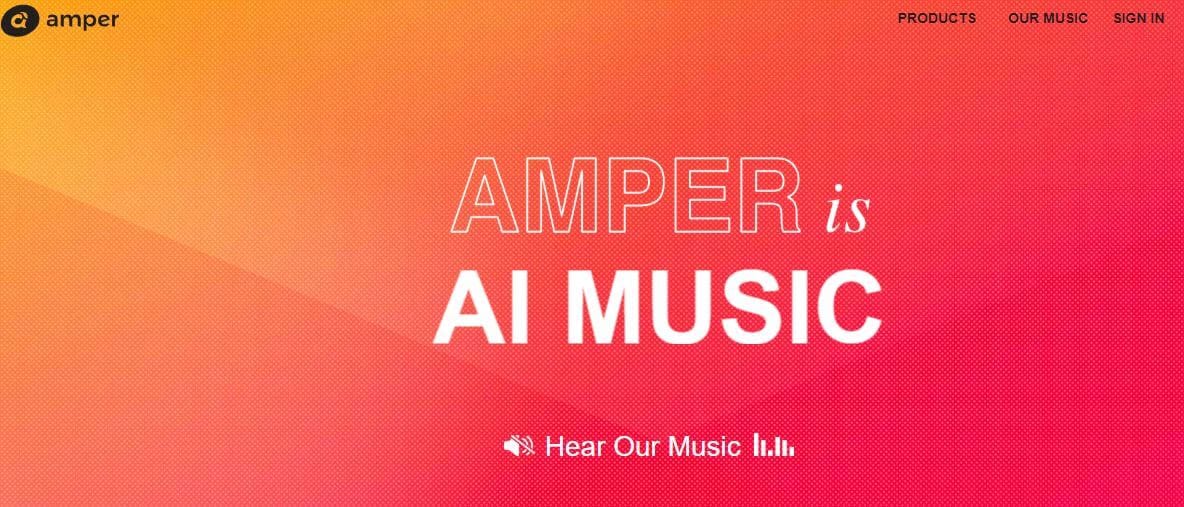
Industry professionals know just how frustrating the music licensing process can be. Amper Music is a cloud-based platform designed to simplify the process of creating soundtracks for movies and video games, as it produces AI generated algorithms that help users create music in a variety of music genres. You must first create an account on this platform, in order to be able to use the free version of Amper Music that provides only a limited amount of features. Upgrading to the pro version of Amper Music will enable you to enjoy the full potential of this rapidly growing AI Music Composer.
2. AIVA
Price: Free version available, subscription plans start from €14 p/month
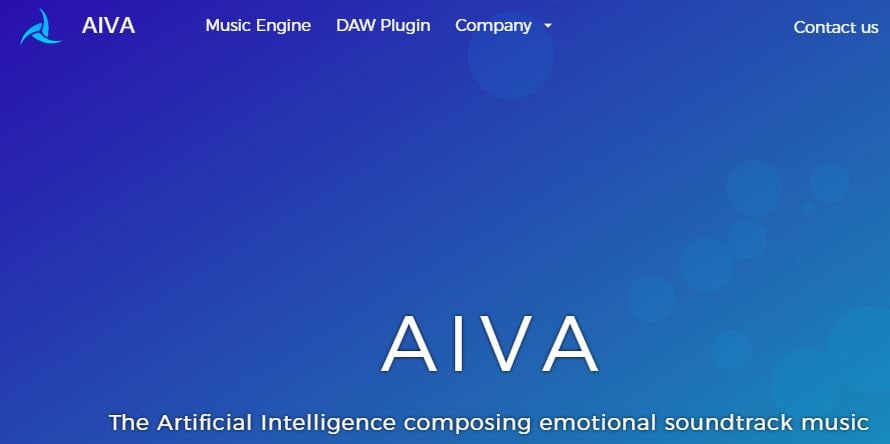
Since 2016, when AIVA Technologies was founded, its team has worked on developing an AI script that can compose emotional soundtracks for ads, video games, or movies. Soon after, the AI published its first oeuvre titled ‘Opus 1 for Piano Solo and in the subsequent years, AIVA released an album and composed music for a video game. Besides enabling its users to create music from scratch, AIVA can also be used to produce variations of existing songs. The music engine that powers this AI music composer makes the production of corporate or social media videos much easier, as it eliminates the need to go through the music licensing process.
3. Jukedeck
Price: Free version available, Pricing plans start from $0.99 per download

The AI music composer developed by the Jukedeck startup resembles the Amper’s music composer because they both rely on neural networks to analyze music data, that is then used by the AI to learn how to compose original music. Each track that is available through this AI music composer can be edited, so you can change its length or its tempo. You can create music with Jukedeck for free if you decide to give all the rights to the AI composer, while both individuals and small businesses can purchase the license to use the song created with Jukedeck for just $0.99.
Note: Jukedeck has been acquired by TikTok, and we are waiting for a new Jukedeck.
![]()
A cross-platform for making videos anywhere for all creators

Why your video editing isn’t good enough? How about some creative inspo?
- 100 Million+ Users
- 150+ Countries and Regions
- 4 Million+ Social Media Followers
- 5 Million+ Stock Media for Use
* Secure Download

4. Ecrett Music
Price: Subscription plans start at $5
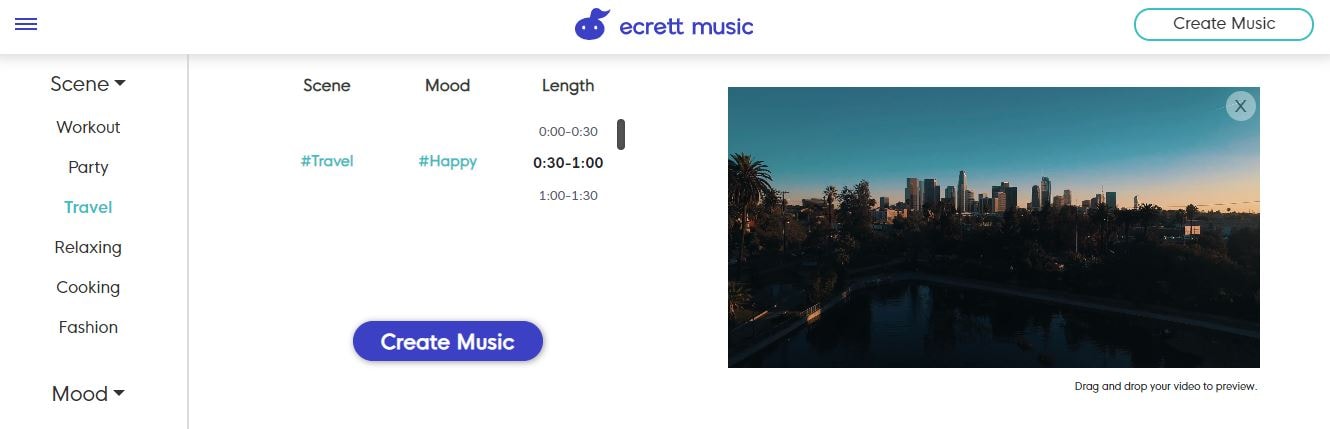
This online AI music composer makes creating stunning soundtracks for videos look easy. You just have to upload a video for which you want to generate music and select the type of scene and the mood of that scene. Party, Travel or Fashion are among the types of scenes you can choose from, while moods range from happy to serious. When done, simply click on the Create Music button, and the platform will automatically generate the soundtrack for your video. In case you are producing videos on a constant basis, you should consider purchasing one of the available subscription plans.
5. Melodrive
Price: Free
Compatibility: iOS, Windows
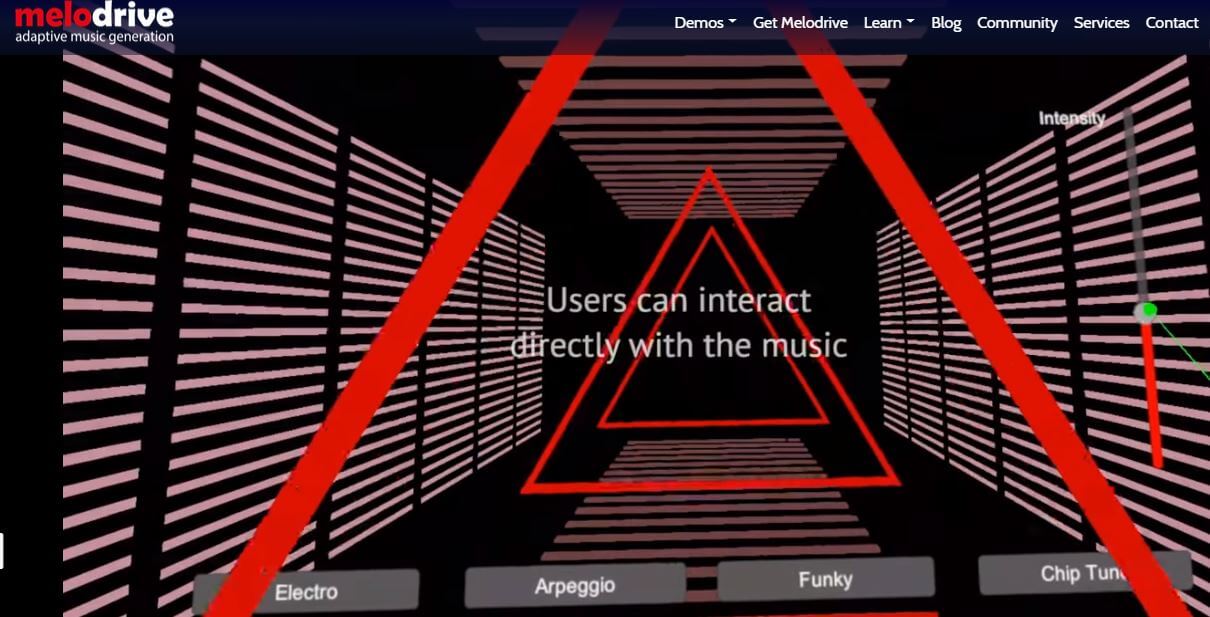
At the moment, the Lite and Indie versions of Melodrive are available for download free of charge, but the Indie version of this AI music composer still offers more options. Melodrive is one of the first AI systems that can compose emotional and unique music in real time. The AI generates music by adapting to the media environment and aims to match the mood and the style of the video. It is worth noting that Melodrive is still under development and that through time its capabilities to compose music are going to become even more refined than they already are.
6. ORB Composer
Price: Pricing plans start at $149,00
Compatibility: macOS, Windows

You can’t generate music automatically with ORB Composer, because the AI creates music based on your choices. That’s why you need to know at least the basic rules of music composition in order to be able to use the ORB Composer properly. The AI music composer comes bundled with a rich collection of chord progressions, that contains almost all chords used in popular music. This tool is aimed at artists who are interested in experimenting with the possibilities of creating music with artificial intelligence and discovering new styles of music. There are six music templates you can choose from, and you can create compositions by simply organizing different blocks of music.

Filmora AI Audio Stretcher
Wondershare Filmora - AI Audio Stretcher
• Retime any audio track to fit the duration of your video almost instantly.
• Rearrange songs without quality loss.
• Cross-platform supported - (Windows, Mac, iOS, Android)
Start Audio Stretch Start Audio Stretch Start Audio Stretch Learn More >
7. Amadeus Code
Price: Free, but the app offers in-app purchases
Compatibility: iOS
Both skilled musicians and music enthusiast can use this iOS-based app to create new melodies in just a few minutes. The AI engine that the Amadeus Code uses contains chord progressions of some of the most famous songs ever created and it let you use them to create new and innovative structures of music compositions. Moreover, you can use gestures to create new songs or recreate specific segments of songs you composed earlier. Even though Amadeus Code lets its users export audio and MIDI files to audio editing software, you still have to purchase all songs you want to keep.
8. Humtap
Price: Free
Compatibility: iOS
Musicians who have a tough time remembering their own ideas are going to love using Humtap because they can just hum a melody and the app will automatically generate an entire song using different instruments. What’s more, beats can be added with a single tap, and after the music is generated you can proceed to add the vocals as well. Humptap also has video making capabilities, so you can create videos for all songs you compose with this app. All tracks and videos generated with the Humtap AI music composer can be saved to your phone, but you can’t share your new creations to social media directly from the app.
9. Muzeek
Price: Free trial available, pricing plans start from $19 per month
Compatibility: macOS
If you are in need of licensed music for the video you’re planning on sharing to social media networks, then Muzeek is one of the best choices you can make. The AI algorithm Muzeek uses analyzes the videos for which you are generating music and it creates soundtracks that perfectly fit the rhythm of the video. All content creators, including online marketing agencies or video game developers, can rely on Muzeek AI music composer to create authentic music in high quality. Moreover, Muzeek can also analyze the video’s original audio and create subtitles from it or adjust its volume automatically.
10. Brain.fm
Price: Subscription plans start from $6,95 per month
Compatibility: Android, online
The idea that music can make our brains more productive is at the very core of what Brain.fm platform is all about. A team of scientists, musicians and engineers uses artificial intelligence to generate music designed to make your brain more productive and focused. They claim that the music created with their AI music composer achieve its effects in just ten to fifteen minutes. However, you can’t use Brain.fm to create your own music, as this platform is better suited for people who spend a lot of time at work and have a tough time maintaining their focus while performing important tasks.
Conclusion
The opportunities AI music composers offer are still not properly explored, because most of these technologies are still under development. The results AI music composers we included in this article have managed to achieve so far are impressive because each of them can produce high-quality audio files for all sorts of video content. Which AI music composer do you like to use the most? Leave a comment, and let us know.
Benjamin Arango
Benjamin Arango is a writer and a lover of all things video.
Follow @Benjamin Arango
Benjamin Arango
Mar 27, 2024• Proven solutions
Robots can’t be creative, right? A number of startups that focus on the development of artificial intelligence that is capable of composing music have proved this statement wrong. AI music composers generate original, copyright-free music you can use in your latest YouTube video or social media video ad. You don’t even have to be a sound designer or a musician to produce soundtracks for your videos with AI Music Composers, because you can upload the music that has already been recorded and create variations of it. So, let’s take a look at what AI music composers have to offer in 2024.
| 1 - Amper Music | 2 - AIVA |
|---|---|
| 3 - Jukedeck | 4 - Ecrett Music |
| 5 - Melodrive | 6 - ORB Composer |
| 7 - Amadeus Code | 8 - Humtap |
| 9 - Muzeek | 10 - Brain.fm |
Ten Best AI Music Composers You Should Know About
The AI technologies that can compose music are still relatively novel, and as time passes, they can only develop and grow further. Consequently, each of the AI music composers we featured in this article offers a different range of possibilities. Here are the ten best AI music composers you shouldn’t miss out on in 2024.
Filmora AI Music Editor
Edit Audio with AI Music Editor
Experience the power of Filmora’s AI tools and make your audio or music stand out like never before! Audio Denoise, Audio Ducking, Audio Synchronization, Audio Stretch, etc…
Try It Free Try It Free Try It Free Learn More >
1. Amper Music
Price: Available upon request
Industry professionals know just how frustrating the music licensing process can be. Amper Music is a cloud-based platform designed to simplify the process of creating soundtracks for movies and video games, as it produces AI generated algorithms that help users create music in a variety of music genres. You must first create an account on this platform, in order to be able to use the free version of Amper Music that provides only a limited amount of features. Upgrading to the pro version of Amper Music will enable you to enjoy the full potential of this rapidly growing AI Music Composer.
2. AIVA
Price: Free version available, subscription plans start from €14 p/month
Since 2016, when AIVA Technologies was founded, its team has worked on developing an AI script that can compose emotional soundtracks for ads, video games, or movies. Soon after, the AI published its first oeuvre titled ‘Opus 1 for Piano Solo and in the subsequent years, AIVA released an album and composed music for a video game. Besides enabling its users to create music from scratch, AIVA can also be used to produce variations of existing songs. The music engine that powers this AI music composer makes the production of corporate or social media videos much easier, as it eliminates the need to go through the music licensing process.
3. Jukedeck
Price: Free version available, Pricing plans start from $0.99 per download
The AI music composer developed by the Jukedeck startup resembles the Amper’s music composer because they both rely on neural networks to analyze music data, that is then used by the AI to learn how to compose original music. Each track that is available through this AI music composer can be edited, so you can change its length or its tempo. You can create music with Jukedeck for free if you decide to give all the rights to the AI composer, while both individuals and small businesses can purchase the license to use the song created with Jukedeck for just $0.99.
Note: Jukedeck has been acquired by TikTok, and we are waiting for a new Jukedeck.
![]()
A cross-platform for making videos anywhere for all creators
Why your video editing isn’t good enough? How about some creative inspo?
- 100 Million+ Users
- 150+ Countries and Regions
- 4 Million+ Social Media Followers
- 5 Million+ Stock Media for Use
* Secure Download
4. Ecrett Music
Price: Subscription plans start at $5

This online AI music composer makes creating stunning soundtracks for videos look easy. You just have to upload a video for which you want to generate music and select the type of scene and the mood of that scene. Party, Travel or Fashion are among the types of scenes you can choose from, while moods range from happy to serious. When done, simply click on the Create Music button, and the platform will automatically generate the soundtrack for your video. In case you are producing videos on a constant basis, you should consider purchasing one of the available subscription plans.
5. Melodrive
Price: Free
Compatibility: iOS, Windows
At the moment, the Lite and Indie versions of Melodrive are available for download free of charge, but the Indie version of this AI music composer still offers more options. Melodrive is one of the first AI systems that can compose emotional and unique music in real time. The AI generates music by adapting to the media environment and aims to match the mood and the style of the video. It is worth noting that Melodrive is still under development and that through time its capabilities to compose music are going to become even more refined than they already are.
6. ORB Composer
Price: Pricing plans start at $149,00
Compatibility: macOS, Windows

You can’t generate music automatically with ORB Composer, because the AI creates music based on your choices. That’s why you need to know at least the basic rules of music composition in order to be able to use the ORB Composer properly. The AI music composer comes bundled with a rich collection of chord progressions, that contains almost all chords used in popular music. This tool is aimed at artists who are interested in experimenting with the possibilities of creating music with artificial intelligence and discovering new styles of music. There are six music templates you can choose from, and you can create compositions by simply organizing different blocks of music.
Filmora AI Audio Stretcher
Wondershare Filmora - AI Audio Stretcher
• Retime any audio track to fit the duration of your video almost instantly.
• Rearrange songs without quality loss.
• Cross-platform supported - (Windows, Mac, iOS, Android)
Start Audio Stretch Start Audio Stretch Start Audio Stretch Learn More >
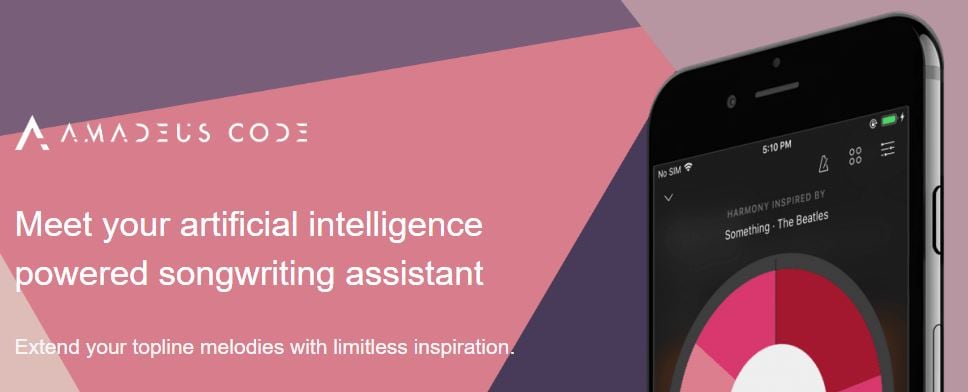
7. Amadeus Code
Price: Free, but the app offers in-app purchases
Compatibility: iOS
Both skilled musicians and music enthusiast can use this iOS-based app to create new melodies in just a few minutes. The AI engine that the Amadeus Code uses contains chord progressions of some of the most famous songs ever created and it let you use them to create new and innovative structures of music compositions. Moreover, you can use gestures to create new songs or recreate specific segments of songs you composed earlier. Even though Amadeus Code lets its users export audio and MIDI files to audio editing software, you still have to purchase all songs you want to keep.
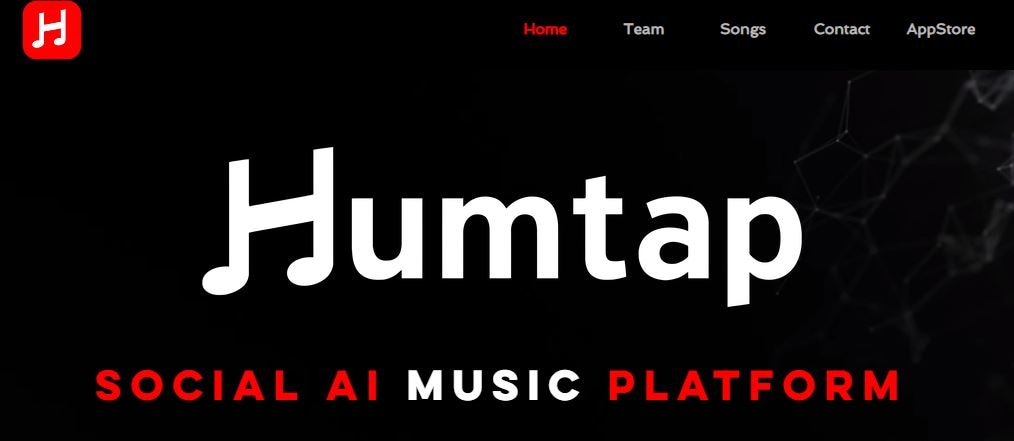
8. Humtap
Price: Free
Compatibility: iOS
Musicians who have a tough time remembering their own ideas are going to love using Humtap because they can just hum a melody and the app will automatically generate an entire song using different instruments. What’s more, beats can be added with a single tap, and after the music is generated you can proceed to add the vocals as well. Humptap also has video making capabilities, so you can create videos for all songs you compose with this app. All tracks and videos generated with the Humtap AI music composer can be saved to your phone, but you can’t share your new creations to social media directly from the app.
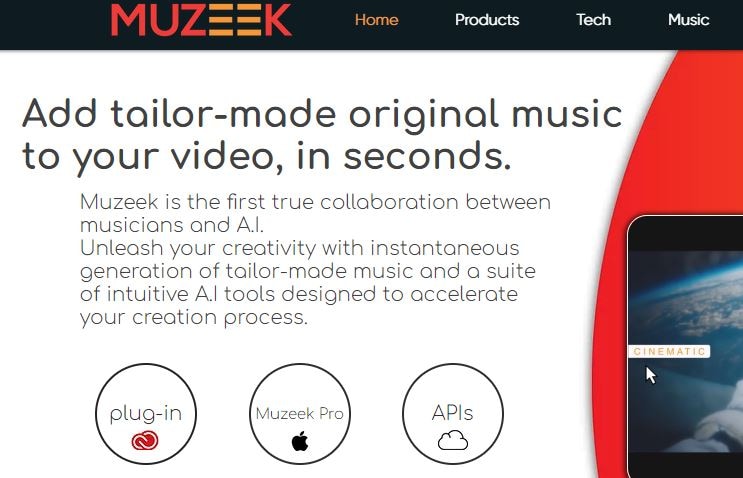
9. Muzeek
Price: Free trial available, pricing plans start from $19 per month
Compatibility: macOS
If you are in need of licensed music for the video you’re planning on sharing to social media networks, then Muzeek is one of the best choices you can make. The AI algorithm Muzeek uses analyzes the videos for which you are generating music and it creates soundtracks that perfectly fit the rhythm of the video. All content creators, including online marketing agencies or video game developers, can rely on Muzeek AI music composer to create authentic music in high quality. Moreover, Muzeek can also analyze the video’s original audio and create subtitles from it or adjust its volume automatically.
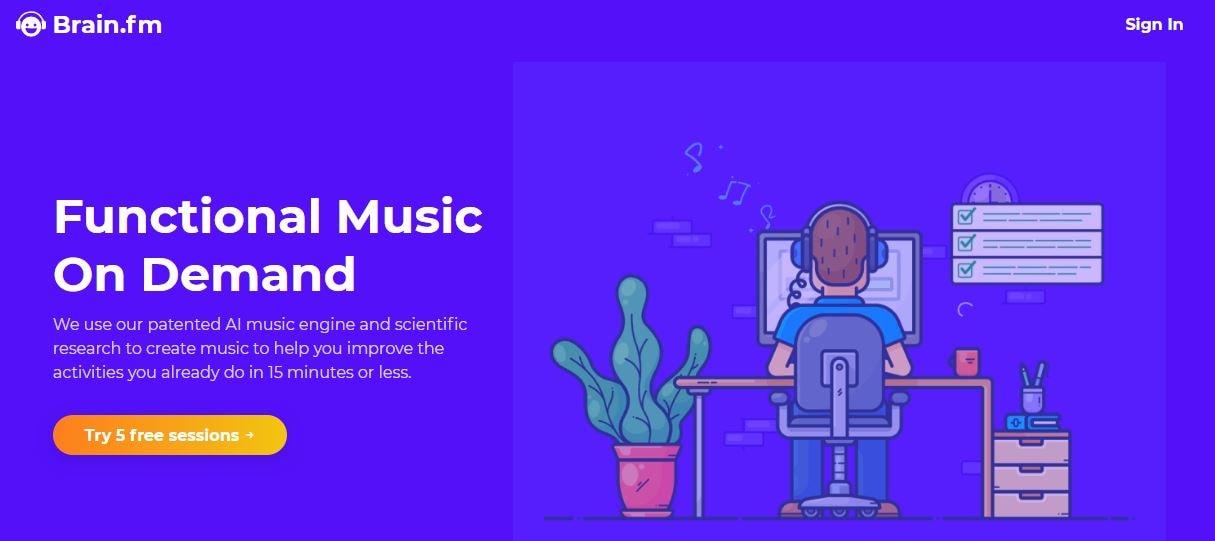
10. Brain.fm
Price: Subscription plans start from $6,95 per month
Compatibility: Android, online
The idea that music can make our brains more productive is at the very core of what Brain.fm platform is all about. A team of scientists, musicians and engineers uses artificial intelligence to generate music designed to make your brain more productive and focused. They claim that the music created with their AI music composer achieve its effects in just ten to fifteen minutes. However, you can’t use Brain.fm to create your own music, as this platform is better suited for people who spend a lot of time at work and have a tough time maintaining their focus while performing important tasks.
Conclusion
The opportunities AI music composers offer are still not properly explored, because most of these technologies are still under development. The results AI music composers we included in this article have managed to achieve so far are impressive because each of them can produce high-quality audio files for all sorts of video content. Which AI music composer do you like to use the most? Leave a comment, and let us know.
Benjamin Arango
Benjamin Arango is a writer and a lover of all things video.
Follow @Benjamin Arango
Benjamin Arango
Mar 27, 2024• Proven solutions
Robots can’t be creative, right? A number of startups that focus on the development of artificial intelligence that is capable of composing music have proved this statement wrong. AI music composers generate original, copyright-free music you can use in your latest YouTube video or social media video ad. You don’t even have to be a sound designer or a musician to produce soundtracks for your videos with AI Music Composers, because you can upload the music that has already been recorded and create variations of it. So, let’s take a look at what AI music composers have to offer in 2024.
| 1 - Amper Music | 2 - AIVA |
|---|---|
| 3 - Jukedeck | 4 - Ecrett Music |
| 5 - Melodrive | 6 - ORB Composer |
| 7 - Amadeus Code | 8 - Humtap |
| 9 - Muzeek | 10 - Brain.fm |
Ten Best AI Music Composers You Should Know About
The AI technologies that can compose music are still relatively novel, and as time passes, they can only develop and grow further. Consequently, each of the AI music composers we featured in this article offers a different range of possibilities. Here are the ten best AI music composers you shouldn’t miss out on in 2024.
Filmora AI Music Editor
Edit Audio with AI Music Editor
Experience the power of Filmora’s AI tools and make your audio or music stand out like never before! Audio Denoise, Audio Ducking, Audio Synchronization, Audio Stretch, etc…
Try It Free Try It Free Try It Free Learn More >
1. Amper Music
Price: Available upon request
Industry professionals know just how frustrating the music licensing process can be. Amper Music is a cloud-based platform designed to simplify the process of creating soundtracks for movies and video games, as it produces AI generated algorithms that help users create music in a variety of music genres. You must first create an account on this platform, in order to be able to use the free version of Amper Music that provides only a limited amount of features. Upgrading to the pro version of Amper Music will enable you to enjoy the full potential of this rapidly growing AI Music Composer.
2. AIVA
Price: Free version available, subscription plans start from €14 p/month
Since 2016, when AIVA Technologies was founded, its team has worked on developing an AI script that can compose emotional soundtracks for ads, video games, or movies. Soon after, the AI published its first oeuvre titled ‘Opus 1 for Piano Solo and in the subsequent years, AIVA released an album and composed music for a video game. Besides enabling its users to create music from scratch, AIVA can also be used to produce variations of existing songs. The music engine that powers this AI music composer makes the production of corporate or social media videos much easier, as it eliminates the need to go through the music licensing process.
3. Jukedeck
Price: Free version available, Pricing plans start from $0.99 per download
The AI music composer developed by the Jukedeck startup resembles the Amper’s music composer because they both rely on neural networks to analyze music data, that is then used by the AI to learn how to compose original music. Each track that is available through this AI music composer can be edited, so you can change its length or its tempo. You can create music with Jukedeck for free if you decide to give all the rights to the AI composer, while both individuals and small businesses can purchase the license to use the song created with Jukedeck for just $0.99.
Note: Jukedeck has been acquired by TikTok, and we are waiting for a new Jukedeck.
![]()
A cross-platform for making videos anywhere for all creators
Why your video editing isn’t good enough? How about some creative inspo?
- 100 Million+ Users
- 150+ Countries and Regions
- 4 Million+ Social Media Followers
- 5 Million+ Stock Media for Use
* Secure Download
4. Ecrett Music
Price: Subscription plans start at $5

This online AI music composer makes creating stunning soundtracks for videos look easy. You just have to upload a video for which you want to generate music and select the type of scene and the mood of that scene. Party, Travel or Fashion are among the types of scenes you can choose from, while moods range from happy to serious. When done, simply click on the Create Music button, and the platform will automatically generate the soundtrack for your video. In case you are producing videos on a constant basis, you should consider purchasing one of the available subscription plans.
5. Melodrive
Price: Free
Compatibility: iOS, Windows
At the moment, the Lite and Indie versions of Melodrive are available for download free of charge, but the Indie version of this AI music composer still offers more options. Melodrive is one of the first AI systems that can compose emotional and unique music in real time. The AI generates music by adapting to the media environment and aims to match the mood and the style of the video. It is worth noting that Melodrive is still under development and that through time its capabilities to compose music are going to become even more refined than they already are.
6. ORB Composer
Price: Pricing plans start at $149,00
Compatibility: macOS, Windows

You can’t generate music automatically with ORB Composer, because the AI creates music based on your choices. That’s why you need to know at least the basic rules of music composition in order to be able to use the ORB Composer properly. The AI music composer comes bundled with a rich collection of chord progressions, that contains almost all chords used in popular music. This tool is aimed at artists who are interested in experimenting with the possibilities of creating music with artificial intelligence and discovering new styles of music. There are six music templates you can choose from, and you can create compositions by simply organizing different blocks of music.
Filmora AI Audio Stretcher
Wondershare Filmora - AI Audio Stretcher
• Retime any audio track to fit the duration of your video almost instantly.
• Rearrange songs without quality loss.
• Cross-platform supported - (Windows, Mac, iOS, Android)
Start Audio Stretch Start Audio Stretch Start Audio Stretch Learn More >
7. Amadeus Code
Price: Free, but the app offers in-app purchases
Compatibility: iOS
Both skilled musicians and music enthusiast can use this iOS-based app to create new melodies in just a few minutes. The AI engine that the Amadeus Code uses contains chord progressions of some of the most famous songs ever created and it let you use them to create new and innovative structures of music compositions. Moreover, you can use gestures to create new songs or recreate specific segments of songs you composed earlier. Even though Amadeus Code lets its users export audio and MIDI files to audio editing software, you still have to purchase all songs you want to keep.
8. Humtap
Price: Free
Compatibility: iOS
Musicians who have a tough time remembering their own ideas are going to love using Humtap because they can just hum a melody and the app will automatically generate an entire song using different instruments. What’s more, beats can be added with a single tap, and after the music is generated you can proceed to add the vocals as well. Humptap also has video making capabilities, so you can create videos for all songs you compose with this app. All tracks and videos generated with the Humtap AI music composer can be saved to your phone, but you can’t share your new creations to social media directly from the app.
9. Muzeek
Price: Free trial available, pricing plans start from $19 per month
Compatibility: macOS
If you are in need of licensed music for the video you’re planning on sharing to social media networks, then Muzeek is one of the best choices you can make. The AI algorithm Muzeek uses analyzes the videos for which you are generating music and it creates soundtracks that perfectly fit the rhythm of the video. All content creators, including online marketing agencies or video game developers, can rely on Muzeek AI music composer to create authentic music in high quality. Moreover, Muzeek can also analyze the video’s original audio and create subtitles from it or adjust its volume automatically.
10. Brain.fm
Price: Subscription plans start from $6,95 per month
Compatibility: Android, online
The idea that music can make our brains more productive is at the very core of what Brain.fm platform is all about. A team of scientists, musicians and engineers uses artificial intelligence to generate music designed to make your brain more productive and focused. They claim that the music created with their AI music composer achieve its effects in just ten to fifteen minutes. However, you can’t use Brain.fm to create your own music, as this platform is better suited for people who spend a lot of time at work and have a tough time maintaining their focus while performing important tasks.
Conclusion
The opportunities AI music composers offer are still not properly explored, because most of these technologies are still under development. The results AI music composers we included in this article have managed to achieve so far are impressive because each of them can produce high-quality audio files for all sorts of video content. Which AI music composer do you like to use the most? Leave a comment, and let us know.
Benjamin Arango
Benjamin Arango is a writer and a lover of all things video.
Follow @Benjamin Arango
Also read:
- Updated In 2024, How to Remove Distortion From Audio for Your Video
- Updated The Essential Manual Tackling Unwanted Audio Elements with Precision in Audacity
- Updated Top 10 Best Sites to Download Free HD Video Backgrounds
- New 2024 Approved Methods to Decrease Media Content Volume
- In 2024, The Seamless Audio Journey Crafting Subtle Volume Transitions in Adobe After Effects
- Updated Demystifying Reapers Audio World A Comprehensive Review of Its Tools and Tutorials
- New Sounds of Success Unveiling the Top 8 Cinematic Audio Wonders for 2024
- 2024 Approved Innovations in Noise Suppression Applying Artificial Intelligence to Improve Sound Quality
- Free Voice Creation Platforms Speak Your Text Now!
- New 2024 Approved Top-Rated Vocal Transformer & Harmonizer Tool for Performers
- Updated 2024 Approved Locating Authentic Bell Ringing Audio Samples
- New 2024 Approved Top 5 Digital Audio Organizers for Seamless MP3 Management
- New The Modern Editors Toolkit Turning Off Audio in Media Files for 2024
- Updated Accessible Speech Modification Tools Detailed Analysis and Comparatives
- In 2024, Auditory Refinement How to Subtract Reverberation From Your Recordings for Unblemished Quality
- New 2024 Approved Excellent Real-Time Vocal Disguise Apps The Best Edition
- New 2024 Approved Tips and Tricks to Use Clownfish Voice Changer on Discord/ Fortnite/ Skype
- New 2024 Approved The Path to a New Sonic Presence Innovative Approaches to Vocal Adaptation
- New Top 10 Spotlight on Popular Pop Chansons for Visual Media Projects
- New In 2024, Leading Speech Conversion Platforms for Microsoft Windows Users, Updated
- The Zen of Soundscaping Advanced Strategies for Removing Background Noise in Virtual Realms for 2024
- Updated 2024 Approved Tips of Playing M4A Audio Files on Android Devices
- New In 2024, FREE MUSIC Integration Into Digital Photography on PC/Mobile Devices
- New Mastering the Mix An Introduction to REAPERs Capabilities
- New Harnessing the Power of Tension-Building Melodies in Cinematic Storytelling
- In 2024, Sim Unlock Lava Blaze Pro 5G Phones without Code 2 Ways to Remove Android Sim Lock
- How to OnePlus Get Deleted Pictures Back with Ease and Safety?
- How Do I Stop Someone From Tracking My Google Pixel 7a? | Dr.fone
- Updated Edit MP4 Videos Like a Pro Top 10 Free Tools for 2024
- In 2024, How PGSharp Save You from Ban While Spoofing Pokemon Go On Samsung Galaxy M34? | Dr.fone
- The Best of Both Worlds Free and Open-Source Video Editors for 2024
- In 2024, 2 Ways to Monitor Oppo Find X7 Activity | Dr.fone
- In 2024, Top 10 Best Spy Watches For your Apple iPhone 6s Plus | Dr.fone
- Updated In 2024, Unleash Your Creativity A Comprehensive Guide to Jaycut Free Video Editing
- What is the best Pokemon for pokemon pvp ranking On Oppo A79 5G? | Dr.fone
- How to Mirror Nubia Z50 Ultra to Mac? | Dr.fone
- In 2024, Preparation to Beat Giovani in Pokemon Go For Realme 12 Pro+ 5G | Dr.fone
- New Ranking the Top Web-Based Vertical Video Editors
- Updated Top 10 AI Script Generators for 2024
- Updated GIF Animation Made Easy Top Free Makers for 2024
- Where Is the Best Place to Catch Dratini On Apple iPhone 15 Pro Max | Dr.fone
- Updated In 2024, How to Make a Video with Photos and Music
- In 2024, Unlocking the Power of Smart Lock A Beginners Guide for Oppo A2 Users
- How to Fix Life360 Shows Wrong Location On Xiaomi Redmi 12? | Dr.fone
- In 2024, Top 10 Oppo Reno 11F 5G Android SIM Unlock APK
- Title: Updated In 2024, Unlocking Audio Potential A User-Friendly Approach to Track Combining in Premiere Pro
- Author: Kate
- Created at : 2024-06-18 18:41:29
- Updated at : 2024-06-19 18:41:29
- Link: https://audio-editing.techidaily.com/updated-in-2024-unlocking-audio-potential-a-user-friendly-approach-to-track-combining-in-premiere-pro/
- License: This work is licensed under CC BY-NC-SA 4.0.
