
:max_bytes(150000):strip_icc():format(webp)/d-link-default-password-list-2619152-d6281a924f45426f879c8707220ce92d.png)
Updated In 2024, The Ultimate Guide to Transferring Audio From Video Files Across Various Operating Systems and Devices
The Ultimate Guide to Transferring Audio From Video Files Across Various Operating Systems and Devices
How to Extract Audio from Videos on Win/Mac/Phone

Shanoon Cox
Mar 27, 2024• Proven solutions
Remake a remix from raw audio, dub the movie dialogues in a different language or simply use the same audio in one of yours YouTube or Instagram video, all it requires is a high-end audio extractor program and you are good to go.
So if you are on an exploration of some good audio extractor software from a video, here we are to guide you all along the way for each of the platforms ranging from phones to PC.
You will Learn :
- How to Make Audio Extraction from Videos Using Mac and Windows?
- How to Extract Audio on Mac Using QuickTime?
- How to Make Audio Extraction on Windows Using Movie Maker?
- How to Extract Audio from Videos on Mobile Phones
- How to Extract Audio from Video Online?
- How to Extract Audio from YouTube Video?
- How to Extract Audio from a Facebook Video?
- How to Extract Audio from an Instagram Video?
- How to Extract Audio from Streaming Video?
So, let’s begin!
How to Make Audio Extraction from Videos Using Mac and Windows?
When you extract audio from videos on PC, you need a tool to make it done. That can be a very easy job if you use the professional video editing software-Wondershare Filmora . Just follow this guide to extract audio from video with ease.
Wondershare filmora is one of the best professional video editing software which can make a job of audio extraction from a video.
Here’s how to extract audio from a video using Filmora:


Step 1: Download Wondershare Filmora and run the program.
Step 2: Click on “import” button and include the desired video. You can also directly drag and drop the video to the program. The loaded video will be listed in the media library like the following picture shows.
Step 3: Start extracting audio from video.
After importing video to Wondershare Filmora, drag the video from the media library to the video Timeline.
Step 4: You can then right-click the video clip and choose “Audio Detach” to extract audio from the video.
After a while, video and audio will be displayed on different tracks. This will extract the audio from the video and display both the files separately.
If you don’t want to keep the video file, right-click it and choose “Delete” to remove it from the video timeline. Bring the video to the video timeline from the library by drag option.
Step 5: Edit the audio you desired.
Then double click to edit the audio in the popup window.
Here you can change the Volume, Fade in, Fade out, and Pitch, etc. as you like.
If you want to delete part of the audio, just put the cursor to the place where you would like the deletion to start and press the “Split” button above the timeline.
The end of the deletion area is marked similarly – play the audio and select the final point of the area to be excluded from the output audio, and then press the “Split” button again.
Besides that, you can also add an image to the newly extracted audio. Here is a detailed guide about it >>
Step 6: Select the desired output method and save the audio file
After that, click the “Create” button to export the audio track. Choose the desired file format and adjust settings accordingly.
Here different options are provided.
For example, you can save the audio in regular formats such as MP3, MP4, WMV, AVI and so on in the “Format” tab and adjust the settings such as Encoder, Sample Rate, Bit Rate, and Channel as you like.
Or export it for playback on portable devices, burn it to DVD disc or share it to YouTube directly.
After you select the desired output method, simply select a desirable output method and then click the “Create” button to save the audio track.
How to Extract Audio on Mac Using QuickTime?
This section entails you about how to extract audio from video mac
QuickTime Player is a pre-installed player in Mac PCs that you can utilize to extract the audio from a video with merely some clicks away in seconds. Hence, you don’t need to download this player. All you need is to follow the below step:
Step 1: Open the QuickTime Player.
Step 2: Open the targeted video on this player.
Step 3: Click on “file” from the top bar of the player.
Step 4: On the “export as” option, click on “audio-only”.

Step 5: Give a name to the audio file, select a location to store and click on “save”.
How to Make Audio Extraction on Windows Using Movie Maker?
On Windows you can use the free utility, Movie Maker, to extract the audio and save as an MP4 file.
Movie Maker is a free utility on windows that you can utilize for multiple purposes. So, if you are wondering how to extract audio from video in windows movie maker then look no further! All you have to do is:
Step 1: Download “movie maker” and “photo gallery” if you don’t own one or both of them already.
Step 2: Due to the sharing of ample coherent features, both of these software has to be downloaded together.
Step 3: Open “movie maker” and select “add video and photo” option to select the desired targeted video from a location on your computer.
Step 4: After the loading of the video, you need to click on “file”.
Step 5: Select “save movie” and scroll down to click “audio-only”.

Step 6: Name the audio file and save the file. The file gets saved with MP4 file format by default. You can save the file with WMA format as well but the most common and standard format is MP4 that can easily be played on any of the mobile devices having any operating system.
Step 7: The progress bar is displayed during the conversion of a video into the audio-only file. This may take some time as time varies depending upon the length and size of the file to be extracted from.
Step 8: When it’s done converting, you can play the audio right away or may move the file to another folder wherever you want it to be.
How to Extract Audio from Videos on Mobile Phones
Extracting the audio from a video file through mobile phones is often a tedious process to do so. But all thanks to the applications that come for a specific or general mobile operating systems to make a slow-paced job much easier and faster.
We have several mobile applications specific foe android phones and iPhone users that can do video to audio conversions within a wink of an eye. So, let’s explore the ways:
How to Extract Audio Using Android
This section entails you about how to extract audio from videos on android by the converter App, Video to Mp3 Converter .

Step 1: First off, Make and save or simply download a video in the local memory or SD card on your phone if you don’t already have a video.
Step 2: Open video to MP3 converter.
Step 3: You’ll see 4 options in the middle of the interface.
Step 4: Press the “video to audio” option.
Step 5: Select the targeted video file from where you want to extract the audio.
Step 6: You will be given a simple and advanced option. The simple option lets you perform basic operations on the video while the advance option will let you perform operations like bit rate and audio encoding etc.
Step 7: If you want the best quality audio output then set the quality to maximum, 9.
Step 8: Click on the “convert” button at the bottom to start the conversion process.
Step 9: When completed with the process, you can play the audio right away or may set it as a new ringtone as well.
How to Extract Audio from Video on iPhone or iPda?
This section entails you about how to extract audio from the iPhone video by MP3 Converter -Audio Extractor .

This is one of the free applications available on both iPhones and iPad. These handy applications will let you extract the audio from any of the videos on the phone. So if you are seeking about how to extract audio from a video file using your phone then the MP3 converter will serve the purpose.
Step 1: Open the MP3 converter application.
Step 2: Tap on the plus sign in the middle of the screen at the bottom.
Step 3: Select the import option according to where you want to choose the video, either the camera gallery or iCloud.
Step 4: Select a targeted video and tap on the “Add” button at the bottom right.
Step 5: Click on the video on the following screen.
Step 6: Select “convert”.
Step 7: Select MP3 by clicking on the “default mode”.
Step 8: If m4a is the desired file format you can to convert your audio file in then click on “advanced mode” and select the desired output format.
Step 9: You may also amend other settings like Audio Sample, Output Range etc.
Step 10: Click on “converted media” to access the converted audio file.
Step 11: You can play the audio right away or you may click “open in” option which lets you provide several options like saving, storing and sending to some platforms.
How to Extract Audio from Video Online?
This section entails you about how to extract audio from videos online by the Audio converter .
You don’t have to own an application-specific for audio extraction. You can do the same with online software, named as an audio converter.
This will save the internal memory of your system since you don’t need to download an app.
The steps are very simple as defined below:
Step 1: Open “audio converter” and Click on the “open files” option.
Step 2: Choose the file in the window from where you need the audio to be extracted with 2048 Mb as the maximum file size supported by this converter.

Step 3: While the sound extraction process is still going on, select the audio file format you want to convert in.
Step 4: If you are confused with the file formats options, then go with the default on, MP3 which is a standard format.
Step 5: Tap on the “convert” button and wait until the extraction process completes.
Step 6: After being extracted, click on “download”.
How to Extract Audio from YouTube Video?
Audials One , It is a user-friendly software suitable for audio extraction from a YouTube video. You can extract the file and save it in any of the file formats like WMV, MP4, and MP3, etc.
Before starting off with the extraction process, you will require a video file locally.
Below are the steps to extract audio from a YouTube publication using Audials one.
Step 1: Download and run Audials One
Step 2: Open this software and select “converter” below Universal Converter in the left window. Click on files>>add files

Step 3: Select a downloaded file of YouTube
Step 4: Tap on “close” when prompted with a window of adding files being done.
Step 5: Check the “Convert video to audio” checkbox.
Step 6: Select “start”.
Step 7: The free version of Audials one will allow 30 minutes of recording. You need to buy a pro version to be able to extract audio for a YouTube video longer than 30 minutes. Click on “no thanks” if you don’t need to upgrade the version. The conversion process will be continued.
Step 8: After conversion, you can play the audio by clicking the “edit” option given at the right corner and then tap on “open folder”
How to Extract Audio from a Facebook Video?
You can easily extract audio from the Facebook video by Any Audio Converter . Steps are as following:
Step 1: Download the converter software.
Step 2: Tap on “Add URLs”. This will pop a dialogue box. Select the plus tab and paste there the download link.
Step 3: Tap the “start download” option to begin the downloading process.

Step 4: Tap on the “Set output profile” option and from the drop-down, select MP3 Audio.
Step 5: The customize the audio configuration, click on “ Audio Options” which gives you Volume, Channel, Bit Rate, Audio Codec options respectively.
Step 6: To save the output file in a specified folder, tap on the “setting” option.
Step 7: Select “convert now!” option which will initiate the conversion of Facebook video into an MP3 audio file.
Not only limited to this option, but you can also perform basic editing operation as well by using this software.
How to Extract Audio from an Instagram Video?
You can easily download an Instagram video through this online application Instagram Video Downloader and can extract the audio from an Instagram video with very few steps:
Step 1: Open the post on the Instagram platform from which you want to extract the audio.
Step 2: Locate the post URL link and copy it.
Step 3: Then paste the copied link in the white bar on the top.

Step 4: Click on “submit” to download the Instagram video.
Step 5: Then convert the video into an MP3 audio file by selecting the desired file format.
How to Extract Multiple Audio Tracks from the Video?
Here you’ll get to know how to extract audio from video with the use of Handbrake software in order to extract multiple audio tracks from a video.
Step 1: Download and open handbrake software.
Step 2: You have to select a video having multiple audio tracks on “source selection” pane.
Step 3: File selection will generate an interface beneath. Select “audio tab” and expand the first dropdown which lists down all the audio tracks in a selected file. Select one of them and name the file and enter the output directory.
Step 4: Tap on “start encode” which will convert the audio in MP4 format. Now the audio extraction from the video is done using VLC player.
Step 5: Open the VLC player and select the “convert” option inside “media”.
Step 6: Tap on “add” in the Open Media pane then select the recently created handbrake video. From the drop-down next to the Convert/Save option, tap on “convert”.
Step 7: Below profile, tap on “MP3” on the following screen, name the file and enter the directory then select “start” and voila! You are done.
How to Extract Audio from Streaming Video?
You can use Video Downloader if you use Chrome as a web browser or DownloadHelper for Firefox users in order to download any streaming video as a file locally in your system. If one asks how to extract audio from the mp4 video, the process remains the same.
After the downloading process, there exist several programs for audio extraction from a video.
Below are the steps for the VLC player :
Step 1: Open VLC player, select “media” then click “convert/save” option, click “Add” beside File Selection box.
Step 2: Browse the desired downloaded file from PC and press “OK”.
Step 3: Select “audio-MP3” from “profile” and then select “start”.

Conclusion
Depending upon the availability of resources, all of the aforementioned approaches are great in their own way.
But considering that Wondershare filmora runs smoothly given the easiest interface and requiring least steps to perform audio extraction whilst being compatible with Mac and Windows both operating system, I would personally recommend this software for ease of accessibility and usability.
Shanoon Cox
Shanoon Cox is a writer and a lover of all things video.
Follow @Shanoon Cox
Shanoon Cox
Mar 27, 2024• Proven solutions
Remake a remix from raw audio, dub the movie dialogues in a different language or simply use the same audio in one of yours YouTube or Instagram video, all it requires is a high-end audio extractor program and you are good to go.
So if you are on an exploration of some good audio extractor software from a video, here we are to guide you all along the way for each of the platforms ranging from phones to PC.
You will Learn :
- How to Make Audio Extraction from Videos Using Mac and Windows?
- How to Extract Audio on Mac Using QuickTime?
- How to Make Audio Extraction on Windows Using Movie Maker?
- How to Extract Audio from Videos on Mobile Phones
- How to Extract Audio from Video Online?
- How to Extract Audio from YouTube Video?
- How to Extract Audio from a Facebook Video?
- How to Extract Audio from an Instagram Video?
- How to Extract Audio from Streaming Video?
So, let’s begin!
How to Make Audio Extraction from Videos Using Mac and Windows?
When you extract audio from videos on PC, you need a tool to make it done. That can be a very easy job if you use the professional video editing software-Wondershare Filmora . Just follow this guide to extract audio from video with ease.
Wondershare filmora is one of the best professional video editing software which can make a job of audio extraction from a video.
Here’s how to extract audio from a video using Filmora:
Step 1: Download Wondershare Filmora and run the program.
Step 2: Click on “import” button and include the desired video. You can also directly drag and drop the video to the program. The loaded video will be listed in the media library like the following picture shows.
Step 3: Start extracting audio from video.
After importing video to Wondershare Filmora, drag the video from the media library to the video Timeline.
Step 4: You can then right-click the video clip and choose “Audio Detach” to extract audio from the video.
After a while, video and audio will be displayed on different tracks. This will extract the audio from the video and display both the files separately.
If you don’t want to keep the video file, right-click it and choose “Delete” to remove it from the video timeline. Bring the video to the video timeline from the library by drag option.
Step 5: Edit the audio you desired.
Then double click to edit the audio in the popup window.
Here you can change the Volume, Fade in, Fade out, and Pitch, etc. as you like.
If you want to delete part of the audio, just put the cursor to the place where you would like the deletion to start and press the “Split” button above the timeline.
The end of the deletion area is marked similarly – play the audio and select the final point of the area to be excluded from the output audio, and then press the “Split” button again.
Besides that, you can also add an image to the newly extracted audio. Here is a detailed guide about it >>
Step 6: Select the desired output method and save the audio file
After that, click the “Create” button to export the audio track. Choose the desired file format and adjust settings accordingly.
Here different options are provided.
For example, you can save the audio in regular formats such as MP3, MP4, WMV, AVI and so on in the “Format” tab and adjust the settings such as Encoder, Sample Rate, Bit Rate, and Channel as you like.
Or export it for playback on portable devices, burn it to DVD disc or share it to YouTube directly.
After you select the desired output method, simply select a desirable output method and then click the “Create” button to save the audio track.
How to Extract Audio on Mac Using QuickTime?
This section entails you about how to extract audio from video mac
QuickTime Player is a pre-installed player in Mac PCs that you can utilize to extract the audio from a video with merely some clicks away in seconds. Hence, you don’t need to download this player. All you need is to follow the below step:
Step 1: Open the QuickTime Player.
Step 2: Open the targeted video on this player.
Step 3: Click on “file” from the top bar of the player.
Step 4: On the “export as” option, click on “audio-only”.
Step 5: Give a name to the audio file, select a location to store and click on “save”.
How to Make Audio Extraction on Windows Using Movie Maker?
On Windows you can use the free utility, Movie Maker, to extract the audio and save as an MP4 file.
Movie Maker is a free utility on windows that you can utilize for multiple purposes. So, if you are wondering how to extract audio from video in windows movie maker then look no further! All you have to do is:
Step 1: Download “movie maker” and “photo gallery” if you don’t own one or both of them already.
Step 2: Due to the sharing of ample coherent features, both of these software has to be downloaded together.
Step 3: Open “movie maker” and select “add video and photo” option to select the desired targeted video from a location on your computer.
Step 4: After the loading of the video, you need to click on “file”.
Step 5: Select “save movie” and scroll down to click “audio-only”.
Step 6: Name the audio file and save the file. The file gets saved with MP4 file format by default. You can save the file with WMA format as well but the most common and standard format is MP4 that can easily be played on any of the mobile devices having any operating system.
Step 7: The progress bar is displayed during the conversion of a video into the audio-only file. This may take some time as time varies depending upon the length and size of the file to be extracted from.
Step 8: When it’s done converting, you can play the audio right away or may move the file to another folder wherever you want it to be.
How to Extract Audio from Videos on Mobile Phones
Extracting the audio from a video file through mobile phones is often a tedious process to do so. But all thanks to the applications that come for a specific or general mobile operating systems to make a slow-paced job much easier and faster.
We have several mobile applications specific foe android phones and iPhone users that can do video to audio conversions within a wink of an eye. So, let’s explore the ways:
How to Extract Audio Using Android
This section entails you about how to extract audio from videos on android by the converter App, Video to Mp3 Converter .
Step 1: First off, Make and save or simply download a video in the local memory or SD card on your phone if you don’t already have a video.
Step 2: Open video to MP3 converter.
Step 3: You’ll see 4 options in the middle of the interface.
Step 4: Press the “video to audio” option.
Step 5: Select the targeted video file from where you want to extract the audio.
Step 6: You will be given a simple and advanced option. The simple option lets you perform basic operations on the video while the advance option will let you perform operations like bit rate and audio encoding etc.
Step 7: If you want the best quality audio output then set the quality to maximum, 9.
Step 8: Click on the “convert” button at the bottom to start the conversion process.
Step 9: When completed with the process, you can play the audio right away or may set it as a new ringtone as well.
How to Extract Audio from Video on iPhone or iPda?
This section entails you about how to extract audio from the iPhone video by MP3 Converter -Audio Extractor .
This is one of the free applications available on both iPhones and iPad. These handy applications will let you extract the audio from any of the videos on the phone. So if you are seeking about how to extract audio from a video file using your phone then the MP3 converter will serve the purpose.
Step 1: Open the MP3 converter application.
Step 2: Tap on the plus sign in the middle of the screen at the bottom.
Step 3: Select the import option according to where you want to choose the video, either the camera gallery or iCloud.
Step 4: Select a targeted video and tap on the “Add” button at the bottom right.
Step 5: Click on the video on the following screen.
Step 6: Select “convert”.
Step 7: Select MP3 by clicking on the “default mode”.
Step 8: If m4a is the desired file format you can to convert your audio file in then click on “advanced mode” and select the desired output format.
Step 9: You may also amend other settings like Audio Sample, Output Range etc.
Step 10: Click on “converted media” to access the converted audio file.
Step 11: You can play the audio right away or you may click “open in” option which lets you provide several options like saving, storing and sending to some platforms.
How to Extract Audio from Video Online?
This section entails you about how to extract audio from videos online by the Audio converter .
You don’t have to own an application-specific for audio extraction. You can do the same with online software, named as an audio converter.
This will save the internal memory of your system since you don’t need to download an app.
The steps are very simple as defined below:
Step 1: Open “audio converter” and Click on the “open files” option.
Step 2: Choose the file in the window from where you need the audio to be extracted with 2048 Mb as the maximum file size supported by this converter.
Step 3: While the sound extraction process is still going on, select the audio file format you want to convert in.
Step 4: If you are confused with the file formats options, then go with the default on, MP3 which is a standard format.
Step 5: Tap on the “convert” button and wait until the extraction process completes.
Step 6: After being extracted, click on “download”.
How to Extract Audio from YouTube Video?
Audials One , It is a user-friendly software suitable for audio extraction from a YouTube video. You can extract the file and save it in any of the file formats like WMV, MP4, and MP3, etc.
Before starting off with the extraction process, you will require a video file locally.
Below are the steps to extract audio from a YouTube publication using Audials one.
Step 1: Download and run Audials One
Step 2: Open this software and select “converter” below Universal Converter in the left window. Click on files>>add files
Step 3: Select a downloaded file of YouTube
Step 4: Tap on “close” when prompted with a window of adding files being done.
Step 5: Check the “Convert video to audio” checkbox.
Step 6: Select “start”.
Step 7: The free version of Audials one will allow 30 minutes of recording. You need to buy a pro version to be able to extract audio for a YouTube video longer than 30 minutes. Click on “no thanks” if you don’t need to upgrade the version. The conversion process will be continued.
Step 8: After conversion, you can play the audio by clicking the “edit” option given at the right corner and then tap on “open folder”
How to Extract Audio from a Facebook Video?
You can easily extract audio from the Facebook video by Any Audio Converter . Steps are as following:
Step 1: Download the converter software.
Step 2: Tap on “Add URLs”. This will pop a dialogue box. Select the plus tab and paste there the download link.
Step 3: Tap the “start download” option to begin the downloading process.
Step 4: Tap on the “Set output profile” option and from the drop-down, select MP3 Audio.
Step 5: The customize the audio configuration, click on “ Audio Options” which gives you Volume, Channel, Bit Rate, Audio Codec options respectively.
Step 6: To save the output file in a specified folder, tap on the “setting” option.
Step 7: Select “convert now!” option which will initiate the conversion of Facebook video into an MP3 audio file.
Not only limited to this option, but you can also perform basic editing operation as well by using this software.
How to Extract Audio from an Instagram Video?
You can easily download an Instagram video through this online application Instagram Video Downloader and can extract the audio from an Instagram video with very few steps:
Step 1: Open the post on the Instagram platform from which you want to extract the audio.
Step 2: Locate the post URL link and copy it.
Step 3: Then paste the copied link in the white bar on the top.
Step 4: Click on “submit” to download the Instagram video.
Step 5: Then convert the video into an MP3 audio file by selecting the desired file format.
How to Extract Multiple Audio Tracks from the Video?
Here you’ll get to know how to extract audio from video with the use of Handbrake software in order to extract multiple audio tracks from a video.
Step 1: Download and open handbrake software.
Step 2: You have to select a video having multiple audio tracks on “source selection” pane.
Step 3: File selection will generate an interface beneath. Select “audio tab” and expand the first dropdown which lists down all the audio tracks in a selected file. Select one of them and name the file and enter the output directory.
Step 4: Tap on “start encode” which will convert the audio in MP4 format. Now the audio extraction from the video is done using VLC player.
Step 5: Open the VLC player and select the “convert” option inside “media”.
Step 6: Tap on “add” in the Open Media pane then select the recently created handbrake video. From the drop-down next to the Convert/Save option, tap on “convert”.
Step 7: Below profile, tap on “MP3” on the following screen, name the file and enter the directory then select “start” and voila! You are done.
How to Extract Audio from Streaming Video?
You can use Video Downloader if you use Chrome as a web browser or DownloadHelper for Firefox users in order to download any streaming video as a file locally in your system. If one asks how to extract audio from the mp4 video, the process remains the same.
After the downloading process, there exist several programs for audio extraction from a video.
Below are the steps for the VLC player :
Step 1: Open VLC player, select “media” then click “convert/save” option, click “Add” beside File Selection box.
Step 2: Browse the desired downloaded file from PC and press “OK”.
Step 3: Select “audio-MP3” from “profile” and then select “start”.
Conclusion
Depending upon the availability of resources, all of the aforementioned approaches are great in their own way.
But considering that Wondershare filmora runs smoothly given the easiest interface and requiring least steps to perform audio extraction whilst being compatible with Mac and Windows both operating system, I would personally recommend this software for ease of accessibility and usability.
Shanoon Cox
Shanoon Cox is a writer and a lover of all things video.
Follow @Shanoon Cox
Music Noise Removal With Adobe Audition: A Complete Guidebook
With the invention of advanced editing software, the demands of content creation increased. Content creators outrun many challenges to create captivating content. One of these challenges is the maintenance of audio quality. Sometimes, singing a microphone is not enough, so post-creation methods do the trick. One of the ways of doing this is through Adobe Audition noise reduction.
There are multiple things to consider during audio editing at a professional level. For instance, microphone noise, humming, wind, hiss removal, and others. Adobe Audition removes background noises and nuisances that decline audio quality. In this article, you can read about Adobe Audition remove noise methods. In addition, some other tools are discussed for users’ ease and accessibility.
AI Noise Reduction A cross-platform for facilitating your video editing process by offering valuable benefits!
Free Download Free Download Learn More

Part 1: What Do You Know About Background Noise?
Background noise is anything that disturbs the pace of the video and diverts the viewer’s attention. It is the unwanted and unintended sound that takes up your audio. This may include someone chatting in the background, wind noise, and other noises. These factors decline and disrupt the clarity of audio. However, these elements can be managed through various tools and techniques to help creators.
Part 2: How to Remove Noise from Adobe Audition: A Comprehensive Review
Adobe Audition is a tool tailored to assist in audio editing tasks with precision. Users can create, merge, and mix different sound effects and be creative with them. It also has seamless support of Adobe After Effects and Adobe Stock for this purpose. Noise reduction Audition is one of its features that helps in cleaning and enhancing audio. It clears out any unnecessary background noises from any project.
In addition, the tool allows you to manage the audio levels for denoising. Along with manual settings, you can also add denoise effects to reduce background effects. You can manage high and low frequencies in Adobe Audition to remove noise. Upon editing this software, you can review the results afterward.
Different Methods of Audio Reduction in Adobe Audition
As a content creator, you must often manage dialogues and music within a video. Combining both can sometimes get the focus off actual dialogues. This can be due to many reasons; however, the solution is noise reduction in Audition. In this section, you can explore different methods to reduce noise:
1. Noise Reduction Effect
In this section, we are doing a noise reduction Audition manually. The process is straightforward, and here is a step-by-step guide to it:
Step 1: Upon importing your audio in Adobe Audition, navigate towards the top toolbar. Select the “Effects” tab and choose “Noise Reduction/Restoration” from the dropdown menu. As the menu expands further, select “Noise Reduction.”

Step 2: This will feature a Noise Reduction window on your screen. In this window, select the “Capture Noise Print” tab and adjust the Noise Reduction slider. Afterwards, press the play button on this window to listen to the audio and select “Apply.”

2. DeNoise Effect
This is the second method of Adobe Audition to remove noise. Accessing this option is almost the same, but settings may vary. Here is an instruction manual on how you can denoise in Audition:
Step 1: Once you have imported media into the timeline, reach the upper toolbar. Look for the “Effects” tab and proceed to the “Noise Reduction/Restoration” settings. From the expansion panel, choose the “DeNoise” option.

Step 2: After accessing the DeNoise window appearing on the screen, direct towards it. Then, change the position of the “Amount” slider and play your audio. Further, select the “Apply” button to add this effect to your audio.

3. Dynamic Effect
Another audio effect that you can apply and adjust in the same manner is the dynamic effect. Follow the steps given below to achieve this effect:
Step 1: After selecting the “Audio” tab, choose “Amplitude and Compression” from the dropdown menu. Expand this option and select “Dynamics” from the expansion menu.

Step 2: From the Dynamics window, expand the “Preset” option and set it to “Default.” Further, activate the “AutoGate” option and change the “Threshold” value. Then, click “Apply” to save and apply these settings.

Part 3: Other Solutions That Can Be Tried to Remove Noise from Videos
Since Adobe Audition remove noise has a professional interface, it might trouble some of you. The settings can be challenging to apply, so this section is all about alternatives. In this section, you can find the online solutions for noise reduction below:
1. Flixier
With this online Adobe Audition remove noise alternative, you can remove background noise. Users simply need to upload a video and activate the enhanced audio option. The audio enhancer eliminates unnecessary sound, giving it a name and description. It is compatible with popular and worldwide media formats like WAV, MP3, etc. Moreover, you can share the video straight to social platforms.

Key Features
- Offers an Improve Quality feature to clear up and enhance speech.
- Users can edit audio after denoising, and you can access its audio library to apply effects.
- Users can detach audio from the clip or fade in and out the audio effects to align with the video.
2. MyEdit
Are you looking for an online AI alternative to Adobe Audition noise reduction? This is a versatile platform for removing unwanted audio from up to 100 MB file size. It can denoise a 10 minutes file of formats like MP3, MP4, WAV, and FLAC. It enhances quality through audio denoise, wind remover, and speech enhancement. It uses AI technology to auto-remove background noise and enables a preview.

Key Features
- Users can employ its Vocal Remover to create clear and high-quality voiceovers.
- The user interface is a simple upload-to-convert process and doesn’t take up any storage.
- The AI helps accelerate the denoise process and retains audio quality.
3. KwiCut
Utilize this web-based Adobe Audition remove noise alternative to eliminate background noises. It can remove anything that declines an audio quality, like hums, hisses, and more. It removes any distractions in the background that decline communication. The AI assists in enhancing speech to maintain the professional element in the continent.

Key Features
- The tool supports a range of audio and video formats like MP3, MOV, WAV, and more.
- It supports text-based audio editing to edit audio or remove secondary noises.
- To create effective voiceovers for videos, use KwiCut’s voice cloning feature.
Part 4: Wondershare Filmora: A Unique Solution to Reducing Noise in Video and Audio Content
In contrast to all these Adobe Audition noise reduction alternatives, here is another. Wondershare Filmora is a wide platform for video, audio, and visual editing. The tool allows users to use manual and AI features to enhance content. In addition, Filmora introduced its V13 upgrade with new AI features. Amongst them is the AI Vocal Remover tool that separates vocals from background noise.
Using this tool can help you embed vocals in video tutorials or vlogs. In addition, Filmora also offers an Audio Denoise feature to remove distracting noises and voices. Users can enhance speech by removing wind noise, humming, and hissing. In addition, you can take Filmora’s Denoise AI’s assistance to do this.
Steps for Filmora AI Audio Denoise
If you wish to employ Filmora’s denoise feature, you are at the right place. This tool enables AI Speech Enhancement and Wind Removal with a denoise option. In addition, it has DeReverb, Hum Removal, and Hiss Removal. Users can manually adjust the value of this slider to set audio preferences. By following this step-by-step guide, users can remove background noises from video:
Free Download For Win 7 or later(64-bit)
Free Download For macOS 10.14 or later
Step 1: Initiate Filmora and Import Media to Timeline
First, download this AI software on your device and launch it. After logging in, locate and hit the “New Project” option and enter its editing interface. Afterward, click the “Ctrl + I” keys and choose files from your device. Once the files are imported, drag and place them in the timeline.

Step 2: Activate Audio Denoise
Once the media is in the timeline, select it and navigate towards the right-side panel. Under the “Audio” tab, locate and expand the “Denoise” option. In this section, enable the “Normal Denoise” button, which will auto-denoise audio. You can also use the “Denoise Level” slider to adjust the intensity of denoise.

Step 3: Export the Edited File
Once you have made all the changes, click the “Export” button at the top right corner. Further, adjust export settings in the appeared window and click the “Export” button.

Bonus Tip: Remove Vocals from Audio with Dedicated AI Vocal Remover in Filmora
Other than denoising, you can use Vocal Remover to extract speech from the background. It separates both vocals and background noise. We have crafted the step-by-step procedure to use vocal remover:
Step 1: Start Filmora and Import Video
Begin by installing and launching Wondershare Filmora on your device. Log in and select the “New Project” tab to access Filmora’s editing interface. Next, use the “Import” option to import files from your device. Once imported, simply drag and drop them onto the timeline.

Step 2: Access the AI Vocal Remover
Next, direct towards the timeline panel and right-click on the video in the timeline. From the options menu, select the “AI Vocal Remover” option. The AI will start separating vocals from background audio.

Step 3: Download the AI Processed Video
Once both vocals and background noise are separate, delete the background audio. Then, click the “Export” button to download this file on your device.

Free Download For Win 7 or later(64-bit)
Free Download For macOS 10.14 or later
Conclusion
After reading this article, users have knowledge of noise reduction in Audition. The article discussed different methods of removing noises in this professional software. Users can employ the web-based Adobe Audition noise reduction alternatives.
If you want a next-level tool for creative editing, then download Wondershare Filmora. The article discussed two methods for enhancing audio content. The software is compatible across multiple platforms to assist all types of users.
Free Download Free Download Learn More
Part 1: What Do You Know About Background Noise?
Background noise is anything that disturbs the pace of the video and diverts the viewer’s attention. It is the unwanted and unintended sound that takes up your audio. This may include someone chatting in the background, wind noise, and other noises. These factors decline and disrupt the clarity of audio. However, these elements can be managed through various tools and techniques to help creators.
Part 2: How to Remove Noise from Adobe Audition: A Comprehensive Review
Adobe Audition is a tool tailored to assist in audio editing tasks with precision. Users can create, merge, and mix different sound effects and be creative with them. It also has seamless support of Adobe After Effects and Adobe Stock for this purpose. Noise reduction Audition is one of its features that helps in cleaning and enhancing audio. It clears out any unnecessary background noises from any project.
In addition, the tool allows you to manage the audio levels for denoising. Along with manual settings, you can also add denoise effects to reduce background effects. You can manage high and low frequencies in Adobe Audition to remove noise. Upon editing this software, you can review the results afterward.
Different Methods of Audio Reduction in Adobe Audition
As a content creator, you must often manage dialogues and music within a video. Combining both can sometimes get the focus off actual dialogues. This can be due to many reasons; however, the solution is noise reduction in Audition. In this section, you can explore different methods to reduce noise:
1. Noise Reduction Effect
In this section, we are doing a noise reduction Audition manually. The process is straightforward, and here is a step-by-step guide to it:
Step 1: Upon importing your audio in Adobe Audition, navigate towards the top toolbar. Select the “Effects” tab and choose “Noise Reduction/Restoration” from the dropdown menu. As the menu expands further, select “Noise Reduction.”
Step 2: This will feature a Noise Reduction window on your screen. In this window, select the “Capture Noise Print” tab and adjust the Noise Reduction slider. Afterwards, press the play button on this window to listen to the audio and select “Apply.”
2. DeNoise Effect
This is the second method of Adobe Audition to remove noise. Accessing this option is almost the same, but settings may vary. Here is an instruction manual on how you can denoise in Audition:
Step 1: Once you have imported media into the timeline, reach the upper toolbar. Look for the “Effects” tab and proceed to the “Noise Reduction/Restoration” settings. From the expansion panel, choose the “DeNoise” option.
Step 2: After accessing the DeNoise window appearing on the screen, direct towards it. Then, change the position of the “Amount” slider and play your audio. Further, select the “Apply” button to add this effect to your audio.
3. Dynamic Effect
Another audio effect that you can apply and adjust in the same manner is the dynamic effect. Follow the steps given below to achieve this effect:
Step 1: After selecting the “Audio” tab, choose “Amplitude and Compression” from the dropdown menu. Expand this option and select “Dynamics” from the expansion menu.
Step 2: From the Dynamics window, expand the “Preset” option and set it to “Default.” Further, activate the “AutoGate” option and change the “Threshold” value. Then, click “Apply” to save and apply these settings.
Part 3: Other Solutions That Can Be Tried to Remove Noise from Videos
Since Adobe Audition remove noise has a professional interface, it might trouble some of you. The settings can be challenging to apply, so this section is all about alternatives. In this section, you can find the online solutions for noise reduction below:
1. Flixier
With this online Adobe Audition remove noise alternative, you can remove background noise. Users simply need to upload a video and activate the enhanced audio option. The audio enhancer eliminates unnecessary sound, giving it a name and description. It is compatible with popular and worldwide media formats like WAV, MP3, etc. Moreover, you can share the video straight to social platforms.
Key Features
- Offers an Improve Quality feature to clear up and enhance speech.
- Users can edit audio after denoising, and you can access its audio library to apply effects.
- Users can detach audio from the clip or fade in and out the audio effects to align with the video.
2. MyEdit
Are you looking for an online AI alternative to Adobe Audition noise reduction? This is a versatile platform for removing unwanted audio from up to 100 MB file size. It can denoise a 10 minutes file of formats like MP3, MP4, WAV, and FLAC. It enhances quality through audio denoise, wind remover, and speech enhancement. It uses AI technology to auto-remove background noise and enables a preview.
Key Features
- Users can employ its Vocal Remover to create clear and high-quality voiceovers.
- The user interface is a simple upload-to-convert process and doesn’t take up any storage.
- The AI helps accelerate the denoise process and retains audio quality.
3. KwiCut
Utilize this web-based Adobe Audition remove noise alternative to eliminate background noises. It can remove anything that declines an audio quality, like hums, hisses, and more. It removes any distractions in the background that decline communication. The AI assists in enhancing speech to maintain the professional element in the continent.
Key Features
- The tool supports a range of audio and video formats like MP3, MOV, WAV, and more.
- It supports text-based audio editing to edit audio or remove secondary noises.
- To create effective voiceovers for videos, use KwiCut’s voice cloning feature.
Part 4: Wondershare Filmora: A Unique Solution to Reducing Noise in Video and Audio Content
In contrast to all these Adobe Audition noise reduction alternatives, here is another. Wondershare Filmora is a wide platform for video, audio, and visual editing. The tool allows users to use manual and AI features to enhance content. In addition, Filmora introduced its V13 upgrade with new AI features. Amongst them is the AI Vocal Remover tool that separates vocals from background noise.
Using this tool can help you embed vocals in video tutorials or vlogs. In addition, Filmora also offers an Audio Denoise feature to remove distracting noises and voices. Users can enhance speech by removing wind noise, humming, and hissing. In addition, you can take Filmora’s Denoise AI’s assistance to do this.
Steps for Filmora AI Audio Denoise
If you wish to employ Filmora’s denoise feature, you are at the right place. This tool enables AI Speech Enhancement and Wind Removal with a denoise option. In addition, it has DeReverb, Hum Removal, and Hiss Removal. Users can manually adjust the value of this slider to set audio preferences. By following this step-by-step guide, users can remove background noises from video:
Free Download For Win 7 or later(64-bit)
Free Download For macOS 10.14 or later
Step 1: Initiate Filmora and Import Media to Timeline
First, download this AI software on your device and launch it. After logging in, locate and hit the “New Project” option and enter its editing interface. Afterward, click the “Ctrl + I” keys and choose files from your device. Once the files are imported, drag and place them in the timeline.
Step 2: Activate Audio Denoise
Once the media is in the timeline, select it and navigate towards the right-side panel. Under the “Audio” tab, locate and expand the “Denoise” option. In this section, enable the “Normal Denoise” button, which will auto-denoise audio. You can also use the “Denoise Level” slider to adjust the intensity of denoise.
Step 3: Export the Edited File
Once you have made all the changes, click the “Export” button at the top right corner. Further, adjust export settings in the appeared window and click the “Export” button.
Bonus Tip: Remove Vocals from Audio with Dedicated AI Vocal Remover in Filmora
Other than denoising, you can use Vocal Remover to extract speech from the background. It separates both vocals and background noise. We have crafted the step-by-step procedure to use vocal remover:
Step 1: Start Filmora and Import Video
Begin by installing and launching Wondershare Filmora on your device. Log in and select the “New Project” tab to access Filmora’s editing interface. Next, use the “Import” option to import files from your device. Once imported, simply drag and drop them onto the timeline.
Step 2: Access the AI Vocal Remover
Next, direct towards the timeline panel and right-click on the video in the timeline. From the options menu, select the “AI Vocal Remover” option. The AI will start separating vocals from background audio.
Step 3: Download the AI Processed Video
Once both vocals and background noise are separate, delete the background audio. Then, click the “Export” button to download this file on your device.
Free Download For Win 7 or later(64-bit)
Free Download For macOS 10.14 or later
Conclusion
After reading this article, users have knowledge of noise reduction in Audition. The article discussed different methods of removing noises in this professional software. Users can employ the web-based Adobe Audition noise reduction alternatives.
If you want a next-level tool for creative editing, then download Wondershare Filmora. The article discussed two methods for enhancing audio content. The software is compatible across multiple platforms to assist all types of users.
Discover the Best Android Speech-to-Text Programs with No Monthly Fees
10 Best Voice Recording Apps for Android Devices [Free Included]

Benjamin Arango
Mar 27, 2024• Proven solutions
Memorizing every bit of information you need to perform your daily or weekly tasks becomes increasingly difficult as your workload rises. Students, journalists, and professionals from a wide array of industries can benefit from making audio notes or even recording entire conversations with their Smartphones.
A simple Android voice recorder can make this task easy since you can just tap on the Record button and create an audio note in seconds. However, with so many voice recorder apps for Android devices out there, finding the one best suited for your needs can be more complicated than it seems. So, in this article, we are going to help you discover some best free voice recorder for an Android device you are currently using.
Want to record voiceover and audio on iPhone? Check 10 Best Voice Recorder Apps for iPhones >>
10 Best Free Voice Recording Apps for Android Devices
Recording audio is no longer a highly technical process since now you can create an audio note or record an interview with an Android phone and a voice recorder app. The question is which voice recording app should you install on your device. So, let’s take a look at some of the most potent Android voice recorders you can find at Google Play Store.
1. Easy Voice Recorder Pro
Price: $3.99
Supported OS: Varies with the device
Best for: Students, musicians, and businessmen

App in Google Play
As the app’s name suggests making recordings for a broad range of purposes is easy. All you need to do is launch the app and start a new audio recording session. Easy Voice Recorder Pro doesn’t limit the duration of your recordings, and it also allows you to compress the recorded audio . That is perfect if you need to record long lectures or conversations. Besides, you can connect an external microphone with the app in case you want to increase the quality of the sound you are recording. The app also lets you store your recordings on Dropbox or Google Drive, while it also offers the possibility to send recordings via email.
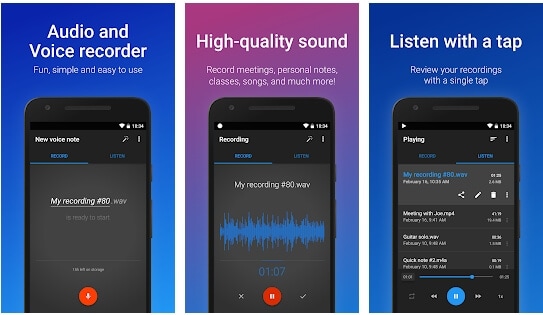
Easy Voice Recorder Pro Interface
Pros
- Allows users to manage and organize their recordings effortlessly
- Supports all standard output audio file formats
- Offers the option to record in stereo
- Recordings made with this app can be used as the ringtone
Cons
- Ads can be frustrating
- Limited basic audio editing tools
2. Smart Recorder – High-quality voice recorder
Price: Free, but contains ads and offers in-app purchases
Supported OS: Varies with the device
Best for: Students, musicians, and businessmen
App in Google Play
Capturing high-quality audio recordings effortlessly is the ultimate goal of all Android users who want to use voice recorders. As one of the best free voice recorders for Android, Smart Recorder app has a plethora of features that enable users to make high-quality audio recordings even in imperfect conditions. Options like Live Audio Spectrum Analyzer, microphone gain calibration or automatic and manual sensitivity control in Skip Silence mode are just a few reasons why this app has over 10 million installs. However, you should keep in mind that you cannot create audio files that are larger than 2 GB with this app.
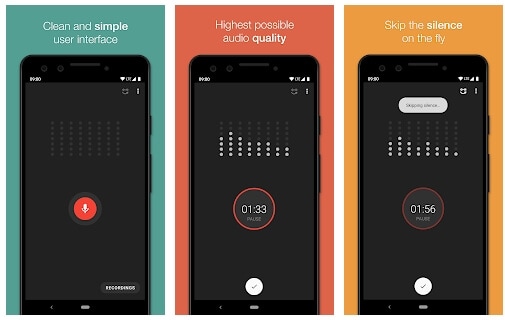
Smart Recorder – High-quality voice recorder Interface
Pros
- Provides full control over the audio recording process
- Equipped with the Wave Lock feature that prevents the device from going into the sleep mode
- Features a live audio spectrum analyzer
- Preserves battery life
Cons
- No phone call recording options
- Limited file-sharing capabilities
3. RecForge II Audio Recorder
Price: Free, but contains ads
Supported OS: Android 4.0 and up
Best for: Musicians
RecForge-audio-recorder App in Google Play
If you are looking for an Android voice recorder that allows you to customize bit rates, sample rates, choose codecs or record in mono or stereo mode, then you should consider installing RecForge II Audio Recorder on your device. The app allows you to schedule recordings, connect different types of external microphones or adjust the gain manually. In addition, you can also adjust the pitch , tempo and the playback rate of all audio files you record and edit with this app. RecForge II Audio Recorder continues working even while you are using other apps, and it keeps the battery consumption at the very minimum.
Pros
- Supports nearly all common audio file formats
- Offers a versatile set of audio editing tools
- Excellent file-sharing capabilities
- Allows users to increase the audio quality by disabling Automatic Gain Control
Cons
- The maximum duration of a recording is limited for some file formats
- Can be too complicated for inexperienced users
4. Hi-Q MP3 Voice Recorder
Price: Free
Supported OS: Varies with the device
Best for: Students, general use
Hi-Q MP3 Voice Recorder App in Google Play
You don’t need any previous audio recording experience to record long lectures, interviews and all other types of voice recordings with Hi-Q MP3 Voice Recorder. The free version of the app limits the maximum duration of a recording you can make to just 10 minutes. That is why you must upgrade to the Pro version of Hi-Q MP3 Voice Recorder if you want to capture hours of material directly from your phone. The best part is that all versions of the app automatically upload recordings to Google Drive or Dropbox which frees up space on your device.
Pros
- Intuitive and modernly designed interface
- Simple audio recording session setup
- Customizable audio quality
- Excellent file management capabilities
Cons
- Recording with external microphones is not an option
- The free version of the app limits the maximum duration of recordings
5. Voice Recorder
Price: Free, but contains ads
Supported OS: Android 4.1 and up
Best for: Students, musicians, and businessmen
Voice Recorder App in Google Play
If you are looking for an app you can use to record an interview, a business meeting or a lecture, then Voice Recorder may be one of your best options. You can record audio files without any restrictions and visualize the sounds with the Audio Spectrum Analyzer. The app continues recording from the background even while the phone’s screen is off which preserves battery life and enables you to perform other tasks while the recording session is in progress. Voice Recorder offers a broad range of file-sharing capabilities so that you can easily send your audio recordings via SMS, email and the Messenger app or share them on Facebook and WhatsApp.
Pros
- Available for free to all Android users
- Stopping, pausing or resuming a recording session is easy
- Allows users to adjust the sample rate
- Offers the microphone gain calibration tool
Cons
- Audio recordings can only be saved in two different file formats
- Doesn’t provide audio editing options
6. Music Maker JAM
Price: Free, but contains ads and offers in-app purchases
Supported OS: Varies with the device
Best for: Musicians
Music Maker JAM App in Google Play
With the selection of 300 mix packs, Music Maker JAM is one of the best android apps for aspiring musicians who want to compose their music even while they are on the go. You can choose from a variety of samples, audio loops and beats to create your next song or record live performances with the app’s 8-channel mixer. Music Maker JAM also enables you to record vocals, adjust the tempo of the audio files or apply effects to all recordings you edit with this app. Once your recording is ready, you can upload it to SoundCloud directly from the app or post it on Facebook and other social networks.
Pros
- Shake your Android phone to remix a song
- The app lets you choose from more than 300 mix packs
- Supports multi-channel recording
- Offers advanced audio editing options
Cons
- Music Maker JAM is not primarily a voice recorder
- No support for external microphones
7. LectureNotes
Price: Free
Supported OS: Android 3.0 and up
Best for: Students
LectureNotes App in Google Play
In case you take notes often, then this app can be an excellent choice for you as it allows you to use a stylus to create notes. However, the trial version limits the number of notebooks to just two, and neither of the notebooks can have more than eight pages. Moreover, if you would like to utilize the app’s voice recording features, you must install LectureRecordings plugin on your device. To capture videos, you must first install the LectureVideos plugin. Another disappointing thing is that you won’t be able to adjust the settings for your audio recording sessions or edit the recording you create with this app.
Pros
- An efficient tool for creating hand-written notes
- The app can be used while your Android phone is offline
- Allows users to export PDF files
- Compatible with OneNote and Evernote apps
Cons
- Underwhelming voice recording options
- You must install a plugin to record audio files
8. ASR Voice Recorder
Price: Free, but contains ads
Supported OS: Android 5.0 and up
Best for: Journalists, musicians, students

ASR Voice Recorder App in Google Play
A brief look at the list of features this app offers, you will find this is a well-rounded voice recorder because it offers all the tools you are going to need to create high-quality recordings. You can choose from a variety of file formats, add notes to recordings at recording or control the playback speed of all audio files you listen to in AVR Voice Recorder. You can also skip silences, connect a headset microphone to the app via Bluetooth or arrange your voice recordings in any way you want. The app lets you upload your audio files to Dropbox, Google Drive, and other file-hosting platforms.
Pros
- Provides excellent audio recording options for free
- Allows users to save recordings in different file formats
- Equipped with an audio playback controller
- Sharing multiple files is easy
Cons
- Offers only basic audio editing tools
- No audio transcription options
9. Call Recorder
Price: Free, but contains ads
Supported OS: Android 4.0 and up
Best for: Marketing professionals
Call Recorder App in Google Play
If you would like to record all incoming and outgoing calls on your device, the Call Recorder app is one of the best options you have at your disposal. Besides recording all calls from whitelisted numbers automatically, this app also allows you to choose from a variety of different recording modes. Furthermore, Call Recorder lets you blacklist numbers from which you don’t want to receive calls and enables you to organize your recordings efficiently. All files created with this app can be sent via Skype, SMS, Dropbox and other messaging services, which makes Call Recorder app a perfect choice for marketing professionals.
Pros
- No previous experience required to start using the app
- Records an unlimited number of phone calls
- Simple audio file management
- Offers several recording modes
Cons
- No voice recording options
- Doesn’t provide audio editing tools
10. Otter Voice Meeting Notes
Price: Free, but offers in-app purchases
Supported OS: Android 5.0 and up
Best for: Large teams of professionals
Otter Voice Meeting Notes App in Google Play
Besides being a powerful voice recorder, Otter Voice Meeting Notes is a collaborative tool that enables multiple team members to highlight and edit the transcripts this app generates in real-time. In addition to recording business meetings, you can also use Otter Voice Meeting Notes to record interviews, webinars or podcasts . Starting a new recording session takes only a second since you just have to tap on the Record button to capture the voices of all speakers in the room. What’s more, the app lets you add photos or slides to transcripts while the recording session is still in progress.
Pros
- Makes collaboration on a single transcript easier
- The app’s AI identifies different speakers automatically after the initial training
- Allows users to export MP3 audio files
- Compatible with the Call Recorder app
Cons
- In-app purchases are expensive
- Audio editing tools could be better
You may also like: 10 Best Free Discord Voice Changers
Conclusion
Creating an audio note or recording an entire interview with an Android device has never been easier. Each of the voice recorder apps we featured in this article enables you to create high-quality audio files you can share via email or store on the cloud.
Which of these Android voice recorders you are going to choose depends on a broad spectrum of factors, which range from the context in which you want to make the recording toaudio editing tools you want to use to process the audio files you created.
We’ve summarized the essential information in the table below. Hope that will help you to determine. What is your favorite Android voice recorder? Leave a comment and let us know.
| Voice recorder app | Price | Supported OS | User Rating | Best for |
|---|---|---|---|---|
| Easy Voice Recorder Pro | $3.99 | Varies with the device | 4.8 | Students, musicians, and businessmen |
| Smart Recorder – High-quality voice recorder | Free, but contains ads and offers in-app purchases | Varies with the device | 4.7 | Students, musicians, and businessmen |
| RecForge II Audio Recorder | Free, but contains ads | Android 4.0 and up | 4.0 | Musicians |
| Hi-Q MP3 Voice Recorder | Free | Varies with the device | 4.5 | Students |
| Voice Recorder | Free, but contains ads | Android 4.1 and up | 4.8 | Students, musicians, and businessmen |
| Music Maker JAM | Free, but contains ads and offers in-app purchases | Varies with the device | 4.6 | Musicians |
| LectureNotes | Free | Android 3.0 and up | 4.3 | Students |
| ASR Voice Recorder | Free, but contains ads | Android 5.0 and up | 4.4 | Journalists, musicians, students |
| Call Recorder | Free, but contains ads | Android 4.0 and up | 4.3 | Marketing professionals |
| Otter Voice Meeting Notes | Free, but offers in-app purchases | Android 5.0 and up | 4.5 | Large teams of professionals |
Benjamin Arango
Benjamin Arango is a writer and a lover of all things video.
Follow @Benjamin Arango
Benjamin Arango
Mar 27, 2024• Proven solutions
Memorizing every bit of information you need to perform your daily or weekly tasks becomes increasingly difficult as your workload rises. Students, journalists, and professionals from a wide array of industries can benefit from making audio notes or even recording entire conversations with their Smartphones.
A simple Android voice recorder can make this task easy since you can just tap on the Record button and create an audio note in seconds. However, with so many voice recorder apps for Android devices out there, finding the one best suited for your needs can be more complicated than it seems. So, in this article, we are going to help you discover some best free voice recorder for an Android device you are currently using.
Want to record voiceover and audio on iPhone? Check 10 Best Voice Recorder Apps for iPhones >>
10 Best Free Voice Recording Apps for Android Devices
Recording audio is no longer a highly technical process since now you can create an audio note or record an interview with an Android phone and a voice recorder app. The question is which voice recording app should you install on your device. So, let’s take a look at some of the most potent Android voice recorders you can find at Google Play Store.
1. Easy Voice Recorder Pro
Price: $3.99
Supported OS: Varies with the device
Best for: Students, musicians, and businessmen
App in Google Play
As the app’s name suggests making recordings for a broad range of purposes is easy. All you need to do is launch the app and start a new audio recording session. Easy Voice Recorder Pro doesn’t limit the duration of your recordings, and it also allows you to compress the recorded audio . That is perfect if you need to record long lectures or conversations. Besides, you can connect an external microphone with the app in case you want to increase the quality of the sound you are recording. The app also lets you store your recordings on Dropbox or Google Drive, while it also offers the possibility to send recordings via email.
Easy Voice Recorder Pro Interface
Pros
- Allows users to manage and organize their recordings effortlessly
- Supports all standard output audio file formats
- Offers the option to record in stereo
- Recordings made with this app can be used as the ringtone
Cons
- Ads can be frustrating
- Limited basic audio editing tools
2. Smart Recorder – High-quality voice recorder
Price: Free, but contains ads and offers in-app purchases
Supported OS: Varies with the device
Best for: Students, musicians, and businessmen
App in Google Play
Capturing high-quality audio recordings effortlessly is the ultimate goal of all Android users who want to use voice recorders. As one of the best free voice recorders for Android, Smart Recorder app has a plethora of features that enable users to make high-quality audio recordings even in imperfect conditions. Options like Live Audio Spectrum Analyzer, microphone gain calibration or automatic and manual sensitivity control in Skip Silence mode are just a few reasons why this app has over 10 million installs. However, you should keep in mind that you cannot create audio files that are larger than 2 GB with this app.
Smart Recorder – High-quality voice recorder Interface
Pros
- Provides full control over the audio recording process
- Equipped with the Wave Lock feature that prevents the device from going into the sleep mode
- Features a live audio spectrum analyzer
- Preserves battery life
Cons
- No phone call recording options
- Limited file-sharing capabilities
3. RecForge II Audio Recorder
Price: Free, but contains ads
Supported OS: Android 4.0 and up
Best for: Musicians
RecForge-audio-recorder App in Google Play
If you are looking for an Android voice recorder that allows you to customize bit rates, sample rates, choose codecs or record in mono or stereo mode, then you should consider installing RecForge II Audio Recorder on your device. The app allows you to schedule recordings, connect different types of external microphones or adjust the gain manually. In addition, you can also adjust the pitch , tempo and the playback rate of all audio files you record and edit with this app. RecForge II Audio Recorder continues working even while you are using other apps, and it keeps the battery consumption at the very minimum.
Pros
- Supports nearly all common audio file formats
- Offers a versatile set of audio editing tools
- Excellent file-sharing capabilities
- Allows users to increase the audio quality by disabling Automatic Gain Control
Cons
- The maximum duration of a recording is limited for some file formats
- Can be too complicated for inexperienced users
4. Hi-Q MP3 Voice Recorder
Price: Free
Supported OS: Varies with the device
Best for: Students, general use
Hi-Q MP3 Voice Recorder App in Google Play
You don’t need any previous audio recording experience to record long lectures, interviews and all other types of voice recordings with Hi-Q MP3 Voice Recorder. The free version of the app limits the maximum duration of a recording you can make to just 10 minutes. That is why you must upgrade to the Pro version of Hi-Q MP3 Voice Recorder if you want to capture hours of material directly from your phone. The best part is that all versions of the app automatically upload recordings to Google Drive or Dropbox which frees up space on your device.
Pros
- Intuitive and modernly designed interface
- Simple audio recording session setup
- Customizable audio quality
- Excellent file management capabilities
Cons
- Recording with external microphones is not an option
- The free version of the app limits the maximum duration of recordings
5. Voice Recorder
Price: Free, but contains ads
Supported OS: Android 4.1 and up
Best for: Students, musicians, and businessmen
Voice Recorder App in Google Play
If you are looking for an app you can use to record an interview, a business meeting or a lecture, then Voice Recorder may be one of your best options. You can record audio files without any restrictions and visualize the sounds with the Audio Spectrum Analyzer. The app continues recording from the background even while the phone’s screen is off which preserves battery life and enables you to perform other tasks while the recording session is in progress. Voice Recorder offers a broad range of file-sharing capabilities so that you can easily send your audio recordings via SMS, email and the Messenger app or share them on Facebook and WhatsApp.
Pros
- Available for free to all Android users
- Stopping, pausing or resuming a recording session is easy
- Allows users to adjust the sample rate
- Offers the microphone gain calibration tool
Cons
- Audio recordings can only be saved in two different file formats
- Doesn’t provide audio editing options
6. Music Maker JAM
Price: Free, but contains ads and offers in-app purchases
Supported OS: Varies with the device
Best for: Musicians
Music Maker JAM App in Google Play
With the selection of 300 mix packs, Music Maker JAM is one of the best android apps for aspiring musicians who want to compose their music even while they are on the go. You can choose from a variety of samples, audio loops and beats to create your next song or record live performances with the app’s 8-channel mixer. Music Maker JAM also enables you to record vocals, adjust the tempo of the audio files or apply effects to all recordings you edit with this app. Once your recording is ready, you can upload it to SoundCloud directly from the app or post it on Facebook and other social networks.
Pros
- Shake your Android phone to remix a song
- The app lets you choose from more than 300 mix packs
- Supports multi-channel recording
- Offers advanced audio editing options
Cons
- Music Maker JAM is not primarily a voice recorder
- No support for external microphones
7. LectureNotes
Price: Free
Supported OS: Android 3.0 and up
Best for: Students
LectureNotes App in Google Play
In case you take notes often, then this app can be an excellent choice for you as it allows you to use a stylus to create notes. However, the trial version limits the number of notebooks to just two, and neither of the notebooks can have more than eight pages. Moreover, if you would like to utilize the app’s voice recording features, you must install LectureRecordings plugin on your device. To capture videos, you must first install the LectureVideos plugin. Another disappointing thing is that you won’t be able to adjust the settings for your audio recording sessions or edit the recording you create with this app.
Pros
- An efficient tool for creating hand-written notes
- The app can be used while your Android phone is offline
- Allows users to export PDF files
- Compatible with OneNote and Evernote apps
Cons
- Underwhelming voice recording options
- You must install a plugin to record audio files
8. ASR Voice Recorder
Price: Free, but contains ads
Supported OS: Android 5.0 and up
Best for: Journalists, musicians, students
ASR Voice Recorder App in Google Play
A brief look at the list of features this app offers, you will find this is a well-rounded voice recorder because it offers all the tools you are going to need to create high-quality recordings. You can choose from a variety of file formats, add notes to recordings at recording or control the playback speed of all audio files you listen to in AVR Voice Recorder. You can also skip silences, connect a headset microphone to the app via Bluetooth or arrange your voice recordings in any way you want. The app lets you upload your audio files to Dropbox, Google Drive, and other file-hosting platforms.
Pros
- Provides excellent audio recording options for free
- Allows users to save recordings in different file formats
- Equipped with an audio playback controller
- Sharing multiple files is easy
Cons
- Offers only basic audio editing tools
- No audio transcription options
9. Call Recorder
Price: Free, but contains ads
Supported OS: Android 4.0 and up
Best for: Marketing professionals
Call Recorder App in Google Play
If you would like to record all incoming and outgoing calls on your device, the Call Recorder app is one of the best options you have at your disposal. Besides recording all calls from whitelisted numbers automatically, this app also allows you to choose from a variety of different recording modes. Furthermore, Call Recorder lets you blacklist numbers from which you don’t want to receive calls and enables you to organize your recordings efficiently. All files created with this app can be sent via Skype, SMS, Dropbox and other messaging services, which makes Call Recorder app a perfect choice for marketing professionals.
Pros
- No previous experience required to start using the app
- Records an unlimited number of phone calls
- Simple audio file management
- Offers several recording modes
Cons
- No voice recording options
- Doesn’t provide audio editing tools
10. Otter Voice Meeting Notes
Price: Free, but offers in-app purchases
Supported OS: Android 5.0 and up
Best for: Large teams of professionals
Otter Voice Meeting Notes App in Google Play
Besides being a powerful voice recorder, Otter Voice Meeting Notes is a collaborative tool that enables multiple team members to highlight and edit the transcripts this app generates in real-time. In addition to recording business meetings, you can also use Otter Voice Meeting Notes to record interviews, webinars or podcasts . Starting a new recording session takes only a second since you just have to tap on the Record button to capture the voices of all speakers in the room. What’s more, the app lets you add photos or slides to transcripts while the recording session is still in progress.
Pros
- Makes collaboration on a single transcript easier
- The app’s AI identifies different speakers automatically after the initial training
- Allows users to export MP3 audio files
- Compatible with the Call Recorder app
Cons
- In-app purchases are expensive
- Audio editing tools could be better
You may also like: 10 Best Free Discord Voice Changers
Conclusion
Creating an audio note or recording an entire interview with an Android device has never been easier. Each of the voice recorder apps we featured in this article enables you to create high-quality audio files you can share via email or store on the cloud.
Which of these Android voice recorders you are going to choose depends on a broad spectrum of factors, which range from the context in which you want to make the recording toaudio editing tools you want to use to process the audio files you created.
We’ve summarized the essential information in the table below. Hope that will help you to determine. What is your favorite Android voice recorder? Leave a comment and let us know.
| Voice recorder app | Price | Supported OS | User Rating | Best for |
|---|---|---|---|---|
| Easy Voice Recorder Pro | $3.99 | Varies with the device | 4.8 | Students, musicians, and businessmen |
| Smart Recorder – High-quality voice recorder | Free, but contains ads and offers in-app purchases | Varies with the device | 4.7 | Students, musicians, and businessmen |
| RecForge II Audio Recorder | Free, but contains ads | Android 4.0 and up | 4.0 | Musicians |
| Hi-Q MP3 Voice Recorder | Free | Varies with the device | 4.5 | Students |
| Voice Recorder | Free, but contains ads | Android 4.1 and up | 4.8 | Students, musicians, and businessmen |
| Music Maker JAM | Free, but contains ads and offers in-app purchases | Varies with the device | 4.6 | Musicians |
| LectureNotes | Free | Android 3.0 and up | 4.3 | Students |
| ASR Voice Recorder | Free, but contains ads | Android 5.0 and up | 4.4 | Journalists, musicians, students |
| Call Recorder | Free, but contains ads | Android 4.0 and up | 4.3 | Marketing professionals |
| Otter Voice Meeting Notes | Free, but offers in-app purchases | Android 5.0 and up | 4.5 | Large teams of professionals |
Benjamin Arango
Benjamin Arango is a writer and a lover of all things video.
Follow @Benjamin Arango
Also read:
- New Trimming Sound Extracting Silence From MOV Clips on PC & Mac Systems
- New 2024 Approved Deciphering the Unheard Advanced Audio Separation Techniques for Digital Videos
- Premium Sound Design Software Free Vs. Paid Edition - Focusing on Linux-Based Audio Editing Tools
- Updated Panoramic Listing of Podcast Index Networks and Services
- 2023S Top Methods for Harmonizing Audio Levels A Trifecta of Speed and Efficiency for 2024
- New Harmonizing Words Into Sounds Top Choices in Online Text-to-Speech Services for 2024
- New In 2024, FREE MUSIC Integration Into Digital Photography on PC/Mobile Devices
- In 2024, Unveiling the Top 10 Free Audio Recording Apps for Professional Podcasters
- New The Swift Method for Rescaling Audio Playback Rates
- 2024 Approved The Ultimate Guide Selecting the Highest-Rated MP3 Recorders (Windows/Mac)
- Updated Mastering the Art of De-Echoing Audio Simple, Proven Techniques
- Enhancing Audacitys Functionality Adding the Latest Lame Encoder for 2024
- In 2024, Perfect Pitch Control The Ultimate Strategy for Uniform Sound Amplitude in Videos
- 2024 Approved Stylish Soundscape for Social Media and Blogging Videos
- New Fighting the Frenzy of Wind Vibration in Multimedia Capture Across OSes and Devices for 2024
- Updated In 2024, The Ultimate Apowersoft Auditory Recording Guide, Complete with 4 Other Options
- Updated In 2024, Techniques for Converting Audacity Projects Into MP3 Format
- New In 2024, The Most Reliable Online Platforms for Securely Downloading Ding Sound Effects (2023 Selection)
- New Exploring the Premier 8 Voice-Activated Applications for PCs & MACs for 2024
- New Beginner-Friendly Choir Separation Technology for Professional Use
- Zero-Cost Strategy Stripping Out Sound From Your Windows 10 Media Files for 2024
- In 2024, Comprehensive Directory of Podcast Hosting Platforms
- Comparing Titans in Digital Audio Workstations Is MAGIX Samplitude at the Pinnacle for 2024
- 2024 Approved Expert Tips on Isolating Soundtracks in Adobe Premiere Projects
- Updated In 2024, Natures Chirp Collection in MP3 Format
- New Choosing Your Perfect Match Leading Mac-Based Audio Tagging Software for 2024
- Updated 2024 Approved Streamlining Digital Audio Production in Audacity Using Lame
- Tricks for Reducing Resonance in Sound Files Step-by-Step Approach for 2024
- New Snipping the Best Moments of Melodies Building Your Own Caller ID Tunes
- New In 2024, Explore the Leading Audio Editors A Windows & Mac Comparison Guide
- Online Auditory Hygiene Methods to Purify Sound Recordings of Digital Transmission
- Updated In 2024, Master Video Editing on Mac with MKVtoolnix A Step-by-Step Guide 2023
- Top 12 Prominent Nubia Red Magic 9 Pro+ Fingerprint Not Working Solutions
- Sim Unlock Motorola Razr 40 Phones without Code 2 Ways to Remove Android Sim Lock
- Customize Your LinkedIn Video Previews for Maximum Impact
- Here are Some Pro Tips for Pokemon Go PvP Battles On Vivo Y78+ | Dr.fone
- Lava Agni 2 5G Music Recovery - Recover Deleted Music from Lava Agni 2 5G
- Can I use iTools gpx file to catch the rare Pokemon On Motorola Defy 2 | Dr.fone
- Updated Kids in the Directors Chair A Fun Guide to Making Movies for 2024
- Easy steps to recover deleted data from Xiaomi Redmi Note 12 4G
- 3 Things You Must Know about Fake Snapchat Location On Vivo Y17s | Dr.fone
- In 2024, Pokémon Go Cooldown Chart On Tecno Spark 10C | Dr.fone
- What Is Talking Avatar, In 2024
- In 2024, From Boring to Brilliant How to Customize Your LinkedIn Video Thumbnails
- Unlocking Greatness How to Edit Videos From Your Sony Digital Camcorder
- Title: Updated In 2024, The Ultimate Guide to Transferring Audio From Video Files Across Various Operating Systems and Devices
- Author: Kate
- Created at : 2024-05-05 08:10:12
- Updated at : 2024-05-06 08:10:12
- Link: https://audio-editing.techidaily.com/updated-in-2024-the-ultimate-guide-to-transferring-audio-from-video-files-across-various-operating-systems-and-devices/
- License: This work is licensed under CC BY-NC-SA 4.0.
