
:max_bytes(150000):strip_icc():format(webp)/free-disk-partition-software-tools-2624950-fad3ccc557d34ed89d53eff7538f5fdb.png)
Updated In 2024, How to Record Computer Audio and Voice Audio with Audacity for Free?
How to Record Computer Audio and Voice Audio with Audacity for Free?
Natural audio recording software, such as Voice Memos for Macs or Sound Recorder for Windows PCs, is included with every machine. These applications enable users to record audio using either the desktop’s internal or an external microphone, and they generally have basic audio editing features.
However, when you’re looking for a higher-quality recording program, Audacity is the way to go. Audacity is a free audio editor with a lot of cutting-edge features. More significantly, recording using Audacity is as simple as clicking a button.
In this Audacity Record Computer Audio guide, we will show you all the methods of recording internal audio on your computer and Mac.
In this article
01 Record Audio On Audacity with a Microphone
02 Record Sounds Playing on Your Computer Using Audacity on Win
03 Record Sounds Playing on Your Computer Using Audacity on Mac
04 Set up Audacity to Record as Schedule
Part 1: How to Record Audio On Audacity with a Microphone On Windows and Mac Computers?
For both Windows and Mac, the procedures for recording audio from a microphone are the same if you’re utilizing your desktop’s built-in mic or an external microphone. Here’s your step-by-step guide to audacity record using a microphone:
Step 1: Launch Audacity and get to know the Device Toolbar, situated underneath the playback controls. You may modify the Audio Host and the Recording and Playback Devices—all of which are required for Audacity recording.

Step 2: To begin, select Tracks under the Add New tab, Stereo Track, or Mono Track to create a new track.

Step 3: Select Recording Device from the options list. Select your microphone from the dropdown menu and hit the Record option.

Step 4: A soundwave emerges along the track as you talk into the speaker. The Recording Level may be found at the top of the display. To pause or stop the recording, click Stop or Pause until you select Record anew.

Step 5: With the mouse over any recording area, click the Delete button to cut out any portion of it quickly. Click Ctrl + A, then Delete to erase whatever you’ve just saved. Alternatively, press the X button to delete the track completely.

Part 2: How to Record Sounds Playing on Your Computer Using Audacity On Windows?
Unlike Mac, Windows makes it simple to capture audio from a movie or media file running on your desktop. There seem to be two primary methods for accomplishing audacity record desktop audio in this way:
1. Use MME as the Audio Host
Step 1: To use MME as your audio host, go to Tracks in the Add New tab in Stereo Track and create a new file.

Step 2: Change the Audio Host (to the left of Recording Device) to MME—this is the standard setting, so you might not have to change anything.

Step 3: Choose desired option from the Recording Device dropdown menu. Based on your configuration, this might be referred to as Wave Out or Loopback. When you’re uncertain, try it out.

Step 4: To record your audio source, click Record, then play it back.
2. Use WASAPI as the Audio Host
WASAPI provides higher-resolution digital recordings. If capturing audio from an external monitor, it’s also a good idea to utilize it.
Step 1: Convert the Audio Host from MME to Windows WASAPI after creating a fresh Stereo Track.

Step 2: Switch the Recording Device to Speaker (loopback). To display the entire label, you might have to slide the toolbar’s knobs outwards. Begin recording by pressing the red dot and then listen to the audio source. Audacity will capture the audio even if your PC is muted.
Part 3: How to Record Sounds Playing on Your Computer Using Audacity on Mac?
Unfortunately, there’s no ready-made method to record computer audio using Audacity on a Mac. Some alternative ways to use Audacity to record from Mac including using a loopback cable, or download and using a third-party software. You can try some Audacity alternatives to record the computer audio on Mac.
For Win 7 or later (64-bit)
For macOS 10.12 or later
If you have installed Filmora already, you can use it to record the sound playing on your Mac with some tricks.
Step 1: Luanch Filmora, and then click the Record button and select Record PC Screen.

Step 2: Set up the recording settings based on the need. Since we’re going to record the playing audio from the Mac computer, select Microphone and System Audio On and click the Red button to start.

Step 3: Now you have a screen captured video with sound included. Since we need th audio only, we can attache the audio from the video first and then do some editing such as adding fade in and fade out effect, or remove unwanted audio clip.

Part 4: How to Set up Audacity to Record as Schedule?
A streaming video recorder or cassette can be used to arrange a recording. All of those are identical to Time Recordings in that they are used to schedule recording. The Timer record configuration dialog box may be used to set the beginning and finish of the recording. This is how you do it:
Step 1: By definition, the recording’s Start Date and Time are set to the present time. It will begin recording on the present day and hour by default when you don’t alter it. There is no default setting for the End Date and Time. You must either choose a date and time to determine the end time.

Step 2: There is a Checkbox to Save the work immediately. By Ticking the option, you may choose the path or Folder where the file will be saved when the recording is finished.

Conclusion
Well, there you have it – your complete Audacity Record Computer Audio guide. One thing is for certain that Audacity allows some great ways of recording audio from internal and external components of your Windows and Mac. However, if your Audacity is having issues, we would highly recommend opting for another software, such as Wondershare Filmora.
Wondershare Filmora is the finest thing that has come out in recent years for recording audio from a desktop. It is intended not just for pros but also for any enthusiast videographer who desires to create a high-quality movie for their family and friends. Download it today to make your movie a delightful journey with high-quality audio recording.
02 Record Sounds Playing on Your Computer Using Audacity on Win
03 Record Sounds Playing on Your Computer Using Audacity on Mac
04 Set up Audacity to Record as Schedule
Part 1: How to Record Audio On Audacity with a Microphone On Windows and Mac Computers?
For both Windows and Mac, the procedures for recording audio from a microphone are the same if you’re utilizing your desktop’s built-in mic or an external microphone. Here’s your step-by-step guide to audacity record using a microphone:
Step 1: Launch Audacity and get to know the Device Toolbar, situated underneath the playback controls. You may modify the Audio Host and the Recording and Playback Devices—all of which are required for Audacity recording.
Step 2: To begin, select Tracks under the Add New tab, Stereo Track, or Mono Track to create a new track.
Step 3: Select Recording Device from the options list. Select your microphone from the dropdown menu and hit the Record option.
Step 4: A soundwave emerges along the track as you talk into the speaker. The Recording Level may be found at the top of the display. To pause or stop the recording, click Stop or Pause until you select Record anew.
Step 5: With the mouse over any recording area, click the Delete button to cut out any portion of it quickly. Click Ctrl + A, then Delete to erase whatever you’ve just saved. Alternatively, press the X button to delete the track completely.
Part 2: How to Record Sounds Playing on Your Computer Using Audacity On Windows?
Unlike Mac, Windows makes it simple to capture audio from a movie or media file running on your desktop. There seem to be two primary methods for accomplishing audacity record desktop audio in this way:
1. Use MME as the Audio Host
Step 1: To use MME as your audio host, go to Tracks in the Add New tab in Stereo Track and create a new file.
Step 2: Change the Audio Host (to the left of Recording Device) to MME—this is the standard setting, so you might not have to change anything.
Step 3: Choose desired option from the Recording Device dropdown menu. Based on your configuration, this might be referred to as Wave Out or Loopback. When you’re uncertain, try it out.
Step 4: To record your audio source, click Record, then play it back.
2. Use WASAPI as the Audio Host
WASAPI provides higher-resolution digital recordings. If capturing audio from an external monitor, it’s also a good idea to utilize it.
Step 1: Convert the Audio Host from MME to Windows WASAPI after creating a fresh Stereo Track.
Step 2: Switch the Recording Device to Speaker (loopback). To display the entire label, you might have to slide the toolbar’s knobs outwards. Begin recording by pressing the red dot and then listen to the audio source. Audacity will capture the audio even if your PC is muted.
Part 3: How to Record Sounds Playing on Your Computer Using Audacity on Mac?
Unfortunately, there’s no ready-made method to record computer audio using Audacity on a Mac. Some alternative ways to use Audacity to record from Mac including using a loopback cable, or download and using a third-party software. You can try some Audacity alternatives to record the computer audio on Mac.
For Win 7 or later (64-bit)
For macOS 10.12 or later
If you have installed Filmora already, you can use it to record the sound playing on your Mac with some tricks.
Step 1: Luanch Filmora, and then click the Record button and select Record PC Screen.
Step 2: Set up the recording settings based on the need. Since we’re going to record the playing audio from the Mac computer, select Microphone and System Audio On and click the Red button to start.
Step 3: Now you have a screen captured video with sound included. Since we need th audio only, we can attache the audio from the video first and then do some editing such as adding fade in and fade out effect, or remove unwanted audio clip.
Part 4: How to Set up Audacity to Record as Schedule?
A streaming video recorder or cassette can be used to arrange a recording. All of those are identical to Time Recordings in that they are used to schedule recording. The Timer record configuration dialog box may be used to set the beginning and finish of the recording. This is how you do it:
Step 1: By definition, the recording’s Start Date and Time are set to the present time. It will begin recording on the present day and hour by default when you don’t alter it. There is no default setting for the End Date and Time. You must either choose a date and time to determine the end time.
Step 2: There is a Checkbox to Save the work immediately. By Ticking the option, you may choose the path or Folder where the file will be saved when the recording is finished.
Conclusion
Well, there you have it – your complete Audacity Record Computer Audio guide. One thing is for certain that Audacity allows some great ways of recording audio from internal and external components of your Windows and Mac. However, if your Audacity is having issues, we would highly recommend opting for another software, such as Wondershare Filmora.
Wondershare Filmora is the finest thing that has come out in recent years for recording audio from a desktop. It is intended not just for pros but also for any enthusiast videographer who desires to create a high-quality movie for their family and friends. Download it today to make your movie a delightful journey with high-quality audio recording.
The Sound of Depth: Amplifying Voice Intensity Through Filmora Editing
You have watched trailers for movies, TV shows, and YouTube videos throughout the year. Your ears have heard radio advertisements and podcasts. It has dawned on you that deep voices sound much better than shallow voices. However, how to make your voice deeper?
Nature would list voice deepening at the top of her list of requests if she had one. People who use their voices as a source of income, voice actors, and even the everyday person think about reducing the pitch of the sound they make.
Speaking with a deeper voice can help you sound more authoritative or become a better speaker. We have conducted extensive research on this topic, and controlling your breathing is one way to make your voice deeper, but it requires a lot of practice. Likewise, you can project your voice and try various techniques to use when you speak deeply, such as swallowing before you start to speak.
If you want to learn how you can make your voice deeper, then you just landed on the right page. In this article, we will suggest to you some natural tips to make your voice deeper, but it is a very time-consuming process because it needs a lot of practice. There is another method to make your voice sound deeper if you are recording it for videos or any other purpose. There are many software and apps available in the market today that can help you alter your voice and make it sound deeper. This article will show you how you can make your voice deeper using Filmora X.
So, Let’s start our article with a basic question.
Can You Make Your Voice Deeper?
Yes, It is possible to make your voice deeper.
It is possible to train your voice for a deep, more attractive sound even though you cannot lower it. According to numerous sources online, you can achieve a lower voice pitch by doing specific exercises. However, experts and physicians have not tested these deep voice exercises, which can lead to long-term harm to your throat.
The best way is to use software like Filmora X because all you need to do is record your voice and leave the rest to the software. Using Filmora X, you can easily edit your voice and adjust the pitch to make it sound deeper.

How To Make Your Voice Deeper Naturally?
1. Listen to Yourself
First of all, you have to think about what you have to work with. Record yourself talking with the app on your phone that records audio. If you do not listen carefully to your voice, you will not know what needs to be fixed.
Take a moment to listen to your voice. Because you’re now hearing your voice from an external perspective, it might sound completely different from how you thought it would. You can’t always avoid mistakes, but you can learn from them.
Take note of how you sound and accept that this is exactly how you sound. During this exercise, listen carefully as words come out of your mouth, study your pitch, and record your voice so you can review the recording later after you’ve completed your exercise.
2. Relax Your Muscles
As a consequence of stress, bad posture, and injuries, our muscles are drowning in tension. Our entire lives involve the use of our bodies, which directly affects our muscles and adds a great deal of tension. There are four key areas of our body. If you want to make your voice deeper, then you have to release tension from these four key areas. They include the tongue, jaw, throat, and neck. All these organs play a key role in controlling your voice. So, if you are able to relieve stress from these organs and you are able to relax them, then you can easily make your voice deeper with a little practice.
3. Use Your Diaphram
If you’re wondering how to make your voice deeper, you shouldn’t use your chest for breathing when we have a whole respiratory system to control. As a rule of thumb, the deeper your voice sounds, the deeper the air you inhale goes. You can direct the air to go just where you want it by adjusting the diaphragm.
As you breathe in, bring your nose to your mouth and push your chest backward while taking deep breaths from your nose. When you exhale, tell yourself your full name as you do so. When you speak, you may feel a vibration. It is now easier for you to produce a deeper voice effect since you have learned how to use your diaphragm.
In the world of professional singing, diaphragmatic breathing is one of the most popular techniques. With it, they can control their voice and position it precisely when they want, to produce deep, low-pitched cries (or even high-pitched cries). When you first start, you won’t be able to do it naturally, but you’ll be able to do it subconsciously with practice.
4. Practice Your Chest Voice
The magic happens in your chest voice. You can make it sound stronger, deeper, and less nasal with a little control. These exercises will focus on deepening your voice since you’re looking for ways to make your voice deeper.
Engage your throat first and then speak normally. You will sound lighter and less confident if you usually speak through your nose, which is not good for a deep voice.
Make a hissing sound while exhaling a deep diaphragmatic breath. Having your voice-controlled right within your lungs will allow you to open up your chest. It would help if you started talking now. You will feel your voice flowing up and out of your mouth via your breath. This is the voice of your chest.
5. Hum Like You Mean It
Humming warms up your voice, making it easier to control. In addition, it unleashes feelings of relaxation throughout your entire body, so your muscles can be relaxed. With Hum, you’ll be able to lower your voice pitch, talk deeper, and even make your voice sound deeper in a video. Hold your breath with a deep humming for as long as possible. During this process, your vocal cords will be stretched, and stretched vocal cords always give a voice a deeper tone.
As you breathe in again, point your chin downwards toward your chest. Put your chin up and start humming. Speak now. You will feel intense and deep in your voice.
These are some of the natural ways to make your voice deeper. But the thing is, all of them need a lot of practice, and according to experts, one can also damage his vocal cords when practicing all these techniques. But as we told you earlier, there is an easier way of making your voice deeper which is discussed below.
How To Make Your Voice Deeper With Filmora?
You can use Filmora to make your voice sound deeper in your already recorded videos. You don’t need to do intense exercises to sound deeper. Just record your video in your natural voice and follow the steps given below to edit your voice and make it deeper.
Step1: First of all, make sure that the latest version of Wondershare Filmora video editor is installed on your computer. If it isn’t already installed, then you can download it below or go to the official website.
For Win 7 or later (64-bit)
For macOS 10.12 or later
Step2: Now, Run the Program and import your video to Filmora by clicking on the file, then import, and then click on import media files.

Step3: Now drag the video and drop it into the timeline.

Step4: Now, right-click on the track in the timeline and click on “Adjust Audio” from the menu.

Step 5: Now, you need to adjust the pitch at this step. Try to lower the pitch by a point or two, and you play the video. You will notice a considerable change in your voice. You will feel that your voice has become much deeper than the original one.

Step 6: Reduce the pitch point by point by point and observe that at which point do you have the desired depth in your voice.
Step7: Once you are satisfied with the results, all you need to do is click on the “OK” button to save the settings and then export your video to your system.
These are some simple steps to make your voice deeper in Filmora easily. It only takes a few seconds if you do the things right.
Conclusion
So, in this article, we discussed some of the natural ways to make your voice deeper, and then we discussed how you can make your voice deeper with Filmora. If you compare both methods, then in our opinion, using FIlmora is the best choice here. Using natural methods requires you to do a lot of practice, and still, there is a possibility that you won’t be able to get the desired results. But, in Filmora, all you need to do is adjust the pitch of your voice, and you are good to go. Here you also have an option to make your voice deeper as much as you.
You might be interested in: Top Siri Voice Generator for Windows .
Versatile Video Editor - Wondershare Filmora
An easy yet powerful editor
Numerous effects to choose from
Detailed tutorials provided by the official channel
For macOS 10.12 or later
Step2: Now, Run the Program and import your video to Filmora by clicking on the file, then import, and then click on import media files.
Step3: Now drag the video and drop it into the timeline.
Step4: Now, right-click on the track in the timeline and click on “Adjust Audio” from the menu.
Step 5: Now, you need to adjust the pitch at this step. Try to lower the pitch by a point or two, and you play the video. You will notice a considerable change in your voice. You will feel that your voice has become much deeper than the original one.
Step 6: Reduce the pitch point by point by point and observe that at which point do you have the desired depth in your voice.
Step7: Once you are satisfied with the results, all you need to do is click on the “OK” button to save the settings and then export your video to your system.
These are some simple steps to make your voice deeper in Filmora easily. It only takes a few seconds if you do the things right.
Conclusion
So, in this article, we discussed some of the natural ways to make your voice deeper, and then we discussed how you can make your voice deeper with Filmora. If you compare both methods, then in our opinion, using FIlmora is the best choice here. Using natural methods requires you to do a lot of practice, and still, there is a possibility that you won’t be able to get the desired results. But, in Filmora, all you need to do is adjust the pitch of your voice, and you are good to go. Here you also have an option to make your voice deeper as much as you.
You might be interested in: Top Siri Voice Generator for Windows .
Versatile Video Editor - Wondershare Filmora
An easy yet powerful editor
Numerous effects to choose from
Detailed tutorials provided by the official channel
“Best Vocal Trackers: Essential Software for Seamless Sound Capture”
Top 10 Audio Recording Software to Capture Your Voice Easily

Shanoon Cox
Mar 27, 2024• Proven solutions
Whether professional or for amateur purposes, the audio recording software programs are very important. These programs allow manipulating the audio so that it matches the need for a specific project.
The best audio recording software has a variety of tools embedded to polish the audio recorded, in which this article we are going to review the best of them for you.
What is Audio Recording Software?
As the name suggests, the audio recording software is used to record audio using a unique technology. This allows the users to capture their own or the voice they want and transfer it wherever they want. The software also adds effects to the voice and makes it professional to use wherever the user wants to.
What Does a Sound Recorder Use for?
There are several uses of audio recording software program. Some are listed as under:
- In the music field, this software is of great use. It can be used for multitrack recording. The mixing of the sound is then done using the same or different tools.
- The audio recorded can be edited with ease. This includes enhancing and adding effects to it with perfection.
- With microphone use, the recording software can be integrated to make sure that the voice of the user is also recorded if required.
- Some audio recording software programs also come with screen recording, and therefore, these foster multitasking.
List of Top 10 Audio Recording Software Programs
The audio recording software for PC that would make your life easy is mentioned as under.
1.Wondershare DemoCreator
This is by far the best and the most used software program when it comes to audio recording. It is highly reliable and comes with a GUI. The user interface is easy to understand, and so are the functionalities.
With the best and the most advanced controls recording audio has never been this easy. It also acts as Mac audio recording software, and therefore it is highly recommended for all platforms. The frequent updates make this program even easier to use.
Features
- The interface of the program is very easy to use and stress-free.
- The high definition audio can be recorded with ease.
- The program supports 50+ formats to import audio, video, and other files to the system.
- There are highly advanced options for professional audio recording.
- The program can record endless video and audio as far as there is space on your disk.
Pros
- It is one of the programs that support professional audio editing.
- The program is very easy to use as it has a graphical interface.
Cons
- The program is flash software-based, which can slow down the system.
- It does not offer highly advanced audio editing at all.
Supported Platforms
The program can be used with both Windows and Mac.
Go ahead to download and have a try now!
2.WavePad
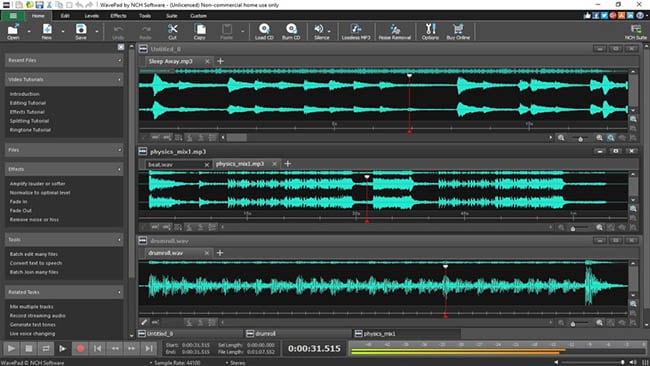
It is one of the best and most used programs to make sure that the audio is recorded with perfection. This program is compatible with most of the audio formats, and therefore it is highly recommended. The overall rating of the program is high as it is used by professionals and, therefore, highly rated as well.
Features
- It has several audio enhancing capabilities, which include amplification and effect addition.
- The audio can be edited, trimmed, and cropped with this program.
- The professional-quality sound recording is used by this program to enhance the capabilities.
Pros
- The best part of this program is its quality of end product that is very high.
- It is a wave editor that gives the users more control over the end product.
Cons
- The mp3 editor of this program does not offer top quality work.
- The program cannot work with multiple files efficiently.
Supported Platforms
It can be installed over Mac, Windows, Android, and iOS.
3.Ocenaudio

As a cross-platform program, this one has a lot to offer. The interface is a bit technical, but overall the use of the program is easy once the hands-on is done. The program is also highly intuitive and allows the users to overcome the day to day audio recording and editing tasks.
Features
- The Ocen Framework is also integrated with this platform to enhance its capabilities.
- The program also records screen if required by the users.
- It is one of the programs that have been rated on other high-end platforms.
Pros
- The program uses auto trim and voice recording controls.
- The sound spectral analysis of the program is highly advanced.
Cons
- The program cannot directly load the file from a CD.
- The program cannot be opened in multiple screens, so the work rate is slow.
Supported Platforms
It is compatible with Mac, Windows, and Linux.
4.Adobe Audition

It can be rightfully regarded as one of the best and the most advanced programs. Backed by years of Adobe experience, it is a program that will get the user a step forward. It is highly recommended to all those users that are looking for a professional level of audio recording.
Features
- It includes multitrack, wave editing, and audio restoration tools to give the best results.
- The essential sound panel has been integrated with the program to get the best oomph effect to the audio.
- The music clips can be integrated within the audio recording to make it sound professional.
Pros
- The platform can be used to create awesome podcasts.
- The audio break can be repaired with perfection.
Cons
- It is expensive, so all the users cannot afford it at all.
- The interface is high tech in nature and requires time to learn.
Supported Platforms
It is supported by Windows and Mac.
5.Audacity

It is free software that is used to record audio professionally. This high-performance program makes sure that the audio which is recorded is also shared with different platforms. The built-in panel is upgraded, and therefore it is highly advance.
Features
- It is ad-free and therefore provides hassle-free work.
- The audio editing and recording have never been as easy as it is with audacity.
- Multitrack editing is also possible with this program.
Pros
- The VST plugin support is provided by the program.
- It is a portable program that can be used for pitch correction.
Cons
- The noise reduction tool of this program needs an upgrade.
- The record to tape feature is currently unavailable.
Supported Platforms
It is supported by Mac, Linux, Windows, and BSD.
6.Wavosaur

It is one of the free programs that can be regarded as better than many paid ones. It is all because the qualities of the program are matchless. The processing of files is done with WAV and Mp3 files filter, which makes the process very much easier.
Features
- The program has multiple document interfaces for multiple file handling.
- The editing features such as cut, copy, paste, and edit can be performed in a single window.
- The waveform representation of the program is accurate and highly advanced.
Pros
- The program offers bit depth convert, pitch shift, and DC offset removal.
- The VST effects can be added to the entire batch of sound files.
Cons
- The audio routing and the multichannel support of the program are not efficient.
- The software sampler extraction is a bit slow when it comes to this program.
Supported Platforms
The program can only be installed on Windows.
7.MixPad
The audio processing and mixing have been made very easy with this platform. The program has an interface that is sleek in design and allows the processing of the audio info with care. The program also supports cloud storage, which means that the entire user’s hard work remains safe and secures all the time.
Features
- The program can mix the unlimited number of tracks all at the same time.
- Depending upon the requirement, the multiple or a single track can be processed at the same time.
- The program supports almost every sound format, so any type of sound can be imported with perfection.
Pros
- The audio effects such as EQ, compression, and reverb can be added with perfection.
- The latency rate is very low, and the program also offers ASIO support for accurate processing.
Cons
- The program only offers the export of the sound that is up to 32 bits.
- The sample rates of up to 96 kHz are only supported, which is less than most of the other mixers.
Supported Platforms
The program can be installed on Mac, Windows, Android, iPad, and Kindle Fire.
8.Sound Forge

If a user wants to completely control the audio editing process, then this software is for them. It is highly advanced and makes sure that the work that is done is highly précised. From Red Book CD creation to sound design and mixing, this program provides the users with complete control and authority over the process.
Features
- The multichannel WAV recording and processing is now possible with the new version of the program.
- The VST plugin support is provided by this program with perfection.
- The VST effects can be chained in a virtual rack.
Pros
- The simple digitization and restoration of the audio have been made simple by this program.
- The one-click solutions allow the users to process the audio tracks easily.
Cons
- The program only offers 32 bits of power, which is very low.
- The multiple VST GUI is not supported by this program.
Supported Platforms
The Sound Forge can be installed on Mac and Windows.
9.Spek

The best part of the software is that it is free and allows the users to overcome the problems which the other audio recorders present. The interface is easy to learn, and therefore the overall usage is easy. The lossless quality is something for which the software is known for. It also supports the FFMPEG library.
Features
- The signal processing is ultra-fast as it uses several threads to process audio.
- The drag and drop support of the program is highly efficient, and the program supports common audio formats.
- The program can be accessed in 19 different languages.
Pros
- The spectral density rulers allow the auto fitting of time.
- The spectral density range of the program is also adjustable.
Cons
- The codec names are, and the audio signal parameters cannot be seen.
- The program is licensed under GPLv3, which is now obsolete.
Supported Platforms
The program is compatible with Windows, Linux, and Mac.
10.Audio Highjack

The program, as the name suggests, makes it possible for the users to completely delve deep into the process of audio editing. The interface, as well as the controls, is very easy to understand and use. For novice users, this program is highly recommended as it makes audio editing a fun-filled activity.
Features
- It provides detailed statistics and min, the max value per channel.
- The processed audio can be listened in real-time to get an idea about the end product.
- The waveform generator and frequency impulse train are embedded within the program.
Pros
- The lame encoder support has been embedded within the recorder to export mp3 files.
- The editor’s look is skin able, which can be changed as per the user choice.
Cons
- The processing options are less as compared to the other recorders.
- The audio files cannot be exported as text, so the program cannot be used with PSpice.
Supported Platforms
The program is only available for Mac.
A Roundup of the Best Audio Recording Software Programs
| No. | Tools | Rating | Supported Formats | Price | Processing Power |
|---|---|---|---|---|---|
| 1 | DemoCreator | 4.5 | .mp3, .m4a, .wav, .wma, .ogg, .flac, .aif, .aiff | $29.99 | 64-bit |
| 2 | WavePad | 4.4 | vox, gsm, WMA, real audio, au, aif, FLAC, and Ogg | $69.95 | 64-bit |
| 3 | Ocenaudio | 4.0 | vox, gsm, WMA, wav, .wma, .ogg, and .flac | Free | 32-bit |
| 4 | Adobe Audition | 4.5 | AIF, AIFF, AIFC | $74.99 | 64-bit |
| 5 | Audacity | 3.9 | mp3, wav, AIFF, au, and ogg | Free | 32-bit |
| 6 | Wavosaur | 3.5 | VST plugins, ASIO driver, multichannel wav files, real-time effect processing. | Free | 32-bit |
| 7 | MixPad | 3.2 | wav, mp3, vox, and gsm | $129 | 32-bit |
| 8 | Sound Forge | 4.0 | SWF, RealMedia 9, WMA, AVI , AIFF, AIF, and SND | Free | 32-bit |
| 9 | Spek | 4.4 | vox, gsm, WMA, Wav, WMA, real audio, au, aif, FLAC, and Ogg | Free | 64-bit |
| 10 | Audio Highjack | 4.2 | .mp3, .m4a, .wav, .wma, aif, FLAC, and Ogg | Free | 64-bit |
Conclusion
With the overall specs and ratings by the users, the Wondershare DemoCreator is the best software that should be used for audio recording.
The program is highly compatible with major operating systems, and therefore it is highly recommended. The overall mechanism is easy, and the program also supports multiple formats.
It is highly technical and is constantly upgraded to make sure that it remains in line with modern technologies. It is a one-stop-shop for all the audio recording needs of the users and therefore highly viable.
With this program, the audio that has been worked on can be shared on most popular social media platforms like YouTube and Facebook.


Shanoon Cox
Shanoon Cox is a writer and a lover of all things video.
Follow @Shanoon Cox
Shanoon Cox
Mar 27, 2024• Proven solutions
Whether professional or for amateur purposes, the audio recording software programs are very important. These programs allow manipulating the audio so that it matches the need for a specific project.
The best audio recording software has a variety of tools embedded to polish the audio recorded, in which this article we are going to review the best of them for you.
What is Audio Recording Software?
As the name suggests, the audio recording software is used to record audio using a unique technology. This allows the users to capture their own or the voice they want and transfer it wherever they want. The software also adds effects to the voice and makes it professional to use wherever the user wants to.
What Does a Sound Recorder Use for?
There are several uses of audio recording software program. Some are listed as under:
- In the music field, this software is of great use. It can be used for multitrack recording. The mixing of the sound is then done using the same or different tools.
- The audio recorded can be edited with ease. This includes enhancing and adding effects to it with perfection.
- With microphone use, the recording software can be integrated to make sure that the voice of the user is also recorded if required.
- Some audio recording software programs also come with screen recording, and therefore, these foster multitasking.
List of Top 10 Audio Recording Software Programs
The audio recording software for PC that would make your life easy is mentioned as under.
1.Wondershare DemoCreator
This is by far the best and the most used software program when it comes to audio recording. It is highly reliable and comes with a GUI. The user interface is easy to understand, and so are the functionalities.
With the best and the most advanced controls recording audio has never been this easy. It also acts as Mac audio recording software, and therefore it is highly recommended for all platforms. The frequent updates make this program even easier to use.
Features
- The interface of the program is very easy to use and stress-free.
- The high definition audio can be recorded with ease.
- The program supports 50+ formats to import audio, video, and other files to the system.
- There are highly advanced options for professional audio recording.
- The program can record endless video and audio as far as there is space on your disk.
Pros
- It is one of the programs that support professional audio editing.
- The program is very easy to use as it has a graphical interface.
Cons
- The program is flash software-based, which can slow down the system.
- It does not offer highly advanced audio editing at all.
Supported Platforms
The program can be used with both Windows and Mac.
Go ahead to download and have a try now!
2.WavePad
It is one of the best and most used programs to make sure that the audio is recorded with perfection. This program is compatible with most of the audio formats, and therefore it is highly recommended. The overall rating of the program is high as it is used by professionals and, therefore, highly rated as well.
Features
- It has several audio enhancing capabilities, which include amplification and effect addition.
- The audio can be edited, trimmed, and cropped with this program.
- The professional-quality sound recording is used by this program to enhance the capabilities.
Pros
- The best part of this program is its quality of end product that is very high.
- It is a wave editor that gives the users more control over the end product.
Cons
- The mp3 editor of this program does not offer top quality work.
- The program cannot work with multiple files efficiently.
Supported Platforms
It can be installed over Mac, Windows, Android, and iOS.
3.Ocenaudio
As a cross-platform program, this one has a lot to offer. The interface is a bit technical, but overall the use of the program is easy once the hands-on is done. The program is also highly intuitive and allows the users to overcome the day to day audio recording and editing tasks.
Features
- The Ocen Framework is also integrated with this platform to enhance its capabilities.
- The program also records screen if required by the users.
- It is one of the programs that have been rated on other high-end platforms.
Pros
- The program uses auto trim and voice recording controls.
- The sound spectral analysis of the program is highly advanced.
Cons
- The program cannot directly load the file from a CD.
- The program cannot be opened in multiple screens, so the work rate is slow.
Supported Platforms
It is compatible with Mac, Windows, and Linux.
4.Adobe Audition
It can be rightfully regarded as one of the best and the most advanced programs. Backed by years of Adobe experience, it is a program that will get the user a step forward. It is highly recommended to all those users that are looking for a professional level of audio recording.
Features
- It includes multitrack, wave editing, and audio restoration tools to give the best results.
- The essential sound panel has been integrated with the program to get the best oomph effect to the audio.
- The music clips can be integrated within the audio recording to make it sound professional.
Pros
- The platform can be used to create awesome podcasts.
- The audio break can be repaired with perfection.
Cons
- It is expensive, so all the users cannot afford it at all.
- The interface is high tech in nature and requires time to learn.
Supported Platforms
It is supported by Windows and Mac.
5.Audacity
It is free software that is used to record audio professionally. This high-performance program makes sure that the audio which is recorded is also shared with different platforms. The built-in panel is upgraded, and therefore it is highly advance.
Features
- It is ad-free and therefore provides hassle-free work.
- The audio editing and recording have never been as easy as it is with audacity.
- Multitrack editing is also possible with this program.
Pros
- The VST plugin support is provided by the program.
- It is a portable program that can be used for pitch correction.
Cons
- The noise reduction tool of this program needs an upgrade.
- The record to tape feature is currently unavailable.
Supported Platforms
It is supported by Mac, Linux, Windows, and BSD.
6.Wavosaur
It is one of the free programs that can be regarded as better than many paid ones. It is all because the qualities of the program are matchless. The processing of files is done with WAV and Mp3 files filter, which makes the process very much easier.
Features
- The program has multiple document interfaces for multiple file handling.
- The editing features such as cut, copy, paste, and edit can be performed in a single window.
- The waveform representation of the program is accurate and highly advanced.
Pros
- The program offers bit depth convert, pitch shift, and DC offset removal.
- The VST effects can be added to the entire batch of sound files.
Cons
- The audio routing and the multichannel support of the program are not efficient.
- The software sampler extraction is a bit slow when it comes to this program.
Supported Platforms
The program can only be installed on Windows.
7.MixPad
The audio processing and mixing have been made very easy with this platform. The program has an interface that is sleek in design and allows the processing of the audio info with care. The program also supports cloud storage, which means that the entire user’s hard work remains safe and secures all the time.
Features
- The program can mix the unlimited number of tracks all at the same time.
- Depending upon the requirement, the multiple or a single track can be processed at the same time.
- The program supports almost every sound format, so any type of sound can be imported with perfection.
Pros
- The audio effects such as EQ, compression, and reverb can be added with perfection.
- The latency rate is very low, and the program also offers ASIO support for accurate processing.
Cons
- The program only offers the export of the sound that is up to 32 bits.
- The sample rates of up to 96 kHz are only supported, which is less than most of the other mixers.
Supported Platforms
The program can be installed on Mac, Windows, Android, iPad, and Kindle Fire.
8.Sound Forge
If a user wants to completely control the audio editing process, then this software is for them. It is highly advanced and makes sure that the work that is done is highly précised. From Red Book CD creation to sound design and mixing, this program provides the users with complete control and authority over the process.
Features
- The multichannel WAV recording and processing is now possible with the new version of the program.
- The VST plugin support is provided by this program with perfection.
- The VST effects can be chained in a virtual rack.
Pros
- The simple digitization and restoration of the audio have been made simple by this program.
- The one-click solutions allow the users to process the audio tracks easily.
Cons
- The program only offers 32 bits of power, which is very low.
- The multiple VST GUI is not supported by this program.
Supported Platforms
The Sound Forge can be installed on Mac and Windows.
9.Spek
The best part of the software is that it is free and allows the users to overcome the problems which the other audio recorders present. The interface is easy to learn, and therefore the overall usage is easy. The lossless quality is something for which the software is known for. It also supports the FFMPEG library.
Features
- The signal processing is ultra-fast as it uses several threads to process audio.
- The drag and drop support of the program is highly efficient, and the program supports common audio formats.
- The program can be accessed in 19 different languages.
Pros
- The spectral density rulers allow the auto fitting of time.
- The spectral density range of the program is also adjustable.
Cons
- The codec names are, and the audio signal parameters cannot be seen.
- The program is licensed under GPLv3, which is now obsolete.
Supported Platforms
The program is compatible with Windows, Linux, and Mac.
10.Audio Highjack
The program, as the name suggests, makes it possible for the users to completely delve deep into the process of audio editing. The interface, as well as the controls, is very easy to understand and use. For novice users, this program is highly recommended as it makes audio editing a fun-filled activity.
Features
- It provides detailed statistics and min, the max value per channel.
- The processed audio can be listened in real-time to get an idea about the end product.
- The waveform generator and frequency impulse train are embedded within the program.
Pros
- The lame encoder support has been embedded within the recorder to export mp3 files.
- The editor’s look is skin able, which can be changed as per the user choice.
Cons
- The processing options are less as compared to the other recorders.
- The audio files cannot be exported as text, so the program cannot be used with PSpice.
Supported Platforms
The program is only available for Mac.
A Roundup of the Best Audio Recording Software Programs
| No. | Tools | Rating | Supported Formats | Price | Processing Power |
|---|---|---|---|---|---|
| 1 | DemoCreator | 4.5 | .mp3, .m4a, .wav, .wma, .ogg, .flac, .aif, .aiff | $29.99 | 64-bit |
| 2 | WavePad | 4.4 | vox, gsm, WMA, real audio, au, aif, FLAC, and Ogg | $69.95 | 64-bit |
| 3 | Ocenaudio | 4.0 | vox, gsm, WMA, wav, .wma, .ogg, and .flac | Free | 32-bit |
| 4 | Adobe Audition | 4.5 | AIF, AIFF, AIFC | $74.99 | 64-bit |
| 5 | Audacity | 3.9 | mp3, wav, AIFF, au, and ogg | Free | 32-bit |
| 6 | Wavosaur | 3.5 | VST plugins, ASIO driver, multichannel wav files, real-time effect processing. | Free | 32-bit |
| 7 | MixPad | 3.2 | wav, mp3, vox, and gsm | $129 | 32-bit |
| 8 | Sound Forge | 4.0 | SWF, RealMedia 9, WMA, AVI , AIFF, AIF, and SND | Free | 32-bit |
| 9 | Spek | 4.4 | vox, gsm, WMA, Wav, WMA, real audio, au, aif, FLAC, and Ogg | Free | 64-bit |
| 10 | Audio Highjack | 4.2 | .mp3, .m4a, .wav, .wma, aif, FLAC, and Ogg | Free | 64-bit |
Conclusion
With the overall specs and ratings by the users, the Wondershare DemoCreator is the best software that should be used for audio recording.
The program is highly compatible with major operating systems, and therefore it is highly recommended. The overall mechanism is easy, and the program also supports multiple formats.
It is highly technical and is constantly upgraded to make sure that it remains in line with modern technologies. It is a one-stop-shop for all the audio recording needs of the users and therefore highly viable.
With this program, the audio that has been worked on can be shared on most popular social media platforms like YouTube and Facebook.
Shanoon Cox
Shanoon Cox is a writer and a lover of all things video.
Follow @Shanoon Cox
Also read:
- In 2024, Identify Stomach Gas Acoustics Recording
- Leading Gender Shifting Audio Tools Available for 2024
- New Pro MPEG Blender - Craft the Finest Mac MP3 Fusion
- Remove Sound From Video on Desktop or Online for 2024
- Updated In 2024, The Free Guide to Silencing Movie Trailers in Windows 10 Videos
- Updated Premium 10 Sound Enhancement Apps for Android and iOS Devices for 2024
- New Mastering the Art of Auditory File Partitioning
- In 2024, Ultimate Guide to Dynamic Ducking The Five Must-Have Audio Processors for Clearer Stereo Separation
- New Where Can I Find Game Sound Effects for 2024
- Updated 2024 Approved Where Can I Find Game Sound Effects?
- In 2024, Advanced Web Tools for Optimizing Audio Fidelity
- New In 2024, The Ultimate Guide to Top 8 Online Havens for Cost-Free SFX & Impactful Audio Libraries
- New 2024 Approved Innovative Approaches to Amplify Online Films with Free Audio Sources
- New In 2024, Ultimate WAV to MP3 Conversion Tool Speedy, Flawless Converting
- 2024 Approved 2 Key Steps to Achieve Clear Vocal Recordings without Echo
- 2024 Approved The Filmmakers Voice How to Raise Your Pitch for Impact Using Filmora
- Harmonizing Your Media Playback Expert Guide to Adjusting Decibels in VLC for 2024
- 2024 Approved Advanced Audio Purification Removing Background Noise Using Voice Enhancers Online
- New Find Applause Sound Effect for 2024
- Updated In 2024, How to Add Music/Audio to a GIF on Mac?
- Updated In 2024, Advanced Audio Editing How to Achieve Seamless Volume Automation Using Final Cut Pro X Ducking Tools
- MP3 Unification Hub Highest Rated Free Online Solution
- Updated 2024 Approved Unlocking Audio Fidelity Top Advice for Playing M4A on Android Devices
- Updated Quick Guide to Disabling Zoom Microphones on PC/Mac and iOS Devices for 2024
- Applications for Adding Audio to Video in Android
- PitchPerfect Pro - Elite Audio Editing and Alteration Toolkit for the Modern Singer
- Updated In 2024, Leverage Google Voices Features Secure and Capture Every Call Interaction
- New In 2024, The Complete Guide to Saving Call Transcripts From Google Voice on Mobile and Laptop Devices
- Updated Silencing the Distractions Leveraging Artificial Intelligence in Signal Refinement
- 2024 Approved Echo Eradication Excellence Essential Noise Reduction Tips & Tricks with Premiere Pro
- New Blend Music Sequences Into Animated File Format on WIN OS
- New Mastering Vocal Modification in Audacity A Step-by-Step Guide for 2024
- New Seamless Blending of Audio with Visuals Using QuickTime Tools and Techniques
- Cutting-Edge, Cost-Free DAW Software Options Revealed A Beginners Guide to 2023
- 2024 Approved Sony Vegas Audio Editor A Step-by-Step Tutorial for Professionals
- In 2024, Experts Selection The Premier MP3 Snipper Software for Mac Devices, Updated
- New The Foremost Selection of 9 Breakthrough AI Voices Shaping the Future for 2024
- Updated In 2024, Best Siri Voice Generator for Windows & Mac
- Recording Google Voice Calls Techniques for Smartphones & Desktops for 2024
- New Introductory Summary to the Wave Editor Core Characteristics, Consumer Feedback, and Educational Resources for 2024
- New 2024 Approved Premier Voice Capture Apps on Android The Best
- New Symphony in Reverse A Guide to State-of-the-Art Audio Reversal Applications
- In 2024, 4 solution to get rid of pokemon fail to detect location On Poco C51 | Dr.fone
- Updated 2024 Approved 10 Top-Rated Image to Video Creation Platforms
- In 2024, Change Location on Yik Yak For your Realme 12+ 5G to Enjoy More Fun | Dr.fone
- New The Ultimate Guide to YouTube Thumbnails Sizing, Designing, and Converting for 2024
- New In 2024, This Is a Recommendation About Bandicut. If You Are Confused, Please Check It Out
- The Best 8 VPN Hardware Devices Reviewed On Vivo T2 5G | Dr.fone
- Pokemon Go Error 12 Failed to Detect Location On Oppo Find X6? | Dr.fone
- In 2024, How to Transfer Contacts from OnePlus Ace 2 Pro To Phone | Dr.fone
- In 2024, Unlock Oppo A59 5G Phone Password Without Factory Reset Full Guide Here
- In 2024, Unlock Honor Magic 6 Pro Phone Password Without Factory Reset Full Guide Here
- How to Hard Reset Oppo Reno 11 5G Without Password | Dr.fone
- In 2024, Top 4 Ways to Trace Vivo V29 Location | Dr.fone
- In 2024, Ultimate Guide on iPhone 14 Pro Max iCloud Activation Lock Bypass
- Updated 2024 Approved Calculating Image Resolution A Guide to Aspect Ratios
- In 2024, The Ultimate Guide to Adding Subtitles in Final Cut Pro X
- How to Transfer Videos from Motorola Defy 2 to iPad | Dr.fone
- 4 Solutions to Fix Unfortunately Your App Has Stopped Error on Honor Magic 5 | Dr.fone
- In 2024, How to Change Your Lava Blaze Pro 5G Location on life360 Without Anyone Knowing? | Dr.fone
- 2024 Approved Unlock Chromecast How to Play Any Video File Format
- Forgot Pattern Lock? Heres How You Can Unlock Honor X8b Pattern Lock Screen
- New The Ultimate List 10 Best Webcam Recorders for Windows 10
- S Best Free MKV Editors for Cutting and Trimming for 2024
- Best MP4 to MP3 Apps for iOS and Android Devices for 2024
- Title: Updated In 2024, How to Record Computer Audio and Voice Audio with Audacity for Free?
- Author: Kate
- Created at : 2024-05-05 08:03:20
- Updated at : 2024-05-06 08:03:20
- Link: https://audio-editing.techidaily.com/updated-in-2024-how-to-record-computer-audio-and-voice-audio-with-audacity-for-free/
- License: This work is licensed under CC BY-NC-SA 4.0.
