
:max_bytes(150000):strip_icc():format(webp)/copilot-b197f8dd690845d5bf8ebbc082c89c20.jpg)
Updated In 2024, Best Voice Recording Apps for Android Free Options Included
Best Voice Recording Apps for Android [Free Options Included]
10 Best Voice Recording Apps for Android Devices [Free Included]

Benjamin Arango
Mar 27, 2024• Proven solutions
Memorizing every bit of information you need to perform your daily or weekly tasks becomes increasingly difficult as your workload rises. Students, journalists, and professionals from a wide array of industries can benefit from making audio notes or even recording entire conversations with their Smartphones.
A simple Android voice recorder can make this task easy since you can just tap on the Record button and create an audio note in seconds. However, with so many voice recorder apps for Android devices out there, finding the one best suited for your needs can be more complicated than it seems. So, in this article, we are going to help you discover some best free voice recorder for an Android device you are currently using.
Want to record voiceover and audio on iPhone? Check 10 Best Voice Recorder Apps for iPhones >>
10 Best Free Voice Recording Apps for Android Devices
Recording audio is no longer a highly technical process since now you can create an audio note or record an interview with an Android phone and a voice recorder app. The question is which voice recording app should you install on your device. So, let’s take a look at some of the most potent Android voice recorders you can find at Google Play Store.
1. Easy Voice Recorder Pro
Price: $3.99
Supported OS: Varies with the device
Best for: Students, musicians, and businessmen

App in Google Play
As the app’s name suggests making recordings for a broad range of purposes is easy. All you need to do is launch the app and start a new audio recording session. Easy Voice Recorder Pro doesn’t limit the duration of your recordings, and it also allows you to compress the recorded audio . That is perfect if you need to record long lectures or conversations. Besides, you can connect an external microphone with the app in case you want to increase the quality of the sound you are recording. The app also lets you store your recordings on Dropbox or Google Drive, while it also offers the possibility to send recordings via email.
Easy Voice Recorder Pro Interface
Pros
- Allows users to manage and organize their recordings effortlessly
- Supports all standard output audio file formats
- Offers the option to record in stereo
- Recordings made with this app can be used as the ringtone
Cons
- Ads can be frustrating
- Limited basic audio editing tools
2. Smart Recorder – High-quality voice recorder
Price: Free, but contains ads and offers in-app purchases
Supported OS: Varies with the device
Best for: Students, musicians, and businessmen
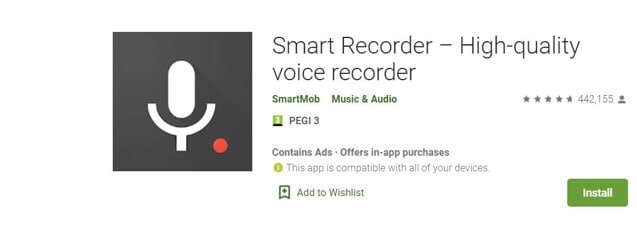
App in Google Play
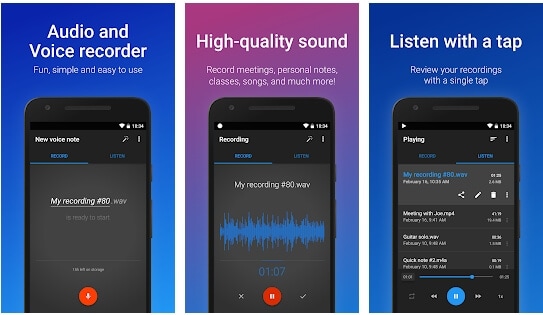
Capturing high-quality audio recordings effortlessly is the ultimate goal of all Android users who want to use voice recorders. As one of the best free voice recorders for Android, Smart Recorder app has a plethora of features that enable users to make high-quality audio recordings even in imperfect conditions. Options like Live Audio Spectrum Analyzer, microphone gain calibration or automatic and manual sensitivity control in Skip Silence mode are just a few reasons why this app has over 10 million installs. However, you should keep in mind that you cannot create audio files that are larger than 2 GB with this app.
Smart Recorder – High-quality voice recorder Interface
Pros
- Provides full control over the audio recording process
- Equipped with the Wave Lock feature that prevents the device from going into the sleep mode
- Features a live audio spectrum analyzer
- Preserves battery life
Cons
- No phone call recording options
- Limited file-sharing capabilities
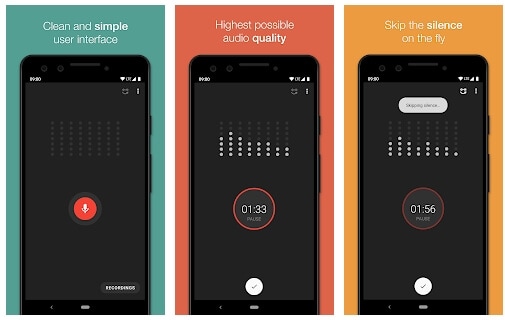
3. RecForge II Audio Recorder
Price: Free, but contains ads
Supported OS: Android 4.0 and up
Best for: Musicians
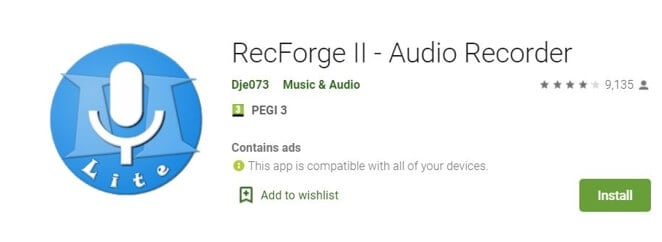
RecForge-audio-recorder App in Google Play
If you are looking for an Android voice recorder that allows you to customize bit rates, sample rates, choose codecs or record in mono or stereo mode, then you should consider installing RecForge II Audio Recorder on your device. The app allows you to schedule recordings, connect different types of external microphones or adjust the gain manually. In addition, you can also adjust the pitch , tempo and the playback rate of all audio files you record and edit with this app. RecForge II Audio Recorder continues working even while you are using other apps, and it keeps the battery consumption at the very minimum.
Pros
- Supports nearly all common audio file formats
- Offers a versatile set of audio editing tools
- Excellent file-sharing capabilities
- Allows users to increase the audio quality by disabling Automatic Gain Control
Cons
- The maximum duration of a recording is limited for some file formats
- Can be too complicated for inexperienced users
4. Hi-Q MP3 Voice Recorder
Price: Free
Supported OS: Varies with the device
Best for: Students, general use
Hi-Q MP3 Voice Recorder App in Google Play
You don’t need any previous audio recording experience to record long lectures, interviews and all other types of voice recordings with Hi-Q MP3 Voice Recorder. The free version of the app limits the maximum duration of a recording you can make to just 10 minutes. That is why you must upgrade to the Pro version of Hi-Q MP3 Voice Recorder if you want to capture hours of material directly from your phone. The best part is that all versions of the app automatically upload recordings to Google Drive or Dropbox which frees up space on your device.
Pros
- Intuitive and modernly designed interface
- Simple audio recording session setup
- Customizable audio quality
- Excellent file management capabilities
Cons
- Recording with external microphones is not an option
- The free version of the app limits the maximum duration of recordings
5. Voice Recorder
Price: Free, but contains ads
Supported OS: Android 4.1 and up
Best for: Students, musicians, and businessmen
Voice Recorder App in Google Play
If you are looking for an app you can use to record an interview, a business meeting or a lecture, then Voice Recorder may be one of your best options. You can record audio files without any restrictions and visualize the sounds with the Audio Spectrum Analyzer. The app continues recording from the background even while the phone’s screen is off which preserves battery life and enables you to perform other tasks while the recording session is in progress. Voice Recorder offers a broad range of file-sharing capabilities so that you can easily send your audio recordings via SMS, email and the Messenger app or share them on Facebook and WhatsApp.
Pros
- Available for free to all Android users
- Stopping, pausing or resuming a recording session is easy
- Allows users to adjust the sample rate
- Offers the microphone gain calibration tool
Cons
- Audio recordings can only be saved in two different file formats
- Doesn’t provide audio editing options
6. Music Maker JAM
Price: Free, but contains ads and offers in-app purchases
Supported OS: Varies with the device
Best for: Musicians
Music Maker JAM App in Google Play
With the selection of 300 mix packs, Music Maker JAM is one of the best android apps for aspiring musicians who want to compose their music even while they are on the go. You can choose from a variety of samples, audio loops and beats to create your next song or record live performances with the app’s 8-channel mixer. Music Maker JAM also enables you to record vocals, adjust the tempo of the audio files or apply effects to all recordings you edit with this app. Once your recording is ready, you can upload it to SoundCloud directly from the app or post it on Facebook and other social networks.
Pros
- Shake your Android phone to remix a song
- The app lets you choose from more than 300 mix packs
- Supports multi-channel recording
- Offers advanced audio editing options
Cons
- Music Maker JAM is not primarily a voice recorder
- No support for external microphones
7. LectureNotes
Price: Free
Supported OS: Android 3.0 and up
Best for: Students
LectureNotes App in Google Play
In case you take notes often, then this app can be an excellent choice for you as it allows you to use a stylus to create notes. However, the trial version limits the number of notebooks to just two, and neither of the notebooks can have more than eight pages. Moreover, if you would like to utilize the app’s voice recording features, you must install LectureRecordings plugin on your device. To capture videos, you must first install the LectureVideos plugin. Another disappointing thing is that you won’t be able to adjust the settings for your audio recording sessions or edit the recording you create with this app.
Pros
- An efficient tool for creating hand-written notes
- The app can be used while your Android phone is offline
- Allows users to export PDF files
- Compatible with OneNote and Evernote apps
Cons
- Underwhelming voice recording options
- You must install a plugin to record audio files
8. ASR Voice Recorder
Price: Free, but contains ads
Supported OS: Android 5.0 and up
Best for: Journalists, musicians, students

ASR Voice Recorder App in Google Play
A brief look at the list of features this app offers, you will find this is a well-rounded voice recorder because it offers all the tools you are going to need to create high-quality recordings. You can choose from a variety of file formats, add notes to recordings at recording or control the playback speed of all audio files you listen to in AVR Voice Recorder. You can also skip silences, connect a headset microphone to the app via Bluetooth or arrange your voice recordings in any way you want. The app lets you upload your audio files to Dropbox, Google Drive, and other file-hosting platforms.
Pros
- Provides excellent audio recording options for free
- Allows users to save recordings in different file formats
- Equipped with an audio playback controller
- Sharing multiple files is easy
Cons
- Offers only basic audio editing tools
- No audio transcription options
9. Call Recorder
Price: Free, but contains ads
Supported OS: Android 4.0 and up
Best for: Marketing professionals
Call Recorder App in Google Play
If you would like to record all incoming and outgoing calls on your device, the Call Recorder app is one of the best options you have at your disposal. Besides recording all calls from whitelisted numbers automatically, this app also allows you to choose from a variety of different recording modes. Furthermore, Call Recorder lets you blacklist numbers from which you don’t want to receive calls and enables you to organize your recordings efficiently. All files created with this app can be sent via Skype, SMS, Dropbox and other messaging services, which makes Call Recorder app a perfect choice for marketing professionals.
Pros
- No previous experience required to start using the app
- Records an unlimited number of phone calls
- Simple audio file management
- Offers several recording modes
Cons
- No voice recording options
- Doesn’t provide audio editing tools
10. Otter Voice Meeting Notes
Price: Free, but offers in-app purchases
Supported OS: Android 5.0 and up
Best for: Large teams of professionals
Otter Voice Meeting Notes App in Google Play
Besides being a powerful voice recorder, Otter Voice Meeting Notes is a collaborative tool that enables multiple team members to highlight and edit the transcripts this app generates in real-time. In addition to recording business meetings, you can also use Otter Voice Meeting Notes to record interviews, webinars or podcasts . Starting a new recording session takes only a second since you just have to tap on the Record button to capture the voices of all speakers in the room. What’s more, the app lets you add photos or slides to transcripts while the recording session is still in progress.
Pros
- Makes collaboration on a single transcript easier
- The app’s AI identifies different speakers automatically after the initial training
- Allows users to export MP3 audio files
- Compatible with the Call Recorder app
Cons
- In-app purchases are expensive
- Audio editing tools could be better
You may also like: 10 Best Free Discord Voice Changers
Conclusion
Creating an audio note or recording an entire interview with an Android device has never been easier. Each of the voice recorder apps we featured in this article enables you to create high-quality audio files you can share via email or store on the cloud.
Which of these Android voice recorders you are going to choose depends on a broad spectrum of factors, which range from the context in which you want to make the recording toaudio editing tools you want to use to process the audio files you created.
We’ve summarized the essential information in the table below. Hope that will help you to determine. What is your favorite Android voice recorder? Leave a comment and let us know.
| Voice recorder app | Price | Supported OS | User Rating | Best for |
|---|---|---|---|---|
| Easy Voice Recorder Pro | $3.99 | Varies with the device | 4.8 | Students, musicians, and businessmen |
| Smart Recorder – High-quality voice recorder | Free, but contains ads and offers in-app purchases | Varies with the device | 4.7 | Students, musicians, and businessmen |
| RecForge II Audio Recorder | Free, but contains ads | Android 4.0 and up | 4.0 | Musicians |
| Hi-Q MP3 Voice Recorder | Free | Varies with the device | 4.5 | Students |
| Voice Recorder | Free, but contains ads | Android 4.1 and up | 4.8 | Students, musicians, and businessmen |
| Music Maker JAM | Free, but contains ads and offers in-app purchases | Varies with the device | 4.6 | Musicians |
| LectureNotes | Free | Android 3.0 and up | 4.3 | Students |
| ASR Voice Recorder | Free, but contains ads | Android 5.0 and up | 4.4 | Journalists, musicians, students |
| Call Recorder | Free, but contains ads | Android 4.0 and up | 4.3 | Marketing professionals |
| Otter Voice Meeting Notes | Free, but offers in-app purchases | Android 5.0 and up | 4.5 | Large teams of professionals |
Benjamin Arango
Benjamin Arango is a writer and a lover of all things video.
Follow @Benjamin Arango
Benjamin Arango
Mar 27, 2024• Proven solutions
Memorizing every bit of information you need to perform your daily or weekly tasks becomes increasingly difficult as your workload rises. Students, journalists, and professionals from a wide array of industries can benefit from making audio notes or even recording entire conversations with their Smartphones.
A simple Android voice recorder can make this task easy since you can just tap on the Record button and create an audio note in seconds. However, with so many voice recorder apps for Android devices out there, finding the one best suited for your needs can be more complicated than it seems. So, in this article, we are going to help you discover some best free voice recorder for an Android device you are currently using.
Want to record voiceover and audio on iPhone? Check 10 Best Voice Recorder Apps for iPhones >>
10 Best Free Voice Recording Apps for Android Devices
Recording audio is no longer a highly technical process since now you can create an audio note or record an interview with an Android phone and a voice recorder app. The question is which voice recording app should you install on your device. So, let’s take a look at some of the most potent Android voice recorders you can find at Google Play Store.
1. Easy Voice Recorder Pro
Price: $3.99
Supported OS: Varies with the device
Best for: Students, musicians, and businessmen
App in Google Play
As the app’s name suggests making recordings for a broad range of purposes is easy. All you need to do is launch the app and start a new audio recording session. Easy Voice Recorder Pro doesn’t limit the duration of your recordings, and it also allows you to compress the recorded audio . That is perfect if you need to record long lectures or conversations. Besides, you can connect an external microphone with the app in case you want to increase the quality of the sound you are recording. The app also lets you store your recordings on Dropbox or Google Drive, while it also offers the possibility to send recordings via email.
Easy Voice Recorder Pro Interface
Pros
- Allows users to manage and organize their recordings effortlessly
- Supports all standard output audio file formats
- Offers the option to record in stereo
- Recordings made with this app can be used as the ringtone
Cons
- Ads can be frustrating
- Limited basic audio editing tools
2. Smart Recorder – High-quality voice recorder
Price: Free, but contains ads and offers in-app purchases
Supported OS: Varies with the device
Best for: Students, musicians, and businessmen
App in Google Play
Capturing high-quality audio recordings effortlessly is the ultimate goal of all Android users who want to use voice recorders. As one of the best free voice recorders for Android, Smart Recorder app has a plethora of features that enable users to make high-quality audio recordings even in imperfect conditions. Options like Live Audio Spectrum Analyzer, microphone gain calibration or automatic and manual sensitivity control in Skip Silence mode are just a few reasons why this app has over 10 million installs. However, you should keep in mind that you cannot create audio files that are larger than 2 GB with this app.
Smart Recorder – High-quality voice recorder Interface
Pros
- Provides full control over the audio recording process
- Equipped with the Wave Lock feature that prevents the device from going into the sleep mode
- Features a live audio spectrum analyzer
- Preserves battery life
Cons
- No phone call recording options
- Limited file-sharing capabilities
3. RecForge II Audio Recorder
Price: Free, but contains ads
Supported OS: Android 4.0 and up
Best for: Musicians
RecForge-audio-recorder App in Google Play
If you are looking for an Android voice recorder that allows you to customize bit rates, sample rates, choose codecs or record in mono or stereo mode, then you should consider installing RecForge II Audio Recorder on your device. The app allows you to schedule recordings, connect different types of external microphones or adjust the gain manually. In addition, you can also adjust the pitch , tempo and the playback rate of all audio files you record and edit with this app. RecForge II Audio Recorder continues working even while you are using other apps, and it keeps the battery consumption at the very minimum.
Pros
- Supports nearly all common audio file formats
- Offers a versatile set of audio editing tools
- Excellent file-sharing capabilities
- Allows users to increase the audio quality by disabling Automatic Gain Control
Cons
- The maximum duration of a recording is limited for some file formats
- Can be too complicated for inexperienced users
4. Hi-Q MP3 Voice Recorder
Price: Free
Supported OS: Varies with the device
Best for: Students, general use
Hi-Q MP3 Voice Recorder App in Google Play
You don’t need any previous audio recording experience to record long lectures, interviews and all other types of voice recordings with Hi-Q MP3 Voice Recorder. The free version of the app limits the maximum duration of a recording you can make to just 10 minutes. That is why you must upgrade to the Pro version of Hi-Q MP3 Voice Recorder if you want to capture hours of material directly from your phone. The best part is that all versions of the app automatically upload recordings to Google Drive or Dropbox which frees up space on your device.
Pros
- Intuitive and modernly designed interface
- Simple audio recording session setup
- Customizable audio quality
- Excellent file management capabilities
Cons
- Recording with external microphones is not an option
- The free version of the app limits the maximum duration of recordings
5. Voice Recorder
Price: Free, but contains ads
Supported OS: Android 4.1 and up
Best for: Students, musicians, and businessmen
Voice Recorder App in Google Play
If you are looking for an app you can use to record an interview, a business meeting or a lecture, then Voice Recorder may be one of your best options. You can record audio files without any restrictions and visualize the sounds with the Audio Spectrum Analyzer. The app continues recording from the background even while the phone’s screen is off which preserves battery life and enables you to perform other tasks while the recording session is in progress. Voice Recorder offers a broad range of file-sharing capabilities so that you can easily send your audio recordings via SMS, email and the Messenger app or share them on Facebook and WhatsApp.
Pros
- Available for free to all Android users
- Stopping, pausing or resuming a recording session is easy
- Allows users to adjust the sample rate
- Offers the microphone gain calibration tool
Cons
- Audio recordings can only be saved in two different file formats
- Doesn’t provide audio editing options
6. Music Maker JAM
Price: Free, but contains ads and offers in-app purchases
Supported OS: Varies with the device
Best for: Musicians
Music Maker JAM App in Google Play
With the selection of 300 mix packs, Music Maker JAM is one of the best android apps for aspiring musicians who want to compose their music even while they are on the go. You can choose from a variety of samples, audio loops and beats to create your next song or record live performances with the app’s 8-channel mixer. Music Maker JAM also enables you to record vocals, adjust the tempo of the audio files or apply effects to all recordings you edit with this app. Once your recording is ready, you can upload it to SoundCloud directly from the app or post it on Facebook and other social networks.
Pros
- Shake your Android phone to remix a song
- The app lets you choose from more than 300 mix packs
- Supports multi-channel recording
- Offers advanced audio editing options
Cons
- Music Maker JAM is not primarily a voice recorder
- No support for external microphones
7. LectureNotes
Price: Free
Supported OS: Android 3.0 and up
Best for: Students
LectureNotes App in Google Play
In case you take notes often, then this app can be an excellent choice for you as it allows you to use a stylus to create notes. However, the trial version limits the number of notebooks to just two, and neither of the notebooks can have more than eight pages. Moreover, if you would like to utilize the app’s voice recording features, you must install LectureRecordings plugin on your device. To capture videos, you must first install the LectureVideos plugin. Another disappointing thing is that you won’t be able to adjust the settings for your audio recording sessions or edit the recording you create with this app.
Pros
- An efficient tool for creating hand-written notes
- The app can be used while your Android phone is offline
- Allows users to export PDF files
- Compatible with OneNote and Evernote apps
Cons
- Underwhelming voice recording options
- You must install a plugin to record audio files
8. ASR Voice Recorder
Price: Free, but contains ads
Supported OS: Android 5.0 and up
Best for: Journalists, musicians, students
ASR Voice Recorder App in Google Play
A brief look at the list of features this app offers, you will find this is a well-rounded voice recorder because it offers all the tools you are going to need to create high-quality recordings. You can choose from a variety of file formats, add notes to recordings at recording or control the playback speed of all audio files you listen to in AVR Voice Recorder. You can also skip silences, connect a headset microphone to the app via Bluetooth or arrange your voice recordings in any way you want. The app lets you upload your audio files to Dropbox, Google Drive, and other file-hosting platforms.
Pros
- Provides excellent audio recording options for free
- Allows users to save recordings in different file formats
- Equipped with an audio playback controller
- Sharing multiple files is easy
Cons
- Offers only basic audio editing tools
- No audio transcription options
9. Call Recorder
Price: Free, but contains ads
Supported OS: Android 4.0 and up
Best for: Marketing professionals
Call Recorder App in Google Play
If you would like to record all incoming and outgoing calls on your device, the Call Recorder app is one of the best options you have at your disposal. Besides recording all calls from whitelisted numbers automatically, this app also allows you to choose from a variety of different recording modes. Furthermore, Call Recorder lets you blacklist numbers from which you don’t want to receive calls and enables you to organize your recordings efficiently. All files created with this app can be sent via Skype, SMS, Dropbox and other messaging services, which makes Call Recorder app a perfect choice for marketing professionals.
Pros
- No previous experience required to start using the app
- Records an unlimited number of phone calls
- Simple audio file management
- Offers several recording modes
Cons
- No voice recording options
- Doesn’t provide audio editing tools
10. Otter Voice Meeting Notes
Price: Free, but offers in-app purchases
Supported OS: Android 5.0 and up
Best for: Large teams of professionals
Otter Voice Meeting Notes App in Google Play
Besides being a powerful voice recorder, Otter Voice Meeting Notes is a collaborative tool that enables multiple team members to highlight and edit the transcripts this app generates in real-time. In addition to recording business meetings, you can also use Otter Voice Meeting Notes to record interviews, webinars or podcasts . Starting a new recording session takes only a second since you just have to tap on the Record button to capture the voices of all speakers in the room. What’s more, the app lets you add photos or slides to transcripts while the recording session is still in progress.
Pros
- Makes collaboration on a single transcript easier
- The app’s AI identifies different speakers automatically after the initial training
- Allows users to export MP3 audio files
- Compatible with the Call Recorder app
Cons
- In-app purchases are expensive
- Audio editing tools could be better
You may also like: 10 Best Free Discord Voice Changers
Conclusion
Creating an audio note or recording an entire interview with an Android device has never been easier. Each of the voice recorder apps we featured in this article enables you to create high-quality audio files you can share via email or store on the cloud.
Which of these Android voice recorders you are going to choose depends on a broad spectrum of factors, which range from the context in which you want to make the recording toaudio editing tools you want to use to process the audio files you created.
We’ve summarized the essential information in the table below. Hope that will help you to determine. What is your favorite Android voice recorder? Leave a comment and let us know.
| Voice recorder app | Price | Supported OS | User Rating | Best for |
|---|---|---|---|---|
| Easy Voice Recorder Pro | $3.99 | Varies with the device | 4.8 | Students, musicians, and businessmen |
| Smart Recorder – High-quality voice recorder | Free, but contains ads and offers in-app purchases | Varies with the device | 4.7 | Students, musicians, and businessmen |
| RecForge II Audio Recorder | Free, but contains ads | Android 4.0 and up | 4.0 | Musicians |
| Hi-Q MP3 Voice Recorder | Free | Varies with the device | 4.5 | Students |
| Voice Recorder | Free, but contains ads | Android 4.1 and up | 4.8 | Students, musicians, and businessmen |
| Music Maker JAM | Free, but contains ads and offers in-app purchases | Varies with the device | 4.6 | Musicians |
| LectureNotes | Free | Android 3.0 and up | 4.3 | Students |
| ASR Voice Recorder | Free, but contains ads | Android 5.0 and up | 4.4 | Journalists, musicians, students |
| Call Recorder | Free, but contains ads | Android 4.0 and up | 4.3 | Marketing professionals |
| Otter Voice Meeting Notes | Free, but offers in-app purchases | Android 5.0 and up | 4.5 | Large teams of professionals |
Benjamin Arango
Benjamin Arango is a writer and a lover of all things video.
Follow @Benjamin Arango
Adjusting Sound Levels in Audacity: Raising the Volume Up, Lowering It Down
Audacity is a free, open access, cross-platform sound editing and recording tool. It is compatible with Windows, Mac OS X, Linux, and various other operating systems. All of these aspects have contributed to Audacity’s worldwide popularity. Audacity features an amplified effect that alters the loudness of your chosen audio and other practical tools that can change the sound in different ways.
As a result, Audacity can not only assist you in modifying the level of an audio file, but it can also help you equalize, reduce, normalize, and so on.
Yes, you have heard it right, Audacity increase volume, but the primary question is how? But don’t worry, you will get the answer after reading the article. This article will explain how you can increase or decrease the volume of a whole and a specific segment of the audio file. Let’s get started.
In this article
01 How to Increase or Decrease Volume Without Distortion and Clipping in Audacity
02 How to Increase Volume of Multiple Files in Audacity?
03 How to Increase Volume in Certain Parts of Track?
04 What’s the Difference between Normalize and Amplify?
Part 1: How to Increase or Decrease Volume Without Distortion and Clipping in Audacity
Audio clipping occurs when the audio input becomes too loud for an amplifier to produce, and the surplus signal creates distortion. When editing, you cannot add additional volume to your audio clip forever because this would result in clipping. In this case, you can use the Audacity application to emphasize your material by turning the volume up or down without distortion and clipping on a track or recording.
Learn how Audacity increase volume without distortion by following the procedure described below:
Step 1: First, download and install the Audacity software on your computer.
Step 2: Select the File from the menu above and click Open to open the audio file.

Step 3: Choose the audio track, go to the Effect menu and pick the Amplify option from the drop-down menu.

Note: You can increase or decrease the volume by double-clicking the track and using the slider under the Gain title.
Step 4: Increase or decrease the volume by sliding the slider or typing the amplification value in the text box next to it in the Amplify window as needed.

Note: Ensure that the Allow Clipping checkbox remains unchecked to avoid clipping. Moreover, keep in mind that increasing the volume to a greater extent can result in distortion.
Related: How to Change Audio Volume in Filmora
Part 2: How to Increase Volume of Multiple Files in Audacity?
Audacity is an open-source audio editing tool. It is used for various purposes, like audio recording, music creation, and audio file editing. It also allows you to increase and decrease the volume of audio files.
You may also apply the modifications to multiple files at once, rather than one at a time. Check out the instructions below to learn how to change the volume of multiple audio files:
Step 1: Select the Import option from the File menu, and then pick the Audio option. Browse to your audio files, choose all of them, and then click the Open option.

Step 2: To select all the files, press Ctrl + A, click on the Effect option in the menu bar and pick Amplify.

Step 3: Now, either enter the value in the text box next to the Amplification Decibels tab or use the slider under it. To verify the operation of increasing the volume, check the allow clipping checkbox. When you’re through with the options, click the Ok button.

Step 4: Amplification will be applied to all the tracks. Go to the File option from the above menu to export the files and then select the Export option.

If you’re running Audacity on macOS computer, you can watch the video tutorial below to apply effects to multiple files.
Part 3: How to Increase Volume in Certain Parts of Track?
The audacity software also allows you to alter a specific section of an audio file. The selection tool can assist in locating a particular area of the track. After you’ve chosen a section of the audio file, you may utilize the amplification effect to increase its loudness. Check out the instructions below to learn how you can achieve it:
Step 1: Launch the Audacity software on the computer. To open the audio file, go to the File menu and select Open. You may also open the file by dragging it.
Step 2: Ensure that the Selection tool is active now. Click and hold the mouse left-click to move from one spot on the track to another.

Step 3: After picking the part, go to the Effect option from the menu and select Amplify.

Step 4: Now, for that specific region, modify the amplification and click OK. This will only change the volume for the area you have selected.

Part 4: What’s the Difference between Normalize and Amplify?
Amplify and Normalize are two essential features of the Audacity tool. Many people think they are the same thing, they are right up to some extent, but there exists a big difference between both the features. Before discussing the differences, you need to know what the terms Normalize and Amplify imply.
Amplify
It is the quickest approach to comprehend the effect’s name if you want to know precisely what impacts are. The frequency of the vibration is enhanced to increase the amplification effect. As previously said, it raises a tiny sound.
Furthermore, because this amplification is extended to all frequencies and amplitude, the noise increases. If you choose ten sources and magnify them by ten decibels, each source will be ten decibels louder than your present sound.

Normalize
The meaning of normalizing is standardized, which is also a feature of its name. Whenever you pick an audio input and use the normalize feature, the level is adjusted automatically according to the previously indicated average volume size in Oda City.
As a result, when one sound source is normalized, there is no discernible difference between it and the amplification mechanism. Still, the effect is evident when several sound sources are performed concurrently.
By pressing Ctrl + A and selecting all ten various audio sources, you may compute the required standard of every sound source, enhance the audio input that is smaller than the normal, and create the audio signal more significant than the standard. Shrink the size of each noise source, such as the name, and normalize the sound.

Related: Best Audio Normalizers for Windows
Differences
To differentiate the meaning and impact precisely, amplification means increasing or reducing the sound, whereas normalizing means equalizing the sound. Simply defined, if you magnify ten sources by ten decibels, each of the shorter and louder noises equals ten decibels in their actual loudness.
When the ten sources are normalized, the louder sounds grow louder, conforming to the standard sound source size. Because the amplifying is done regardless, the little noises are going insane during this procedure.
Conclusion
All in all, Audacity does an excellent job at audio editing. If you simply need to modify an audio file, Audacity is a great option. For increasing and decreasing the volume of single and multiple audio files, Audacity is still one of the best bets in the market. We hope that now know how Audacity increase volume of the audio files after reading this article.
02 How to Increase Volume of Multiple Files in Audacity?
03 How to Increase Volume in Certain Parts of Track?
04 What’s the Difference between Normalize and Amplify?
Part 1: How to Increase or Decrease Volume Without Distortion and Clipping in Audacity
Audio clipping occurs when the audio input becomes too loud for an amplifier to produce, and the surplus signal creates distortion. When editing, you cannot add additional volume to your audio clip forever because this would result in clipping. In this case, you can use the Audacity application to emphasize your material by turning the volume up or down without distortion and clipping on a track or recording.
Learn how Audacity increase volume without distortion by following the procedure described below:
Step 1: First, download and install the Audacity software on your computer.
Step 2: Select the File from the menu above and click Open to open the audio file.
Step 3: Choose the audio track, go to the Effect menu and pick the Amplify option from the drop-down menu.
Note: You can increase or decrease the volume by double-clicking the track and using the slider under the Gain title.
Step 4: Increase or decrease the volume by sliding the slider or typing the amplification value in the text box next to it in the Amplify window as needed.
Note: Ensure that the Allow Clipping checkbox remains unchecked to avoid clipping. Moreover, keep in mind that increasing the volume to a greater extent can result in distortion.
Related: How to Change Audio Volume in Filmora
Part 2: How to Increase Volume of Multiple Files in Audacity?
Audacity is an open-source audio editing tool. It is used for various purposes, like audio recording, music creation, and audio file editing. It also allows you to increase and decrease the volume of audio files.
You may also apply the modifications to multiple files at once, rather than one at a time. Check out the instructions below to learn how to change the volume of multiple audio files:
Step 1: Select the Import option from the File menu, and then pick the Audio option. Browse to your audio files, choose all of them, and then click the Open option.
Step 2: To select all the files, press Ctrl + A, click on the Effect option in the menu bar and pick Amplify.
Step 3: Now, either enter the value in the text box next to the Amplification Decibels tab or use the slider under it. To verify the operation of increasing the volume, check the allow clipping checkbox. When you’re through with the options, click the Ok button.
Step 4: Amplification will be applied to all the tracks. Go to the File option from the above menu to export the files and then select the Export option.
If you’re running Audacity on macOS computer, you can watch the video tutorial below to apply effects to multiple files.
Part 3: How to Increase Volume in Certain Parts of Track?
The audacity software also allows you to alter a specific section of an audio file. The selection tool can assist in locating a particular area of the track. After you’ve chosen a section of the audio file, you may utilize the amplification effect to increase its loudness. Check out the instructions below to learn how you can achieve it:
Step 1: Launch the Audacity software on the computer. To open the audio file, go to the File menu and select Open. You may also open the file by dragging it.
Step 2: Ensure that the Selection tool is active now. Click and hold the mouse left-click to move from one spot on the track to another.
Step 3: After picking the part, go to the Effect option from the menu and select Amplify.
Step 4: Now, for that specific region, modify the amplification and click OK. This will only change the volume for the area you have selected.
Part 4: What’s the Difference between Normalize and Amplify?
Amplify and Normalize are two essential features of the Audacity tool. Many people think they are the same thing, they are right up to some extent, but there exists a big difference between both the features. Before discussing the differences, you need to know what the terms Normalize and Amplify imply.
Amplify
It is the quickest approach to comprehend the effect’s name if you want to know precisely what impacts are. The frequency of the vibration is enhanced to increase the amplification effect. As previously said, it raises a tiny sound.
Furthermore, because this amplification is extended to all frequencies and amplitude, the noise increases. If you choose ten sources and magnify them by ten decibels, each source will be ten decibels louder than your present sound.
Normalize
The meaning of normalizing is standardized, which is also a feature of its name. Whenever you pick an audio input and use the normalize feature, the level is adjusted automatically according to the previously indicated average volume size in Oda City.
As a result, when one sound source is normalized, there is no discernible difference between it and the amplification mechanism. Still, the effect is evident when several sound sources are performed concurrently.
By pressing Ctrl + A and selecting all ten various audio sources, you may compute the required standard of every sound source, enhance the audio input that is smaller than the normal, and create the audio signal more significant than the standard. Shrink the size of each noise source, such as the name, and normalize the sound.
Related: Best Audio Normalizers for Windows
Differences
To differentiate the meaning and impact precisely, amplification means increasing or reducing the sound, whereas normalizing means equalizing the sound. Simply defined, if you magnify ten sources by ten decibels, each of the shorter and louder noises equals ten decibels in their actual loudness.
When the ten sources are normalized, the louder sounds grow louder, conforming to the standard sound source size. Because the amplifying is done regardless, the little noises are going insane during this procedure.
Conclusion
All in all, Audacity does an excellent job at audio editing. If you simply need to modify an audio file, Audacity is a great option. For increasing and decreasing the volume of single and multiple audio files, Audacity is still one of the best bets in the market. We hope that now know how Audacity increase volume of the audio files after reading this article.
Top 5 Audio Mixers Compatible with Mac Devices
If you’ve ever considered singing, you might look for the ideal audio mixer that allows you to record, edit, and seamlessly mix audio. The suitable audio mixer for Mac enables you to create the best tracks for your audience. Even for professionals, a suitable audio mixer is essential for music producers because it helps them create good music and deliver crisp audio.
Even with quality sounds, you might find that your audio file comes with many traffic noises and unnecessary chatter. The ideal audio mixer will ensure your audio piece stands out. However, we know that finding the ideal audio mixer that’s compatible with the Mac operating system can be challenging. That’s why we’ve done the essential research for you and compiled this impressive list. So, let’s jump straight into the comprehensive list to determine the best audio mixer for you.
Audacity

We’re going to start with a veteran in the audio mixing world. Audacity has been around since 2000 and has continually updated its features to become a quality audio mixer. This explains why it is the best audio editing software out there. Audacity is free, open-source, and works across different platforms. It is also relatively simple to use by professionals and beginners; you don’t need to have any previous audio mixing experience to use this tool.
There are varying activities you can carry out on Audacity. For example, it allows you to record, edit, and add effects to your audio like distortion, reverb, echoes, and auto-tune. With Audacity, you can also digitize recordings from various media files. In addition, many keyboard shortcuts work with Audacity; using these shortcuts allows for a faster and more seamless workflow.
Using this tool, you can visualize the audio in frequencies using the spectrogram mode. It also offers professional-grade plugins to improve the mixing process. If you’d like to improve the sound quality of your file, you can choose to export in 24-bits or 32-bits. Beyond the Mac OS, Audacity also supports Linux and Windows. You should consider Audacity if you want a free editor with many audio mixing functions.
Pros
- It is intuitive and easy to use
- Offers varying plugins for easy mixing
- Keyboard shortcuts improve workflow
- Rich features to enhance overall sound quality
Cons
- Audacity tends to crash on Mac
Adobe Audition

We all know that Adobe only offers excellent software, and you can expect nothing different from Adobe Audition. This is a great audio mixer for editing and polishing your audio, making it into an impeccable sound. It allows you clean, mixes, and fine-tune your sound file by offering a smooth workflow. In addition, Adobe Audition offers a spectral display and a crucial sound panel that helps you restore audio. This tool also helps users achieve a professional-level quality even if you’re a beginner with little to no audio-mixing experience. You can also make audio remixes on this audio mixing software; you can achieve this by rearranging the different tacks to fit various durations.
The many features available on this Mac audio mixer allow you to record and convert audio files into lossless WAV files. If you’re looking to run a radio station, you can do that with Adobe Audition by downloading your audio files to the server after mixing. In addition, you can convert your audio files into MP3 format to use on varying devices if necessary. One of its excellent features is processing and analyzing various audio files.
Adobe Audition also offers users diagnostic tools like DeHummer, DeClipper, diagnostic panel, and audio reduction to determine and fix issues on audio files. It is made for different purposes, as you can always count on this tool to provide you with crisp, quality sounds. In addition, you can visualize the edits on your audio file on this software in real-time.
Pros
- Offers varying mixing and editing features
- Users can import and export audio files in various formats
- It comes with a spectral display for restoring audio files
- Features diagnostic tools for fixing audio file issues
- Interactive and easy-to-use interface
Cons
- Limited free version
WavePad

Another impressive audio mixer with basic and advanced features that you should explore is WavePad. This software is excellent for audio editing, recordings, and music productions. The best part is that it supports the major audio formats and allows users to trim, cut, split, copy, equalize, and amplify audio tracks within a few seconds. WavePad also offers you several options to minimize noise and access advanced tools like TFFT, FFT, and spectral analysis that help you understand video frequencies better.
This audio mixer is excellent for streaming and offers voice-over features. The developers continually update WavePad, and if you have issues, the customer support options on the website allow you to get help immediately. If you like to edit lots of soundtracks and would like to save them as you edit, then you would enjoy the batch processing feature. This feature is ideal for busy producers who want to mix their audio quickly. This versatile tool isn’t just compatible with Mac and works on Chromebook, Windows, Android, and iOS devices.
Pros
- Allows batch processing
- Allows you to amplify and equalize sounds
- It comes with an intuitive user interface
- Excellent customer support options
Cons
- The free version is limited
TwistedWave

Another audio mixer for Mac that allows you to record, mix, master, convert and batch-process your audio is TwistedWave. This tool is an all-in-one solution for everything audio-related. The best part is that it comes with an intuitive interface that’s easy for anyone to use. TwistedWave works with Mac OS alone and is available at a premium price. If you want to master audio with inbuilt effects and make quick, effective edits to audio files, this is the tool for you. In addition, a responsive interface can process large audio files in the background.
Its vast features allow for the seamless mixing and editing of audio files. It features a smart silence detector that detects silences, removes them, and exports the remaining audio as individual files. The batch processor also comes with effects like AU and VST plugins. If you’re uncomfortable with the effects, you can create your effect stacks and then utilize them with just a click. TwistedWave isn’t a basic editor as it has advanced features like pitch shifting, professional time stretching, and multichannel editing. This audio mixing tool also supports up to 32-bit audio and is great if you want a professional and crisp audio output.
Pros
- It easily detects silence points for easy splitting
- Corrects pitch and speeds it up seamlessly
- You can work on present audio tracks while loading large files in the background
- You can create your custom audio stack
- Offers professional-grade plugins
Cons
- No free version
- It can be difficult for beginners to use
Logic Pro

Apple’s Logic Pro is an excellent audio mixer that you can utilize to carry out some professional editing and audio-producing activities. This audio mixer has impressive features like Sampler, Step Sequencer, Quick Sampler, and many more. These features help you build melodic patterns and drum beats. You can also use them to transform various sounds into instruments within a few seconds. So if your goal is to improve your music, Logic Pro makes it relatively easy.
You can also create new music using this tool and, in the process, play different music arrangements on a cell grid and identify the best sounds for you. You can also add the sounds to your timeline before you get started. With Logic Pro, you can add DJ-style effects to your audio file. You can also play any instrument and record clean and high-quality audio to add to your existing file. Logic Pro also allows you to add new music to your track without disturbing its tempo; you can also correct pitch with this tool.
Another tool from Logic Pro is the mountable sound card which allows up to 24-track recording. It also features unique digital effects. Some features it comes with include delay, chorus, ping-pong delay, reverb, and many more. Logic Pro supports several popular audio formats and also allows multi-tracking editing. There’s also a library of royalty-free songs you can explore with this tool.
Pros
- It helps you identify the best sounds
- Users can implement DJ-style effects on audio files
- It offers many impressive features
- Impressive recording features
Cons
- Too complex for beginners
Alternative Option: Wondershare Filmora
Wondershare Filmora is the best software to carry out different audio mixing activating. You can easily edit your audio to ensure a clean and crisp audio output. In addition, this tool offers excellent features like silence detection and auto-beat sync. Beyond this, it offers features like an auto montage maker, which evaluates your audio file and informs you of its best points. It is also useful for adding soundtracks to video files when necessary.
Free Download For Win 7 or later(64-bit)
Free Download For macOS 10.14 or later
Wondershare Filmora allows you efficiently adjust pitch and speed. You can also minimize or increase the volume of your sound file or add sound fading in and out features to your audio file. The best part about this tool is that you can share the mix on social media after mixing and editing audio files. The steps to mix audio files using Wondershare Filmora are easy; check them out below.
Step1Download Wondershare Filmora from the official website and install it on your device following the installation guide.
Step2Launch the audio mixing software and choose ‘create new project’ on the homepage.

Step3Import media files by clicking on ‘import media files’ on the media menu.

Step4Choose the audio file you want to mix and click the ‘import media’ option. Alternatively, you can choose to drag and drop the audio file to the software’s timeline.
Step5Start editing your media file by clicking the ‘audio mixer’ option. It will provide various tools to mix and edit your audio file.

Step6click the master icon to decrease or increase audio volume. Once you’re done, hit the ‘OK’ button.

Step7After mixing, hit the ‘export’ button and choose the location you want to save your edited file. You can also choose to share directly on social media platforms.

Final Thoughts
Audio mixing and editing are sometimes essential to creating an excellent music track. However, finding an audio mixer for Mac can be difficult; we reviewed the 5 best audio mixers for Mac to provide you with options. With this list of best Mac audio mixers, you can transform your audio files into professional quality.
Adobe Audition
We all know that Adobe only offers excellent software, and you can expect nothing different from Adobe Audition. This is a great audio mixer for editing and polishing your audio, making it into an impeccable sound. It allows you clean, mixes, and fine-tune your sound file by offering a smooth workflow. In addition, Adobe Audition offers a spectral display and a crucial sound panel that helps you restore audio. This tool also helps users achieve a professional-level quality even if you’re a beginner with little to no audio-mixing experience. You can also make audio remixes on this audio mixing software; you can achieve this by rearranging the different tacks to fit various durations.
The many features available on this Mac audio mixer allow you to record and convert audio files into lossless WAV files. If you’re looking to run a radio station, you can do that with Adobe Audition by downloading your audio files to the server after mixing. In addition, you can convert your audio files into MP3 format to use on varying devices if necessary. One of its excellent features is processing and analyzing various audio files.
Adobe Audition also offers users diagnostic tools like DeHummer, DeClipper, diagnostic panel, and audio reduction to determine and fix issues on audio files. It is made for different purposes, as you can always count on this tool to provide you with crisp, quality sounds. In addition, you can visualize the edits on your audio file on this software in real-time.
Pros
- Offers varying mixing and editing features
- Users can import and export audio files in various formats
- It comes with a spectral display for restoring audio files
- Features diagnostic tools for fixing audio file issues
- Interactive and easy-to-use interface
Cons
- Limited free version
WavePad
Another impressive audio mixer with basic and advanced features that you should explore is WavePad. This software is excellent for audio editing, recordings, and music productions. The best part is that it supports the major audio formats and allows users to trim, cut, split, copy, equalize, and amplify audio tracks within a few seconds. WavePad also offers you several options to minimize noise and access advanced tools like TFFT, FFT, and spectral analysis that help you understand video frequencies better.
This audio mixer is excellent for streaming and offers voice-over features. The developers continually update WavePad, and if you have issues, the customer support options on the website allow you to get help immediately. If you like to edit lots of soundtracks and would like to save them as you edit, then you would enjoy the batch processing feature. This feature is ideal for busy producers who want to mix their audio quickly. This versatile tool isn’t just compatible with Mac and works on Chromebook, Windows, Android, and iOS devices.
Pros
- Allows batch processing
- Allows you to amplify and equalize sounds
- It comes with an intuitive user interface
- Excellent customer support options
Cons
- The free version is limited
TwistedWave
Another audio mixer for Mac that allows you to record, mix, master, convert and batch-process your audio is TwistedWave. This tool is an all-in-one solution for everything audio-related. The best part is that it comes with an intuitive interface that’s easy for anyone to use. TwistedWave works with Mac OS alone and is available at a premium price. If you want to master audio with inbuilt effects and make quick, effective edits to audio files, this is the tool for you. In addition, a responsive interface can process large audio files in the background.
Its vast features allow for the seamless mixing and editing of audio files. It features a smart silence detector that detects silences, removes them, and exports the remaining audio as individual files. The batch processor also comes with effects like AU and VST plugins. If you’re uncomfortable with the effects, you can create your effect stacks and then utilize them with just a click. TwistedWave isn’t a basic editor as it has advanced features like pitch shifting, professional time stretching, and multichannel editing. This audio mixing tool also supports up to 32-bit audio and is great if you want a professional and crisp audio output.
Pros
- It easily detects silence points for easy splitting
- Corrects pitch and speeds it up seamlessly
- You can work on present audio tracks while loading large files in the background
- You can create your custom audio stack
- Offers professional-grade plugins
Cons
- No free version
- It can be difficult for beginners to use
Logic Pro
Apple’s Logic Pro is an excellent audio mixer that you can utilize to carry out some professional editing and audio-producing activities. This audio mixer has impressive features like Sampler, Step Sequencer, Quick Sampler, and many more. These features help you build melodic patterns and drum beats. You can also use them to transform various sounds into instruments within a few seconds. So if your goal is to improve your music, Logic Pro makes it relatively easy.
You can also create new music using this tool and, in the process, play different music arrangements on a cell grid and identify the best sounds for you. You can also add the sounds to your timeline before you get started. With Logic Pro, you can add DJ-style effects to your audio file. You can also play any instrument and record clean and high-quality audio to add to your existing file. Logic Pro also allows you to add new music to your track without disturbing its tempo; you can also correct pitch with this tool.
Another tool from Logic Pro is the mountable sound card which allows up to 24-track recording. It also features unique digital effects. Some features it comes with include delay, chorus, ping-pong delay, reverb, and many more. Logic Pro supports several popular audio formats and also allows multi-tracking editing. There’s also a library of royalty-free songs you can explore with this tool.
Pros
- It helps you identify the best sounds
- Users can implement DJ-style effects on audio files
- It offers many impressive features
- Impressive recording features
Cons
- Too complex for beginners
Alternative Option: Wondershare Filmora
Wondershare Filmora is the best software to carry out different audio mixing activating. You can easily edit your audio to ensure a clean and crisp audio output. In addition, this tool offers excellent features like silence detection and auto-beat sync. Beyond this, it offers features like an auto montage maker, which evaluates your audio file and informs you of its best points. It is also useful for adding soundtracks to video files when necessary.
Free Download For Win 7 or later(64-bit)
Free Download For macOS 10.14 or later
Wondershare Filmora allows you efficiently adjust pitch and speed. You can also minimize or increase the volume of your sound file or add sound fading in and out features to your audio file. The best part about this tool is that you can share the mix on social media after mixing and editing audio files. The steps to mix audio files using Wondershare Filmora are easy; check them out below.
Step1Download Wondershare Filmora from the official website and install it on your device following the installation guide.
Step2Launch the audio mixing software and choose ‘create new project’ on the homepage.
Step3Import media files by clicking on ‘import media files’ on the media menu.
Step4Choose the audio file you want to mix and click the ‘import media’ option. Alternatively, you can choose to drag and drop the audio file to the software’s timeline.
Step5Start editing your media file by clicking the ‘audio mixer’ option. It will provide various tools to mix and edit your audio file.
Step6click the master icon to decrease or increase audio volume. Once you’re done, hit the ‘OK’ button.
Step7After mixing, hit the ‘export’ button and choose the location you want to save your edited file. You can also choose to share directly on social media platforms.
Final Thoughts
Audio mixing and editing are sometimes essential to creating an excellent music track. However, finding an audio mixer for Mac can be difficult; we reviewed the 5 best audio mixers for Mac to provide you with options. With this list of best Mac audio mixers, you can transform your audio files into professional quality.
Also read:
- Updated Add Background Tracks to DaVinci Resolve Selections
- In 2024, Top 3 Audio Amplifiers Boost Your Videos and Streams to Perfection
- 2024 Approved Essential Tips for Free Voice and Audio Recording in Audacity on Computers
- New In 2024, Four Essential Steps for Streamlined Sound Standardization
- 2024 Approved Effortless Audio Conversion Leading Free Apps for Textualizing Voice Input on Smartphones & Tablets
- Updated In 2024, Mastering the Art of Audio Replacement A Comprehensive Guide to Video Dubbing with Wondershare Filmora
- Updated AudioArchitect Pro The Definitive Guide to Organizing Your MP3s, Windows & Mac Edition 2024
- New Exploring Advanced Methods to Distill Sound From Visual Clips Innovations
- The Important Aspects of Leveraging YouTubes Sound Selection
- 2024 Approved Where to Find Premium DJ Audios Online
- Top 10 Premium Audio Editors for PCs and Macs Beyond Audacity for 2024
- Updated The Ultimate Starters Manual Implementing VoiceChanger on iPhone for 2024
- Updated 2024 Approved Audiobook Authoring Made Accessible Your Ultimate Guide to Production in the Year 2023
- New In 2024, Discover the 5 Premier Voice Recording Gadgets Optimized for MP3 Files
- In 2024, Excellence in Audio Tweaking – Top 10 Song Editors for Windows/Mac Platforms
- New Discovering the Premier Voice Transformation Software
- Top 8 Android Tools for Professional Music Production
- Updated In 2024, Unveiling the Finest A List of 8 Excellent Web-Based, No-Cost Recording Tools
- New In 2024, Decoding Jazz Basics Insights Into Lesser-Known Aspects
- In 2024, From Frame by Frame to Note by Note The Free Methods Set for Converting Videos to Audio .
- New In 2024, The Ultimate Mac User Manual Efficient Techniques for Storing Ambient Sounds
- New The Intricacies of Clubhouse Explored An Insiders Guide to Its Core Principles and Operations
- New The Art of Auditory Transformation Replacing Audio in Videos Step by Step for 2024
- New Step-by-Step Guide Saving Desktop Noises via Audacity
- Updated 2024 Approved Unlocking the Power of Google Voice with Effective Call Recording Techniques
- How to Bypass FRP from Infinix Smart 8 Pro?
- How to Fix Android App Not Installed Error on Tecno Spark 10 4G Quickly? | Dr.fone
- New Free to Create The Best Video Editors for Any Project for 2024
- Updated In 2024, TikTok Screen Real Estate Optimizing Aspect Ratio
- Updated In 2024, Here We Will Introduce some Text Motion Tracking Software (Free & Paid) Tools that Allow You to Pin Text to Video with Minimum Effort
- Updated 2024 Easy Steps to Translate Video on Twitter
- New Image Proportion Perfection A Detailed Tutorial on Calculating Ratios for 2024
- In 2024, Locked Out of iPhone XS Max? 5 Ways to get into a Locked iPhone XS Max | Dr.fone
- Top 7 Skype Hacker to Hack Any Skype Account On your Realme C53 | Dr.fone
- In 2024, Ultimate Guide from iPhone 12 iCloud Activation Lock Bypass
- How to Retrieve Deleted Calendar Events iPhone SE? | Stellar
- Title: Updated In 2024, Best Voice Recording Apps for Android Free Options Included
- Author: Kate
- Created at : 2024-05-05 07:47:09
- Updated at : 2024-05-06 07:47:09
- Link: https://audio-editing.techidaily.com/updated-in-2024-best-voice-recording-apps-for-android-free-options-included/
- License: This work is licensed under CC BY-NC-SA 4.0.
