

Updated In 2024, 8 Must-Have Cartoon Audio Elements You Can Access Now 2023 Releases
8 Must-Have Cartoon Audio Elements You Can Access Now [2023 Releases]
8 Best Cartoon Sound Effects You Can Download

Benjamin Arango
Mar 27, 2024• Proven solutions
The sound plays a significant role in the videos. Without the right sound effects, your videos become dull. It doesn’t create an impact to grab the attention of the viewers. Especially when it comes to attracting the attention of kids while they watch cartoons.
Are you working on a cartoon video for kids or some animated action cartoons? Use the cartoon sound effects to add more intensity and emotions to the videos. Every time creating a new sound effect for your cartoon video becomes difficult.
If you are on a strict budget, producing new content becomes almost impossible. In such situations, free cartoon sound effects are the best way to enhance your cartoon videos.
In this article, you will learn eight best cartoon sound effects that you can download and make your videos perfect.
8 Best Cartoon Sound Effects Resources
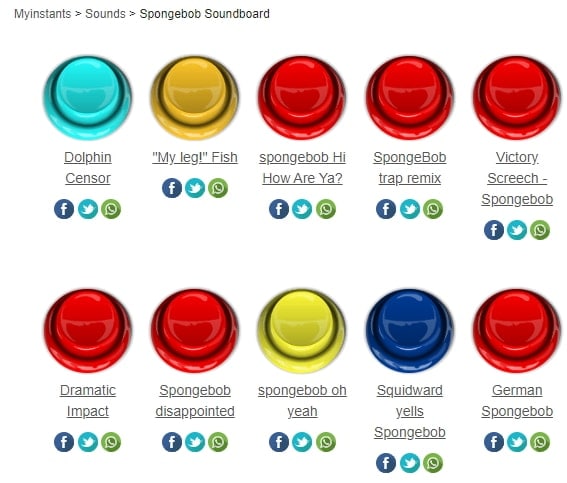
1. Spongebob Sound Effects
MyInstant’s Spongebob soundboard offers a range of cartoon sound effects that can be easily downloaded just by clicking on the Download mp3 sound effect button. You can listen to over 120 classic cartoon sound effects and download it for free. You can also copy the embed link and paste it to your website.
2. Hanna Barbera Sound Effects
From Sounddogs, Hanna Barbera sound effects library, you can find over 2200 cartoon sound effects that are divided into 4 CDs. It has almost all the legendary classic cartoon sound effects from the cartoon shows like Yogi Bear, Huckleberry Hound, the Flintstones, The Jetsons, Quick Draw McGraw, and all the rest of the gang.
You can download the mp3 cartoon sound effects completely free by clicking on the Download ID number mentioned at the right end of each link.
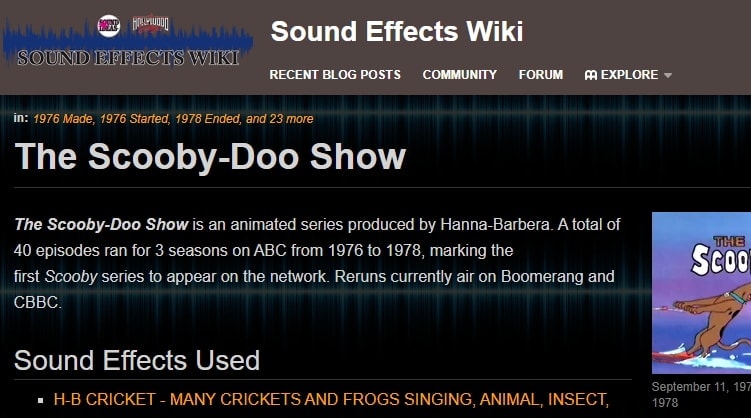
3. Scooby Doo Running Sound
Fandom’s Scooby Doo running sound effects offers all the ideas used in 40 episodes of Scooby Doo throughout the three seasons on ABC. It is over 37000 pages wiki that you can click and browse through the pages to find the right sound effect and download it for free.
4. Tom and Jerry Sound Effects
Pond5 offers 13 Tom and Jerry sound effects that you can listen by scrolling the cursor over the boxes and download the free preview of cartoon sound effects by clicking on Download Preview.
If you want to download the entire cartoon sound effect, you need to register, log in, and pay for it. There are filters like price, collections, duration, etc. to make your selection more precise.
5. Free SFX
In FreeSFX website, you can find a range of comical cartoon sound effects that includes classic effects like descend, boink, impact, pop, musical, running, rip and snap, bounce spring, slide whistle, squelch and splat, horn and loads more.
You need to log in to the website to download free cartoon sound effects.

6.GRSites
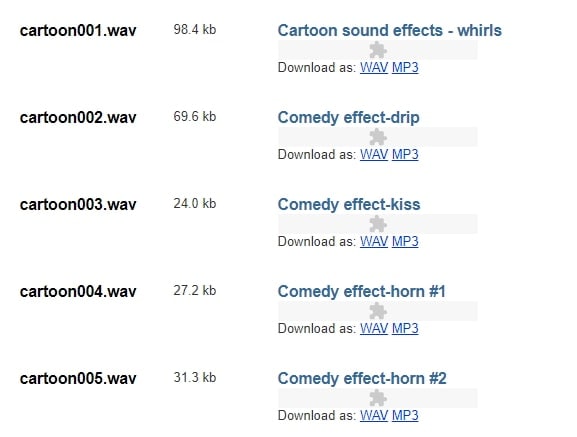
With over 1980 cartoon sound effects, the GRSites is one of the best free sites for downloading both mp3 and WAV files. You can browse from a range of categories to find the best cartoon sound effects for your videos.
7. Cartoon Running Sound Effect
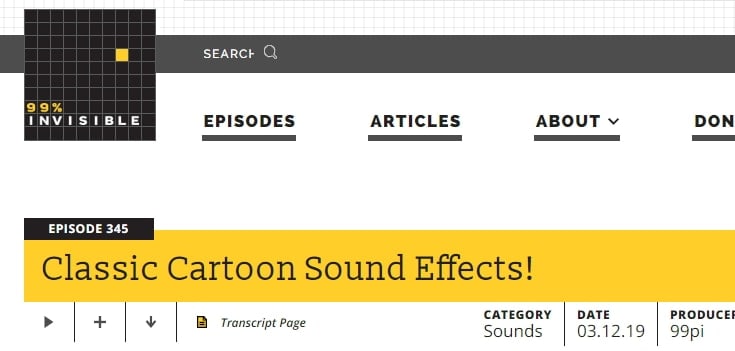
If you are looking for cartoon running sound effect, turn to Episode 345 in 99PercentInvisible. You can download the complete transcript page of around 30 minutes to use it in your video. Use the cartoon running sound effect produced by 99pi to enhance your video.
8. Big Fish Audio
The Big Fish Audio’s cartoon sound FX includes 23 free classic cartoon sound effects. The filters include a range of sound FX types, styles, format, brand, etc.
You can click on the cartoon sound effect and listen to it or add it to your playlist. But, if you wish to download the free cartoon sound effects, you need to register and pay to use the sound effect.

You may also like: How to Extract Audio from Videos on Win/Mac/Phone >>
Conclusion
Make your cartoon videos perfect with the fantastic free cartoon sound effects available for download completely free. With the range of free cartoon sound effects, you don’t need to worry about creating new sounds or expenses. You need to download the free sounds and beautifully enhance it with your creativity. There are several other sites for downloading free cartoon sound effects, but here you can check out some of the trusted ones to use.
Benjamin Arango
Benjamin Arango is a writer and a lover of all things video.
Follow @Benjamin Arango
Benjamin Arango
Mar 27, 2024• Proven solutions
The sound plays a significant role in the videos. Without the right sound effects, your videos become dull. It doesn’t create an impact to grab the attention of the viewers. Especially when it comes to attracting the attention of kids while they watch cartoons.
Are you working on a cartoon video for kids or some animated action cartoons? Use the cartoon sound effects to add more intensity and emotions to the videos. Every time creating a new sound effect for your cartoon video becomes difficult.
If you are on a strict budget, producing new content becomes almost impossible. In such situations, free cartoon sound effects are the best way to enhance your cartoon videos.
In this article, you will learn eight best cartoon sound effects that you can download and make your videos perfect.
8 Best Cartoon Sound Effects Resources
1. Spongebob Sound Effects
MyInstant’s Spongebob soundboard offers a range of cartoon sound effects that can be easily downloaded just by clicking on the Download mp3 sound effect button. You can listen to over 120 classic cartoon sound effects and download it for free. You can also copy the embed link and paste it to your website.
2. Hanna Barbera Sound Effects
From Sounddogs, Hanna Barbera sound effects library, you can find over 2200 cartoon sound effects that are divided into 4 CDs. It has almost all the legendary classic cartoon sound effects from the cartoon shows like Yogi Bear, Huckleberry Hound, the Flintstones, The Jetsons, Quick Draw McGraw, and all the rest of the gang.
You can download the mp3 cartoon sound effects completely free by clicking on the Download ID number mentioned at the right end of each link.
3. Scooby Doo Running Sound
Fandom’s Scooby Doo running sound effects offers all the ideas used in 40 episodes of Scooby Doo throughout the three seasons on ABC. It is over 37000 pages wiki that you can click and browse through the pages to find the right sound effect and download it for free.
4. Tom and Jerry Sound Effects
Pond5 offers 13 Tom and Jerry sound effects that you can listen by scrolling the cursor over the boxes and download the free preview of cartoon sound effects by clicking on Download Preview.
If you want to download the entire cartoon sound effect, you need to register, log in, and pay for it. There are filters like price, collections, duration, etc. to make your selection more precise.
5. Free SFX
In FreeSFX website, you can find a range of comical cartoon sound effects that includes classic effects like descend, boink, impact, pop, musical, running, rip and snap, bounce spring, slide whistle, squelch and splat, horn and loads more.
You need to log in to the website to download free cartoon sound effects.
6.GRSites
With over 1980 cartoon sound effects, the GRSites is one of the best free sites for downloading both mp3 and WAV files. You can browse from a range of categories to find the best cartoon sound effects for your videos.
7. Cartoon Running Sound Effect
If you are looking for cartoon running sound effect, turn to Episode 345 in 99PercentInvisible. You can download the complete transcript page of around 30 minutes to use it in your video. Use the cartoon running sound effect produced by 99pi to enhance your video.
8. Big Fish Audio
The Big Fish Audio’s cartoon sound FX includes 23 free classic cartoon sound effects. The filters include a range of sound FX types, styles, format, brand, etc.
You can click on the cartoon sound effect and listen to it or add it to your playlist. But, if you wish to download the free cartoon sound effects, you need to register and pay to use the sound effect.
You may also like: How to Extract Audio from Videos on Win/Mac/Phone >>
Conclusion
Make your cartoon videos perfect with the fantastic free cartoon sound effects available for download completely free. With the range of free cartoon sound effects, you don’t need to worry about creating new sounds or expenses. You need to download the free sounds and beautifully enhance it with your creativity. There are several other sites for downloading free cartoon sound effects, but here you can check out some of the trusted ones to use.
Benjamin Arango
Benjamin Arango is a writer and a lover of all things video.
Follow @Benjamin Arango
“Audacity on Chromebooks: A Comprehensive Guide to Getting It Running or Taking It Off”
Audacity has emerged as one of the greatest free audio editing tools for Mac, Linux, & Windows operating systems. With a wide range of capabilities and quality attributes, it is a basic and straightforward audio editing application. While Audacity for Chromebook and Chrome OS isn’t supported, does it imply you won’t be utilizing them in the future? Not at all.
A few simple steps are all that is needed to have Audacity for Chromebook installed on your Chromebook. First, let’s have a look at some of the features this device has to offer.
Features of Audacity for Chromebook
Audacity offers a wide range of editing features right inside its user-friendly interface, and it won’t hold back when it comes to personalization even if it costs nothing. Because it has built-in dithering and is superbly compatible with 32-bit/384kHz audio, it’s difficult to ignore this really effective open-source utility. Importing & mixing audio files is a breeze using Audacity, allowing you to combine stereo, mono, and even multitrack recordings. However, it’s worth noting that there are now just a few possibilities for the latter.
In addition, Audacity for Chromebook has low system requirements, to the point where it works even if your PC is able to power on. Using this editing program, you may mix and match multiple audio formats and sample rates to create a single, cohesive piece of work. In addition, when it comes to editing, you’ll enjoy the unparalleled ease of cutting, copying, and pasting, trimming to the sample level, duplicating, and even adding bespoke fades with the discretely introduced envelope tool.
Audacity seems to have all of the essential impacts. Whether you’re looking for preset EQ curves like those found on a telephone or an AM radio, or Bass and Treble improvements, this versatile program has you covered. With the Auto-Duck tool, you may add a voiceover and other essential features to a podcast, such as a compressor, limiter reverb, and phaser reverb. It’s an excellent choice if you don’t have a lot of extra requirements. Even if you don’t use it often, Audacity will be the last piece of editing software you ever buy.
Installing Audacity for Chromebook
Apps for Chromebooks are often downloaded through the Google Play Store approach. However, sinceAudacity for Chromebook does not support our low-power systems, we must go the other route. To put it another way, you’ll have to use Linux to get Audacity.
Linux is pre-installed on most Chromebooks, however, it is still in Beta. Go to the Settings menu and choose Enable from the drop-down menu to use this feature. Please go here for further information on how to enable Linux on your Chromebook. If your device has this wonderful function, you may follow the instructions below to properly install Audacity for Chromebook.
- Open the Linux Terminal in the Launcher.

This is what you’ll see when you click on the Terminal.
- To begin installing Audacity, enter the following command in the Terminal window that has already opened.

- If you’ve done everything correctly up to this point, you’ll be able to enjoy the full benefits of the Linux operating system. What follows instead is a bewildering cacophony of bluster.

- It seems that Linux is questioning whether or not you wish to proceed. To respond, use the “y” key on your keyboard.

This screenshot shows how the installation process is progressing.
- Finally, you’ll notice the green-colored text at the finish of the orders. Your program has been successfully installed, as shown by this message.

- It’s only a matter of selecting Audacity from the Launcher.

How to Uninstall Audacity
Just like installing it, Audacity can be uninstalled with a few clicks. For this, execute the command below in the Linux Terminal (and you can copy & paste it).
sudo apt remove audacity
When this is done on Linux, you’ll be asked whether you want to proceed with the uninstalling procedure or not. If you hit “y” the same way as previously, Audacity will be removed from your Chromebook in a matter of seconds.
A screenshot of Audacity in operation is here.

While recording your podcast using the built-in microphone on your Chromebook is a great way to start, it’s not the only way to fine-tune the final product. You must drag the track and sound to the center of the screen in order to begin the magic with this program. Once you’ve done this, you’ll be offered a variety of alternatives to get the editing process started.
Using Audacity for multitrack recording & editing is doable, but it’s best to use non-linear tools if primary focus is on that element. Apart from that, Audacity is widely regarded as one of the best audio editors on the market.
Conclusion
Your Chromebook may be able to run a variety of audio recording applications. As with Audacity, you won’t be limited in your ability to produce high-quality music with a wide range of unique effects. We also go through Filmora’s voice effects & how users may use them to change and improve their voices. Filmora allows you to re-voice video/audio & previously recorded voiceovers. For video/audio & voiceover files, the Pitch option on the Timeline may be used. Change the tone of a video and recording to make it sound different. You can quickly alter the voices in the videos using Filmora. Your viral should be accompanied by a story or a video. Using the Changing Pitch option, you may change the pitch of your voice. You may modify the pace of the video to change your voice (Optional). Make a duplicate of the video or audio that has been altered.
For Win 7 or later (64-bit)
For macOS 10.12 or later
This is what you’ll see when you click on the Terminal.
- To begin installing Audacity, enter the following command in the Terminal window that has already opened.
- If you’ve done everything correctly up to this point, you’ll be able to enjoy the full benefits of the Linux operating system. What follows instead is a bewildering cacophony of bluster.
- It seems that Linux is questioning whether or not you wish to proceed. To respond, use the “y” key on your keyboard.
This screenshot shows how the installation process is progressing.
- Finally, you’ll notice the green-colored text at the finish of the orders. Your program has been successfully installed, as shown by this message.
- It’s only a matter of selecting Audacity from the Launcher.
How to Uninstall Audacity
Just like installing it, Audacity can be uninstalled with a few clicks. For this, execute the command below in the Linux Terminal (and you can copy & paste it).
sudo apt remove audacity
When this is done on Linux, you’ll be asked whether you want to proceed with the uninstalling procedure or not. If you hit “y” the same way as previously, Audacity will be removed from your Chromebook in a matter of seconds.
A screenshot of Audacity in operation is here.
While recording your podcast using the built-in microphone on your Chromebook is a great way to start, it’s not the only way to fine-tune the final product. You must drag the track and sound to the center of the screen in order to begin the magic with this program. Once you’ve done this, you’ll be offered a variety of alternatives to get the editing process started.
Using Audacity for multitrack recording & editing is doable, but it’s best to use non-linear tools if primary focus is on that element. Apart from that, Audacity is widely regarded as one of the best audio editors on the market.
Conclusion
Your Chromebook may be able to run a variety of audio recording applications. As with Audacity, you won’t be limited in your ability to produce high-quality music with a wide range of unique effects. We also go through Filmora’s voice effects & how users may use them to change and improve their voices. Filmora allows you to re-voice video/audio & previously recorded voiceovers. For video/audio & voiceover files, the Pitch option on the Timeline may be used. Change the tone of a video and recording to make it sound different. You can quickly alter the voices in the videos using Filmora. Your viral should be accompanied by a story or a video. Using the Changing Pitch option, you may change the pitch of your voice. You may modify the pace of the video to change your voice (Optional). Make a duplicate of the video or audio that has been altered.
For Win 7 or later (64-bit)
For macOS 10.12 or later
Crafting Seamless Auditory Flow in Film: Utilizing the Power of Audio Ducking
What is Audio Ducking and How to Use it in Filmora: A Beginner-friendly Guide
Benjamin Arango
Mar 27, 2024• Proven solutions
If you are a content creator, you might already know the importance of having the right audio component in a video. For attaining a perfect balance between voiceovers and the background audio, the concept of “ducking” is implemented. I have come up with this post to help you know more about audio ducking and its importance. I will also include a detailed guide for implementing audio ducking on a video in a stepwise manner. Let’s begin!

- Part 1: What Is Audio Ducking?
- Part 2: When to Use Audio Ducking?
- Part 3: How to Use the Audio Ducking Feature in Filmora?
Audio Ducking: What Is It All About?
In nutshell, it is a process that “ducks” or lowers the background volume when a voiceover appears. For instance, let’s consider that we already have a background score in our video playing. When we would add a narrator’s voice or apply a voiceover, it would create a lot of confusion. Therefore, we implement the audio ducking process to lower the background audio and amplify the voiceover instead.
In most cases, it is achieved through a side-chain compression technique. A control channel is set up that enables the compression of one sound (the background) while amplifying another (the voiceover).


When Do You Need to Implement Audio Ducking?
Since the concept of audio ducking is pretty useful, it can be implemented in different ways during the video editing process. While you can apply the process to any video, here are some of the major instances where it is used.
Travel Vlogs
If you are a travel vlogger, you might already know how tough it can be to make yourself heard in a video. When there are too many background noises, your voice can be diminished. This is exactly where you can apply audio ducking to decrease the background noise and focus on your voice.
Make-up Tutorials
While creating make-up video tutorials, most of us use a background track to keep our viewers engaged. At the same time, you need to let them know about the process by speaking clearly. If you use audio ducking, then you can easily attain a perfect balance between both sounds.
Other Instances
Ideally, if you are creating any other tutorial video for your audience, then audio ducking can be useful. From making video game tutorials to coming up with video lectures on a crucial topic, the concept would come in handy time and time again.
How to Use the Audio Ducking Feature in Filmora?
To implement audio ducking in your videos, you can use a reliable editing tool like Wondershare Filmora . It is a user-friendly and powerful video editing application that lets you “duck” the background sound and easily amplify voiceovers.
- Without undergoing any complicated process, you can implement audio ducking and even scale it (from 1 to 100) to attain the right balance in your videos.
- Filmora also offers tons of powerful audio features for video editing. It has a dedicated audio mixer that would let you split, detach, split, or mute the audio.
- The application can also be used to add voiceovers to your video on its native interface. You can also use its inbuilt operations like noise remover, fade in/fade out, equalizer, etc. to make the needed changes.
- Besides audio ducking, you can also access tons of advanced editing features in Filmora like motion tracking, color grading, keyframing, and so much more.
- The application also offers a wide range of filters, presets, effects, stickers, and royalty-free music that you can easily use in your videos.
To learn how to implement audio ducking in your videos using Filmora, you can go through these basic steps:
Step 1. Import Your Videos on Filmora
To begin with, you have to install Wondershare Filmora on your computer and launch it. Now, go to the “Import” feature from the top, choose to add files, and browse and load your videos. After adding the video, you can drag it to the timeline below to start editing.

Step 2. Import An Audio or Record Voiceovers
Let’s suppose that your video already has an audio track in the background, and now you wish to add another audio component. Most of the people would like to record their voices in the video. For this, you can click on the voiceover (mic) icon at the bottom of the preview panel. This will open a dedicated window so that you can start recording your voice for the video.

Apart from that, you can also go to the “Import” feature to add any other audio component to the project. Besides that, Wondershare Filmora also has a wide range of royalty-free audio files that you can easily add to your projects.

Step 3. Apply Audio Ducking to Your Video
After adding the second audio component, you can view it under the video timeline on Filmora. Now, you need to select the audio track you wish to amplify (like your voiceover) and not the track that already has a prominent volume.

Once you have selected the audio you wish to amplify, right-click to get its context menu. Just select the “Adjust Audio” feature from all the available options.

This will launch a dedicated window on the screen with various audio options to apply. Go to the “Ducking” option here and enable the “Lower the volume of other clips” feature. You can also use a slider here to adjust how much you wish to lower the volume of other clips in the project.

That’s it! Once you have selected the value, click on the “OK” button. You can now preview the results on Filmora and check that the volume of other audio components has been ducked. You can later go to the “Export” option and save the project in the format of your choice.

After reading this post, I’m sure that you will know more about audio ducking and how we can implement it. Since many content creators encounter issues while working on their videos, audio ducking would certainly be a helpful feature. With an application like Wondershare Filmora, you can easily implement audio ducking on multiple files and further edit your videos like a pro
Benjamin Arango
Benjamin Arango is a writer and a lover of all things video.
Follow @Benjamin Arango
Benjamin Arango
Mar 27, 2024• Proven solutions
If you are a content creator, you might already know the importance of having the right audio component in a video. For attaining a perfect balance between voiceovers and the background audio, the concept of “ducking” is implemented. I have come up with this post to help you know more about audio ducking and its importance. I will also include a detailed guide for implementing audio ducking on a video in a stepwise manner. Let’s begin!
- Part 1: What Is Audio Ducking?
- Part 2: When to Use Audio Ducking?
- Part 3: How to Use the Audio Ducking Feature in Filmora?
Audio Ducking: What Is It All About?
In nutshell, it is a process that “ducks” or lowers the background volume when a voiceover appears. For instance, let’s consider that we already have a background score in our video playing. When we would add a narrator’s voice or apply a voiceover, it would create a lot of confusion. Therefore, we implement the audio ducking process to lower the background audio and amplify the voiceover instead.
In most cases, it is achieved through a side-chain compression technique. A control channel is set up that enables the compression of one sound (the background) while amplifying another (the voiceover).
When Do You Need to Implement Audio Ducking?
Since the concept of audio ducking is pretty useful, it can be implemented in different ways during the video editing process. While you can apply the process to any video, here are some of the major instances where it is used.
Travel Vlogs
If you are a travel vlogger, you might already know how tough it can be to make yourself heard in a video. When there are too many background noises, your voice can be diminished. This is exactly where you can apply audio ducking to decrease the background noise and focus on your voice.
Make-up Tutorials
While creating make-up video tutorials, most of us use a background track to keep our viewers engaged. At the same time, you need to let them know about the process by speaking clearly. If you use audio ducking, then you can easily attain a perfect balance between both sounds.
Other Instances
Ideally, if you are creating any other tutorial video for your audience, then audio ducking can be useful. From making video game tutorials to coming up with video lectures on a crucial topic, the concept would come in handy time and time again.
How to Use the Audio Ducking Feature in Filmora?
To implement audio ducking in your videos, you can use a reliable editing tool like Wondershare Filmora . It is a user-friendly and powerful video editing application that lets you “duck” the background sound and easily amplify voiceovers.
- Without undergoing any complicated process, you can implement audio ducking and even scale it (from 1 to 100) to attain the right balance in your videos.
- Filmora also offers tons of powerful audio features for video editing. It has a dedicated audio mixer that would let you split, detach, split, or mute the audio.
- The application can also be used to add voiceovers to your video on its native interface. You can also use its inbuilt operations like noise remover, fade in/fade out, equalizer, etc. to make the needed changes.
- Besides audio ducking, you can also access tons of advanced editing features in Filmora like motion tracking, color grading, keyframing, and so much more.
- The application also offers a wide range of filters, presets, effects, stickers, and royalty-free music that you can easily use in your videos.
To learn how to implement audio ducking in your videos using Filmora, you can go through these basic steps:
Step 1. Import Your Videos on Filmora
To begin with, you have to install Wondershare Filmora on your computer and launch it. Now, go to the “Import” feature from the top, choose to add files, and browse and load your videos. After adding the video, you can drag it to the timeline below to start editing.
Step 2. Import An Audio or Record Voiceovers
Let’s suppose that your video already has an audio track in the background, and now you wish to add another audio component. Most of the people would like to record their voices in the video. For this, you can click on the voiceover (mic) icon at the bottom of the preview panel. This will open a dedicated window so that you can start recording your voice for the video.
Apart from that, you can also go to the “Import” feature to add any other audio component to the project. Besides that, Wondershare Filmora also has a wide range of royalty-free audio files that you can easily add to your projects.
Step 3. Apply Audio Ducking to Your Video
After adding the second audio component, you can view it under the video timeline on Filmora. Now, you need to select the audio track you wish to amplify (like your voiceover) and not the track that already has a prominent volume.
Once you have selected the audio you wish to amplify, right-click to get its context menu. Just select the “Adjust Audio” feature from all the available options.
This will launch a dedicated window on the screen with various audio options to apply. Go to the “Ducking” option here and enable the “Lower the volume of other clips” feature. You can also use a slider here to adjust how much you wish to lower the volume of other clips in the project.
That’s it! Once you have selected the value, click on the “OK” button. You can now preview the results on Filmora and check that the volume of other audio components has been ducked. You can later go to the “Export” option and save the project in the format of your choice.
After reading this post, I’m sure that you will know more about audio ducking and how we can implement it. Since many content creators encounter issues while working on their videos, audio ducking would certainly be a helpful feature. With an application like Wondershare Filmora, you can easily implement audio ducking on multiple files and further edit your videos like a pro
Benjamin Arango
Benjamin Arango is a writer and a lover of all things video.
Follow @Benjamin Arango
Also read:
- Updated 10 Best Podcast Hosting Platforms
- A Curated Collection of 15 Dynamic News Music Pieces
- Updated In 2024, Talkative Movies Trimmed Down Steps for Eliminating Sound in Popular Video Types (MP4/MKV/AVI/MOV)
- New 2024 Approved How to Record & Add Voiceover to Videos
- Audiophiles Guide to MP3 Enhancement Fundamental Strategies
- New In 2024, How to Remove Audio From MOV Files on Windows/Mac
- New LipSync Lite Top Picks for Cost-Free Audio Conversion on Your Smartphone & Tablet for 2024
- New In 2024, Essential Guide to Podcast Submission Portals
- New 2024 Approved Essential Windows Audio Production Tools Selecting Top 8 DAWs with Various Pricing Models
- Aural Affordability The Complete Manual on FREE Audio Download Methods
- Updated In 2024, Tailoring Sound Techniques for Altering Audio Speed & Pitch in Adobe Rush
- The Ultimate Voice Eradication Suite Handpicking the Top 7 Tools for Online & Offline Use
- New Decoding YouTubes Comprehensive Audible Archive for 2024
- New Best Affordable Web Platforms for Equalizing Auditory Content
- Updated Essential Guide to Apowersoft Audio Capturing Techniques & 3 Substitutes for 2024
- New Step-by-Step Process for Expeditiously Converting WhatsApp Audio Recordings Into MP3
- In 2024, The Essential Path to Perfect Sound on GarageBand
- Top-Rated Mac Auto Sound Combiner
- New In 2024, How to Reverse Audio with Best Audio Reversers
- New Male Voice Modification Tools The Ultimate Female Tone List
- New 2024 Approved Clearer Soundscapes Strategies to Eradicate Unwanted Whistling Noises
- In 2024, Advanced Voice Communication Technology for Gamers Interaction
- Updated Exploring Advanced Android Audio Software The Best Non-Audacity Options
- New 2024 Approved Essential Mac Audio Tools Discovering the Top 5 Mixers
- In 2024, Prime MP3 Converters Available on Both Windows and Mac Operating Systems
- Updated Mastering Multimedia Innovative Methods for Integrating Sound Into Films
- Updated 2024 Approved Innovations and Standouts 10 Premier Podcast Hosting Providers
- New In 2024, Capture Conversations Flawlessly The 5 Most Reliable Smartphone Voice Recorders
- Updated Mastering iPhone Disabling Dynamic Volume Adjustment for 2024
- 2024 Approved Harmonizing Visuals & Sounds Displaying Audio Waves & Adding Expressive Animation in Magix Movie Edit Pro
- Updated In 2024, Vocaroo Voice Recorder Guideline and Alternatives
- Updated 2024 Approved The Ultimate List Top Free Online Video Merging Software
- 10 Free Location Spoofers to Fake GPS Location on your Vivo S17 | Dr.fone
- In 2024, What Is an AI Artist?
- How to play MOV files on Samsung ?
- How to jailbreak iCloud locked iPhone 11
- New In 2024, Some Leading AI Tools to Replace Sky Backgrounds
- In 2024, How I Transferred Messages from Vivo Y56 5G to iPhone 12/XS (Max) in Seconds | Dr.fone
- How To Transfer WhatsApp From Apple iPhone 15 Plus to other iPhone 12 Pro Max devices? | Dr.fone
- In 2024, How to Use Life360 on Windows PC For Xiaomi Redmi 12 5G? | Dr.fone
- 2024 Approved How To Make a Timelapse in After Effects
- In 2024, Art of Time Manipulation A Guide to After Effects Slow Motion Mastery
- In 2024, Top 10 Telegram Spy Tools On Vivo V30 for Parents | Dr.fone
- 2024 Approved Ways to Download Instagram MP3
- Capture the Moment Freezing Frames in Videos with Ease
- How To Stream Anything From Honor Magic5 Ultimate to Apple TV | Dr.fone
- In 2024, 3 Facts You Need to Know about Screen Mirroring Google Pixel 7a | Dr.fone
- In 2024, How to Detect and Remove Spyware on Xiaomi Redmi K70 Pro? | Dr.fone
- In 2024, How to Transfer Apps from Vivo X100 Pro to Another | Dr.fone
- In 2024, How to Use Life360 on Windows PC For Tecno Spark 10 5G? | Dr.fone
- Updated Trim, Cut, and Edit AVI Videos with Ease 16 Top-Rated Tools Windows, MAC, Android for 2024
- In 2024, Gaming Intro Creation Made Easy Top 10 Tools for Windows and Mac
- New In 2024, Get Noticed on Facebook The Importance of Proper Video Cover Sizing
- How Can I Catch the Regional Pokémon without Traveling On Apple iPhone 6 | Dr.fone
- Ultimate Guide from Xiaomi Redmi Note 13 5G FRP Bypass
- In 2024, Here Are Some Reliable Ways to Get Pokemon Go Friend Codes For Oppo K11 5G | Dr.fone
- In 2024, How To Use Special Features - Virtual Location On Honor Play 7T? | Dr.fone
- Updated In 2024, Storyboards Are Amazing Way if You Want to Present Your Story in a Visual Way, Like Explaining Any Process or Giving Any Information. It Is a Graphic Layout to Tell You a Story
- Title: Updated In 2024, 8 Must-Have Cartoon Audio Elements You Can Access Now 2023 Releases
- Author: Kate
- Created at : 2024-06-18 18:41:22
- Updated at : 2024-06-19 18:41:22
- Link: https://audio-editing.techidaily.com/updated-in-2024-8-must-have-cartoon-audio-elements-you-can-access-now-2023-releases/
- License: This work is licensed under CC BY-NC-SA 4.0.
