
:max_bytes(150000):strip_icc():format(webp)/GettyImages-14050070541-0fc96b82fdc54287bf3bbce3ba323342.jpg)
Updated 2024 Approved Precision Audio Leveling in Three Simple Steps
“Precision Audio Leveling in Three Simple Steps “
Normalizing Audio in 3 Quick Ways-Audio Normalization

Richard Bennett
Mar 27, 2024• Proven solutions
To normalize audio is to apply a constant amount of gain to a recording to bring the amplitude to a target or norm. Or simply put, normalizing any audio file with a normalizer software searches the file for a peak volume to set a defined maximum and then brings up the rest of the audio to the same maximum level.
Audio normalization is a good practice to get your audio levels right for a better-balanced video, especially imperative for dialogue clips that stand out on YouTube and other platforms. However, out of many different reasons, getting the best audio results from old-fashioned AD/DA converters or matching a group of audios on the same volume levels are still the most common.
Nevertheless, it’s not always easy to find an efficient audio normalization tool and – most importantly – to master the process. But no worries because we have you covered. So, dive in to learn some of the best tools and how you can use them to create masterfully balanced soundtracks.
- Method 1: Normalize Audio Online
- Method 2: Normalize Audio with Wondershare Filmora’s Auto Normalization
- Method 3: Normalize Audio with Audacity
Method 1: Normalize Audio Online
Video2edit online video tool is a one-stop solution for all your audio and video editing needs. The versatile online tool offers a suite of editing features, from extracting audio to converting different formats to normalizing audio. With a drag and drop interface, it allows you to enhance the audio quality of your video and share it to YouTube, Facebook, or other social platforms.
Not to mention, it lets you convert your video files to various popular formats such as MP4, AVI, MOV, 3GP, and WEBM. One of the significant advantages of the tool is the convenience. Without any download or subscription fee hassles, you can normalize audio tracks in a few clicks using Video2edit.com. Here’s how you can use the free tool to get good-quality audio results.
Step 1: Launch the Video2edit Normalize audio tool
Begin by launching the online Video2edit.com on your browser. Then, on the main interface, select the Normalize audio tool from the variety of editing tools.

Step 2: Drop or upload your file
Now, drag and drop your video or audio file or tap the Choose file option to import the file from your local device.

Step 3: Normalize audio
From the Covert video to dropdown, choose the video format you want to convert your file to. Then, click on the Start button to start normalizing your file.

Step 4: Download the converted file
Once the conversion is completed, hit Download in front of the converted file to save it to your computer.

Method 2: Normalize Audio with Wondershare Filmora’s Auto Normalization
Yet another advanced audio normalization software is the Wondershare Filmora . Whether you are looking for basic editing tools or some advanced features, Filmora has it all. The powerful editor uses artificial intelligence editing that provides a smart way to improve your audio quality. The essence of this well-known software is the Auto Normalization feature that allows users to modify the volume of multiple recording clips to standard European audio programs at 23.0 LUFS – with just ONE CLICK.
And for the best part, the normalization process is pretty straightforward and lossless with Wondershare Filmora. Below is a quick step-by-step guide to using this intuitive audio enhancer tool.


Step 1: Download and install the Wondershare Filmora
To get started, download, and install the Wondershare Filmora on your PC. Then launch the program to enter the main interface.

Step 2: Import your audio/video file
From the main menu, go to Import media, then click on Import media files and select to upload your files in the media box. Once uploaded, drag and drop the media clips onto the timeline.

Step 3: Open the audio editing panel
Next, right-click on the audio or video clip on the timeline and then tap Adjust audio, or you can simply double-click it to enter the audio editing panel.

Step 4: Enable auto audio normalization
On the audio editing panel, scroll down and enable the Auto normalization feature. Wondershare Filmora will analyze and normalize the audio file automatically.

Step 5: Export the normalized file
After the normalization process is completed, preview your video or audio to check the auto normalization. If you are not satisfied with the output, hit Reset and try again. Finally, tap on the Export option, give your file a name, and again hit Export to save the high-quality output.

Method 3: Normalize Audio with Audacity
Audacity is a popular audio editor that works wonders for professional music producers. This free, open-source platform has taken audio editing to newer levels with a wide range of advanced features; there is a spectrogram view mode for visualizing and selecting frequencies. In addition, there is extensive support for various plug-ins.
Besides audio normalization, the creative platform can record, mix, add filters, and equalize multiple soundtracks. Moreover, when normalizing with Audacity, you don’t have to worry about losing audio quality, thanks to its 16-bit, 24-bit, and 32-bit support.
To take advantage of this excellent audio normalizer, just follow these quick steps and set your audio tone.
Step 1: Open Audacity on your computer
First, download the Audacity software on your computer, and then open the program.

Step 2: Import your audio files
Go to the File tab on the top menu bar and tap on Open. Then select audio files you want to normalize to import, or simply drag and drop the files on the main screen.

Step 3: Customize audio normalization settings
Now, select the added audio clip and go to Effect on the top menu bar. From the dropdown, choose Normalize and type your desired volume level into the dB.

Step 4: Normalize audio
After editing the normalization settings, click the OK button to start normalizing.

Step 5: Save the audio file
Once finished, select Export under the File tab, and choose how you want to save the file.

FAQs about Normalizing Audio
Here we sorted out some frequently asked questions about audio normalization, which can help you learn more about audio normalization.
1. What dB should I normalize audio to?
Well, that entirely depends on your audio use, and there is no exact number for normalizing an audio clip. However, for safety, the trick is to stay from the maximum volume level of 0 dB. For overall mix levels, most video editors recommend normalizing audio between -10 dB to -20 dB. Likewise, in the case of a dialogue clip, the recommended audio levels are -12 dB to -15 dB. Still some other suggestions are
- Music: -18 dB to -22 dB
- Soundeffects: -10 dB to -20 dB
2. What is the difference between audio normalization and compression?
Audio normalization only and purely changes the volume of a sound by applying a constant amount of gain with a goal to make the loudest peak reach 0 Db. And while normalizing also matches multiple audios to the same volume, it still does not affect the sound dynamics, unlike compression.
On the flip side, audio compression chops off the audio peaks in your recording to get a fuller, louder sound without reaching the clipping limit. In compression, you are changing a proportion of the audio over time in varying amounts.
3. Will the audio normalization process affect the sound quality?
Fortunately, no. Audio normalization, when appropriately done with the help of efficient audio editors, never affects the audio quality. When normalizing an audio clip, the digital bit having the highest level below 0 dB is identified, and all the other bits of the audio are amplified to the same level. This translates to no change in the relative difference between every bit, while the noise level also does not change. So, yes, the only thing affected is the output level and not the quality of the track.
Summing up
Audio normalization is an emerging trend as a good idea to manage high-quality audio levels. This feature can indeed benefit the final steps of mastering music production. However, you need to be careful when deciding where and when to normalize audio or avoid it for better results.
So, are you ready to level up your audio game? The above-mentioned audio editing tools are top-notch normalizers that will do the work for you. Also, don’t forget to try Wondershare Filmora’s distinctive auto normalization feature to produce studio-quality audio.
Richard Bennett
Richard Bennett is a writer and a lover of all things video.
Follow @Richard Bennett
Richard Bennett
Mar 27, 2024• Proven solutions
To normalize audio is to apply a constant amount of gain to a recording to bring the amplitude to a target or norm. Or simply put, normalizing any audio file with a normalizer software searches the file for a peak volume to set a defined maximum and then brings up the rest of the audio to the same maximum level.
Audio normalization is a good practice to get your audio levels right for a better-balanced video, especially imperative for dialogue clips that stand out on YouTube and other platforms. However, out of many different reasons, getting the best audio results from old-fashioned AD/DA converters or matching a group of audios on the same volume levels are still the most common.
Nevertheless, it’s not always easy to find an efficient audio normalization tool and – most importantly – to master the process. But no worries because we have you covered. So, dive in to learn some of the best tools and how you can use them to create masterfully balanced soundtracks.
- Method 1: Normalize Audio Online
- Method 2: Normalize Audio with Wondershare Filmora’s Auto Normalization
- Method 3: Normalize Audio with Audacity
Method 1: Normalize Audio Online
Video2edit online video tool is a one-stop solution for all your audio and video editing needs. The versatile online tool offers a suite of editing features, from extracting audio to converting different formats to normalizing audio. With a drag and drop interface, it allows you to enhance the audio quality of your video and share it to YouTube, Facebook, or other social platforms.
Not to mention, it lets you convert your video files to various popular formats such as MP4, AVI, MOV, 3GP, and WEBM. One of the significant advantages of the tool is the convenience. Without any download or subscription fee hassles, you can normalize audio tracks in a few clicks using Video2edit.com. Here’s how you can use the free tool to get good-quality audio results.
Step 1: Launch the Video2edit Normalize audio tool
Begin by launching the online Video2edit.com on your browser. Then, on the main interface, select the Normalize audio tool from the variety of editing tools.
Step 2: Drop or upload your file
Now, drag and drop your video or audio file or tap the Choose file option to import the file from your local device.
Step 3: Normalize audio
From the Covert video to dropdown, choose the video format you want to convert your file to. Then, click on the Start button to start normalizing your file.
Step 4: Download the converted file
Once the conversion is completed, hit Download in front of the converted file to save it to your computer.
Method 2: Normalize Audio with Wondershare Filmora’s Auto Normalization
Yet another advanced audio normalization software is the Wondershare Filmora . Whether you are looking for basic editing tools or some advanced features, Filmora has it all. The powerful editor uses artificial intelligence editing that provides a smart way to improve your audio quality. The essence of this well-known software is the Auto Normalization feature that allows users to modify the volume of multiple recording clips to standard European audio programs at 23.0 LUFS – with just ONE CLICK.
And for the best part, the normalization process is pretty straightforward and lossless with Wondershare Filmora. Below is a quick step-by-step guide to using this intuitive audio enhancer tool.
Step 1: Download and install the Wondershare Filmora
To get started, download, and install the Wondershare Filmora on your PC. Then launch the program to enter the main interface.
Step 2: Import your audio/video file
From the main menu, go to Import media, then click on Import media files and select to upload your files in the media box. Once uploaded, drag and drop the media clips onto the timeline.
Step 3: Open the audio editing panel
Next, right-click on the audio or video clip on the timeline and then tap Adjust audio, or you can simply double-click it to enter the audio editing panel.
Step 4: Enable auto audio normalization
On the audio editing panel, scroll down and enable the Auto normalization feature. Wondershare Filmora will analyze and normalize the audio file automatically.
Step 5: Export the normalized file
After the normalization process is completed, preview your video or audio to check the auto normalization. If you are not satisfied with the output, hit Reset and try again. Finally, tap on the Export option, give your file a name, and again hit Export to save the high-quality output.
Method 3: Normalize Audio with Audacity
Audacity is a popular audio editor that works wonders for professional music producers. This free, open-source platform has taken audio editing to newer levels with a wide range of advanced features; there is a spectrogram view mode for visualizing and selecting frequencies. In addition, there is extensive support for various plug-ins.
Besides audio normalization, the creative platform can record, mix, add filters, and equalize multiple soundtracks. Moreover, when normalizing with Audacity, you don’t have to worry about losing audio quality, thanks to its 16-bit, 24-bit, and 32-bit support.
To take advantage of this excellent audio normalizer, just follow these quick steps and set your audio tone.
Step 1: Open Audacity on your computer
First, download the Audacity software on your computer, and then open the program.
Step 2: Import your audio files
Go to the File tab on the top menu bar and tap on Open. Then select audio files you want to normalize to import, or simply drag and drop the files on the main screen.
Step 3: Customize audio normalization settings
Now, select the added audio clip and go to Effect on the top menu bar. From the dropdown, choose Normalize and type your desired volume level into the dB.
Step 4: Normalize audio
After editing the normalization settings, click the OK button to start normalizing.
Step 5: Save the audio file
Once finished, select Export under the File tab, and choose how you want to save the file.
FAQs about Normalizing Audio
Here we sorted out some frequently asked questions about audio normalization, which can help you learn more about audio normalization.
1. What dB should I normalize audio to?
Well, that entirely depends on your audio use, and there is no exact number for normalizing an audio clip. However, for safety, the trick is to stay from the maximum volume level of 0 dB. For overall mix levels, most video editors recommend normalizing audio between -10 dB to -20 dB. Likewise, in the case of a dialogue clip, the recommended audio levels are -12 dB to -15 dB. Still some other suggestions are
- Music: -18 dB to -22 dB
- Soundeffects: -10 dB to -20 dB
2. What is the difference between audio normalization and compression?
Audio normalization only and purely changes the volume of a sound by applying a constant amount of gain with a goal to make the loudest peak reach 0 Db. And while normalizing also matches multiple audios to the same volume, it still does not affect the sound dynamics, unlike compression.
On the flip side, audio compression chops off the audio peaks in your recording to get a fuller, louder sound without reaching the clipping limit. In compression, you are changing a proportion of the audio over time in varying amounts.
3. Will the audio normalization process affect the sound quality?
Fortunately, no. Audio normalization, when appropriately done with the help of efficient audio editors, never affects the audio quality. When normalizing an audio clip, the digital bit having the highest level below 0 dB is identified, and all the other bits of the audio are amplified to the same level. This translates to no change in the relative difference between every bit, while the noise level also does not change. So, yes, the only thing affected is the output level and not the quality of the track.
Summing up
Audio normalization is an emerging trend as a good idea to manage high-quality audio levels. This feature can indeed benefit the final steps of mastering music production. However, you need to be careful when deciding where and when to normalize audio or avoid it for better results.
So, are you ready to level up your audio game? The above-mentioned audio editing tools are top-notch normalizers that will do the work for you. Also, don’t forget to try Wondershare Filmora’s distinctive auto normalization feature to produce studio-quality audio.
Richard Bennett
Richard Bennett is a writer and a lover of all things video.
Follow @Richard Bennett
Harmony and Code: The Elite Circle ‘S Digital Compositional Geniuses
Top Best 10 AI Music Composers in 2024

Benjamin Arango
Mar 27, 2024• Proven solutions
Robots can’t be creative, right? A number of startups that focus on the development of artificial intelligence that is capable of composing music have proved this statement wrong. AI music composers generate original, copyright-free music you can use in your latest YouTube video or social media video ad. You don’t even have to be a sound designer or a musician to produce soundtracks for your videos with AI Music Composers, because you can upload the music that has already been recorded and create variations of it. So, let’s take a look at what AI music composers have to offer in 2024.
| 1 - Amper Music | 2 - AIVA |
|---|---|
| 3 - Jukedeck | 4 - Ecrett Music |
| 5 - Melodrive | 6 - ORB Composer |
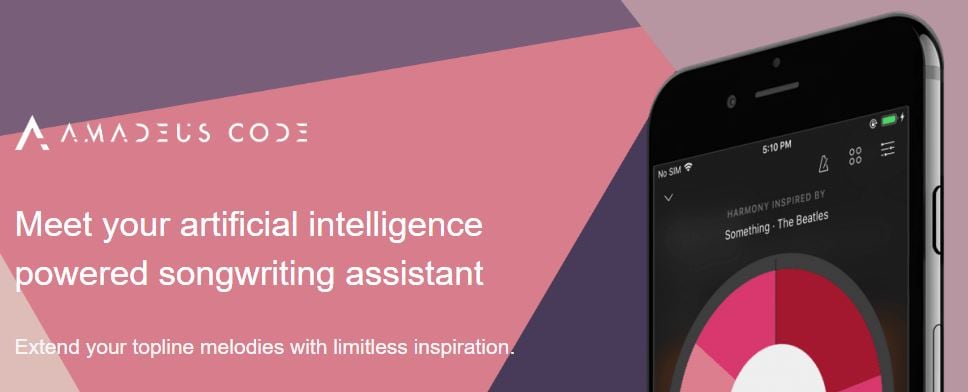
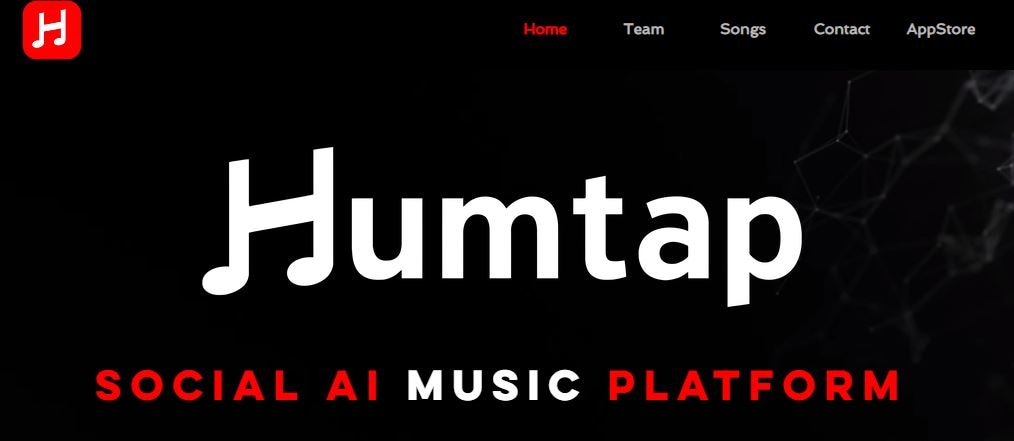
| 7 - Amadeus Code | 8 - Humtap |
| 9 - Muzeek | 10 - Brain.fm |
Ten Best AI Music Composers You Should Know About
The AI technologies that can compose music are still relatively novel, and as time passes, they can only develop and grow further. Consequently, each of the AI music composers we featured in this article offers a different range of possibilities. Here are the ten best AI music composers you shouldn’t miss out on in 2024.

Filmora AI Music Editor
Edit Audio with AI Music Editor
Experience the power of Filmora’s AI tools and make your audio or music stand out like never before! Audio Denoise, Audio Ducking, Audio Synchronization, Audio Stretch, etc…
Try It Free Try It Free Try It Free Learn More >
1. Amper Music
Price: Available upon request
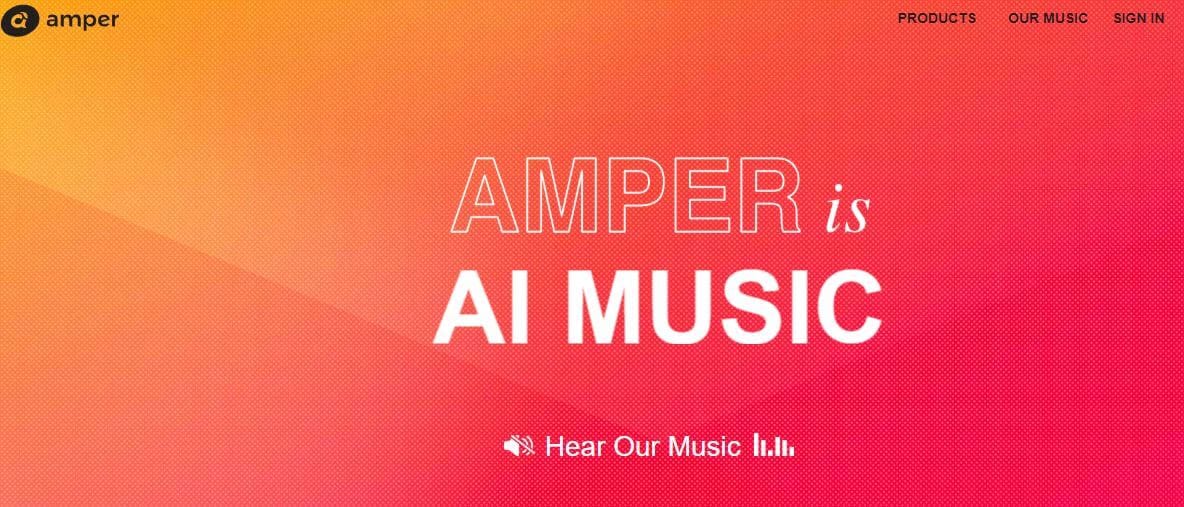
Industry professionals know just how frustrating the music licensing process can be. Amper Music is a cloud-based platform designed to simplify the process of creating soundtracks for movies and video games, as it produces AI generated algorithms that help users create music in a variety of music genres. You must first create an account on this platform, in order to be able to use the free version of Amper Music that provides only a limited amount of features. Upgrading to the pro version of Amper Music will enable you to enjoy the full potential of this rapidly growing AI Music Composer.
2. AIVA
Price: Free version available, subscription plans start from €14 p/month
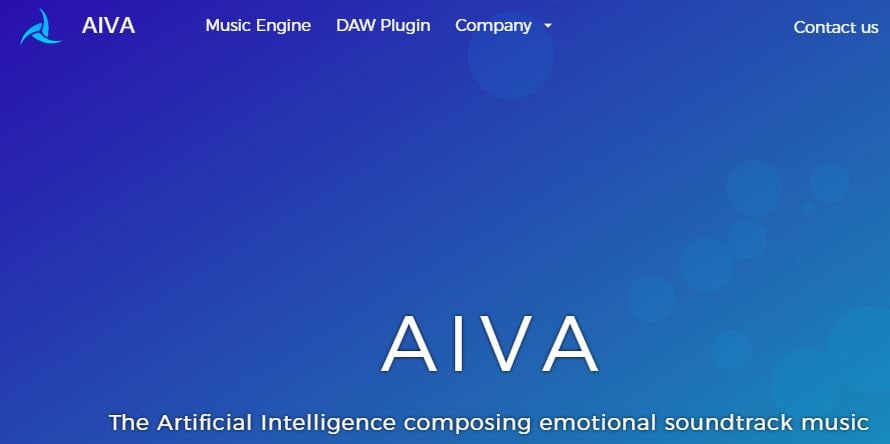
Since 2016, when AIVA Technologies was founded, its team has worked on developing an AI script that can compose emotional soundtracks for ads, video games, or movies. Soon after, the AI published its first oeuvre titled ‘Opus 1 for Piano Solo and in the subsequent years, AIVA released an album and composed music for a video game. Besides enabling its users to create music from scratch, AIVA can also be used to produce variations of existing songs. The music engine that powers this AI music composer makes the production of corporate or social media videos much easier, as it eliminates the need to go through the music licensing process.
3. Jukedeck
Price: Free version available, Pricing plans start from $0.99 per download
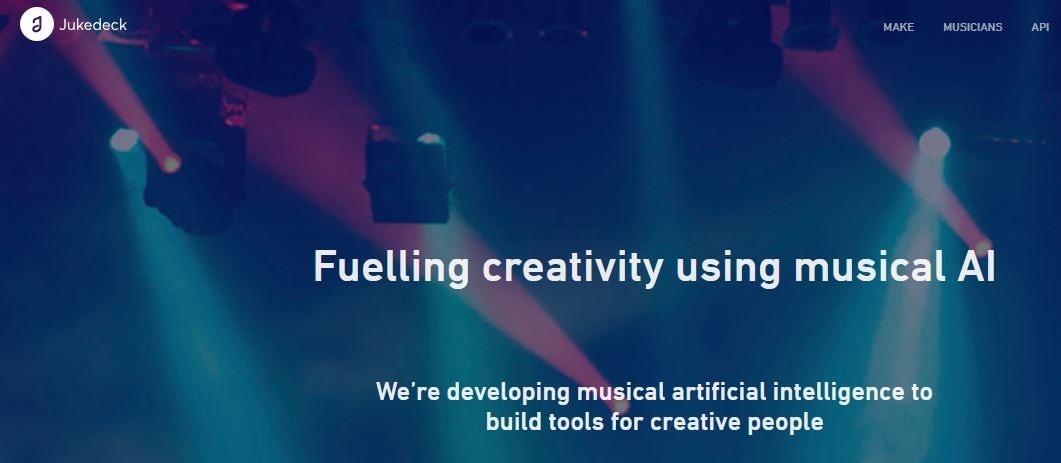
The AI music composer developed by the Jukedeck startup resembles the Amper’s music composer because they both rely on neural networks to analyze music data, that is then used by the AI to learn how to compose original music. Each track that is available through this AI music composer can be edited, so you can change its length or its tempo. You can create music with Jukedeck for free if you decide to give all the rights to the AI composer, while both individuals and small businesses can purchase the license to use the song created with Jukedeck for just $0.99.
Note: Jukedeck has been acquired by TikTok, and we are waiting for a new Jukedeck.
![]()
A cross-platform for making videos anywhere for all creators

Why your video editing isn’t good enough? How about some creative inspo?
- 100 Million+ Users
- 150+ Countries and Regions
- 4 Million+ Social Media Followers
- 5 Million+ Stock Media for Use
* Secure Download

4. Ecrett Music
Price: Subscription plans start at $5
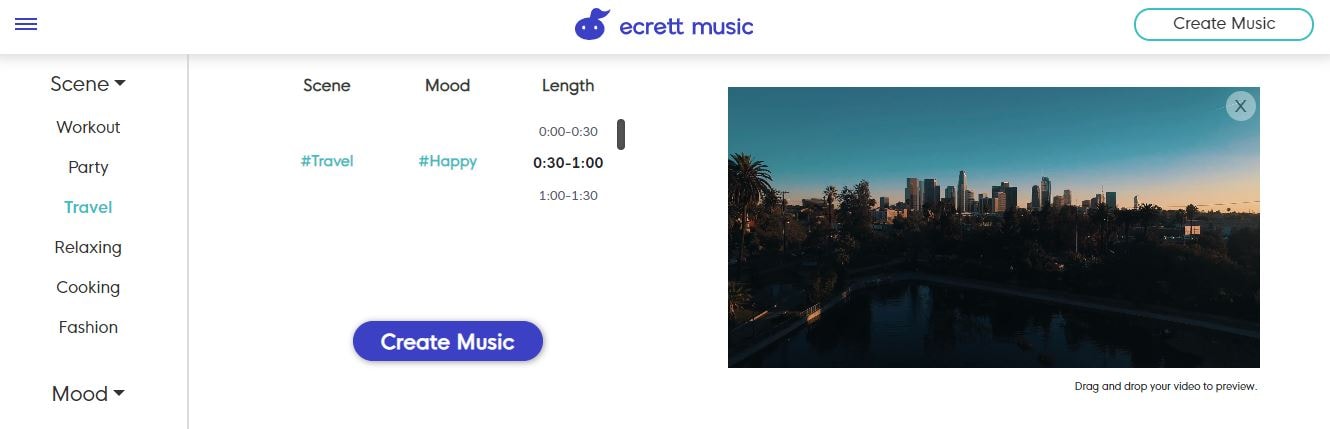
This online AI music composer makes creating stunning soundtracks for videos look easy. You just have to upload a video for which you want to generate music and select the type of scene and the mood of that scene. Party, Travel or Fashion are among the types of scenes you can choose from, while moods range from happy to serious. When done, simply click on the Create Music button, and the platform will automatically generate the soundtrack for your video. In case you are producing videos on a constant basis, you should consider purchasing one of the available subscription plans.
5. Melodrive
Price: Free
Compatibility: iOS, Windows
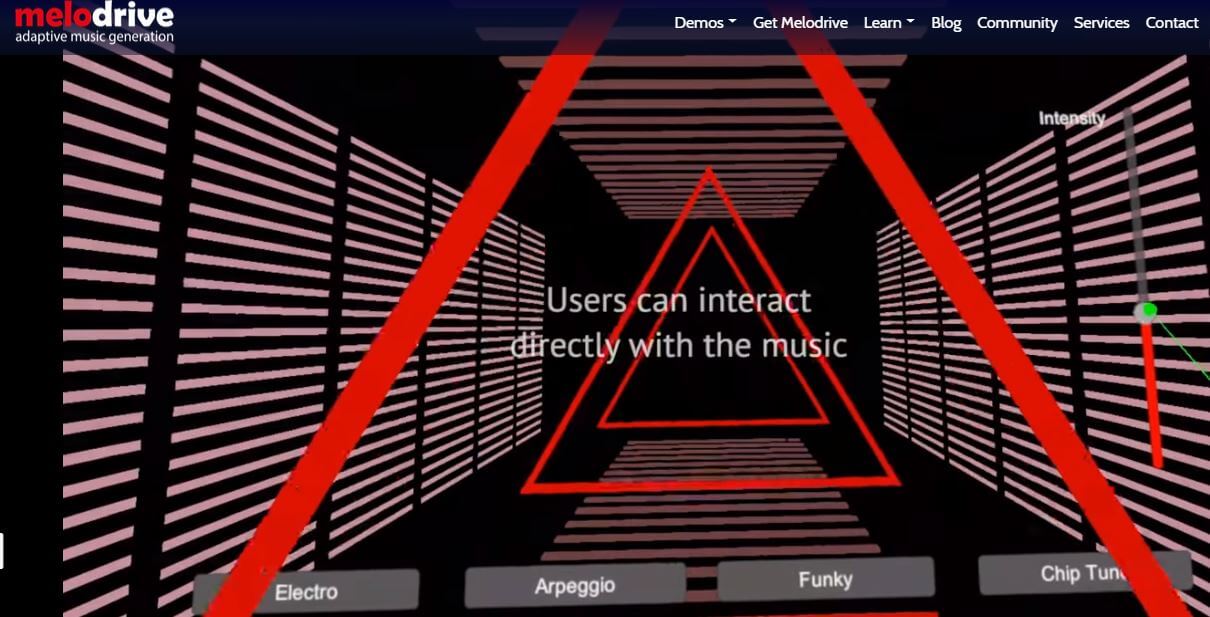
At the moment, the Lite and Indie versions of Melodrive are available for download free of charge, but the Indie version of this AI music composer still offers more options. Melodrive is one of the first AI systems that can compose emotional and unique music in real time. The AI generates music by adapting to the media environment and aims to match the mood and the style of the video. It is worth noting that Melodrive is still under development and that through time its capabilities to compose music are going to become even more refined than they already are.
6. ORB Composer
Price: Pricing plans start at $149,00
Compatibility: macOS, Windows

You can’t generate music automatically with ORB Composer, because the AI creates music based on your choices. That’s why you need to know at least the basic rules of music composition in order to be able to use the ORB Composer properly. The AI music composer comes bundled with a rich collection of chord progressions, that contains almost all chords used in popular music. This tool is aimed at artists who are interested in experimenting with the possibilities of creating music with artificial intelligence and discovering new styles of music. There are six music templates you can choose from, and you can create compositions by simply organizing different blocks of music.

Filmora AI Audio Stretcher
Wondershare Filmora - AI Audio Stretcher
• Retime any audio track to fit the duration of your video almost instantly.
• Rearrange songs without quality loss.
• Cross-platform supported - (Windows, Mac, iOS, Android)
Start Audio Stretch Start Audio Stretch Start Audio Stretch Learn More >
7. Amadeus Code
Price: Free, but the app offers in-app purchases
Compatibility: iOS
Both skilled musicians and music enthusiast can use this iOS-based app to create new melodies in just a few minutes. The AI engine that the Amadeus Code uses contains chord progressions of some of the most famous songs ever created and it let you use them to create new and innovative structures of music compositions. Moreover, you can use gestures to create new songs or recreate specific segments of songs you composed earlier. Even though Amadeus Code lets its users export audio and MIDI files to audio editing software, you still have to purchase all songs you want to keep.
8. Humtap
Price: Free
Compatibility: iOS
Musicians who have a tough time remembering their own ideas are going to love using Humtap because they can just hum a melody and the app will automatically generate an entire song using different instruments. What’s more, beats can be added with a single tap, and after the music is generated you can proceed to add the vocals as well. Humptap also has video making capabilities, so you can create videos for all songs you compose with this app. All tracks and videos generated with the Humtap AI music composer can be saved to your phone, but you can’t share your new creations to social media directly from the app.
9. Muzeek
Price: Free trial available, pricing plans start from $19 per month
Compatibility: macOS
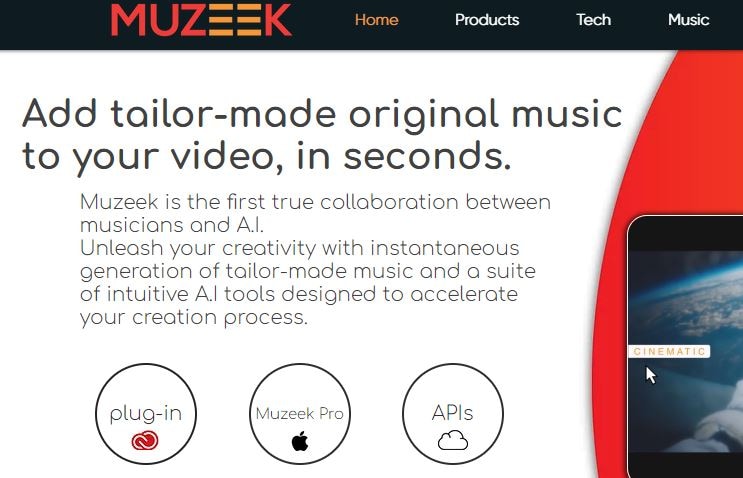
If you are in need of licensed music for the video you’re planning on sharing to social media networks, then Muzeek is one of the best choices you can make. The AI algorithm Muzeek uses analyzes the videos for which you are generating music and it creates soundtracks that perfectly fit the rhythm of the video. All content creators, including online marketing agencies or video game developers, can rely on Muzeek AI music composer to create authentic music in high quality. Moreover, Muzeek can also analyze the video’s original audio and create subtitles from it or adjust its volume automatically.
10. Brain.fm
Price: Subscription plans start from $6,95 per month
Compatibility: Android, online
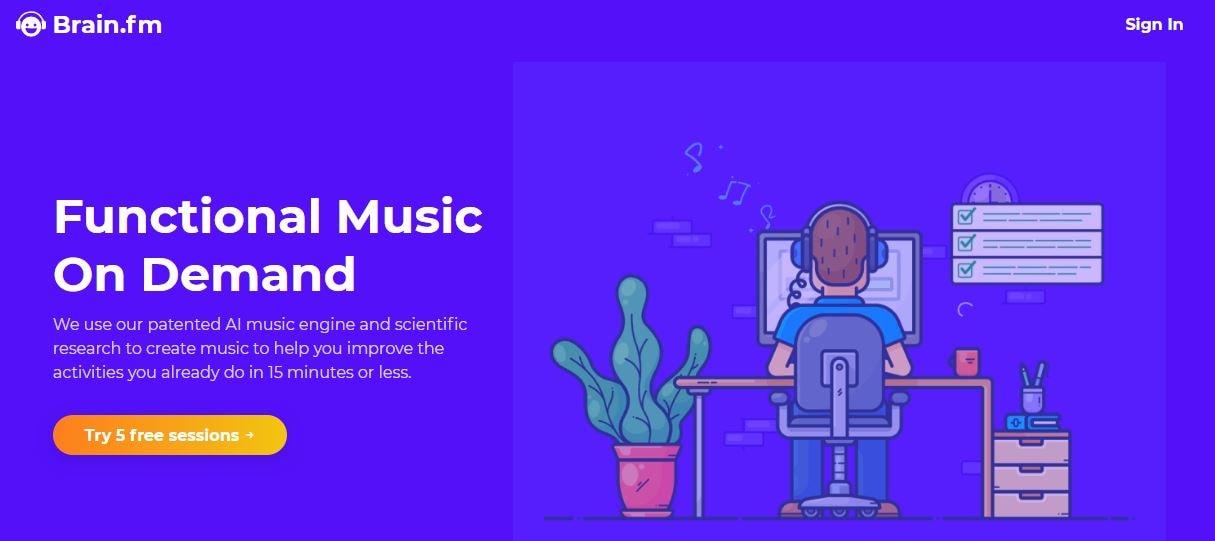
The idea that music can make our brains more productive is at the very core of what Brain.fm platform is all about. A team of scientists, musicians and engineers uses artificial intelligence to generate music designed to make your brain more productive and focused. They claim that the music created with their AI music composer achieve its effects in just ten to fifteen minutes. However, you can’t use Brain.fm to create your own music, as this platform is better suited for people who spend a lot of time at work and have a tough time maintaining their focus while performing important tasks.
Conclusion
The opportunities AI music composers offer are still not properly explored, because most of these technologies are still under development. The results AI music composers we included in this article have managed to achieve so far are impressive because each of them can produce high-quality audio files for all sorts of video content. Which AI music composer do you like to use the most? Leave a comment, and let us know.
Benjamin Arango
Benjamin Arango is a writer and a lover of all things video.
Follow @Benjamin Arango
Benjamin Arango
Mar 27, 2024• Proven solutions
Robots can’t be creative, right? A number of startups that focus on the development of artificial intelligence that is capable of composing music have proved this statement wrong. AI music composers generate original, copyright-free music you can use in your latest YouTube video or social media video ad. You don’t even have to be a sound designer or a musician to produce soundtracks for your videos with AI Music Composers, because you can upload the music that has already been recorded and create variations of it. So, let’s take a look at what AI music composers have to offer in 2024.
| 1 - Amper Music | 2 - AIVA |
|---|---|
| 3 - Jukedeck | 4 - Ecrett Music |
| 5 - Melodrive | 6 - ORB Composer |
| 7 - Amadeus Code | 8 - Humtap |
| 9 - Muzeek | 10 - Brain.fm |
Ten Best AI Music Composers You Should Know About
The AI technologies that can compose music are still relatively novel, and as time passes, they can only develop and grow further. Consequently, each of the AI music composers we featured in this article offers a different range of possibilities. Here are the ten best AI music composers you shouldn’t miss out on in 2024.
Filmora AI Music Editor
Edit Audio with AI Music Editor
Experience the power of Filmora’s AI tools and make your audio or music stand out like never before! Audio Denoise, Audio Ducking, Audio Synchronization, Audio Stretch, etc…
Try It Free Try It Free Try It Free Learn More >
1. Amper Music
Price: Available upon request
Industry professionals know just how frustrating the music licensing process can be. Amper Music is a cloud-based platform designed to simplify the process of creating soundtracks for movies and video games, as it produces AI generated algorithms that help users create music in a variety of music genres. You must first create an account on this platform, in order to be able to use the free version of Amper Music that provides only a limited amount of features. Upgrading to the pro version of Amper Music will enable you to enjoy the full potential of this rapidly growing AI Music Composer.
2. AIVA
Price: Free version available, subscription plans start from €14 p/month
Since 2016, when AIVA Technologies was founded, its team has worked on developing an AI script that can compose emotional soundtracks for ads, video games, or movies. Soon after, the AI published its first oeuvre titled ‘Opus 1 for Piano Solo and in the subsequent years, AIVA released an album and composed music for a video game. Besides enabling its users to create music from scratch, AIVA can also be used to produce variations of existing songs. The music engine that powers this AI music composer makes the production of corporate or social media videos much easier, as it eliminates the need to go through the music licensing process.
3. Jukedeck
Price: Free version available, Pricing plans start from $0.99 per download
The AI music composer developed by the Jukedeck startup resembles the Amper’s music composer because they both rely on neural networks to analyze music data, that is then used by the AI to learn how to compose original music. Each track that is available through this AI music composer can be edited, so you can change its length or its tempo. You can create music with Jukedeck for free if you decide to give all the rights to the AI composer, while both individuals and small businesses can purchase the license to use the song created with Jukedeck for just $0.99.
Note: Jukedeck has been acquired by TikTok, and we are waiting for a new Jukedeck.
![]()
A cross-platform for making videos anywhere for all creators
Why your video editing isn’t good enough? How about some creative inspo?
- 100 Million+ Users
- 150+ Countries and Regions
- 4 Million+ Social Media Followers
- 5 Million+ Stock Media for Use
* Secure Download
4. Ecrett Music
Price: Subscription plans start at $5

This online AI music composer makes creating stunning soundtracks for videos look easy. You just have to upload a video for which you want to generate music and select the type of scene and the mood of that scene. Party, Travel or Fashion are among the types of scenes you can choose from, while moods range from happy to serious. When done, simply click on the Create Music button, and the platform will automatically generate the soundtrack for your video. In case you are producing videos on a constant basis, you should consider purchasing one of the available subscription plans.
5. Melodrive
Price: Free
Compatibility: iOS, Windows
At the moment, the Lite and Indie versions of Melodrive are available for download free of charge, but the Indie version of this AI music composer still offers more options. Melodrive is one of the first AI systems that can compose emotional and unique music in real time. The AI generates music by adapting to the media environment and aims to match the mood and the style of the video. It is worth noting that Melodrive is still under development and that through time its capabilities to compose music are going to become even more refined than they already are.
6. ORB Composer
Price: Pricing plans start at $149,00
Compatibility: macOS, Windows

You can’t generate music automatically with ORB Composer, because the AI creates music based on your choices. That’s why you need to know at least the basic rules of music composition in order to be able to use the ORB Composer properly. The AI music composer comes bundled with a rich collection of chord progressions, that contains almost all chords used in popular music. This tool is aimed at artists who are interested in experimenting with the possibilities of creating music with artificial intelligence and discovering new styles of music. There are six music templates you can choose from, and you can create compositions by simply organizing different blocks of music.
Filmora AI Audio Stretcher
Wondershare Filmora - AI Audio Stretcher
• Retime any audio track to fit the duration of your video almost instantly.
• Rearrange songs without quality loss.
• Cross-platform supported - (Windows, Mac, iOS, Android)
Start Audio Stretch Start Audio Stretch Start Audio Stretch Learn More >
7. Amadeus Code
Price: Free, but the app offers in-app purchases
Compatibility: iOS
Both skilled musicians and music enthusiast can use this iOS-based app to create new melodies in just a few minutes. The AI engine that the Amadeus Code uses contains chord progressions of some of the most famous songs ever created and it let you use them to create new and innovative structures of music compositions. Moreover, you can use gestures to create new songs or recreate specific segments of songs you composed earlier. Even though Amadeus Code lets its users export audio and MIDI files to audio editing software, you still have to purchase all songs you want to keep.
8. Humtap
Price: Free
Compatibility: iOS
Musicians who have a tough time remembering their own ideas are going to love using Humtap because they can just hum a melody and the app will automatically generate an entire song using different instruments. What’s more, beats can be added with a single tap, and after the music is generated you can proceed to add the vocals as well. Humptap also has video making capabilities, so you can create videos for all songs you compose with this app. All tracks and videos generated with the Humtap AI music composer can be saved to your phone, but you can’t share your new creations to social media directly from the app.
9. Muzeek
Price: Free trial available, pricing plans start from $19 per month
Compatibility: macOS
If you are in need of licensed music for the video you’re planning on sharing to social media networks, then Muzeek is one of the best choices you can make. The AI algorithm Muzeek uses analyzes the videos for which you are generating music and it creates soundtracks that perfectly fit the rhythm of the video. All content creators, including online marketing agencies or video game developers, can rely on Muzeek AI music composer to create authentic music in high quality. Moreover, Muzeek can also analyze the video’s original audio and create subtitles from it or adjust its volume automatically.
10. Brain.fm
Price: Subscription plans start from $6,95 per month
Compatibility: Android, online
The idea that music can make our brains more productive is at the very core of what Brain.fm platform is all about. A team of scientists, musicians and engineers uses artificial intelligence to generate music designed to make your brain more productive and focused. They claim that the music created with their AI music composer achieve its effects in just ten to fifteen minutes. However, you can’t use Brain.fm to create your own music, as this platform is better suited for people who spend a lot of time at work and have a tough time maintaining their focus while performing important tasks.
Conclusion
The opportunities AI music composers offer are still not properly explored, because most of these technologies are still under development. The results AI music composers we included in this article have managed to achieve so far are impressive because each of them can produce high-quality audio files for all sorts of video content. Which AI music composer do you like to use the most? Leave a comment, and let us know.
Benjamin Arango
Benjamin Arango is a writer and a lover of all things video.
Follow @Benjamin Arango
4 Ways to Sync Audio to Video in Filmora and Premiere Pro
4 Ways to Sync Audio to Video in Filmora and Premiere Pro

Shanoon Cox
Mar 27, 2024• Proven solutions
Watching a video out-of-sync is an extreme turn off. And having a perception that sync audio and video is easy can be misleading. Despite adding sound easily, the actuality lies in its variety of needed operations as well as precision, especially when you have multiple audios and video clips. Moreover, possessing no idea on proper procedure can serve as real headache.
Nonetheless, you are fortunately at the right place as we are going to introduce an advanced technology that can fulfill this motive. Reading this article will prove to be helpful for you as we will enlighten upon syncing audios smoothly on Filmora and Premiere Pro. If you are interested and never want synchronizing issues, have a look upon this post and learn about how to sync audio and video.
- Part 1: How to Automatically Sync Audio to Video with Filmora
- Part 2: How to Sync Audio to Video in Premiere Pro
- Part 3: How to Sync Audio to Video Manually in Premiere Pro
- Part 4: How to Sync Audio to Video with Plug in
Part 1: How to Automatically Sync Audio to Video with Filmora
Auto Audio Sync is one of the best features of Filmora Video Editor . It allows you to adjust the audio tempo to sync with the video. You can slow down or speed up the audio with the button and setting. Auto Audio Sync is the ability to sync video and audio together automatically. Moreover, it is an all-in-one video editor with powerful functionality and a fully stacked feature set. It makes professional video editing easy with an intuitive interface, drag-and-drop editing, and advanced video editing features.
Steps to Use Auto Audio Sync Tool
This tool is best as it gives a perfect result when you try to match your audio files with your video files. For example, you might have a YouTube channel, and you record your audio from a Microphone, your video from a webcam camera, and your screen from your computer. The audio directly from the camera could be a little faint, resulting from the recording being farther from where you are. While the audio from the microphone would give you a high-quality audio.

First, detach your audio file from your screen recording as the tool works with an audio file and a video file. Right-click on the audio file and click on detach audio to separate the audio file from the screen recording.

Return the audio file and the screen recording to the normal position, which gives you three layers on the timeline.

Next, select your audio and your video by making sure both footages are related to each other and then right-click and then tap the audio synchronization. This will sync the audio and the video together, and the echo will seize because the footage will perfectly match the audio.

Part 2: How to Sync Audio to Video in Premiere Pro – Merging Audio and Video
The first way that can help you sync audio and video is merging the two files. You can simply get the media from the folders and this allows you to sync a max of 16 audio files to single video.
- To proceed, press Control and Command> key on Windows and Mac respectively. Now, pick out the two files that you want to merge. You will now get the Merge Clips menu having a list of options. Choose Audio option and click OK.

- Premiere Pro will now examine your video’s audio with the help of External audio and find out the similarities. In a couple of minutes, you will receive a new file with the name given to it in the Merge Clips menu.
Part 3: How to Sync Audio to Video Manually in Premiere Pro
- Step 1: Another is the manual way to sync audio to your videos. In order to work with this uncomplicated way of synchronization, get your video clip and the audio file into the timeline. Make sure to stack up the two files loosely (do not group them).

- Step 2: Now, you may have either used a professional slate/clapper or simply done a single clap with your hands to give a clue to start performing. All you need to do is to zoom the video file in the timeline. Look for the spike in waveforms that shows the slate. Where you notice the spike, slide the audio file and make the markers lined up.

- Step 3: Start playing the clip to see if it works perfectly. Just in case, if a little tweaking is still required, click the audio file and hold down the Shift key while tapping left or right arrow key to adjust the audio file as per requirement.

Part 4: How to Sync Audio to Video with Plug in
PluralEyes is the next ideal option to work with. It is a plug-in and comes for $200 from Red Giant. When you have the projects like documentaries which include numerous camera angles, PluralEyes easily handles such stuff and make audio and video synchronization easy for you.
- For this, run PluralEyes and hit on Add Media to import the clip. Alternatively, you can drag and drop the file directly to Premiere Pro. Now, click on Synchronize and let the program do the job.

- You will notice the synced clips in green while the files that are not synchronized will show up in red as errors. In case there are files with the red error, you need to get to the Sync drop-down menu and click Try Really Hard.
- When the entire files are synced, hit on Export Timeline and you can then drag the exported project into Premiere Pro.
Bonus Tips: How to Record Audio Properly
Nothing is worse than a bad quality audio file. You must have always wanted to keep a high-quality audio file, correct? More than desire, it is a vital thing to have. Hence, to record your audio appropriately, you must have a quality microphone and an audio recorder that should stand out from others. This dual combination is significant in capturing the sound in an excellent quality and they indeed provide better output than an on-camera microphone.
The audio recorders with a little more price employ XLR cables. On the other hand, some affordable ones make use of the ideal headphone jacks i.e. 1/8” jacks.
You just need to have the right equipment with you when you are looking for the quality output for recording audio files.
Shanoon Cox
Shanoon Cox is a writer and a lover of all things video.
Follow @Shanoon Cox
Shanoon Cox
Mar 27, 2024• Proven solutions
Watching a video out-of-sync is an extreme turn off. And having a perception that sync audio and video is easy can be misleading. Despite adding sound easily, the actuality lies in its variety of needed operations as well as precision, especially when you have multiple audios and video clips. Moreover, possessing no idea on proper procedure can serve as real headache.
Nonetheless, you are fortunately at the right place as we are going to introduce an advanced technology that can fulfill this motive. Reading this article will prove to be helpful for you as we will enlighten upon syncing audios smoothly on Filmora and Premiere Pro. If you are interested and never want synchronizing issues, have a look upon this post and learn about how to sync audio and video.
- Part 1: How to Automatically Sync Audio to Video with Filmora
- Part 2: How to Sync Audio to Video in Premiere Pro
- Part 3: How to Sync Audio to Video Manually in Premiere Pro
- Part 4: How to Sync Audio to Video with Plug in
Part 1: How to Automatically Sync Audio to Video with Filmora
Auto Audio Sync is one of the best features of Filmora Video Editor . It allows you to adjust the audio tempo to sync with the video. You can slow down or speed up the audio with the button and setting. Auto Audio Sync is the ability to sync video and audio together automatically. Moreover, it is an all-in-one video editor with powerful functionality and a fully stacked feature set. It makes professional video editing easy with an intuitive interface, drag-and-drop editing, and advanced video editing features.
Steps to Use Auto Audio Sync Tool
This tool is best as it gives a perfect result when you try to match your audio files with your video files. For example, you might have a YouTube channel, and you record your audio from a Microphone, your video from a webcam camera, and your screen from your computer. The audio directly from the camera could be a little faint, resulting from the recording being farther from where you are. While the audio from the microphone would give you a high-quality audio.
First, detach your audio file from your screen recording as the tool works with an audio file and a video file. Right-click on the audio file and click on detach audio to separate the audio file from the screen recording.
Return the audio file and the screen recording to the normal position, which gives you three layers on the timeline.
Next, select your audio and your video by making sure both footages are related to each other and then right-click and then tap the audio synchronization. This will sync the audio and the video together, and the echo will seize because the footage will perfectly match the audio.
Part 2: How to Sync Audio to Video in Premiere Pro – Merging Audio and Video
The first way that can help you sync audio and video is merging the two files. You can simply get the media from the folders and this allows you to sync a max of 16 audio files to single video.
- To proceed, press Control and Command> key on Windows and Mac respectively. Now, pick out the two files that you want to merge. You will now get the Merge Clips menu having a list of options. Choose Audio option and click OK.
- Premiere Pro will now examine your video’s audio with the help of External audio and find out the similarities. In a couple of minutes, you will receive a new file with the name given to it in the Merge Clips menu.
Part 3: How to Sync Audio to Video Manually in Premiere Pro
- Step 1: Another is the manual way to sync audio to your videos. In order to work with this uncomplicated way of synchronization, get your video clip and the audio file into the timeline. Make sure to stack up the two files loosely (do not group them).
- Step 2: Now, you may have either used a professional slate/clapper or simply done a single clap with your hands to give a clue to start performing. All you need to do is to zoom the video file in the timeline. Look for the spike in waveforms that shows the slate. Where you notice the spike, slide the audio file and make the markers lined up.
- Step 3: Start playing the clip to see if it works perfectly. Just in case, if a little tweaking is still required, click the audio file and hold down the Shift key while tapping left or right arrow key to adjust the audio file as per requirement.
Part 4: How to Sync Audio to Video with Plug in
PluralEyes is the next ideal option to work with. It is a plug-in and comes for $200 from Red Giant. When you have the projects like documentaries which include numerous camera angles, PluralEyes easily handles such stuff and make audio and video synchronization easy for you.
- For this, run PluralEyes and hit on Add Media to import the clip. Alternatively, you can drag and drop the file directly to Premiere Pro. Now, click on Synchronize and let the program do the job.
- You will notice the synced clips in green while the files that are not synchronized will show up in red as errors. In case there are files with the red error, you need to get to the Sync drop-down menu and click Try Really Hard.
- When the entire files are synced, hit on Export Timeline and you can then drag the exported project into Premiere Pro.
Bonus Tips: How to Record Audio Properly
Nothing is worse than a bad quality audio file. You must have always wanted to keep a high-quality audio file, correct? More than desire, it is a vital thing to have. Hence, to record your audio appropriately, you must have a quality microphone and an audio recorder that should stand out from others. This dual combination is significant in capturing the sound in an excellent quality and they indeed provide better output than an on-camera microphone.
The audio recorders with a little more price employ XLR cables. On the other hand, some affordable ones make use of the ideal headphone jacks i.e. 1/8” jacks.
You just need to have the right equipment with you when you are looking for the quality output for recording audio files.
Shanoon Cox
Shanoon Cox is a writer and a lover of all things video.
Follow @Shanoon Cox
Also read:
- New In 2024, How to Improve Sound Quality on a Home Recorded Video?
- New 2024 Approved Sonic Alchemy Transforming Footage Through Piano-Inspired Soundtracks
- Updated Enhance Your Memories Download Free MP3s Onto Images for 2024
- Updated Suppress Ambient Sounds and Insert Unique Soundscapes with the Help of Microsofts Movie Creator
- 2024 Approved How to Discern and Assess the Best in the Business for Audio Post-Production Excellence
- Updated Can Advanced Audio Equalization Make a Difference in Sound Quality for 2024
- Updated The Ultimate Guide to Fine-Tuning Audio Volume for Optimal Listening Experience
- New Top-Ranked Noise Reducer App Boost Visual Impact in Your Clips
- Updated Hunt Down Acoustic Representations of Packs Affected by Howling for 2024
- Background Freedom Mastering Noise Reduction in Videos and Audio for 2024
- New 2024 Approved Capturing the Essence of Cricket Soundscape
- Updated Ultimate Rankings Exceptional Free Auditory Slicing Applications Online for 2024
- Cost-Effective Mac Sound Editor Software for 2024
- Updated 2024 Approved Clearing Up Wind Interference on Smartphone and Tablet Video Recording
- New Cutting-Edge Oratorian Software 10 Leading Generators for Top-Notch Voice-Ovation
- Updated In 2024, Discovering Your Ideal Audio Format A Step-by-Step Strategy
- Audiobook Creation Simplified Your Comprehensive Step-by-Step Tutorial
- Updated In 2024, Best Online Tools to Extract Audio From Video Files
- Updated In 2024, Transforming Everyday Mac Users Into Pro Voice Recording Enthusiasts A Beginners Approach
- Updated 2024 Approved Decoding the Features of Google Podcast Application
- New Introduction to LexiEdit A Starters Guide for Novice Editors for 2024
- Updated Rhythm Rulers The Ultimate List of Hit Identification Tools, Revised for 2024
- New Quiet Cutscenes Comprehensive Guide to Minimizing Loud Backgrounds Using Premiere Pro
- Updated In 2024, Mastering Audio Quality An In-Depth Look at Noise Reduction in Audacity
- New TalkTransformation Advanced Tools for Customizing Skype Voices
- New In 2024, Seamlessly Mixing Soundtracks and Sounds in Final Cut Pro Editing Suite
- New 2024 Approved Exploring PCs Best Sound Capture Software A Selection of Top 10
- New Joyful Ambiance Tunes for a 24Th Anniversary Celebration
- Updated In 2024, Mastering Music Integration The Ultimate KineMaster Manual
- New The Ultimate Guide to MP3 Modification Software for Mac Uncovering the Best Tools and Comparisons .
- Updated Innovative Applications Unveiling the Most Advanced 11 Voice Modification Solutions on iOS and Android Without an Expense
- Reimagining Auditory Experiences with These Industry Standards
- Updated Elevating Your Music Collection Advanced MP3 File Editing Tips and Tricks for 2024
- New 2024 Approved Top 10 Windows-Compatible Speech Recognition Tools
- New 2024 Approved Best Pop Background Music List for Videos
- 2024 Approved A Step-by-Step Process to Remove Audio in MP4 Videos
- New AVS Soundscape Suite Unveiled An In-Depth Review of Features, User Reviews, and Alternate Audio Editors
- In 2024, Decoding the Perfect Audio Format A Comprehensive Advice Guide
- New In 2024, A New Dawn for Music Creation A Compilation of the Most Promising AI Composers
- New Expert Tips on Removing Audio Fuzziness for Crystal-Clear Video Production
- New Mastering the Art of Sound Recording via Vocaroo Strategies and Replacements
- New Online Learning Module A Complete Overview
- In 2024, Pushing Boundaries in Sound Design Top 5 Innovative Audio Distortion Applications
- 2024 Approved Sony Vegas Audio Editor A Step-by-Step Tutorial for Professionals
- New Eclectic Mix Modern Emotional Tracks on the Horizon
- New The Ultimate Voice Recognition Technology Compilation Windows & macOS Dictation Software + Cloud Services Ranked (Top 8 )
- New 2024 Approved Simplified Soundscape A Modern Approach to Adding Sound Effects in Videos
- Updated 2024 Approved AVI Video Editing Made Easy Top 16 Cutting Tools for All Platforms
- Updated In 2024, Web-Based Lyric Video Editing Solutions
- In 2024, How To Remove Phone Number From Your Apple ID on Your iPhone 14?
- In 2024, The Complete Guide to Huawei Nova Y91 FRP Bypass Everything You Need to Know
- In 2024, Full Guide on Mirroring Your Samsung Galaxy Z Flip 5 to Your PC/Mac | Dr.fone
- App Wont Open on Your Tecno Camon 20? Here Are All Fixes | Dr.fone
- Guide to Create a Timelapse Video in After Effects
- Top 5 Samsung Galaxy F14 5G Bypass FRP Tools for PC That Actually Work
- Updated 2024 Approved Lumafusion for Mac Install It or Get Alternatives
- Undelete lost music from Asus ROG Phone 8
- In 2024, How to Migrate Android Data From Itel P55T to New Android Phone? | Dr.fone
- Top Video Rotation Tools Flip, Spin, and Rotate Your Videos Online for 2024
- Here Are Some Reliable Ways to Get Pokemon Go Friend Codes For Itel S23+ | Dr.fone
- Tips and Tricks for Setting Up your Realme Narzo N55 Phone Pattern Lock
- Best Android Data Recovery - Retrieve Lost Pictures from Honor V Purse.
- How to Upgrade Apple iPhone 13 Pro Max without Losing Anything? | Dr.fone
- Updated This Guide Will Help You to Understand Everything About the Zoho Show. Also, Know What the Zoho Show Slide Is, Why It Is Used and All Related Information
- 2024 Approved Snap, Edit, Share The Top Mobile Video Editors for iPhone and Android Users
- How to identify missing or malfunctioning drivers with Windows Device Manager in Windows 11/10/7
- How to Get and Use Pokemon Go Promo Codes On Realme 12 5G | Dr.fone
- In 2024, Become a Cartoon Star Best Apps for Transforming Your Photos on iPhone and Android
- Best Methods for Itel P40+ Wont Turn On | Dr.fone
- New Unraveling the Mystery When to Use Premiere and When to Use After Effects
- Add Tags to Your Videos Best MP4 Editors for Windows and macOS for 2024
- In 2024, How to Share/Fake Location on WhatsApp for Samsung Galaxy A23 5G | Dr.fone
- In 2024, Reaction Video Maker Top Picks for iPhone and Android
- In 2024, How to Remove and Reset Face ID on Apple iPhone 15
- In 2024, The 10 Best Tools to Bypass iCloud Activation Lock From iPhone 13 Pro You Should Try Out
- New In 2024, Free 4K Video Editors Top Picks for Creators
- How to Fake Snapchat Location on Nokia C02 | Dr.fone
- Undelete lost music from Itel
- New In 2024, Make Waves with These Online Audio Visualizer Tools
- Different Methods for Resetting Motorola Edge+ (2023) Phones with Screen Locked and Not | Dr.fone
- Title: Updated 2024 Approved Precision Audio Leveling in Three Simple Steps
- Author: Kate
- Created at : 2024-05-05 08:02:17
- Updated at : 2024-05-06 08:02:17
- Link: https://audio-editing.techidaily.com/updated-2024-approved-precision-audio-leveling-in-three-simple-steps/
- License: This work is licensed under CC BY-NC-SA 4.0.
