
:max_bytes(150000):strip_icc():format(webp)/linksys-default-password-list-2619153-5fccecc7c0b04133b2202a1fa9e8d37a.png)
Updated 2024 Approved Combatting Audio Misfires Methods for Rectifying Sound Warping
Combatting Audio Misfires: Methods for Rectifying Sound Warping
Create High-Quality Video - Wondershare Filmora
An easy and powerful YouTube video editor
Numerous video and audio effects to choose from
Detailed tutorials are provided by the official channel
So you’re all set: you’ve sat down, grabbed your microphone, fired up your recording software, and started pouring out the content of your mind. Once finished, you listen back to the recording, thinking you’re about to hear the silky-smooth undertones of your voice resonating through your ears, but something odd occurs — it sounds terrible. Distorted audio is very unwelcoming since you want the sound to be natural. This guide will explain how to fix distorted audio using various methods.
In this article
01 What Causes Distorted Audio?
02 How To Fix Distorted Audio Using Different Methods
What Causes Distorted Audio?
Distorted audio is the main culprit in ruined audio clips. Here are some of the causes of distorted sound.
1. Recording Environment
Not recording dialogue and voice-over in a studio can cause distorted audio. However, audio quality can be out of control if you conduct an onsite interview. Getting a meaningful and cinematic shot should come first. If you do not use a studio-quality microphone that comes with directional controls, you’ll likely have distorted audio. You might want to go for a unidirectional stereo channel if you want boom movements to be undetectable.
When a cheap, low-quality microphone is moving, you’ll hear the unsteadiness in your recording, leading to distorted audio. Recording audio in an echo chamber or an overly large room can also result in distorted audio.
2. Touching the Mic While Recording
If you hand the microphone to someone who does not know how to use it, they might hold it too loosely or close. Microphones feature sensitive parts that should not be dropped, shaken, or breathed on. When you are interviewing people unfamiliar with industry standards, you should hold the microphone, not the person you are interviewing. The mic is not within the range of 6” to 12 “ away from the speaker, this could lead to distorted audio.
3. Using the Wrong Mic
A reliable mic comes with audio controls and captures room tone and timbre. It should be portable, compact, and have a wind sleeve. In outdoor situations where ADR is not an option, you might want to use a wind sleeve.
Podcast showrunners and content creators often use Blue Yeti mics connected to a soundboard. While these are cheaper options, they can cause distorted audio. Content creators who are not stationary should purchase a lavalier, and wireless is a more high-end and expensive option.
4. Positioning Your Microphones Incorrectly
You have to be careful if you’ll be mounting a mic on your DSLR. Filming events with a one-mic setup is a promise to record everything you hear again. You’ll inevitably film some moments at a distance and leave the audio compromised to distortion.
5. Faulty Equipment
Your equipment can fail in different ways. For instance, your effects processor can fail, meaning that you won’t hear any sound passing through it. It can also fail, and you end up hearing a distorted sound passing out of the processor. Essentially, this might or might not be linked to the component’s capability of handling the signal as much as the busted internals result.
How To Fix Distorted Audio Using Different Methods
You can fix distorted audio using various methods. They include:
Method 1: How To Fix Distorted Audio in Audacity
Audacity is the bread and butter for individuals who adore a crisp audio quality. Audacity helps users finetune various attributes of their recordings. It is a free and intuitive software suite suitable for newbies and individuals who don’t interact with computers. With that in mind, here is how to fix distorted audio using Audacity.
- Open the audio file by dragging and dropping it into Audacity.
- Select the distorted part and click on the Effect option. Then, select Noise Reduction.


- The Noise Reduction window will open.

- Now, click on Noise Profile, and Audacity will know what to filter out.
- Next, select the entire audio and open the Noise Reduction Window again ( Effect > Noise Reduction ). Then, set the values to suit your preferences.
- Hit preview to check the audio, then the Click OK button.
If the audio is still distorted, apply the filter again. Don’t overdo the process numerous times to ensure your audio is not degraded, making the voice sound robotic and tinny.
Now, use compression to your advantage. If compression confuses you, think of it as a tool that adjusts your audio for the listener’s benefit. Compression not only quiets the background minutiae that creeps into your recording, but it also boosts your voice and gives it a full, captivating resonance.
- To start the compression process, select your audio track, press CTRL + A, click “Effect” and then click “Compressor.”

- Adjust the values in the compressor to meet your needs and make your voice “pop” from the background.
- Once you have set the values, hit the Preview button to check the audio. Then, click on OK.
That is how to fix distorted audio using Audacity.
You May Be Interested In
How To Fix Distorted Audio in Garageband
Garageband is one of the most popular audio recording software available. Though you can use it for various purposes, it is mainly intended to be used to create music. However, many people have the problem of distorted audio files, making production difficult when trying to perfect a project. To learn how to fix distorted audio in Garageband, follow the steps below:
- Launch GarageBand, then open your audio file. Once your audio file finishes loading, select the audio file from which you want to remove distortion by clicking it.
- Click on the “i” symbol encapsulated in a blue circle positioned on the lower-right portion of your screen. This icon sits in the middle of two other icons: a set of notes and an eye.
- Select the “Real Instrument” tab located on the top right side of your screen. You’ll see two tabs: Master Tracks and Real Instrument.
- Click the Edit tab to activate it, and a list of effects will pop up.
- Select Distortion from the list, and you’ll see a drop-down menu.
- Next, select the None option to remove distortion.
If you have distorted audio due to poor recording quality, navigate to the Real Instrument”Edit menu and select AULowpass from the boxes available. Doing this will remove frequencies above a certain range, and this will fix the distorted audio.
Method 3: How To Fix Distorted Audio in Windows 10
Several actions can cause problems or distort sound on your Windows 10 application. Some of the common causes include:
- When upgrading your computer from an older version to a new one
- In case your computer gets corrupted with a virus
- If your computer or device doesn’t the right sound drivers
So how do you fix distorted audio in Windows 10? There are several ways you can fix distorted audio in Windows 10. Here is how to fix distorted audio using some of the best ways.
1. Reinstall drivers
- Right-click the start button and choose device manager.
- Navigate through sound, video, and game controllers.
- Click on the Details tab.
- Select hardware Ids from the drop-down menu.

- Copy and first the first value of drivers in your browser and search the internet.

- Open the official site and download the correct driver。
- Install and restart your PC。
2. Update drivers
- Right-click on the start button.
- Scroll to the sound, video, and game controllers option.
- Right-click on the sound device and select uninstall the device.

- Restart your PC after the uninstall process is finished.
- Open the device manager.
- Select and click on the scan for hardware changes option.

Windows will automatically install a new version of sound drivers
3. Run Windows Audio Troubleshooter
- To use this method, open Start and click the cog-like icon. This will open the Settings app.
- Select Update & security.
- Choose Troubleshoot in the left pane.
- Expand the Playing Audio by clicking it.
- Hit the Run the troubleshooter button, then follow the further instructions.

4. Take Exclusive Control of Your Device Option by Disabling Allow Applications
- Navigate to the notification area and right-click on the sound icon. Open Playback devices.
- Next, right-click on the default Playback Device, then open Properties.
- Choose the Advanced tab option.
- Navigate to the Exclusive mode section and check the box that says disable Allow applications to control your device.

When it comes to editing or performing audio editing in the video, Wondershare Filmora is a powerful video editing software that can help you with reducing the voiceover volume, mute the audio in the video, or cut, copy, paste or insert your audio files. Learn more about the audio editing features of Filmora from the below video & download Filmora to try!
For Win 7 or later (64-bit)
For macOS 10.12 or later
Conclusion
● Whether you’re an amateur audio enthusiast or produce a podcast with thousands of listeners, the quality of your audio can “make or break” your results. When your audience is listening to an audio recording, the last thing they want to notice or hear is a distortion because it is very distracting. When recording, it is almost impossible to find an environment that removes audio distortion without access to a recording studio. Luckily, you can use the above methods to fix distorted audio and make it look professional.
So you’re all set: you’ve sat down, grabbed your microphone, fired up your recording software, and started pouring out the content of your mind. Once finished, you listen back to the recording, thinking you’re about to hear the silky-smooth undertones of your voice resonating through your ears, but something odd occurs — it sounds terrible. Distorted audio is very unwelcoming since you want the sound to be natural. This guide will explain how to fix distorted audio using various methods.
In this article
01 What Causes Distorted Audio?
02 How To Fix Distorted Audio Using Different Methods
What Causes Distorted Audio?
Distorted audio is the main culprit in ruined audio clips. Here are some of the causes of distorted sound.
1. Recording Environment
Not recording dialogue and voice-over in a studio can cause distorted audio. However, audio quality can be out of control if you conduct an onsite interview. Getting a meaningful and cinematic shot should come first. If you do not use a studio-quality microphone that comes with directional controls, you’ll likely have distorted audio. You might want to go for a unidirectional stereo channel if you want boom movements to be undetectable.
When a cheap, low-quality microphone is moving, you’ll hear the unsteadiness in your recording, leading to distorted audio. Recording audio in an echo chamber or an overly large room can also result in distorted audio.
2. Touching the Mic While Recording
If you hand the microphone to someone who does not know how to use it, they might hold it too loosely or close. Microphones feature sensitive parts that should not be dropped, shaken, or breathed on. When you are interviewing people unfamiliar with industry standards, you should hold the microphone, not the person you are interviewing. The mic is not within the range of 6” to 12 “ away from the speaker, this could lead to distorted audio.
3. Using the Wrong Mic
A reliable mic comes with audio controls and captures room tone and timbre. It should be portable, compact, and have a wind sleeve. In outdoor situations where ADR is not an option, you might want to use a wind sleeve.
Podcast showrunners and content creators often use Blue Yeti mics connected to a soundboard. While these are cheaper options, they can cause distorted audio. Content creators who are not stationary should purchase a lavalier, and wireless is a more high-end and expensive option.
4. Positioning Your Microphones Incorrectly
You have to be careful if you’ll be mounting a mic on your DSLR. Filming events with a one-mic setup is a promise to record everything you hear again. You’ll inevitably film some moments at a distance and leave the audio compromised to distortion.
5. Faulty Equipment
Your equipment can fail in different ways. For instance, your effects processor can fail, meaning that you won’t hear any sound passing through it. It can also fail, and you end up hearing a distorted sound passing out of the processor. Essentially, this might or might not be linked to the component’s capability of handling the signal as much as the busted internals result.
How To Fix Distorted Audio Using Different Methods
You can fix distorted audio using various methods. They include:
Method 1: How To Fix Distorted Audio in Audacity
Audacity is the bread and butter for individuals who adore a crisp audio quality. Audacity helps users finetune various attributes of their recordings. It is a free and intuitive software suite suitable for newbies and individuals who don’t interact with computers. With that in mind, here is how to fix distorted audio using Audacity.
- Open the audio file by dragging and dropping it into Audacity.
- Select the distorted part and click on the Effect option. Then, select Noise Reduction.
- The Noise Reduction window will open.
- Now, click on Noise Profile, and Audacity will know what to filter out.
- Next, select the entire audio and open the Noise Reduction Window again ( Effect > Noise Reduction ). Then, set the values to suit your preferences.
- Hit preview to check the audio, then the Click OK button.
If the audio is still distorted, apply the filter again. Don’t overdo the process numerous times to ensure your audio is not degraded, making the voice sound robotic and tinny.
Now, use compression to your advantage. If compression confuses you, think of it as a tool that adjusts your audio for the listener’s benefit. Compression not only quiets the background minutiae that creeps into your recording, but it also boosts your voice and gives it a full, captivating resonance.
- To start the compression process, select your audio track, press CTRL + A, click “Effect” and then click “Compressor.”
- Adjust the values in the compressor to meet your needs and make your voice “pop” from the background.
- Once you have set the values, hit the Preview button to check the audio. Then, click on OK.
That is how to fix distorted audio using Audacity.
You May Be Interested In
How To Fix Distorted Audio in Garageband
Garageband is one of the most popular audio recording software available. Though you can use it for various purposes, it is mainly intended to be used to create music. However, many people have the problem of distorted audio files, making production difficult when trying to perfect a project. To learn how to fix distorted audio in Garageband, follow the steps below:
- Launch GarageBand, then open your audio file. Once your audio file finishes loading, select the audio file from which you want to remove distortion by clicking it.
- Click on the “i” symbol encapsulated in a blue circle positioned on the lower-right portion of your screen. This icon sits in the middle of two other icons: a set of notes and an eye.
- Select the “Real Instrument” tab located on the top right side of your screen. You’ll see two tabs: Master Tracks and Real Instrument.
- Click the Edit tab to activate it, and a list of effects will pop up.
- Select Distortion from the list, and you’ll see a drop-down menu.
- Next, select the None option to remove distortion.
If you have distorted audio due to poor recording quality, navigate to the Real Instrument”Edit menu and select AULowpass from the boxes available. Doing this will remove frequencies above a certain range, and this will fix the distorted audio.
Method 3: How To Fix Distorted Audio in Windows 10
Several actions can cause problems or distort sound on your Windows 10 application. Some of the common causes include:
- When upgrading your computer from an older version to a new one
- In case your computer gets corrupted with a virus
- If your computer or device doesn’t the right sound drivers
So how do you fix distorted audio in Windows 10? There are several ways you can fix distorted audio in Windows 10. Here is how to fix distorted audio using some of the best ways.
1. Reinstall drivers
- Right-click the start button and choose device manager.
- Navigate through sound, video, and game controllers.
- Click on the Details tab.
- Select hardware Ids from the drop-down menu.
- Copy and first the first value of drivers in your browser and search the internet.
- Open the official site and download the correct driver。
- Install and restart your PC。
2. Update drivers
- Right-click on the start button.
- Scroll to the sound, video, and game controllers option.
- Right-click on the sound device and select uninstall the device.
- Restart your PC after the uninstall process is finished.
- Open the device manager.
- Select and click on the scan for hardware changes option.
Windows will automatically install a new version of sound drivers
3. Run Windows Audio Troubleshooter
- To use this method, open Start and click the cog-like icon. This will open the Settings app.
- Select Update & security.
- Choose Troubleshoot in the left pane.
- Expand the Playing Audio by clicking it.
- Hit the Run the troubleshooter button, then follow the further instructions.
4. Take Exclusive Control of Your Device Option by Disabling Allow Applications
- Navigate to the notification area and right-click on the sound icon. Open Playback devices.
- Next, right-click on the default Playback Device, then open Properties.
- Choose the Advanced tab option.
- Navigate to the Exclusive mode section and check the box that says disable Allow applications to control your device.
When it comes to editing or performing audio editing in the video, Wondershare Filmora is a powerful video editing software that can help you with reducing the voiceover volume, mute the audio in the video, or cut, copy, paste or insert your audio files. Learn more about the audio editing features of Filmora from the below video & download Filmora to try!
For Win 7 or later (64-bit)
For macOS 10.12 or later
Conclusion
● Whether you’re an amateur audio enthusiast or produce a podcast with thousands of listeners, the quality of your audio can “make or break” your results. When your audience is listening to an audio recording, the last thing they want to notice or hear is a distortion because it is very distracting. When recording, it is almost impossible to find an environment that removes audio distortion without access to a recording studio. Luckily, you can use the above methods to fix distorted audio and make it look professional.
The Animator’s Toolkit: A Detailed List of the Best Cartoon Sounds Available Online
8 Best Cartoon Sound Effects You Can Download

Benjamin Arango
Mar 27, 2024• Proven solutions
The sound plays a significant role in the videos. Without the right sound effects, your videos become dull. It doesn’t create an impact to grab the attention of the viewers. Especially when it comes to attracting the attention of kids while they watch cartoons.
Are you working on a cartoon video for kids or some animated action cartoons? Use the cartoon sound effects to add more intensity and emotions to the videos. Every time creating a new sound effect for your cartoon video becomes difficult.
If you are on a strict budget, producing new content becomes almost impossible. In such situations, free cartoon sound effects are the best way to enhance your cartoon videos.
In this article, you will learn eight best cartoon sound effects that you can download and make your videos perfect.
8 Best Cartoon Sound Effects Resources
1. Spongebob Sound Effects
MyInstant’s Spongebob soundboard offers a range of cartoon sound effects that can be easily downloaded just by clicking on the Download mp3 sound effect button. You can listen to over 120 classic cartoon sound effects and download it for free. You can also copy the embed link and paste it to your website.
2. Hanna Barbera Sound Effects
From Sounddogs, Hanna Barbera sound effects library, you can find over 2200 cartoon sound effects that are divided into 4 CDs. It has almost all the legendary classic cartoon sound effects from the cartoon shows like Yogi Bear, Huckleberry Hound, the Flintstones, The Jetsons, Quick Draw McGraw, and all the rest of the gang.
You can download the mp3 cartoon sound effects completely free by clicking on the Download ID number mentioned at the right end of each link.
3. Scooby Doo Running Sound
Fandom’s Scooby Doo running sound effects offers all the ideas used in 40 episodes of Scooby Doo throughout the three seasons on ABC. It is over 37000 pages wiki that you can click and browse through the pages to find the right sound effect and download it for free.
4. Tom and Jerry Sound Effects
Pond5 offers 13 Tom and Jerry sound effects that you can listen by scrolling the cursor over the boxes and download the free preview of cartoon sound effects by clicking on Download Preview.
If you want to download the entire cartoon sound effect, you need to register, log in, and pay for it. There are filters like price, collections, duration, etc. to make your selection more precise.
5. Free SFX
In FreeSFX website, you can find a range of comical cartoon sound effects that includes classic effects like descend, boink, impact, pop, musical, running, rip and snap, bounce spring, slide whistle, squelch and splat, horn and loads more.
You need to log in to the website to download free cartoon sound effects.

6.GRSites
With over 1980 cartoon sound effects, the GRSites is one of the best free sites for downloading both mp3 and WAV files. You can browse from a range of categories to find the best cartoon sound effects for your videos.
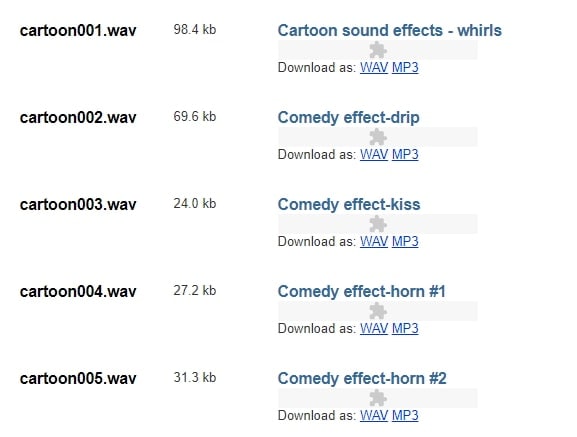
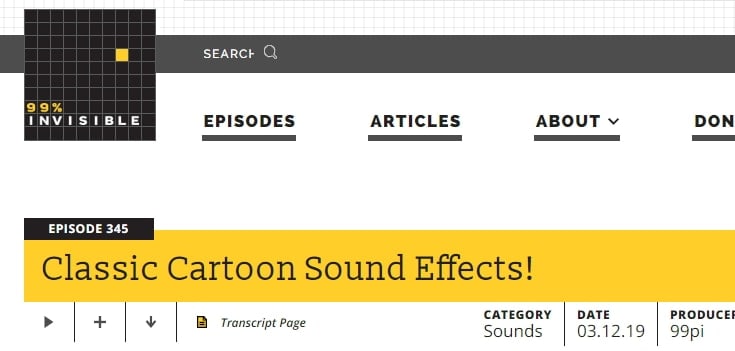
7. Cartoon Running Sound Effect
If you are looking for cartoon running sound effect, turn to Episode 345 in 99PercentInvisible. You can download the complete transcript page of around 30 minutes to use it in your video. Use the cartoon running sound effect produced by 99pi to enhance your video.
8. Big Fish Audio
The Big Fish Audio’s cartoon sound FX includes 23 free classic cartoon sound effects. The filters include a range of sound FX types, styles, format, brand, etc.
You can click on the cartoon sound effect and listen to it or add it to your playlist. But, if you wish to download the free cartoon sound effects, you need to register and pay to use the sound effect.

You may also like: How to Extract Audio from Videos on Win/Mac/Phone >>
Conclusion
Make your cartoon videos perfect with the fantastic free cartoon sound effects available for download completely free. With the range of free cartoon sound effects, you don’t need to worry about creating new sounds or expenses. You need to download the free sounds and beautifully enhance it with your creativity. There are several other sites for downloading free cartoon sound effects, but here you can check out some of the trusted ones to use.
Benjamin Arango
Benjamin Arango is a writer and a lover of all things video.
Follow @Benjamin Arango
Benjamin Arango
Mar 27, 2024• Proven solutions
The sound plays a significant role in the videos. Without the right sound effects, your videos become dull. It doesn’t create an impact to grab the attention of the viewers. Especially when it comes to attracting the attention of kids while they watch cartoons.
Are you working on a cartoon video for kids or some animated action cartoons? Use the cartoon sound effects to add more intensity and emotions to the videos. Every time creating a new sound effect for your cartoon video becomes difficult.
If you are on a strict budget, producing new content becomes almost impossible. In such situations, free cartoon sound effects are the best way to enhance your cartoon videos.
In this article, you will learn eight best cartoon sound effects that you can download and make your videos perfect.
8 Best Cartoon Sound Effects Resources
1. Spongebob Sound Effects
MyInstant’s Spongebob soundboard offers a range of cartoon sound effects that can be easily downloaded just by clicking on the Download mp3 sound effect button. You can listen to over 120 classic cartoon sound effects and download it for free. You can also copy the embed link and paste it to your website.
2. Hanna Barbera Sound Effects
From Sounddogs, Hanna Barbera sound effects library, you can find over 2200 cartoon sound effects that are divided into 4 CDs. It has almost all the legendary classic cartoon sound effects from the cartoon shows like Yogi Bear, Huckleberry Hound, the Flintstones, The Jetsons, Quick Draw McGraw, and all the rest of the gang.
You can download the mp3 cartoon sound effects completely free by clicking on the Download ID number mentioned at the right end of each link.
3. Scooby Doo Running Sound
Fandom’s Scooby Doo running sound effects offers all the ideas used in 40 episodes of Scooby Doo throughout the three seasons on ABC. It is over 37000 pages wiki that you can click and browse through the pages to find the right sound effect and download it for free.
4. Tom and Jerry Sound Effects
Pond5 offers 13 Tom and Jerry sound effects that you can listen by scrolling the cursor over the boxes and download the free preview of cartoon sound effects by clicking on Download Preview.
If you want to download the entire cartoon sound effect, you need to register, log in, and pay for it. There are filters like price, collections, duration, etc. to make your selection more precise.
5. Free SFX
In FreeSFX website, you can find a range of comical cartoon sound effects that includes classic effects like descend, boink, impact, pop, musical, running, rip and snap, bounce spring, slide whistle, squelch and splat, horn and loads more.
You need to log in to the website to download free cartoon sound effects.
6.GRSites
With over 1980 cartoon sound effects, the GRSites is one of the best free sites for downloading both mp3 and WAV files. You can browse from a range of categories to find the best cartoon sound effects for your videos.
7. Cartoon Running Sound Effect
If you are looking for cartoon running sound effect, turn to Episode 345 in 99PercentInvisible. You can download the complete transcript page of around 30 minutes to use it in your video. Use the cartoon running sound effect produced by 99pi to enhance your video.
8. Big Fish Audio
The Big Fish Audio’s cartoon sound FX includes 23 free classic cartoon sound effects. The filters include a range of sound FX types, styles, format, brand, etc.
You can click on the cartoon sound effect and listen to it or add it to your playlist. But, if you wish to download the free cartoon sound effects, you need to register and pay to use the sound effect.
You may also like: How to Extract Audio from Videos on Win/Mac/Phone >>
Conclusion
Make your cartoon videos perfect with the fantastic free cartoon sound effects available for download completely free. With the range of free cartoon sound effects, you don’t need to worry about creating new sounds or expenses. You need to download the free sounds and beautifully enhance it with your creativity. There are several other sites for downloading free cartoon sound effects, but here you can check out some of the trusted ones to use.
Benjamin Arango
Benjamin Arango is a writer and a lover of all things video.
Follow @Benjamin Arango
Podcast to Text: Discovering the Top 10 Free & Paid Conversion Tools
Top 10 Podcasting Audio to Text Transcription Software
Benjamin Arango
Mar 27, 2024• Proven solutions
Currently, there are over 29 million podcast episodes in over a hundred languages on the Internet, which shows how much competition you will be facing once you start a new podcast. That is why it is so important to optimize each new episode of your podcast for Google’s ever-changing algorithm. Adding tags, metadata, or writing a description of the podcast are just a few ways to improve the visibility of the content you share online.
Transcribing podcasts on your own becomes increasingly difficult as their duration increases. Instead of wasting hours going through the material and trying to figure out what your guests said, it is much easier to utilize podcasting transcription software that enables you to go through this process automatically. We have selected the 10 best podcasting audio to text transcription software products that are going to help you reach a larger number of listeners.
Top 10 Best Podcasting Audio to Text Transcription Software Products
Running a podcast involves much more than justrecording the materials and uploading them to the hosting platform . Podcasting audio to text transcription software products improves the searchability of the episodes of your show and makes it easier for your listeners to find them.
Let’s take a look at some of the best options you will have if you want to turn Podcasting audio into text automatically.
1. Sonix
Price: Pricing plans start as $10 per hour

Image Credit: sonix
The Sonix media player is designed to help podcasters widen their audience by improving the SEO optimization for search engines like Google or Bing. Moreover, this media player assists the search engines in crawling through and indexing the content you transcribe, which makes your podcasts easier to discover. Sonix also reduces the amount of time you’ll have to spend with the sound engineer by allowing you to keep all of the work materials at the same location. The app’s AudioText Editor lets you edit audio quickly by making the adjustments to the transcribed text. Sonix integrates with Adobe Audition and enables you to edit your audio files just moments after you transcribed them.
Pros
- Provides automated translation services for a multitude of languages
- Detects different speakers effortlessly
- Great selection of export file formats
- Allow users to edit video and audio by editing text
Cons
- Automated translation is not available in the Standard package
- The quality of customer support could be better
2. Trint
Price: Pricing plans start at $44 per month

Image Credit: Trint
Transcribing audio files with Trint is a straightforward process that can be completed in just a few simple steps. Simply upload a video or an audio file and this web-based software is going to transcribe them so that you can edit the text the AI has generated. You can use Trint to highlight specific segments of your files and export them as TXT, DOC, or SRT files. All of your data is protected by the app’s data management that is certified to ISO 27001, which means that all the information you process with Trint can only be accessed by you.
Pros
- Lighting fast transcription process
- Trint Editor is equipped with a versatile set of text editing tools
- Transcriptions services are available in 27 languages
- Trint can be integrated with hundreds of applications through Zapier
Cons
- More expensive than similar online audio to text software products
- Short trial period
3. GoTranscript
Price: The transcription fees start at under $1 per minute

Image Credit: GoTranscript
With more than 10, 000 users, GoTranscript is one of the largest podcasting audio to text service platforms on the Internet. This web-based platform employs highly skilled professionals who transcribe both audio and video files and convert all of your radio, webcast or video podcasts to text. GoTranscript’s teams ensure that the voices of different speakers are transcribed separately, which makes this platform a perfect choice if you are looking for a way to transcribe interviews or any other type of show that includes more than just one speaker. All texts are proofread in order to ensure that each segment of the text is accurate.
Pros
- The efficient 4-step transcription process
- Audio files are transcribed with 99% accuracy
- Equally efficient when utilized for education and marketing purposes
- Translation services are available
Cons
- Transcription process can take several days
- Editing text on GoTranscript isn’t an option
4. Happy Scribe
Price: $30 for 3 hours of subscription per month

Image Credit: Happyscribe
Podcasters who are looking for a simple and quick way to transcribe their audio recordings should consider using Happy Scribe. This web-based software detects more than a hundred languages and it can transcribe both video and audio files.
You just have to upload a file you want to transcribe and then use the Happy Scribe’s Interactive Editor to make corrections to the text before exporting it as a Export in Word, PDF, TXT, SRT, VTT, STL, XML, Premiere or AVID file. Happy Scribe’s Proofreading Helper enables you to detect segments of the text where the algorithm wasn’t accurate so that you can correct all of the mistakes before sharing the document you created.
Pros
- Features the Embed Player that can be added to any website
- Supports API integrations
- Creating and managing teams with Happy Scribe is easy
- Available in more than a hundred languages
Cons
- The algorithm’s accuracy depends on the quality of the audio or video recording
- Poor price to performance ratio
5. Simon Says
Price: Pricing options start at $15 per hour
The platform’s advanced AI speech recognition system is designed to transcribe both audio and video files accurately. Simon Says is available in over ninety languages, which enables you to transcribe video and audio files regardless of the language that is used in the podcast. In addition, the software can be used as an extension for FCPX and allows you to create subtitles for interviews, video podcasts, documentaries and all other projects you create with this video editing app. The transcription process lasts for just a few minutes, and once it is completed you can export your transcripts to Adobe Premiere Pro, FCPX, Excel, Word or any other software you’re using to create your podcasts.
Pros
- Equipped with a powerful AI speech recognition system
- Accurate transcriptions of audio and video files
- Allows podcasters to add bookmarks and highlight quotes from their footage
- Supports a variety of export file formats
Cons
- The quality of customer support depends on the subscription model you purchase
- Supports a limited number of audio and video file formats
6. InqScribe
Price: Free, $99 for an individual license
Compatibility: Windows, macOS
Unlike the previous podcasting audio to text software products we featured in this article, InqSribe can only be used on Mac and PC computers. Even though anyone can install and use this software for free, you must purchase the license if you want to print, save or export transcripts from InqScribe.
This digital media transcription software makes adding time codes to your transcripts easy, while you can also utilize custom snippets to insert frequently used text to a particular segment of the transcript. Each audio file you transcribe with InqScribe can be exported in file formats that are compatible with a broad range of video editing, subtitling or word processing software products.
Pros
- Affordable solution for podcasters who want to create transcripts of their audio and video files
- Provides support for nearly all audio and video file formats
- Accurate transcriptions of multi-lingual documents
- Excellent subtitling options
Cons
- Saving or exporting transcripts is not possible with the free version of the software
- No auto transcription options
7. Audext
Price: 30 free-trial minutes available
Media, podcast or education professionals can benefit from using Audext’s services since this platform can transcribe audio to text in just a few moments. You just have to upload an audio file you would like to transcribe and Audext will generate and DOC or TXT file for you. Optionally, you can use the platform’s text editor to correct any mistakes that occurred during the automatic transcription process. Audext identifies different speakers, which makes it an excellent option for podcasters who host new guests on each new episode of their podcast. The platform lets you export your transcripts to TXT or DOC file formats.
Pros
- The quick and efficient audio transcription process
- Powerful text editor
- Multi-speaker recognition features
- Customizable audio playback speed
Cons
- No video transcription options
- Transcriptions are not always accurate
8. Temi
Price: $0,10 per minute
This is a simple audio transcription tool that can generate text files you can use to create blogs or improve the searchability of your podcasts. Temi’s proprietary algorithm was created by speech recognition experts and it can easily detect multiple speakers. Furthermore, the platform lets you add timestamps wherever you want and it grants you access to the tools you can use to polish the automatically generated transcripts. You can download all the transcriptions you create with Temi to your computer and choose if you want to save them as Word, PDF or SRT files.
Pros
- The straightforward audio transcription process
- Excellent speaker identification features
- No subscriptions required
- Inexpensive audio transcription option
Cons
- The quality of the transcription depends on the quality of the audio file
- Transcription of long audio recordings can take a while
9. Castos
Price: Pay as you go, $0,10 per minute
Castos is a podcast hosting platform that is equipped with a powerful voice to text technology which transcribes all episodes of your podcasts accurately. This tool improves the visibility and the reach of the content you upload to your account on Castos, and makes it easier for you to optimize it for search engines. So, in order to start using this option, you will have to activate it from the Integrations section on the dashboard. Once you enabled the platform’s transcription features, all new episodes you upload to Castos are going to be transcribed automatically. What’s more, you will also be able to transcribe episodes you uploaded before activating this feature.
Pros
- Automatic transcription process
- Castos lets its users transcribe all podcast episodes regardless of when they were uploaded
- Compatible with YouTube Republishing feature
- Generates PDF transcription files listeners can download
Cons
- Limited transcription editing capabilities
- All audio transcription services are added to the monthly bill
10. Descript
Price: Free, pricing options start at $10 per month
Compatibility: web-based, macOS, Windows
In case you are looking for software you can use to record, edit and transcribe your podcasts, then you shouldn’t look much further than Descript. This cross-platform tool can be used to edit both audio and video files, while the Lyrebird AI enables you to correct any mistakes by simply typing what you really want to say. Descript automatically transcribes your videos with 96% accuracy and it detects multiple speakers effortlessly. It takes only three minutes to transcribe an hour-long podcast, but the software also allows you to use the human transcription services, although you will have to pay $1,25 for each minute of the transcription.
Pros
- Available on both Mac and PC computers
- Equipped with the Lyrebird AI
- Offers both audio and video editing tools
- Quick transcription turnaround
Cons
- No file sharing options
- The free version of Descript doesn’t offer transcription services
How to Make the Process of Transcribing Podcasts Quicker for Free
You don’t have to spend money on subscriptions to voice-to-text software products every month since Google Docs offers a simple and free solution. You can enable the Voice Typing feature from the Tools menu and then just proceed to record your podcasts.
This tool will transcribe everything you say, although its accuracy depends on the quality of the audio recording. In addition, the Voice Typing feature can be used to transcribe the podcasts you already recorded, but you have to repeat exactly what is being said in the episode you are transcribing.
You shouldn’t expect a high level of accuracy, since the Voice Typing tool is still being improved, and you should keep in mind that proofreading a transcript can help you eliminate all mistakes that occurred during the automatic transcription process.
Utilizing YouTube to Transcribe Podcast
One of the easiest ways to create captions for YouTube videos is to utilize the platform’s Transcribe feature. Every time you upload a new podcast to your YouTube channel, you’ll be able to generate captions for that video file automatically.
However, the voice to text technology the platform is using doesn’t always create accurate transcriptions, which is the reason why you must go through the entire transcription and make sure that the text matches its source.
Moreover, YouTube recently made the automatic captioning feature available during live streams, which enables you to generate transcriptions of your podcasts even while the recording session is in progress.
Conclusion
Extending the reach of your audience is an essential step towards creating a loyal base of subscribers who follow your work. Transcribing each episode of the podcast you are running can help you improve your SEO strategy and draw more attention to your work. Which podcasting audio to text transcription software are you using to transcribe audio and video files? Leave a comment and let us know.
Benjamin Arango
Benjamin Arango is a writer and a lover of all things video.
Follow @Benjamin Arango
Benjamin Arango
Mar 27, 2024• Proven solutions
Currently, there are over 29 million podcast episodes in over a hundred languages on the Internet, which shows how much competition you will be facing once you start a new podcast. That is why it is so important to optimize each new episode of your podcast for Google’s ever-changing algorithm. Adding tags, metadata, or writing a description of the podcast are just a few ways to improve the visibility of the content you share online.
Transcribing podcasts on your own becomes increasingly difficult as their duration increases. Instead of wasting hours going through the material and trying to figure out what your guests said, it is much easier to utilize podcasting transcription software that enables you to go through this process automatically. We have selected the 10 best podcasting audio to text transcription software products that are going to help you reach a larger number of listeners.
Top 10 Best Podcasting Audio to Text Transcription Software Products
Running a podcast involves much more than justrecording the materials and uploading them to the hosting platform . Podcasting audio to text transcription software products improves the searchability of the episodes of your show and makes it easier for your listeners to find them.
Let’s take a look at some of the best options you will have if you want to turn Podcasting audio into text automatically.
1. Sonix
Price: Pricing plans start as $10 per hour
Image Credit: sonix
The Sonix media player is designed to help podcasters widen their audience by improving the SEO optimization for search engines like Google or Bing. Moreover, this media player assists the search engines in crawling through and indexing the content you transcribe, which makes your podcasts easier to discover. Sonix also reduces the amount of time you’ll have to spend with the sound engineer by allowing you to keep all of the work materials at the same location. The app’s AudioText Editor lets you edit audio quickly by making the adjustments to the transcribed text. Sonix integrates with Adobe Audition and enables you to edit your audio files just moments after you transcribed them.
Pros
- Provides automated translation services for a multitude of languages
- Detects different speakers effortlessly
- Great selection of export file formats
- Allow users to edit video and audio by editing text
Cons
- Automated translation is not available in the Standard package
- The quality of customer support could be better
2. Trint
Price: Pricing plans start at $44 per month
Image Credit: Trint
Transcribing audio files with Trint is a straightforward process that can be completed in just a few simple steps. Simply upload a video or an audio file and this web-based software is going to transcribe them so that you can edit the text the AI has generated. You can use Trint to highlight specific segments of your files and export them as TXT, DOC, or SRT files. All of your data is protected by the app’s data management that is certified to ISO 27001, which means that all the information you process with Trint can only be accessed by you.
Pros
- Lighting fast transcription process
- Trint Editor is equipped with a versatile set of text editing tools
- Transcriptions services are available in 27 languages
- Trint can be integrated with hundreds of applications through Zapier
Cons
- More expensive than similar online audio to text software products
- Short trial period
3. GoTranscript
Price: The transcription fees start at under $1 per minute
Image Credit: GoTranscript
With more than 10, 000 users, GoTranscript is one of the largest podcasting audio to text service platforms on the Internet. This web-based platform employs highly skilled professionals who transcribe both audio and video files and convert all of your radio, webcast or video podcasts to text. GoTranscript’s teams ensure that the voices of different speakers are transcribed separately, which makes this platform a perfect choice if you are looking for a way to transcribe interviews or any other type of show that includes more than just one speaker. All texts are proofread in order to ensure that each segment of the text is accurate.
Pros
- The efficient 4-step transcription process
- Audio files are transcribed with 99% accuracy
- Equally efficient when utilized for education and marketing purposes
- Translation services are available
Cons
- Transcription process can take several days
- Editing text on GoTranscript isn’t an option
4. Happy Scribe
Price: $30 for 3 hours of subscription per month
Image Credit: Happyscribe
Podcasters who are looking for a simple and quick way to transcribe their audio recordings should consider using Happy Scribe. This web-based software detects more than a hundred languages and it can transcribe both video and audio files.
You just have to upload a file you want to transcribe and then use the Happy Scribe’s Interactive Editor to make corrections to the text before exporting it as a Export in Word, PDF, TXT, SRT, VTT, STL, XML, Premiere or AVID file. Happy Scribe’s Proofreading Helper enables you to detect segments of the text where the algorithm wasn’t accurate so that you can correct all of the mistakes before sharing the document you created.
Pros
- Features the Embed Player that can be added to any website
- Supports API integrations
- Creating and managing teams with Happy Scribe is easy
- Available in more than a hundred languages
Cons
- The algorithm’s accuracy depends on the quality of the audio or video recording
- Poor price to performance ratio
5. Simon Says
Price: Pricing options start at $15 per hour
The platform’s advanced AI speech recognition system is designed to transcribe both audio and video files accurately. Simon Says is available in over ninety languages, which enables you to transcribe video and audio files regardless of the language that is used in the podcast. In addition, the software can be used as an extension for FCPX and allows you to create subtitles for interviews, video podcasts, documentaries and all other projects you create with this video editing app. The transcription process lasts for just a few minutes, and once it is completed you can export your transcripts to Adobe Premiere Pro, FCPX, Excel, Word or any other software you’re using to create your podcasts.
Pros
- Equipped with a powerful AI speech recognition system
- Accurate transcriptions of audio and video files
- Allows podcasters to add bookmarks and highlight quotes from their footage
- Supports a variety of export file formats
Cons
- The quality of customer support depends on the subscription model you purchase
- Supports a limited number of audio and video file formats
6. InqScribe
Price: Free, $99 for an individual license
Compatibility: Windows, macOS
Unlike the previous podcasting audio to text software products we featured in this article, InqSribe can only be used on Mac and PC computers. Even though anyone can install and use this software for free, you must purchase the license if you want to print, save or export transcripts from InqScribe.
This digital media transcription software makes adding time codes to your transcripts easy, while you can also utilize custom snippets to insert frequently used text to a particular segment of the transcript. Each audio file you transcribe with InqScribe can be exported in file formats that are compatible with a broad range of video editing, subtitling or word processing software products.
Pros
- Affordable solution for podcasters who want to create transcripts of their audio and video files
- Provides support for nearly all audio and video file formats
- Accurate transcriptions of multi-lingual documents
- Excellent subtitling options
Cons
- Saving or exporting transcripts is not possible with the free version of the software
- No auto transcription options
7. Audext
Price: 30 free-trial minutes available
Media, podcast or education professionals can benefit from using Audext’s services since this platform can transcribe audio to text in just a few moments. You just have to upload an audio file you would like to transcribe and Audext will generate and DOC or TXT file for you. Optionally, you can use the platform’s text editor to correct any mistakes that occurred during the automatic transcription process. Audext identifies different speakers, which makes it an excellent option for podcasters who host new guests on each new episode of their podcast. The platform lets you export your transcripts to TXT or DOC file formats.
Pros
- The quick and efficient audio transcription process
- Powerful text editor
- Multi-speaker recognition features
- Customizable audio playback speed
Cons
- No video transcription options
- Transcriptions are not always accurate
8. Temi
Price: $0,10 per minute
This is a simple audio transcription tool that can generate text files you can use to create blogs or improve the searchability of your podcasts. Temi’s proprietary algorithm was created by speech recognition experts and it can easily detect multiple speakers. Furthermore, the platform lets you add timestamps wherever you want and it grants you access to the tools you can use to polish the automatically generated transcripts. You can download all the transcriptions you create with Temi to your computer and choose if you want to save them as Word, PDF or SRT files.
Pros
- The straightforward audio transcription process
- Excellent speaker identification features
- No subscriptions required
- Inexpensive audio transcription option
Cons
- The quality of the transcription depends on the quality of the audio file
- Transcription of long audio recordings can take a while
9. Castos
Price: Pay as you go, $0,10 per minute
Castos is a podcast hosting platform that is equipped with a powerful voice to text technology which transcribes all episodes of your podcasts accurately. This tool improves the visibility and the reach of the content you upload to your account on Castos, and makes it easier for you to optimize it for search engines. So, in order to start using this option, you will have to activate it from the Integrations section on the dashboard. Once you enabled the platform’s transcription features, all new episodes you upload to Castos are going to be transcribed automatically. What’s more, you will also be able to transcribe episodes you uploaded before activating this feature.
Pros
- Automatic transcription process
- Castos lets its users transcribe all podcast episodes regardless of when they were uploaded
- Compatible with YouTube Republishing feature
- Generates PDF transcription files listeners can download
Cons
- Limited transcription editing capabilities
- All audio transcription services are added to the monthly bill
10. Descript
Price: Free, pricing options start at $10 per month
Compatibility: web-based, macOS, Windows
In case you are looking for software you can use to record, edit and transcribe your podcasts, then you shouldn’t look much further than Descript. This cross-platform tool can be used to edit both audio and video files, while the Lyrebird AI enables you to correct any mistakes by simply typing what you really want to say. Descript automatically transcribes your videos with 96% accuracy and it detects multiple speakers effortlessly. It takes only three minutes to transcribe an hour-long podcast, but the software also allows you to use the human transcription services, although you will have to pay $1,25 for each minute of the transcription.
Pros
- Available on both Mac and PC computers
- Equipped with the Lyrebird AI
- Offers both audio and video editing tools
- Quick transcription turnaround
Cons
- No file sharing options
- The free version of Descript doesn’t offer transcription services
How to Make the Process of Transcribing Podcasts Quicker for Free
You don’t have to spend money on subscriptions to voice-to-text software products every month since Google Docs offers a simple and free solution. You can enable the Voice Typing feature from the Tools menu and then just proceed to record your podcasts.
This tool will transcribe everything you say, although its accuracy depends on the quality of the audio recording. In addition, the Voice Typing feature can be used to transcribe the podcasts you already recorded, but you have to repeat exactly what is being said in the episode you are transcribing.
You shouldn’t expect a high level of accuracy, since the Voice Typing tool is still being improved, and you should keep in mind that proofreading a transcript can help you eliminate all mistakes that occurred during the automatic transcription process.
Utilizing YouTube to Transcribe Podcast
One of the easiest ways to create captions for YouTube videos is to utilize the platform’s Transcribe feature. Every time you upload a new podcast to your YouTube channel, you’ll be able to generate captions for that video file automatically.
However, the voice to text technology the platform is using doesn’t always create accurate transcriptions, which is the reason why you must go through the entire transcription and make sure that the text matches its source.
Moreover, YouTube recently made the automatic captioning feature available during live streams, which enables you to generate transcriptions of your podcasts even while the recording session is in progress.
Conclusion
Extending the reach of your audience is an essential step towards creating a loyal base of subscribers who follow your work. Transcribing each episode of the podcast you are running can help you improve your SEO strategy and draw more attention to your work. Which podcasting audio to text transcription software are you using to transcribe audio and video files? Leave a comment and let us know.
Benjamin Arango
Benjamin Arango is a writer and a lover of all things video.
Follow @Benjamin Arango
Also read:
- New Harmonizing Screens A List of the Top 15 Scores for Various Genre Videos
- 2024 Approved The Ultimate List of Top 10 Podcast Editors, Including Both Cost-Free and Paid Variants
- New Top Podcast Hosting Services A Comprehensive Ranking
- New In 2024, A Comprehensive Guide to the Revolutionary Vocalists Who Redefined Anime Characters
- Updated Discovering the Best Vocal Enhancement Tools An Examination & Comparison
- Updated In 2024, Elevating Cinematic Experience Effective Application of Tension-Inducing Themes
- Next-Gen Audio Data Organizer The Ultimate Tagging App for Windows & Mac Users, for 2024
- 2024 Approved Find Game Sound Effects
- New Advanced Techniques for Audio Detachment in Newly Updated MKV Files (MKV-2023)
- 2024 Approved Speak Now, Type Soon Essential Free Tools for Mobile Audio Transcriptions
- New 2024 Approved Sonic Image Gallery Embed Free Music on Your Pictures Desktop/Smartphone
- New Top 10 Free Browser-Based DAWs for Creatives
- The Zen of Zoom A No-Nonsense Guide for Muting Audio on Computer/Mobile Devices
- Step-by-Step Tutorial Incorporating Autotune Plugins Into Your Audacity Projects for 2024
- In 2024, Installing Lame Encoder on Audacity A Step-by-Step Guide
- Updated How To Add & Edit A Song To Video For Free, In 2024
- Updated Authoritative Hubs for Securing Lofi Melodies and Visual Backdrops
- Updated In 2024, Premium Selection The Most Exceptional 11 Voice Alteration Apps Available at No Charge for Mobile Devices
- Updated In 2024, Speak Simply Top 10 Software Solutions to Streamline Your Voice Recordings
- Innovative Storytelling Constructing Audio Waves Visualization and Imbuing Videos with Kinetic Animations Through Premiere Pro for 2024
- In 2024, Innovative Vocalization Crafting A Selection of Top-Ranked Generators for Audio Enthusiasts
- Androids Finest Audio Collection Tools A Curated List of 10 Excellent Recorders
- Vocalizing Text Pioneering Audio to Written Content Conversion for 2024
- Updated In 2024, Navigating Internet-Based Audio Manipulation Techniques
- 2024 Approved Peak Happiness Uprising in Crowds
- Updated 2024 Approved Combining Sounds & Visuals A Guide to Blending Video and Audio
- New 2024 Approved Digital Venues for Encountering and Bonding with Unknown Individuals Responsibly
- New 2024 Approved Top-Rated Speech-to-Text Applications for Mobile Devices
- Online Learning Campaign Comprehensive Insights Streamed Live for 2024
- 2024 Approved Score Your Story Editing and Enriching Videos with Auditory Elements via Filmora
- New Become an Expert at Uncomplicated Podcasting A Stepwise Manual to Success 2023 Guidebook for 2024
- Ways To Remove Background Noise From Audio With Voice Cleaner Online
- Essential Audiophile Gear Top 9 Tools to Boost Your Podcast and Broadcast Clarity for 2024
- New 2024 Approved Free Audio Synthesis Platforms Transforming Your Words Into Sound!
- 2024 Approved The Ultimate List 10 Best Free and Paid Audio Editors for Professional Sound Designers
- New In 2024, Unlocking Audio Content Effective Strategies for Transferring Podcast Episodes Onto Computers
- New 2024 Approved Echo Eradication Professional Strategies for Silencing Unwanted Acoustic Features
- 2024 Approved Choosing a Pinnacle of Auditory Experience A Modern Approach
- New Finding Optimal Applications for Effective Sound Isolation in Videos and Audios for 2024
- In 2024, A Comprehensive Guide to iPhone XS Max Blacklist Removal Tips and Tools
- Updated In 2024, Kapwing Editor How to Shorten Videos Online Without Downloading Software
- In 2024, Top 10 Samsung Galaxy M34 Android SIM Unlock APK
- In 2024, How to Screen Mirroring Motorola Moto G34 5G? | Dr.fone
- Full Guide to Fix iToolab AnyGO Not Working On Xiaomi Redmi A2 | Dr.fone
- Updated 2024 Approved Tips for Soundcloud to MP3 Converter
- Unleash Your Creativity WeVideos Intuitive Video Creation Platform for 2024
- New Online Video Creators with Built-In Music Libraries for 2024
- 2024 Approved Do You Want to Give Your Videos and Photos a Cinematic Look but Couldnt Find How? Here Are Different Cinematic LUTs Discussed that You Can Try and Use
- Best Fixes For Samsung Galaxy A54 5G Hard Reset | Dr.fone
- In 2024, CatchEmAll Celebrate National Pokémon Day with Virtual Location On Honor Magic 6 Pro | Dr.fone
- A Complete Guide To OEM Unlocking on Lenovo
- In 2024, How to Transfer Data from OnePlus Nord CE 3 5G to Any iOS Devices | Dr.fone
- 3 Ways to Unlock Apple iPhone 7 without Passcode or Face ID | Dr.fone
- Mastering Android Device Manager The Ultimate Guide to Unlocking Your Poco M6 Pro 4G Device
- Title: Updated 2024 Approved Combatting Audio Misfires Methods for Rectifying Sound Warping
- Author: Kate
- Created at : 2024-05-05 07:48:04
- Updated at : 2024-05-06 07:48:04
- Link: https://audio-editing.techidaily.com/updated-2024-approved-combatting-audio-misfires-methods-for-rectifying-sound-warping/
- License: This work is licensed under CC BY-NC-SA 4.0.
