
:max_bytes(150000):strip_icc():format(webp)/windows11contextmenu-f4d6ebb14db4444d851b4338aa553e21.png)
Relaxation Through Rustling Leaves A Top 10 List of Nature Sound Apps for Your Smartphone
Relaxation Through Rustling Leaves: A Top 10 List of Nature Sound Apps for Your Smartphone
Best Nature Sounds Apps for iOS and Android

Benjamin Arango
Apr 26, 2024• Proven solutions
In today’s challenging times, when stress and anxiety has become inevitable for a majority of population, there is a constant search for solutions that will enable people to live a peaceful and pleasant life. Here, the technology comes to their rescue with nature sound effects app.
These applications provide multiple sounds related to the Nature. The users just need to download any of these programs, and select the desired tone according to their choice. Such mobile software also offer numerous relaxing audios that assist in achieving a deeper level of concentration during the meditation.
10 Best Nature Sounds Apps
1. YouTube
YouTube is also one of the important apps for nature sounds where one can get almost any kind of relaxing sounds related to the Nature.
Binaural beats videos, where two different frequencies of sounds are combined to create a new frequency tone are getting highly popular among people. These are believed to help in lowering stress, anxiety and depression and increase concentration, attention, and efficiency of an individual.
It can also be helpful in attaining mental peace and serenity. The app even contains peaceful meditation sounds that ease the ability to focus and remain relaxed during the whole process. It is highly a user-friendly app and is absolutely free to download on the Android Smartphones.
2. Atmosphere: Relaxing Sounds
Compatible with Android 5.0 or up , and iOS 10.0 or later

Atmosphere is one of the best apps for nature sounds. It is custom-made to help people relieve stress and relax their mind.
The key feature of this application is that it allows users to import their personalized audios and mix them with various default acoustics available within the app itself.
The soothing sounds available here are divided into 8 different environments such as Beach, City, Park, Countryside, Home, Underwater, Forest and Oriental. Users can also mix and match the sounds between environments to produce a tailored theme.
3. Rainy Mood
Compatible with both iOS and Android OS 5.0 and up

Rainy Mood provides the most genuine rain, thunderstorm, and lightening sounds available online.
It not only relieves tension and anxiety but also helps users suffering from insomnia.
This app even contains natural white noise facility that helps in getting rid of any unwanted sounds around us.
The various rain sounds are available here in different environments such as heavy rain, tropical rain, umbrella, rain on tent, rain on porch etc. The best thing about this app is that it can work in offline mode, i.e. without any Internet connection. This eventually results in less power consumption.
4. Animal Sounds
Compatible with Android 4.1 and up
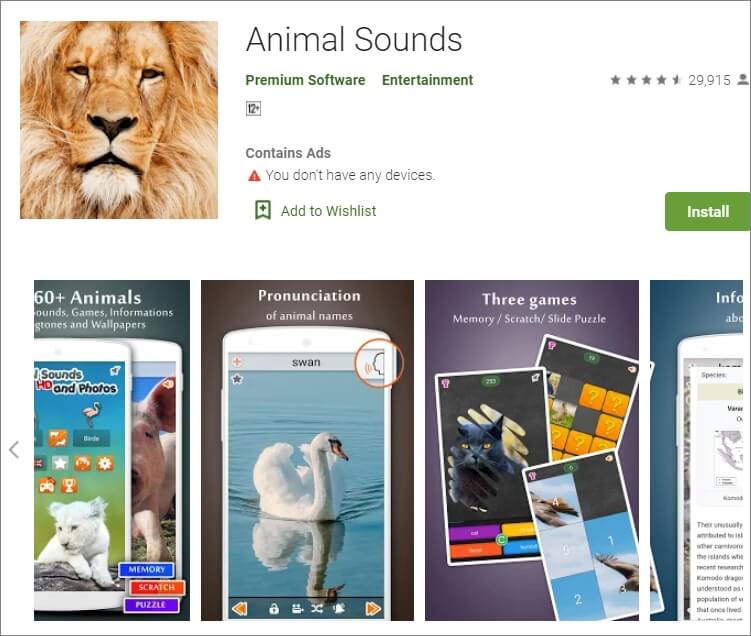
Animal Sounds is a one-stop destination for all animal lovers. The program provides the most detailed information about animals, and also contains hundreds of animal sounds and photographs from all over the globe.
The quality of audios and pictures is remarkably high and clear. The sounds here are categorized under pet animals, mammals, farm animals, bird sounds, wild animals, reptiles and amphibians.
The application also provides the facility of customized ringtones and wallpapers to its users.
5. Sleep Sounds
Compatible with Android 4.4 or later
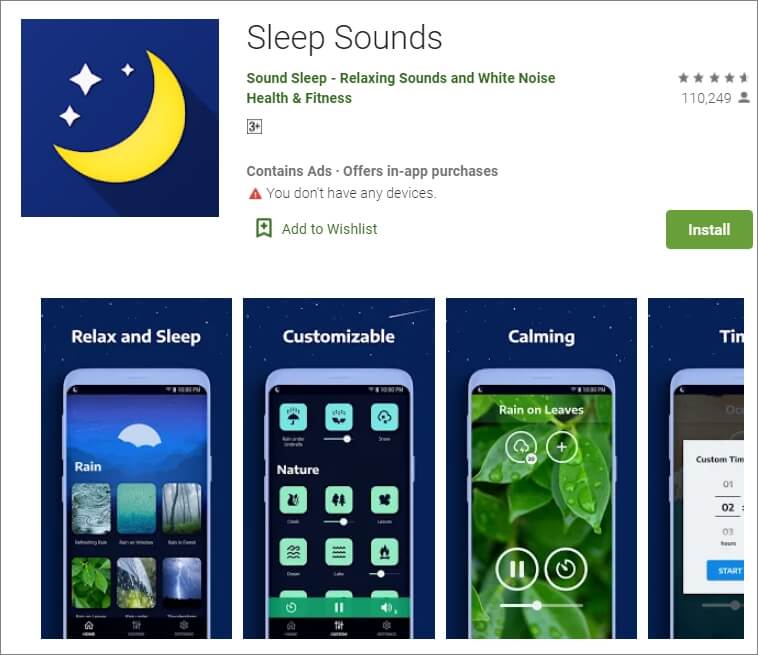
Sleep Sounds is one of the top trending apps nowadays owing to the increasing problems of insomnia and irregular sleep patterns among people. It is very helpful for an uninterrupted quality sleep.
The calm and soft music gradually tranquilizes the mind and the user eases into a good sleep. Its interface is user-friendly with beautiful images in the background.
The sounds here are categorized under rain, nature, relax, transport, noise, and white noise classes. This app also works without an Internet connection.
6.Calm
Compatible with Android and iOS 10.0 and watchOS 6.0 or later
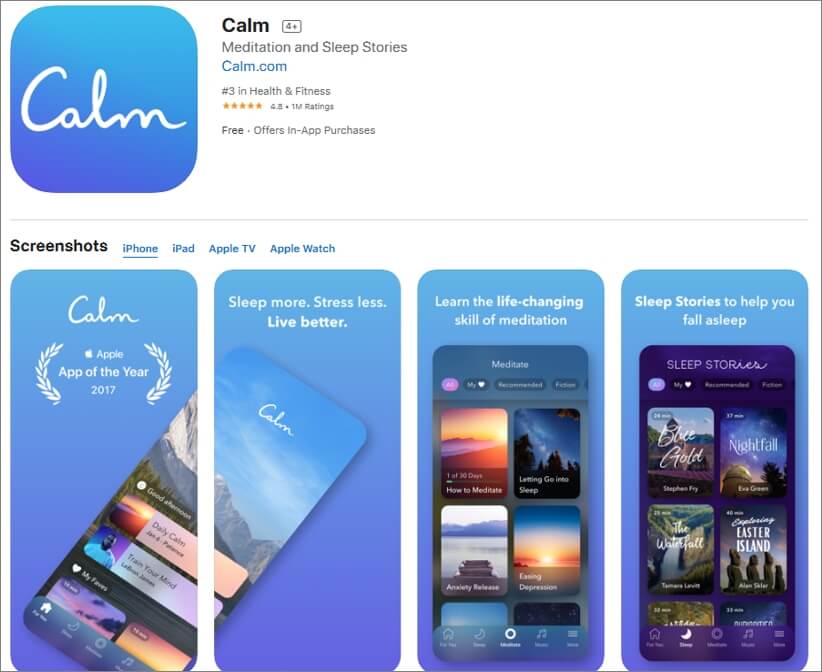
Calm is best suitable for the people who practice meditation on a daily basis. It is available for free and can be used by the beginners as well as experienced users.
The main features include guided meditation programs, breathing sessions, adult bed-time stories, masterclasses by the international coaches, etc.
Here, one can choose a personalized guide for meditation from several topics such as relationships, self-esteem, breaking habits, forgiveness, mindfulness, etc. Users can even track their daily progress on the basis of time spent by them on the app.
7. Ambience – Nature sounds: sleep and meditation
Compatible with Android 4.2 and up .
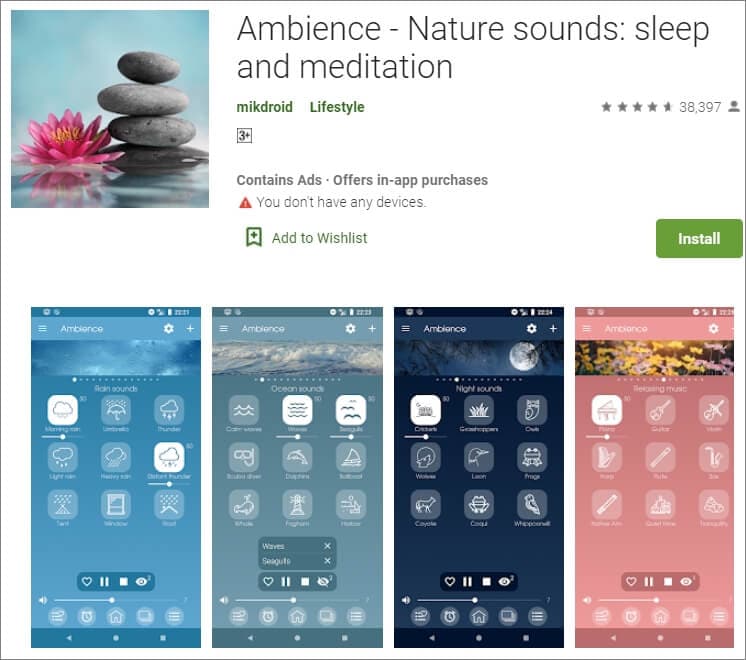
Ambience is another one of the most popular apps for nature sounds providing peace and serenity to its users through relaxing and soothing tones.
It has a very simple and clean user interface which makes it a highly demanding program. The main features include the facility of mixing maximum 10 sounds at the same time. Along with various preset mixtures of audios that are available here, users can also save their customized combinations for future use.
8. Naturespace: Sleep Relax Focus
Compatible with Android 4.0 or up and iOS 9.0 or later
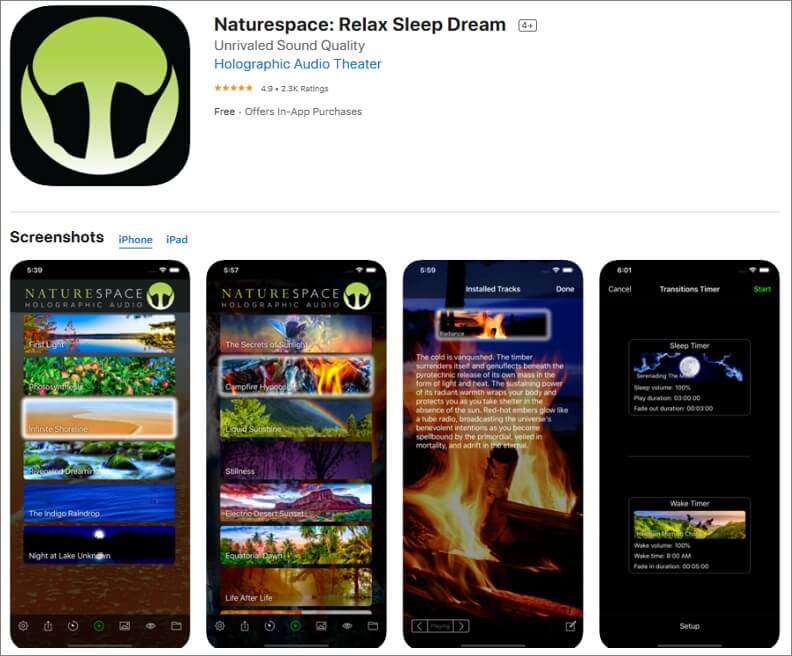
Naturespace is a unique app containing real time 3D recordings of natural places such as forests, deserts, mountains, etc. The equipment used in the program for recording the sounds are of extremely high quality, and as a result, the listening experience is out of this world.
The clarity of the sound surpasses almost every other application available in this genre of nature sound apps. It also provides the facility of sleep and wake timer to its users. The simple user interface along with earbud optimisation facility makes the software highly efficient and popular among people.
9. SimplyNoise – Free White Noise
Compatible with iOS 8.0 or later and Android
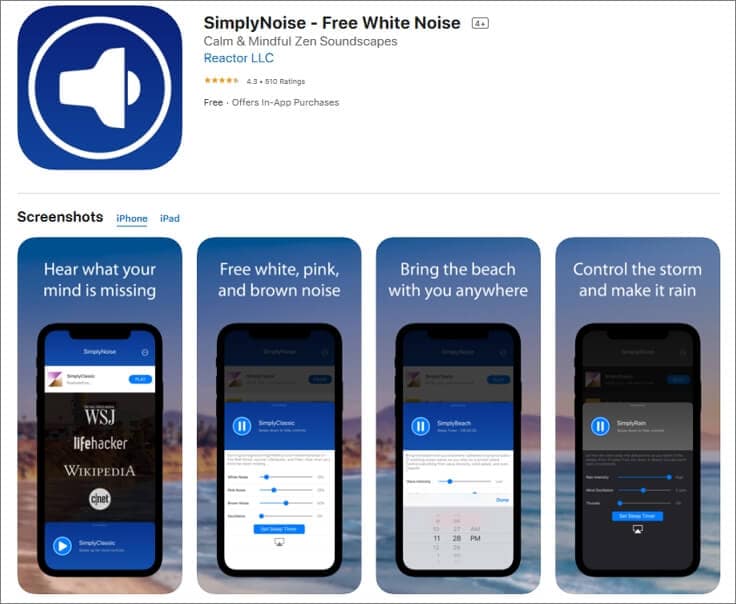
Simply Noise is one of the most basic apps for nature sounds as it provides only one acoustic without any background noises. As there are no such complexities involved, it can also be used by people who are not tech-savvy.
The categorization of sounds is done here as white noise, pink noise, and brown noise. Users can select any of these according to their requirement.
This app is best suitable for people who are unable to concentrate on a particular thing, or suffer from sleeping disorder. Sleep-timer option is also available here.
10. aSleep
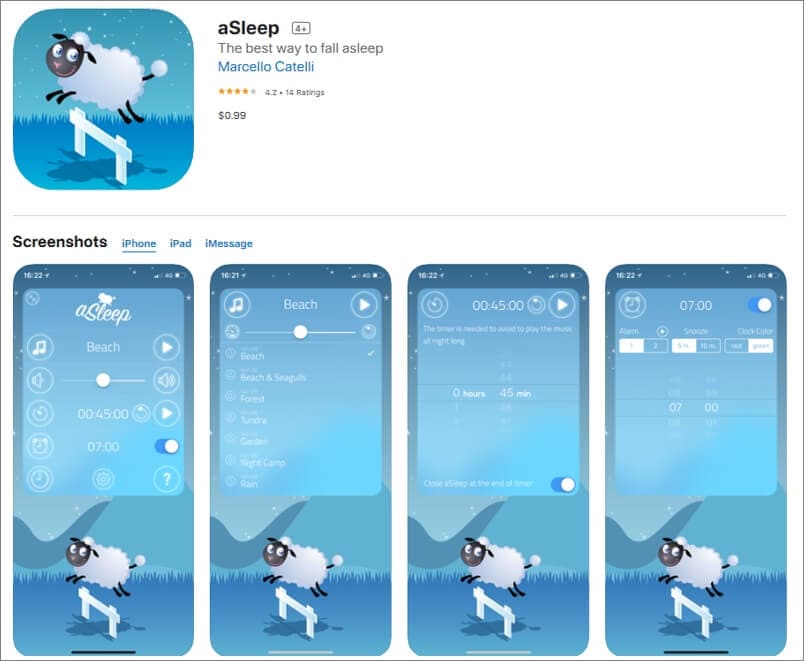
Available for iOS devices like iPhone and iPad, aSleep offers around 64 realistic stereo nature sounds to help you relax your mind and fall asleep almost instantaneously. With the built-in Timer feature, the music can be programmed to stop automatically after a certain amount of time to save your device’s battery.
Furthermore, the also works as an alarm clock that wakes you up with nature sounds at your predefined hour. The application is also good for kids as it can be used to play lullabies to help them get a tight sleep at night. And the program does all this without collecting any data from your iDevice.
What Is the Best Rain Sound App?
Among various rain sound applications available online, Rainy Mood is the most popular one that enjoys high star rating. When it comes to rain sounds, there is no match to it. It mainly includes 4 rain scenes namely Classic, Ocean, Countryside and Cafe. These genres can be customized according to different tastes and preferences.
What Are the Different Sounds of Nature?
The nature is made up of 5 basic elements which include Air, Water, Fire, Earth and Space. These components constitute various natural acoustics. Some examples are music of the rain, thunderstorm or a waterfall, wind blows, sounds of leaves and water streams, chirping of birds or grasshoppers, stridulation of insects like crickets, etc. All these sounds are beautifully incorporated in nature sound effects app.
In case that you want to add some nature sound to your video clip, you can try Wondershare Filmora, which features an audio library containing different nature sound effects as well. Download the free trial version of Filmora and have a try.


Besides adding sound to video, you can also add some elemental 2D visual effects to videos to make it cooler.
Benjamin Arango
Benjamin Arango is a writer and a lover of all things video.
Follow @Benjamin Arango
Benjamin Arango
Apr 26, 2024• Proven solutions
In today’s challenging times, when stress and anxiety has become inevitable for a majority of population, there is a constant search for solutions that will enable people to live a peaceful and pleasant life. Here, the technology comes to their rescue with nature sound effects app.
These applications provide multiple sounds related to the Nature. The users just need to download any of these programs, and select the desired tone according to their choice. Such mobile software also offer numerous relaxing audios that assist in achieving a deeper level of concentration during the meditation.
10 Best Nature Sounds Apps
1. YouTube
YouTube is also one of the important apps for nature sounds where one can get almost any kind of relaxing sounds related to the Nature.
Binaural beats videos, where two different frequencies of sounds are combined to create a new frequency tone are getting highly popular among people. These are believed to help in lowering stress, anxiety and depression and increase concentration, attention, and efficiency of an individual.
It can also be helpful in attaining mental peace and serenity. The app even contains peaceful meditation sounds that ease the ability to focus and remain relaxed during the whole process. It is highly a user-friendly app and is absolutely free to download on the Android Smartphones.
2. Atmosphere: Relaxing Sounds
Compatible with Android 5.0 or up , and iOS 10.0 or later
Atmosphere is one of the best apps for nature sounds. It is custom-made to help people relieve stress and relax their mind.
The key feature of this application is that it allows users to import their personalized audios and mix them with various default acoustics available within the app itself.
The soothing sounds available here are divided into 8 different environments such as Beach, City, Park, Countryside, Home, Underwater, Forest and Oriental. Users can also mix and match the sounds between environments to produce a tailored theme.
3. Rainy Mood
Compatible with both iOS and Android OS 5.0 and up
Rainy Mood provides the most genuine rain, thunderstorm, and lightening sounds available online.
It not only relieves tension and anxiety but also helps users suffering from insomnia.
This app even contains natural white noise facility that helps in getting rid of any unwanted sounds around us.
The various rain sounds are available here in different environments such as heavy rain, tropical rain, umbrella, rain on tent, rain on porch etc. The best thing about this app is that it can work in offline mode, i.e. without any Internet connection. This eventually results in less power consumption.
4. Animal Sounds
Compatible with Android 4.1 and up
Animal Sounds is a one-stop destination for all animal lovers. The program provides the most detailed information about animals, and also contains hundreds of animal sounds and photographs from all over the globe.
The quality of audios and pictures is remarkably high and clear. The sounds here are categorized under pet animals, mammals, farm animals, bird sounds, wild animals, reptiles and amphibians.
The application also provides the facility of customized ringtones and wallpapers to its users.
5. Sleep Sounds
Compatible with Android 4.4 or later
Sleep Sounds is one of the top trending apps nowadays owing to the increasing problems of insomnia and irregular sleep patterns among people. It is very helpful for an uninterrupted quality sleep.
The calm and soft music gradually tranquilizes the mind and the user eases into a good sleep. Its interface is user-friendly with beautiful images in the background.
The sounds here are categorized under rain, nature, relax, transport, noise, and white noise classes. This app also works without an Internet connection.
6.Calm
Compatible with Android and iOS 10.0 and watchOS 6.0 or later
Calm is best suitable for the people who practice meditation on a daily basis. It is available for free and can be used by the beginners as well as experienced users.
The main features include guided meditation programs, breathing sessions, adult bed-time stories, masterclasses by the international coaches, etc.
Here, one can choose a personalized guide for meditation from several topics such as relationships, self-esteem, breaking habits, forgiveness, mindfulness, etc. Users can even track their daily progress on the basis of time spent by them on the app.
7. Ambience – Nature sounds: sleep and meditation
Compatible with Android 4.2 and up .
Ambience is another one of the most popular apps for nature sounds providing peace and serenity to its users through relaxing and soothing tones.
It has a very simple and clean user interface which makes it a highly demanding program. The main features include the facility of mixing maximum 10 sounds at the same time. Along with various preset mixtures of audios that are available here, users can also save their customized combinations for future use.
8. Naturespace: Sleep Relax Focus
Compatible with Android 4.0 or up and iOS 9.0 or later
Naturespace is a unique app containing real time 3D recordings of natural places such as forests, deserts, mountains, etc. The equipment used in the program for recording the sounds are of extremely high quality, and as a result, the listening experience is out of this world.
The clarity of the sound surpasses almost every other application available in this genre of nature sound apps. It also provides the facility of sleep and wake timer to its users. The simple user interface along with earbud optimisation facility makes the software highly efficient and popular among people.
9. SimplyNoise – Free White Noise
Compatible with iOS 8.0 or later and Android
Simply Noise is one of the most basic apps for nature sounds as it provides only one acoustic without any background noises. As there are no such complexities involved, it can also be used by people who are not tech-savvy.
The categorization of sounds is done here as white noise, pink noise, and brown noise. Users can select any of these according to their requirement.
This app is best suitable for people who are unable to concentrate on a particular thing, or suffer from sleeping disorder. Sleep-timer option is also available here.
10. aSleep
Available for iOS devices like iPhone and iPad, aSleep offers around 64 realistic stereo nature sounds to help you relax your mind and fall asleep almost instantaneously. With the built-in Timer feature, the music can be programmed to stop automatically after a certain amount of time to save your device’s battery.
Furthermore, the also works as an alarm clock that wakes you up with nature sounds at your predefined hour. The application is also good for kids as it can be used to play lullabies to help them get a tight sleep at night. And the program does all this without collecting any data from your iDevice.
What Is the Best Rain Sound App?
Among various rain sound applications available online, Rainy Mood is the most popular one that enjoys high star rating. When it comes to rain sounds, there is no match to it. It mainly includes 4 rain scenes namely Classic, Ocean, Countryside and Cafe. These genres can be customized according to different tastes and preferences.
What Are the Different Sounds of Nature?
The nature is made up of 5 basic elements which include Air, Water, Fire, Earth and Space. These components constitute various natural acoustics. Some examples are music of the rain, thunderstorm or a waterfall, wind blows, sounds of leaves and water streams, chirping of birds or grasshoppers, stridulation of insects like crickets, etc. All these sounds are beautifully incorporated in nature sound effects app.
In case that you want to add some nature sound to your video clip, you can try Wondershare Filmora, which features an audio library containing different nature sound effects as well. Download the free trial version of Filmora and have a try.
Besides adding sound to video, you can also add some elemental 2D visual effects to videos to make it cooler.
Benjamin Arango
Benjamin Arango is a writer and a lover of all things video.
Follow @Benjamin Arango
Enhancing Visuals: The Guide to Blending Photos with Music
Almost everyone shoots videos and photos now. But sometimes, it’s hard to record videos while boring to capture images. What if a hybrid mingles still images with an audio file? You can add audio to photo easily.
Images with a soundtrack are simpler to create and more interactive than video; they naturally improve the project without time commitment or complexity. The question that appears is; how to add audio to a photo/image and create great multimedia photography?
In this post, we will describe and clear all your queries on how to add audio to photo. Whether you wish to combine audio and image on the computer or add audio to iPhone pictures, you can all find the answer.
In this article
01 [Can I add audio to the photo?](#Part 1)
02 [How to add audio to a photo?](#Part 2)
03 [Secret about adding audio to the photo?](#Part 3)
Part 1 Can I add audio to the photo?

Yes, it’s possible to add audio to photo, and we have various methods to do this. One of the simplest methods is arranging images into slideshows and adding audio.
Yes, there are different ways by which you can add audio to photo online or offline, including both the easiest and most brutal ways. Let’s list out some general courses as follows!
● The first and common way is by making a slideshow or photo collage like a video and adding background music as audio.
● You can use an image collage app or add audio to a photo app for Android or iPhone devices.
● Lastly, you can add audio to the photo online editor or online video editing program and include voiceover or background music.
All in all, it’s possible to add audio to photo provided you’ve to look straightforward and quick ways of doing so.
Part 2 How to add audio to a photo?
ACDSee supports images with embedded audio and photos with associated audio files. Images with embedded audio are JPEG or TIFF images saved inside the photo folder. You can embed audio inside the folder of photos by adding audio to the photo online.
Images with associated audio are photos are merged with individual WAV audio files. The photo folders and their associated audio files contain the same file name and are placed within the same folder.
You can associate any WAV file with a photo by assigning them the same name and locating them in the same folder or adding audio to the photo.
Note: If you rename or move either an audio file or an image file associated with it, you must rename both the folders or they will not associate for longer. It does not apply to photos with embedded audio.
Steps to add audio to photo via ACDSee
Do one of the following:
● Select an image in Manage mode.
● Open an image in View mode.
Step1 Click Tools | Image Audio | Edit
Step2 In the Edit Audio dialog box, click the Browse button
Step3 Select a WAV file and click Save
Step4 If you would like to truncate or clip the audio file, select the Use markers checkbox and drag the Start marker and End marker sliders. Do one of the following
● Click the Truncate button to remove the beginning and end of the audio file (the sections outside of the start and end markers).
● Click the Clip button to remove the audio file section inside the start and end markers.
Step5 To hear a preview of the file, click the Play button
Step6 Click OK
Part 3 Secret about adding audio to the photo?
If you’re looking to add audio to a photo in a straightforward manner, here’s a tip for you than going complex. It’s because the software or programs available are highly problematic when it comes to better understanding. Thus, using the ideal program is the best way out (and a secret)!
We have to admit that customization is quite trendy among the young generation. Customizing a unique album is a cool thing, too.
A professional editing tool would be an ideal helper to do this (hence, the reason you’re here). While a great variety of music management software and video editors support adding audio to images, Wondershare Filmora stands out for its efficiency, simplicity, and robust capability.
To get started, consider a free trial copy of Wondershare Filmora
Step1 Import Media
Hit the “Import” tab to load your songs from ripped CDs or downloaded from the internet.
Then drag and drop your image in a format like JPEG, JPG, JPE, GIF, BMP, DIB, PNG, JFIF, TIFF, TIF to the media library panel. Now you’ll consider using all the imported files displayed as thumbnails in the Media library.
Step2 Drag and Drop to add photos to audio
Drag songs and photos from the Media Library to the Timeline accordingly.
Filmora assists you in adding various photos to the audio. You can highlight the image and hover your mouse to the last section.
Click the “set duration” icon on the toolbar and set it to fit your music file’s length.
Tips: You can zoom-out or zoom-in on the Timeline in the top right corner by dragging the timeline slider to find the ideal position easily.
Check the effect in the preview window after this. If possible, you can ramp up your creation, e.g., add captions, apply special effects, transitions, and even create a picture-in-picture effect.

Step3 Save Music with Photos
When you’re satisfied with the outcomes, hit the Export tab.
Then, select MP4 under the format tab in the output window, or if you want to play the media on your phone, you can choose the device in the Export window and choose target devices among iPad, iPhone, or Apple TV, etc. Filmora will create a proper setting for phone device saving.

Bonus tips
Rip audio from video: If you wish to extract audio from a movie trailer, film, comedy, TV show, etc., highlight the video file in the Timeline tab, right-click it and choose the “Audio Detach” tab, then you can eliminate the original video stream and save in a new MP3 format, and now you can freely add your images to the ripped music.
Or, you can delete the original audio file and add a new one.
Conclusion
So, that’s all you had to know about adding audio to photo. We’ve discussed all the questions you’re wandering on how to add audio to photo online and mentioned the different ways by which you can do the same.
As the uploading speed is slow, we highly suggest using Filmora to add audio to photos. Besides, Filmora provides 50 plus sounds that you can use. Try it now!
02 [How to add audio to a photo?](#Part 2)
03 [Secret about adding audio to the photo?](#Part 3)
Part 1 Can I add audio to the photo?
Yes, it’s possible to add audio to photo, and we have various methods to do this. One of the simplest methods is arranging images into slideshows and adding audio.
Yes, there are different ways by which you can add audio to photo online or offline, including both the easiest and most brutal ways. Let’s list out some general courses as follows!
● The first and common way is by making a slideshow or photo collage like a video and adding background music as audio.
● You can use an image collage app or add audio to a photo app for Android or iPhone devices.
● Lastly, you can add audio to the photo online editor or online video editing program and include voiceover or background music.
All in all, it’s possible to add audio to photo provided you’ve to look straightforward and quick ways of doing so.
Part 2 How to add audio to a photo?
ACDSee supports images with embedded audio and photos with associated audio files. Images with embedded audio are JPEG or TIFF images saved inside the photo folder. You can embed audio inside the folder of photos by adding audio to the photo online.
Images with associated audio are photos are merged with individual WAV audio files. The photo folders and their associated audio files contain the same file name and are placed within the same folder.
You can associate any WAV file with a photo by assigning them the same name and locating them in the same folder or adding audio to the photo.
Note: If you rename or move either an audio file or an image file associated with it, you must rename both the folders or they will not associate for longer. It does not apply to photos with embedded audio.
Steps to add audio to photo via ACDSee
Do one of the following:
● Select an image in Manage mode.
● Open an image in View mode.
Step1 Click Tools | Image Audio | Edit
Step2 In the Edit Audio dialog box, click the Browse button
Step3 Select a WAV file and click Save
Step4 If you would like to truncate or clip the audio file, select the Use markers checkbox and drag the Start marker and End marker sliders. Do one of the following
● Click the Truncate button to remove the beginning and end of the audio file (the sections outside of the start and end markers).
● Click the Clip button to remove the audio file section inside the start and end markers.
Step5 To hear a preview of the file, click the Play button
Step6 Click OK
Part 3 Secret about adding audio to the photo?
If you’re looking to add audio to a photo in a straightforward manner, here’s a tip for you than going complex. It’s because the software or programs available are highly problematic when it comes to better understanding. Thus, using the ideal program is the best way out (and a secret)!
We have to admit that customization is quite trendy among the young generation. Customizing a unique album is a cool thing, too.
A professional editing tool would be an ideal helper to do this (hence, the reason you’re here). While a great variety of music management software and video editors support adding audio to images, Wondershare Filmora stands out for its efficiency, simplicity, and robust capability.
To get started, consider a free trial copy of Wondershare Filmora
Step1 Import Media
Hit the “Import” tab to load your songs from ripped CDs or downloaded from the internet.
Then drag and drop your image in a format like JPEG, JPG, JPE, GIF, BMP, DIB, PNG, JFIF, TIFF, TIF to the media library panel. Now you’ll consider using all the imported files displayed as thumbnails in the Media library.
Step2 Drag and Drop to add photos to audio
Drag songs and photos from the Media Library to the Timeline accordingly.
Filmora assists you in adding various photos to the audio. You can highlight the image and hover your mouse to the last section.
Click the “set duration” icon on the toolbar and set it to fit your music file’s length.
Tips: You can zoom-out or zoom-in on the Timeline in the top right corner by dragging the timeline slider to find the ideal position easily.
Check the effect in the preview window after this. If possible, you can ramp up your creation, e.g., add captions, apply special effects, transitions, and even create a picture-in-picture effect.
Step3 Save Music with Photos
When you’re satisfied with the outcomes, hit the Export tab.
Then, select MP4 under the format tab in the output window, or if you want to play the media on your phone, you can choose the device in the Export window and choose target devices among iPad, iPhone, or Apple TV, etc. Filmora will create a proper setting for phone device saving.
Bonus tips
Rip audio from video: If you wish to extract audio from a movie trailer, film, comedy, TV show, etc., highlight the video file in the Timeline tab, right-click it and choose the “Audio Detach” tab, then you can eliminate the original video stream and save in a new MP3 format, and now you can freely add your images to the ripped music.
Or, you can delete the original audio file and add a new one.
Conclusion
So, that’s all you had to know about adding audio to photo. We’ve discussed all the questions you’re wandering on how to add audio to photo online and mentioned the different ways by which you can do the same.
As the uploading speed is slow, we highly suggest using Filmora to add audio to photos. Besides, Filmora provides 50 plus sounds that you can use. Try it now!
How to Edit Videos to the Beat in Premiere Pro?
How to Edit Videos to the Beat in Premiere Pro?
Benjamin Arango
Mar 27, 2024• Proven solutions
A rapid succession of shots can make any music video or a feature film more entertaining to watch. The popularity of beat edits has gone through the roof in the era of social media videos, as so many YouTubers and video content creators produce videos that are perfectly synced to the music. This video editing technique can be used in a single scene or throughout an entire video, depending on the project and the effect you would like the video to make on the viewer. Read on if you would like to learn how to edit video clips to match the beat of a song in Adobe Premiere Pro.
How to Edit and Auto-Sync Video Clips to the Beat of a Song in Adobe Premiere Pro for Free?
Before you start editing clips to the beat, you must first ensure that all of the materials you want to include in that video are imported into the project you created in Adobe Premiere Pro. Once the footage you intend to use in your video is in the Media Bin, you should head over to the New submenu in the File menu.
Afterward, you can add an audio file to the timeline and ensure that the sequence settings are correct. The audio file is going to serve as the core around which you are going to build the entire video, which is why it is important to select a rhythmic song that has clearly distinguishable beats.
Click on the Wrench icon and choose the Show Audio Waveform option from the drop-down menu, so that you can see the beats in the audio file. Make sure that the sequence you created is selected and not the audio file you added to the timeline and then position the playhead at the beginning of the song. Listening to the music to which you would like to edit your video a few times is recommended because it will enable you to better understand where the beats are located.
When ready start adding markers to the sequence by using the M keyboard shortcut, so that every beat of the song contains a marker. This may take a few tries because hitting the beats can be difficult for video editors that don’t have any musical talents, but with practice, you should be able to position the markers precisely where they need to be. Also, you can make the adjustments to the video you’re creating after you sync your footage with the audio so even if the markers aren’t positioned perfectly you can make corrections later.
Head over to the Media Bin and proceed to add In and Out points, by either clicking on their icons or using the I and O buttons, to all video clips you want to edit to the beat. By doing so you will let Adobe Premiere know which parts of the video clips you want to keep and where it should create cuts. After setting the In and Out points for all the video clips you would like to use in your project you just have to select them. The order in which your footage is selected is important as it will determine where they are going to be placed on the timeline.
Choose the Automate to Sequence option from the Clip menu and once the Automate to Sequence window appears on the screen you should choose the Selection Order option from the Ordering menu. Afterward, you should select the At Unnumbered Markers setting from the Placement menu and change the Method to the Overwrite Edit.
Make sure that the Use In/Out Range option is enabled and click on the Ignore Audio checkbox if your video clips also contain audio. Click OK to confirm the changes and Adobe Premiere Pro will automatically match your footage to the markers you added to the sequence.
How to Edit Video Clips to the Beat of a Song with BeatEdit Extension for Adobe Premiere Pro?
Placing markers at each beat in the song can be both difficult and time-consuming, which defeats the purpose of using Adobe Premiere Pro to automate this process. In case you are looking to save some time on adding markers to a sequence, you should try the Mamoworld’s BeatEdit extension for Adobe Premiere Pro that analyses the music and adds markers automatically. Here’s how you can edit video clips to match the beat with BeatEdit.
How to Edit Footage to the Beat in Premiere Pro with the BeatEdit Extension?
In order to download and install the BeatEdit in Adobe Premiere Pro, you must pay a one-time $99,99 fee. After you go through the installation process, you can launch BeatEdit from the Extensions submenu that is located in the Window menu.
After the BeatEdit window pops up on the screen you should click on the Load Music button in order to start the beat detection process. After the audio file is analyzed blue lines are going to be displayed at each beat and you’ll be able to hear a click sound if you play the song. BeatEdit lets you adjust the volume of the audio file you analyzed and enables you to select the beats where you want to make the cuts in your footage.
You can choose if you want to select beats evenly or randomly, specify their frequency or select the portion of the song from which you want to select the beats. The extension also lets you add extra markers that are not located at beat and adjust their amount or minimum distance. BeatEdit generates clip and sequence markers, so make sure that the sequence markers option is selected before clicking on the Create Markers button.
Add the audio file you would like to use in your video to the Adobe Premiere Pro’s timeline and proceed to select the video clips in the Media Bin. Place the playhead at the beginning of the timeline and select the Automate to Sequence option from the Clip menu. You can then select the same settings you’d select if you added the markers to the sequence on your own.
Conclusion
Editing videos to the beat of a song in Premiere Pro is becoming increasingly popular among video content creators. Hopefully, our tutorial has helped you learn this simple but effective video editing technique so that you can use it to make the videos your friends and followers on social media are going to enjoy watching. It is important to remember that how effective your beat edits are going to be, depends on the quality of the footage and the song selection. Do you know how to edit video clips to match the beat of a song in Premiere Pro? If so, share your experiences with us in the comments.
Benjamin Arango
Benjamin Arango is a writer and a lover of all things video.
Follow @Benjamin Arango
Benjamin Arango
Mar 27, 2024• Proven solutions
A rapid succession of shots can make any music video or a feature film more entertaining to watch. The popularity of beat edits has gone through the roof in the era of social media videos, as so many YouTubers and video content creators produce videos that are perfectly synced to the music. This video editing technique can be used in a single scene or throughout an entire video, depending on the project and the effect you would like the video to make on the viewer. Read on if you would like to learn how to edit video clips to match the beat of a song in Adobe Premiere Pro.
How to Edit and Auto-Sync Video Clips to the Beat of a Song in Adobe Premiere Pro for Free?
Before you start editing clips to the beat, you must first ensure that all of the materials you want to include in that video are imported into the project you created in Adobe Premiere Pro. Once the footage you intend to use in your video is in the Media Bin, you should head over to the New submenu in the File menu.
Afterward, you can add an audio file to the timeline and ensure that the sequence settings are correct. The audio file is going to serve as the core around which you are going to build the entire video, which is why it is important to select a rhythmic song that has clearly distinguishable beats.
Click on the Wrench icon and choose the Show Audio Waveform option from the drop-down menu, so that you can see the beats in the audio file. Make sure that the sequence you created is selected and not the audio file you added to the timeline and then position the playhead at the beginning of the song. Listening to the music to which you would like to edit your video a few times is recommended because it will enable you to better understand where the beats are located.
When ready start adding markers to the sequence by using the M keyboard shortcut, so that every beat of the song contains a marker. This may take a few tries because hitting the beats can be difficult for video editors that don’t have any musical talents, but with practice, you should be able to position the markers precisely where they need to be. Also, you can make the adjustments to the video you’re creating after you sync your footage with the audio so even if the markers aren’t positioned perfectly you can make corrections later.
Head over to the Media Bin and proceed to add In and Out points, by either clicking on their icons or using the I and O buttons, to all video clips you want to edit to the beat. By doing so you will let Adobe Premiere know which parts of the video clips you want to keep and where it should create cuts. After setting the In and Out points for all the video clips you would like to use in your project you just have to select them. The order in which your footage is selected is important as it will determine where they are going to be placed on the timeline.
Choose the Automate to Sequence option from the Clip menu and once the Automate to Sequence window appears on the screen you should choose the Selection Order option from the Ordering menu. Afterward, you should select the At Unnumbered Markers setting from the Placement menu and change the Method to the Overwrite Edit.
Make sure that the Use In/Out Range option is enabled and click on the Ignore Audio checkbox if your video clips also contain audio. Click OK to confirm the changes and Adobe Premiere Pro will automatically match your footage to the markers you added to the sequence.
How to Edit Video Clips to the Beat of a Song with BeatEdit Extension for Adobe Premiere Pro?
Placing markers at each beat in the song can be both difficult and time-consuming, which defeats the purpose of using Adobe Premiere Pro to automate this process. In case you are looking to save some time on adding markers to a sequence, you should try the Mamoworld’s BeatEdit extension for Adobe Premiere Pro that analyses the music and adds markers automatically. Here’s how you can edit video clips to match the beat with BeatEdit.
How to Edit Footage to the Beat in Premiere Pro with the BeatEdit Extension?
In order to download and install the BeatEdit in Adobe Premiere Pro, you must pay a one-time $99,99 fee. After you go through the installation process, you can launch BeatEdit from the Extensions submenu that is located in the Window menu.
After the BeatEdit window pops up on the screen you should click on the Load Music button in order to start the beat detection process. After the audio file is analyzed blue lines are going to be displayed at each beat and you’ll be able to hear a click sound if you play the song. BeatEdit lets you adjust the volume of the audio file you analyzed and enables you to select the beats where you want to make the cuts in your footage.
You can choose if you want to select beats evenly or randomly, specify their frequency or select the portion of the song from which you want to select the beats. The extension also lets you add extra markers that are not located at beat and adjust their amount or minimum distance. BeatEdit generates clip and sequence markers, so make sure that the sequence markers option is selected before clicking on the Create Markers button.
Add the audio file you would like to use in your video to the Adobe Premiere Pro’s timeline and proceed to select the video clips in the Media Bin. Place the playhead at the beginning of the timeline and select the Automate to Sequence option from the Clip menu. You can then select the same settings you’d select if you added the markers to the sequence on your own.
Conclusion
Editing videos to the beat of a song in Premiere Pro is becoming increasingly popular among video content creators. Hopefully, our tutorial has helped you learn this simple but effective video editing technique so that you can use it to make the videos your friends and followers on social media are going to enjoy watching. It is important to remember that how effective your beat edits are going to be, depends on the quality of the footage and the song selection. Do you know how to edit video clips to match the beat of a song in Premiere Pro? If so, share your experiences with us in the comments.
Benjamin Arango
Benjamin Arango is a writer and a lover of all things video.
Follow @Benjamin Arango
Also read:
- Updated Discovering the 10 Premium PC Voice Capture Software for 2024
- New 2024 Approved Unveiling the Most Cutting-Edge Speech Modification Technologies
- 2024 Approved Compilation of Websites Offering Feline-Inspired MP3 Sounds
- New 2024 Approved Cut, Compress & Conquer Mastering Avidemux for Audio Post Production ( Edition)
- New Hunt for Terrifying Acoustic Phenomena for 2024
- New Bring Your Movies to Life A Comprehensive Guide to Adding Audio in Final Cut Pro
- New In 2024, Strategies for Silencing Acoustic Reflections A Guide to Clearer Recordings
- Updated Strategies for Silencing Acoustic Reflections A Guide to Clearer Recordings for 2024
- Updated 2024 Approved Voicing the Future The Top 8 Free, Online Recorders Transforming Audio
- 2024 Approved Separate Sounds From Images IMovies Methodology for Mac Computers
- 2024 Approved 15 Must-Have Tech Gadgets and Digital Platforms to Transform Your Videos With Impactful Music Integration A Side-by-Side Analysis
- New In 2024, Chill-Out Playlists for Non-Profit Video Arrangements
- In 2024, Ultimate List of Powerful Gender-Swapping Apps Elevating Masculine Voices to Femininity
- Melodic Minus One Magic A Gratuitous Converter Bringing Downbeats of MP3 Track to Harmony.
- 2024 Approved Searching for High-Quality Vocal Noise Sounds
- Updated In 2024, Discover Virtual Reality Environment Noises
- New In 2024, Explore the Best Selection of 7 Internet-Based Audio Trimming Utilities
- 2024 Approved Ultimate List of Budget-Friendly, Web-Based DAW Tools
- Updated Premier Voice Capture Apps on Android The Best
- New 2024 Approved Quintessential Windows 10 Auditory Harmony Software Picks
- In 2024, The Ultimate List of Male-to-Female Voice Alteration Applications
- Updated Fine-Tuning Audacitys Decibel Settings for Perfect Balance
- In 2024, Vocalizing Text Pioneering Audio to Written Content Conversion
- New Avoiding Audible Distractions Silencing Audio in Current AVI Updates for 2024
- New How to Add Music (Background Music) to Video without Hassle
- The Producers Playbook Discovering Premium Sound Effects for Your Podcast Creations
- Insert Auditory Element to iMovie Storyline for 2024
- New In 2024, Cutting Edge 6 Internet Audio Divide and Conquer Software
- Updated The Art of Acoustic Precision Strategies for Eradicating Unwanted Microphone Noise
- Updated Noise Nullification Made Simple A Complete Look at Noise Reduction in Adobe Premiere Pro for 2024
- New 2024 Approved The Ultimate Compilation Top 7 FREE Voice Transformation Tools for Unleashing Your Inner Artist
- New 2024 Approved Advanced Methods for Silencing Background Music in Videos
- Updated In 2024, Composing for Cinema Adding Musical Layers to Video Content
- The Finest Selection of Affordable, Internet-Based Auditory Modification Software for the Year 2024
- In 2024, How to Unlock Apple ID Activation Lock From iPhone XR?
- Apple iPhone SE (2022) Screen Mirroring You Must Know | Dr.fone
- Android Safe Mode - How to Turn off Safe Mode on Itel A05s? | Dr.fone
- New 2024 Approved Top-Rated Image to Video Makers Free and Paid Solutions
- In 2024, How to Transfer Contacts from Samsung Galaxy M14 5G to iPhone XS/11 | Dr.fone
- How to use Pokemon Go Joystick on Poco M6 5G? | Dr.fone
- Super Easy Ways To Deal with Honor Play 8T Unresponsive Screen | Dr.fone
- In 2024, Change Location on Yik Yak For your Samsung Galaxy S23 Tactical Edition to Enjoy More Fun | Dr.fone
- In 2024, Forgot iPhone Passcode Again? Unlock Apple iPhone 11 Pro Without Passcode Now | Dr.fone
- 3 Effective Ways to Unlock iCloud Account Without Password On Apple iPhone 13 mini
- Title: Relaxation Through Rustling Leaves A Top 10 List of Nature Sound Apps for Your Smartphone
- Author: Kate
- Created at : 2024-05-20 02:42:11
- Updated at : 2024-05-21 02:42:11
- Link: https://audio-editing.techidaily.com/relaxation-through-rustling-leaves-a-top-10-list-of-nature-sound-apps-for-your-smartphone/
- License: This work is licensed under CC BY-NC-SA 4.0.
