
:max_bytes(150000):strip_icc():format(webp)/sb10069770n-003-56a104403df78cafdaa7dd48-ba41d70c51114343aaa38409d9cdfc3f.jpg)
New In 2024, REAPER Unveiled Insights Into Advanced Recording Features & Educational Content
“REAPER Unveiled: Insights Into Advanced Recording Features & Educational Content”
DAW stands for Digital Audio Workstation. It is where you can record, edit, mix or even master your music. You always need good DAW software to help you with the job to produce music or live recording musicians.
A good DAW software must have a multi-track audio recording , virtual instruments, MIDI sequencer, excellent mixing capabilities, and plug-in processor hosting. The software is found for all major operating systems such as Linux , Windows, and Mac. If you want to learn more about DAW, then stay with us. The article will discuss in detail REAPER Recording Software.
In this article
01 What Is REAPER Recording Software?
02 How to Download and Install REAPER Software?
03 Tutorial for Using REAPER Recording Software
Part 1. What Is REAPER Recording Software?
Recording software like REAPER records computer audio is used to produce music, edit it, transform, and customize your music. With REAPER Recording Software , you can record multi-layer audio and MIDI in various formats. REAPER has the easiest interface that allows you to drag and drop to import, split, move and do many other tasks.

This is just one feature of REAPER that sounds very interesting. In this section, we will talk about more of its features.
1. Record and Edit
You can easily record the audio and (MIDI) Musical Instrumental Digital Interface with REAPER recording software. It lets you edit and customize everything. You can record and edit things limitlessly. When it comes to recording, it’s not at all difficult for REAPER software to record various instruments or vocals.
2. Mixing
Initially, the mixer might seem inflexible, but in reality, REAPER has a lot to offer you. It has great automated capabilities for instrument and effect parameters. It doesn’t matter if you are working because you can still bounce or freeze tracks while working.
The mixer is very flexible. With REAPERs mixer, you just have to drag and drop your recordings so that you can create tracks, and also, you can customize the arrangements by moving the portions.
3. Interface
While looking at the interface, you might question yourself about how to use its interface. Some people love to learn about new things, such as the REAPER Recording Software. Whereas, some people seem least interested because the half-empty interface is not intuitive to them.
Whereas, the best thing about its interface is that you can customize it. REAPER allows you to add different wallpapers and layouts to your software interface.
4. Strong Stability
REAPER Recording Software has very strong stability. This is one of its strongest features as compared to other competitors. The RAM is rarely affected by the load time and the used resources. Moreover, the software offers a wide range of languages. You can select your desired language to run the software.
Part 2. How to Download and Install REAPER Software?
REAPER is a Digital Audio Workstation. The perfect platform where you can manipulate and transform your audio. With REAPER Record Computer audio, you can work efficiently in a resource-friendly studio with saving your time. Stay tuned if you plan to learn more about its pricing and requirements.

Pricing of REAPER Software
A reaper is a brilliant software. It has a 60-day trial period. REAPER costs $60 in total to register. It has complete MIDI sequencing. You can also get a discounted license if REAPER is the best private option for you or has commercial usage. You can set the equal license key on every computer for someone with multiple computers.
System Requirements
The recording software has uncountable features. REAPER software facilitates its users at every level by giving the best audio manipulating platform. The best thing about REAPER Recording Software is its compatibility with different operating systems. Let us add more to your knowledge on this.
Windows
REAPER software is available for Windows 7, 8, 10, XP, and Vista. The version of REAPER for Windows is 6.42. This is for Windows 64-bit whereas, a download package is also available for Windows 32-bit.
macOS
For macOS 64-bit, REAPER has a 6.42 version. This version is compatible with macOS 10.5 – 10.14. Whereas, for macOS 10.15+, the available version of REAPER is 6.42 with a 15MB file size.
Linux
REAPER Recording Software is also compatible with Linux x86_64. The REAPER version is 6.42 with an 11 MB file size. This version can also work on AMD64 64-bit.
Downloading and Installing REAPER
Now that REAPER Record Computer Audio has impressed you a lot. You must be thinking about how to download it. If this is on your mind, then we got you. Allow us to share its steps that will guide you to download the software easily.
Step 1: To install REAPER software, first of all, visit its official website. Then locate and head over to its download section.
Step 2: Click on ‘Download REAPER from the download section.’ For Windows users, they can download the Windows installation package. At the same time, Linux and macOS users can select their installation packages.
Step 3: Lastly, after you have downloaded your systems compatible installation package, you simply have to run it and then install it according to your respective operating system.
Part 3. Tutorial for Using REAPER Recording Software
After its attractive features and detailed downloading procedure, it is finally the time to talk about its works. This section of the article will explain to you more about REAPER Recording Software as we are now going to present a tutorial on how to use the software.
Understand the Layout
Understanding and knowing the layout of your software before you start working on it is essential. The crucial components of REAPER software include the Timeline, Arrangement Window, Track Panel, Toolbar, and lastly, Transport.

The Arrangement window holds all the added items. The items are played from left to right order, similar to their timeline arrangement. You can also zoom in and out. Then comes the transport toolbar, which holds the functions to stop, rewind, play, fast forward, adjust the timeline speed, etc. The toolbar holds all the toggle buttons. You can also customize your toolbar.
New Track Creation
For creating a new track on REAPER, go to the Track menu and hit Insert New Track. A track is like another layer to your audio. Multiple layers and tracks make your work complex yet interesting as you can play all the different tracks at the same time. By double-clicking in the Track Control Panel, you can set a name for the added track.

Audio Hardware Settings for Audio Recording
It is best suggested always to check your audio hardware settings before you start to record, edit or mix with REAPER Recording Software. Your primary focus should be on the recording device’s devices should be set as Input Device, whereas the listening device should be set as the Output Device.
For this, you have to select Preferences from the Options menu. A window will appear in front of you, the REAPER Preference window. You have to select the correct Input and Output devices from the dropdown menu from this window.

Arm your Track
Arming your track is very important. For this, head over to the Track Control Panel, and next to your track name, hit the red circle. If you have various tracks, you should solo this track and mute the other tracks.
As soon as the track is armed, a Gain Meter will activate on the side. From this, you can check if you have properly set the microphone or not. This could be tested by tapping on the microphone.

Record
After all, the hardware settings are done, and your track is armed, it’s time to start the recording. For that, just tap on the Record button in the Transport toolbar. A yellow line in the timeline will indicate the end of the recording.

To end the recording, tap on the Stop button from the Transport Toolbar. Lastly, REAPER Recording Software will ask you to save the file. In case you don’t want it, you can also delete it.
Create and Manipulate Clips
Things like manipulation get a lot easier if you split the clips in REAPER. From the items menu, you have to select the option of Split Item on Cursor. This divides your clip into two clips on each side of the cursor. You can also remove the clips by going to the Items Menu. From there, you just have to hit the Remove Item option, or else, simply press the Delete key on your keyboard.

Removing clips will create a gap in the arrangement window that can be filled by dragging forward the remaining clip.
Volume Adjustments – Normalize
By double-clicking on the item or by selecting ‘Item Properties’ from a right-click, you can normalize the item. A new window will appear as Media Item Properties, from where you have to locate the Volume Settings and then select the option of Normalize.
If your item is already loud, then nothing will happen, but if it is not, then the slider will change from 0.00 dB showing an increase in the volume. Lastly, hit the ‘Apply’ or ‘OK’ button to imply the changes.
Fade in/out
With the Media Properties, you can also adjust a Fade in and a Fade out. For this, you simply have to set an end time for the Fade in, whereas a start time is entered for Fade out. Hit the ‘Ok’ or ‘Apply’ button to apply the changes.
From the Arrangement window, fades can be adjusted. For adjusting the fades, hover with your mouse over the red line. You will see a newly shaped cursor. Just drag on the timeline to play and adjust the Fade with this new cursor.

Automate Changes
With REAPER, you can also automate changes in track parameters. We will guide about automation from Track Envelopes. From Track Control Panel, hit the Trim option. A new Envelopes window will open at this point from where you have to check the Volume box.
A new Volume Track will open up. Here, you have to set new Envelope points. That could be done by holding the shift key, right-clicking on the point, and then selecting Create New Point. A green circle will indicate the new point.
By dragging the Envelope point, you can also adjust the volume. Dragging it towards the top will increase the volume, whereas dragging it towards the bottom will eventually decrease.

Finalize the Audio – Render
After all the above steps have been completed to set the order and adjust your desired volume, the last step comes to render your project file. For that, move to the File menu and select the ‘Render’ option. A window will be opened as ‘Render to File.’ Now, from the dropdown menu, select your desired Output Format.
Lastly, hit the Render 1 File button, and then REAPER will export your project. You can immediately listen to it by selecting the ‘Launch File’ option.

Concluding Thoughts
This article is everything you need to learn about REAPER Recording Software. The article that started from an introduction on DAW took you on a roller coaster ride. Everything about REAPER software has been shared.
We hope that this article helps you in all possible ways. The attractive features impress you, and its pricing and system specifications increase your knowledge. Along with that, the shared tutorial will guide you thoroughly on how to use it.
02 How to Download and Install REAPER Software?
03 Tutorial for Using REAPER Recording Software
Part 1. What Is REAPER Recording Software?
Recording software like REAPER records computer audio is used to produce music, edit it, transform, and customize your music. With REAPER Recording Software , you can record multi-layer audio and MIDI in various formats. REAPER has the easiest interface that allows you to drag and drop to import, split, move and do many other tasks.
This is just one feature of REAPER that sounds very interesting. In this section, we will talk about more of its features.
1. Record and Edit
You can easily record the audio and (MIDI) Musical Instrumental Digital Interface with REAPER recording software. It lets you edit and customize everything. You can record and edit things limitlessly. When it comes to recording, it’s not at all difficult for REAPER software to record various instruments or vocals.
2. Mixing
Initially, the mixer might seem inflexible, but in reality, REAPER has a lot to offer you. It has great automated capabilities for instrument and effect parameters. It doesn’t matter if you are working because you can still bounce or freeze tracks while working.
The mixer is very flexible. With REAPERs mixer, you just have to drag and drop your recordings so that you can create tracks, and also, you can customize the arrangements by moving the portions.
3. Interface
While looking at the interface, you might question yourself about how to use its interface. Some people love to learn about new things, such as the REAPER Recording Software. Whereas, some people seem least interested because the half-empty interface is not intuitive to them.
Whereas, the best thing about its interface is that you can customize it. REAPER allows you to add different wallpapers and layouts to your software interface.
4. Strong Stability
REAPER Recording Software has very strong stability. This is one of its strongest features as compared to other competitors. The RAM is rarely affected by the load time and the used resources. Moreover, the software offers a wide range of languages. You can select your desired language to run the software.
Part 2. How to Download and Install REAPER Software?
REAPER is a Digital Audio Workstation. The perfect platform where you can manipulate and transform your audio. With REAPER Record Computer audio, you can work efficiently in a resource-friendly studio with saving your time. Stay tuned if you plan to learn more about its pricing and requirements.
Pricing of REAPER Software
A reaper is a brilliant software. It has a 60-day trial period. REAPER costs $60 in total to register. It has complete MIDI sequencing. You can also get a discounted license if REAPER is the best private option for you or has commercial usage. You can set the equal license key on every computer for someone with multiple computers.
System Requirements
The recording software has uncountable features. REAPER software facilitates its users at every level by giving the best audio manipulating platform. The best thing about REAPER Recording Software is its compatibility with different operating systems. Let us add more to your knowledge on this.
Windows
REAPER software is available for Windows 7, 8, 10, XP, and Vista. The version of REAPER for Windows is 6.42. This is for Windows 64-bit whereas, a download package is also available for Windows 32-bit.
macOS
For macOS 64-bit, REAPER has a 6.42 version. This version is compatible with macOS 10.5 – 10.14. Whereas, for macOS 10.15+, the available version of REAPER is 6.42 with a 15MB file size.
Linux
REAPER Recording Software is also compatible with Linux x86_64. The REAPER version is 6.42 with an 11 MB file size. This version can also work on AMD64 64-bit.
Downloading and Installing REAPER
Now that REAPER Record Computer Audio has impressed you a lot. You must be thinking about how to download it. If this is on your mind, then we got you. Allow us to share its steps that will guide you to download the software easily.
Step 1: To install REAPER software, first of all, visit its official website. Then locate and head over to its download section.
Step 2: Click on ‘Download REAPER from the download section.’ For Windows users, they can download the Windows installation package. At the same time, Linux and macOS users can select their installation packages.
Step 3: Lastly, after you have downloaded your systems compatible installation package, you simply have to run it and then install it according to your respective operating system.
Part 3. Tutorial for Using REAPER Recording Software
After its attractive features and detailed downloading procedure, it is finally the time to talk about its works. This section of the article will explain to you more about REAPER Recording Software as we are now going to present a tutorial on how to use the software.
Understand the Layout
Understanding and knowing the layout of your software before you start working on it is essential. The crucial components of REAPER software include the Timeline, Arrangement Window, Track Panel, Toolbar, and lastly, Transport.
The Arrangement window holds all the added items. The items are played from left to right order, similar to their timeline arrangement. You can also zoom in and out. Then comes the transport toolbar, which holds the functions to stop, rewind, play, fast forward, adjust the timeline speed, etc. The toolbar holds all the toggle buttons. You can also customize your toolbar.
New Track Creation
For creating a new track on REAPER, go to the Track menu and hit Insert New Track. A track is like another layer to your audio. Multiple layers and tracks make your work complex yet interesting as you can play all the different tracks at the same time. By double-clicking in the Track Control Panel, you can set a name for the added track.
Audio Hardware Settings for Audio Recording
It is best suggested always to check your audio hardware settings before you start to record, edit or mix with REAPER Recording Software. Your primary focus should be on the recording device’s devices should be set as Input Device, whereas the listening device should be set as the Output Device.
For this, you have to select Preferences from the Options menu. A window will appear in front of you, the REAPER Preference window. You have to select the correct Input and Output devices from the dropdown menu from this window.
Arm your Track
Arming your track is very important. For this, head over to the Track Control Panel, and next to your track name, hit the red circle. If you have various tracks, you should solo this track and mute the other tracks.
As soon as the track is armed, a Gain Meter will activate on the side. From this, you can check if you have properly set the microphone or not. This could be tested by tapping on the microphone.
Record
After all, the hardware settings are done, and your track is armed, it’s time to start the recording. For that, just tap on the Record button in the Transport toolbar. A yellow line in the timeline will indicate the end of the recording.
To end the recording, tap on the Stop button from the Transport Toolbar. Lastly, REAPER Recording Software will ask you to save the file. In case you don’t want it, you can also delete it.
Create and Manipulate Clips
Things like manipulation get a lot easier if you split the clips in REAPER. From the items menu, you have to select the option of Split Item on Cursor. This divides your clip into two clips on each side of the cursor. You can also remove the clips by going to the Items Menu. From there, you just have to hit the Remove Item option, or else, simply press the Delete key on your keyboard.
Removing clips will create a gap in the arrangement window that can be filled by dragging forward the remaining clip.
Volume Adjustments – Normalize
By double-clicking on the item or by selecting ‘Item Properties’ from a right-click, you can normalize the item. A new window will appear as Media Item Properties, from where you have to locate the Volume Settings and then select the option of Normalize.
If your item is already loud, then nothing will happen, but if it is not, then the slider will change from 0.00 dB showing an increase in the volume. Lastly, hit the ‘Apply’ or ‘OK’ button to imply the changes.
Fade in/out
With the Media Properties, you can also adjust a Fade in and a Fade out. For this, you simply have to set an end time for the Fade in, whereas a start time is entered for Fade out. Hit the ‘Ok’ or ‘Apply’ button to apply the changes.
From the Arrangement window, fades can be adjusted. For adjusting the fades, hover with your mouse over the red line. You will see a newly shaped cursor. Just drag on the timeline to play and adjust the Fade with this new cursor.
Automate Changes
With REAPER, you can also automate changes in track parameters. We will guide about automation from Track Envelopes. From Track Control Panel, hit the Trim option. A new Envelopes window will open at this point from where you have to check the Volume box.
A new Volume Track will open up. Here, you have to set new Envelope points. That could be done by holding the shift key, right-clicking on the point, and then selecting Create New Point. A green circle will indicate the new point.
By dragging the Envelope point, you can also adjust the volume. Dragging it towards the top will increase the volume, whereas dragging it towards the bottom will eventually decrease.
Finalize the Audio – Render
After all the above steps have been completed to set the order and adjust your desired volume, the last step comes to render your project file. For that, move to the File menu and select the ‘Render’ option. A window will be opened as ‘Render to File.’ Now, from the dropdown menu, select your desired Output Format.
Lastly, hit the Render 1 File button, and then REAPER will export your project. You can immediately listen to it by selecting the ‘Launch File’ option.
Concluding Thoughts
This article is everything you need to learn about REAPER Recording Software. The article that started from an introduction on DAW took you on a roller coaster ride. Everything about REAPER software has been shared.
We hope that this article helps you in all possible ways. The attractive features impress you, and its pricing and system specifications increase your knowledge. Along with that, the shared tutorial will guide you thoroughly on how to use it.
Underwater Communication Secrets: Optimizing Your Online Presence with Clownfish Vocal Alterations on Discord/Fortnite/Skype
Want to do something interesting? Think about using a voice changer. A voice changer is used to change your voice to make your daily interaction more interesting. A voice changer changes the pitch or tone of your voice. People also use it to add voice effects that could be either of a certain type or any random effect that the user likes.
You can use voice changers on your live stream. You can also use it on platforms like Discord and Skype. A voice changer can be used to make the gaming experience better as well. You can also use voice changer on online games like Fortnite. If you want to know about Clownfish Voice Changer, then let’s get started.
In this article
01 What Is Clownfish Voice Changer?
02 Tips to Use Clownfish Voice Changer on Discord and Fortnite?
03 Guidelines to Better Use Clownfish Voice Changer on Skype
04 Solution to Fix Clownfish Voice Changer Not Working
For Win 7 or later (64-bit)
For macOS 10.12 or later
Part 1. What Is Clownfish Voice Changer?
Clownfish is considered a famous voice changer. Clownfish Voice Changer is used to change voices for various purposes. It is installed on the system as it uses the microphone of the system that it is installed on. Clownfish Voice Changer has an attractive and intuitive interface that gives the user the best experience. It has plug-in support for Virtual Sound Technology (VST).

Clownfish voice provides multiple choices for voice after-effects that are available in the built-in library. These voices include male/female voices, robotic sounds, radio voices along with alien voices. Clownfish Voice Changer PC is compatible with Windows 7/8/8.1/10 and 11. It also has a built-in music player that supports various media formats.
Part 2. Tips to Use Clownfish Voice Changer on Discord and Fortnite?
As we have discussed earlier, what clownfish voice changer is and how amazing it is, now let’s move further. The following section of this article will share the tips that will help someone use Clownfish Discord and also Clownfish on Fortnite.
Before we start, you should know how to configure the Clownfish voice changer on your device. For this, you can follow the steps given below. Let’s begin!
Step 1: Setup Clownfish
After you have successfully downloaded and installed Clownfish Voice Changer, it’s time to setup. For this, firstly, locate the voice changer in your systems tray. Then, right-click on the icon, and from the menu list, select the ‘Setup’ option to set clownfish across different applications.

Step 2: Install Microphone
You cannot use the voice changer until you have attached a microphone to your device. For this, you need to install the microphone by hitting the ‘Install’ button next to the microphone.

Step 3: Set Microphone as Default Device
For the microphone to work in Clownfish, it should be selected as the default device. For doing this, select the ‘Recording’ option from the ‘Sounds’ tabs. A list of all the compatible devices will appear on the screen, you have to right-click on your device and hit the ‘Set as the Default Device’ option.

Step 4: Default Device is Set
After that, right-click on the Clownfish icon in the system tray and hit the ‘Hear Microphone’ option. The Clownfish Voice Changer is set to the default option. In case you ever plan to change it, right-click on the Clownfish icon from the system tray and tap on ‘Set Voice Changer.’

Step 5: Select Voice Changer Effects
Once Clownfish has been installed and successfully configured, you now have complete access to all voice changer options. There are dozens of effects that you can select from.

How to use Clownfish on Discord
If you want to use Clownfish on Discord, then you have to select Clownfish voice changer as the input device. For this, open Discord and head to ‘App Settings’ under the ‘User Settings’ option. There, look for the ‘Voice and Video’ option. A category of ‘Input Device’ will appear on the screen; from the drop-down list, switch to ‘Clownfish Voice Changer.’

How to use Clownfish on Fortnite
For using Clownfish on Fortnite, start by selecting the ‘Menu’ icon. There, head to the ‘Settings’ and select the ‘Audio’ option. Now, you have to set the input device; for that, go to the ‘Voice Chat’ option and select Clownfish Voice Changer as your input device under the ‘Voice Chat Input Device’ category.

Part 3. Guidelines to Better Use Clownfish Voice Changer on Skype
You can use voice changers on various platforms according to their compatibility; for instance, Clownfish is compatible with Skype. The question is, do you know how to use Clownfish voice changer on Skype? If ‘no,’ then let us share some helping guidelines to use Clownfish on Skype in a better way.
Step 1: If you want to change voice on Skype with Clownfish, then, first of all, download and install Skype on your PC or laptop and launch it.

Step 2: After Skype has been successfully launched, head over to ‘Settings’ by clicking on the three dots present next to your username.

Step 3: From the Settings screen, you have to look for the ‘Audio & Video’ tab and then select it. Lastly, you have to select the microphone ‘Clownfish Voice Changer’ under the ‘Microphone’ option, and you are all done.

Part 4. Solution to Fix Clownfish Voice Changer Not Working
While using Clownfish Voice Changer, you might also come across some troubles. They might be because either the voice changer is not updated, or maybe the apps you are using are not up to date. Let us share some fixes with you for smooth Clownfish functioning.
Fix 1: Update Clownfish Voice Changer
The most significant reason why you face trouble is that your Clownfish version is outdated. For this, you should update the voice changer to its latest version by following the steps given below:
Step 1: You have to start by opening the ‘Control Panel’ from the ‘Run’ window. For that, press ‘Windows and R’ together and then type ‘Control’ and press ‘Enter.’ Now, look for the ‘Programs’ section, and under that section, click on the ‘Uninstall a Program.’

Step 2: A list of all the installed programs will appear on the screen. From that list, look for ‘Clownfish Voice Changer’ and then left-click on it. Lastly, select the option of ‘Uninstall.’

Step 3: Once this is done successfully, head over to the official website of Clownfish Voice Changer and install the latest version. Restart your computer and open the application to check if the problem has been resolved or not.

Fix 2: Check the Application’s Version
Another reason that might be causing the problem is an incompatible version of the application with Clownfish. Both the voice changer and the application must have compatible versions. You can take assistance from the steps below to check the version of Skype.
Step 1: Start by opening Skype, and then from the left menu pane, click on your Skype profile. Then, from the quick access menu list, look for the ‘Settings’ option.

Step 2: After the ‘Settings’ window opens, click on the ‘Help & Feedback’ option once located from the left pane. As the Help & Feedback screen opens, you will see the Skype logo on the screen, and under the logo, you will see the version of Skype.

Fix 3: Microphone Installation in Clownfish
The Voice changer is of no use if the microphone cannot be used as a microphone is an essential component for using a voice changer. An outdated microphone or wrongly installed microphone can cause an error in using Clownfish voice change.
Step 1: Run Clownfish on the computer and open it from the taskbar icon by right-clicking it. Keep your mouse over ‘Setup’ till the sub-menu opens.
Step 2: From the sub-menu, click on ‘System Integration.’ Then, select the microphone which is working fine, and click on ‘Install,’ which will install the microphone automatically.

Step 3: After the installation of the microphone, reboot the computer. Check whether the microphone error is resolved or not.

Bottom Line
Clownfish voice changer is a famous and known software with many amazing features and functionalities. The article above has shared great details about the voice changer and its use on Skype, Discord, and Fortnite.
Additionally, let’s talk about video editing software. As the videos need editing after they are filmed so, why not use Wondershare Filmora for editing your videos? The software offers some crazy and cool features like cut, trim, split, crop, etc.
You can also color match, do animation keyframing and advanced color tuning with the Filmora video editor . The software also owns a media library with hundreds of distinct titles, elements, transitions, effects, and whatnot.
For Win 7 or later (64-bit)
For macOS 10.12 or later
02 Tips to Use Clownfish Voice Changer on Discord and Fortnite?
03 Guidelines to Better Use Clownfish Voice Changer on Skype
04 Solution to Fix Clownfish Voice Changer Not Working
For Win 7 or later (64-bit)
For macOS 10.12 or later
Part 1. What Is Clownfish Voice Changer?
Clownfish is considered a famous voice changer. Clownfish Voice Changer is used to change voices for various purposes. It is installed on the system as it uses the microphone of the system that it is installed on. Clownfish Voice Changer has an attractive and intuitive interface that gives the user the best experience. It has plug-in support for Virtual Sound Technology (VST).
Clownfish voice provides multiple choices for voice after-effects that are available in the built-in library. These voices include male/female voices, robotic sounds, radio voices along with alien voices. Clownfish Voice Changer PC is compatible with Windows 7/8/8.1/10 and 11. It also has a built-in music player that supports various media formats.
Part 2. Tips to Use Clownfish Voice Changer on Discord and Fortnite?
As we have discussed earlier, what clownfish voice changer is and how amazing it is, now let’s move further. The following section of this article will share the tips that will help someone use Clownfish Discord and also Clownfish on Fortnite.
Before we start, you should know how to configure the Clownfish voice changer on your device. For this, you can follow the steps given below. Let’s begin!
Step 1: Setup Clownfish
After you have successfully downloaded and installed Clownfish Voice Changer, it’s time to setup. For this, firstly, locate the voice changer in your systems tray. Then, right-click on the icon, and from the menu list, select the ‘Setup’ option to set clownfish across different applications.
Step 2: Install Microphone
You cannot use the voice changer until you have attached a microphone to your device. For this, you need to install the microphone by hitting the ‘Install’ button next to the microphone.
Step 3: Set Microphone as Default Device
For the microphone to work in Clownfish, it should be selected as the default device. For doing this, select the ‘Recording’ option from the ‘Sounds’ tabs. A list of all the compatible devices will appear on the screen, you have to right-click on your device and hit the ‘Set as the Default Device’ option.
Step 4: Default Device is Set
After that, right-click on the Clownfish icon in the system tray and hit the ‘Hear Microphone’ option. The Clownfish Voice Changer is set to the default option. In case you ever plan to change it, right-click on the Clownfish icon from the system tray and tap on ‘Set Voice Changer.’
Step 5: Select Voice Changer Effects
Once Clownfish has been installed and successfully configured, you now have complete access to all voice changer options. There are dozens of effects that you can select from.
How to use Clownfish on Discord
If you want to use Clownfish on Discord, then you have to select Clownfish voice changer as the input device. For this, open Discord and head to ‘App Settings’ under the ‘User Settings’ option. There, look for the ‘Voice and Video’ option. A category of ‘Input Device’ will appear on the screen; from the drop-down list, switch to ‘Clownfish Voice Changer.’
How to use Clownfish on Fortnite
For using Clownfish on Fortnite, start by selecting the ‘Menu’ icon. There, head to the ‘Settings’ and select the ‘Audio’ option. Now, you have to set the input device; for that, go to the ‘Voice Chat’ option and select Clownfish Voice Changer as your input device under the ‘Voice Chat Input Device’ category.
Part 3. Guidelines to Better Use Clownfish Voice Changer on Skype
You can use voice changers on various platforms according to their compatibility; for instance, Clownfish is compatible with Skype. The question is, do you know how to use Clownfish voice changer on Skype? If ‘no,’ then let us share some helping guidelines to use Clownfish on Skype in a better way.
Step 1: If you want to change voice on Skype with Clownfish, then, first of all, download and install Skype on your PC or laptop and launch it.
Step 2: After Skype has been successfully launched, head over to ‘Settings’ by clicking on the three dots present next to your username.
Step 3: From the Settings screen, you have to look for the ‘Audio & Video’ tab and then select it. Lastly, you have to select the microphone ‘Clownfish Voice Changer’ under the ‘Microphone’ option, and you are all done.
Part 4. Solution to Fix Clownfish Voice Changer Not Working
While using Clownfish Voice Changer, you might also come across some troubles. They might be because either the voice changer is not updated, or maybe the apps you are using are not up to date. Let us share some fixes with you for smooth Clownfish functioning.
Fix 1: Update Clownfish Voice Changer
The most significant reason why you face trouble is that your Clownfish version is outdated. For this, you should update the voice changer to its latest version by following the steps given below:
Step 1: You have to start by opening the ‘Control Panel’ from the ‘Run’ window. For that, press ‘Windows and R’ together and then type ‘Control’ and press ‘Enter.’ Now, look for the ‘Programs’ section, and under that section, click on the ‘Uninstall a Program.’
Step 2: A list of all the installed programs will appear on the screen. From that list, look for ‘Clownfish Voice Changer’ and then left-click on it. Lastly, select the option of ‘Uninstall.’
Step 3: Once this is done successfully, head over to the official website of Clownfish Voice Changer and install the latest version. Restart your computer and open the application to check if the problem has been resolved or not.
Fix 2: Check the Application’s Version
Another reason that might be causing the problem is an incompatible version of the application with Clownfish. Both the voice changer and the application must have compatible versions. You can take assistance from the steps below to check the version of Skype.
Step 1: Start by opening Skype, and then from the left menu pane, click on your Skype profile. Then, from the quick access menu list, look for the ‘Settings’ option.
Step 2: After the ‘Settings’ window opens, click on the ‘Help & Feedback’ option once located from the left pane. As the Help & Feedback screen opens, you will see the Skype logo on the screen, and under the logo, you will see the version of Skype.
Fix 3: Microphone Installation in Clownfish
The Voice changer is of no use if the microphone cannot be used as a microphone is an essential component for using a voice changer. An outdated microphone or wrongly installed microphone can cause an error in using Clownfish voice change.
Step 1: Run Clownfish on the computer and open it from the taskbar icon by right-clicking it. Keep your mouse over ‘Setup’ till the sub-menu opens.
Step 2: From the sub-menu, click on ‘System Integration.’ Then, select the microphone which is working fine, and click on ‘Install,’ which will install the microphone automatically.
Step 3: After the installation of the microphone, reboot the computer. Check whether the microphone error is resolved or not.
Bottom Line
Clownfish voice changer is a famous and known software with many amazing features and functionalities. The article above has shared great details about the voice changer and its use on Skype, Discord, and Fortnite.
Additionally, let’s talk about video editing software. As the videos need editing after they are filmed so, why not use Wondershare Filmora for editing your videos? The software offers some crazy and cool features like cut, trim, split, crop, etc.
You can also color match, do animation keyframing and advanced color tuning with the Filmora video editor . The software also owns a media library with hundreds of distinct titles, elements, transitions, effects, and whatnot.
For Win 7 or later (64-bit)
For macOS 10.12 or later
Audio Innovations: 8 Cutting-Edge Cartoon Soundtracks Now Available for Download [2023 Edition]
8 Best Cartoon Sound Effects You Can Download

Benjamin Arango
Mar 27, 2024• Proven solutions
The sound plays a significant role in the videos. Without the right sound effects, your videos become dull. It doesn’t create an impact to grab the attention of the viewers. Especially when it comes to attracting the attention of kids while they watch cartoons.
Are you working on a cartoon video for kids or some animated action cartoons? Use the cartoon sound effects to add more intensity and emotions to the videos. Every time creating a new sound effect for your cartoon video becomes difficult.
If you are on a strict budget, producing new content becomes almost impossible. In such situations, free cartoon sound effects are the best way to enhance your cartoon videos.
In this article, you will learn eight best cartoon sound effects that you can download and make your videos perfect.
8 Best Cartoon Sound Effects Resources
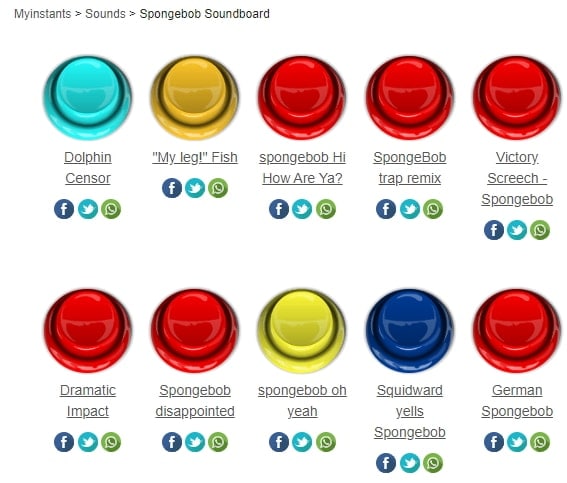
1. Spongebob Sound Effects
MyInstant’s Spongebob soundboard offers a range of cartoon sound effects that can be easily downloaded just by clicking on the Download mp3 sound effect button. You can listen to over 120 classic cartoon sound effects and download it for free. You can also copy the embed link and paste it to your website.
2. Hanna Barbera Sound Effects
From Sounddogs, Hanna Barbera sound effects library, you can find over 2200 cartoon sound effects that are divided into 4 CDs. It has almost all the legendary classic cartoon sound effects from the cartoon shows like Yogi Bear, Huckleberry Hound, the Flintstones, The Jetsons, Quick Draw McGraw, and all the rest of the gang.
You can download the mp3 cartoon sound effects completely free by clicking on the Download ID number mentioned at the right end of each link.
3. Scooby Doo Running Sound
Fandom’s Scooby Doo running sound effects offers all the ideas used in 40 episodes of Scooby Doo throughout the three seasons on ABC. It is over 37000 pages wiki that you can click and browse through the pages to find the right sound effect and download it for free.
4. Tom and Jerry Sound Effects
Pond5 offers 13 Tom and Jerry sound effects that you can listen by scrolling the cursor over the boxes and download the free preview of cartoon sound effects by clicking on Download Preview.
If you want to download the entire cartoon sound effect, you need to register, log in, and pay for it. There are filters like price, collections, duration, etc. to make your selection more precise.
5. Free SFX
In FreeSFX website, you can find a range of comical cartoon sound effects that includes classic effects like descend, boink, impact, pop, musical, running, rip and snap, bounce spring, slide whistle, squelch and splat, horn and loads more.
You need to log in to the website to download free cartoon sound effects.

6.GRSites
With over 1980 cartoon sound effects, the GRSites is one of the best free sites for downloading both mp3 and WAV files. You can browse from a range of categories to find the best cartoon sound effects for your videos.
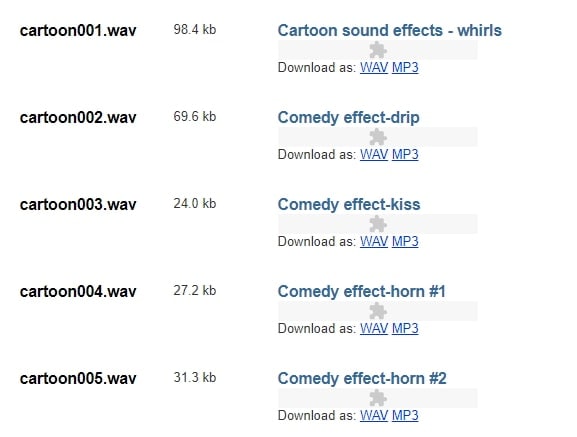
7. Cartoon Running Sound Effect
If you are looking for cartoon running sound effect, turn to Episode 345 in 99PercentInvisible. You can download the complete transcript page of around 30 minutes to use it in your video. Use the cartoon running sound effect produced by 99pi to enhance your video.
8. Big Fish Audio
The Big Fish Audio’s cartoon sound FX includes 23 free classic cartoon sound effects. The filters include a range of sound FX types, styles, format, brand, etc.
You can click on the cartoon sound effect and listen to it or add it to your playlist. But, if you wish to download the free cartoon sound effects, you need to register and pay to use the sound effect.

You may also like: How to Extract Audio from Videos on Win/Mac/Phone >>
Conclusion
Make your cartoon videos perfect with the fantastic free cartoon sound effects available for download completely free. With the range of free cartoon sound effects, you don’t need to worry about creating new sounds or expenses. You need to download the free sounds and beautifully enhance it with your creativity. There are several other sites for downloading free cartoon sound effects, but here you can check out some of the trusted ones to use.
Benjamin Arango
Benjamin Arango is a writer and a lover of all things video.
Follow @Benjamin Arango
Benjamin Arango
Mar 27, 2024• Proven solutions
The sound plays a significant role in the videos. Without the right sound effects, your videos become dull. It doesn’t create an impact to grab the attention of the viewers. Especially when it comes to attracting the attention of kids while they watch cartoons.
Are you working on a cartoon video for kids or some animated action cartoons? Use the cartoon sound effects to add more intensity and emotions to the videos. Every time creating a new sound effect for your cartoon video becomes difficult.
If you are on a strict budget, producing new content becomes almost impossible. In such situations, free cartoon sound effects are the best way to enhance your cartoon videos.
In this article, you will learn eight best cartoon sound effects that you can download and make your videos perfect.
8 Best Cartoon Sound Effects Resources
1. Spongebob Sound Effects
MyInstant’s Spongebob soundboard offers a range of cartoon sound effects that can be easily downloaded just by clicking on the Download mp3 sound effect button. You can listen to over 120 classic cartoon sound effects and download it for free. You can also copy the embed link and paste it to your website.
2. Hanna Barbera Sound Effects
From Sounddogs, Hanna Barbera sound effects library, you can find over 2200 cartoon sound effects that are divided into 4 CDs. It has almost all the legendary classic cartoon sound effects from the cartoon shows like Yogi Bear, Huckleberry Hound, the Flintstones, The Jetsons, Quick Draw McGraw, and all the rest of the gang.
You can download the mp3 cartoon sound effects completely free by clicking on the Download ID number mentioned at the right end of each link.
3. Scooby Doo Running Sound
Fandom’s Scooby Doo running sound effects offers all the ideas used in 40 episodes of Scooby Doo throughout the three seasons on ABC. It is over 37000 pages wiki that you can click and browse through the pages to find the right sound effect and download it for free.
4. Tom and Jerry Sound Effects
Pond5 offers 13 Tom and Jerry sound effects that you can listen by scrolling the cursor over the boxes and download the free preview of cartoon sound effects by clicking on Download Preview.
If you want to download the entire cartoon sound effect, you need to register, log in, and pay for it. There are filters like price, collections, duration, etc. to make your selection more precise.
5. Free SFX
In FreeSFX website, you can find a range of comical cartoon sound effects that includes classic effects like descend, boink, impact, pop, musical, running, rip and snap, bounce spring, slide whistle, squelch and splat, horn and loads more.
You need to log in to the website to download free cartoon sound effects.
6.GRSites
With over 1980 cartoon sound effects, the GRSites is one of the best free sites for downloading both mp3 and WAV files. You can browse from a range of categories to find the best cartoon sound effects for your videos.
7. Cartoon Running Sound Effect
If you are looking for cartoon running sound effect, turn to Episode 345 in 99PercentInvisible. You can download the complete transcript page of around 30 minutes to use it in your video. Use the cartoon running sound effect produced by 99pi to enhance your video.
8. Big Fish Audio
The Big Fish Audio’s cartoon sound FX includes 23 free classic cartoon sound effects. The filters include a range of sound FX types, styles, format, brand, etc.
You can click on the cartoon sound effect and listen to it or add it to your playlist. But, if you wish to download the free cartoon sound effects, you need to register and pay to use the sound effect.
You may also like: How to Extract Audio from Videos on Win/Mac/Phone >>
Conclusion
Make your cartoon videos perfect with the fantastic free cartoon sound effects available for download completely free. With the range of free cartoon sound effects, you don’t need to worry about creating new sounds or expenses. You need to download the free sounds and beautifully enhance it with your creativity. There are several other sites for downloading free cartoon sound effects, but here you can check out some of the trusted ones to use.
Benjamin Arango
Benjamin Arango is a writer and a lover of all things video.
Follow @Benjamin Arango
Also read:
- New Auditory Access From MP4 An Assembled List of Simple Steps to Tap Into Sound
- 2024 Approved Curating High-Quality Instrumental Soundscape for Videos and Films
- Updated 2024 Approved Add Music to Final Cut Pro
- The Ultimate Guide 10 Superior Sound Recording Programs for 2024
- In 2024, 5 Prime Destinations for Finding and Downloading Legal Funny Tunes Online
- Updated Top Sites to Download Lofi Background Music and Wallpapers
- New Global Network Map of Podcast Dissemination Websites
- Top 8 Android Tools for Professional Music Production
- Masterful Melodies Discovering the Top Software for Capturing Guitars for 2024
- In 2024, The Ultimate Guide to the Top 5 Most Advanced Live Audio Modifiers
- New In 2024, Discover Expressive Humming Track
- Title The Enigmatic World of Fibonacci Sequences and Their Mathematical Implications in Modern Science
- New Harmonious Sound Editing Guide Advantages, Disadvantages, and Substitutes for 2024
- Selecting Prime Android Applications for High-Quality Voice Recording (FREE) for 2024
- New 2024 Approved Advanced Techniques in Final Cut Pro Embedding Waveform Diagrams with Live Audio Animation
- Enhancing Viewing Experience 3 Leading Applications for Boosting Audio Volume
- New In 2024, How to Transcribe Audio to Text Free on Android and iOS
- Updated In 2024, Premium Free Digital Audio Stitching Platforms Compared
- 2024 Approved Utilizing Mystery and Intrigue Through Suspense Music for Film Scoring Excellence
- 2024 Approved No-Cost Voice Shaping Secrets Revealed Comprehensive Guide to Professional Video Voice Edits Using Filmora
- New 2024 Approved Step-by-Step Guide to Harnessing the Power of Morphvox in Virtual Worlds
- In 2024, Elevating Auditory Storytelling in Podcasts Essential Sources for High-Quality Sound Effects
- In 2024, BurstSplit Pro Speedy Methods for Efficient MP3 File Partitioning
- Live Audio Modification Masters Reviewed Which Ones Should You Try First, In 2024
- In 2024, Essential Audio Enhancements for Podcasts Top Sources of Sound Effects
- New 2024 Approved Leaderboard The Four Premier Music Editors Tailored to macOS
- Updated Digital Filtration Guide to Removing Ambient Noise in Online Video Media
- 2024 Approved Techniques to Remove Audio From Updated AVI Software File
- New Best Sound Remover From Video Windows/Mac/Online for 2024
- New In 2024, 5 Leading Video Volume Boosters Online for Optimal Sound Experience
- Updated In 2024, Techniques for Implementing an Audio Decline Transition
- New Mastering Audio Cut and Mix A Comprehensive Guide to Using Avidemux
- New Voice to Word Made Easy Discovering the Best Free Android and iOS Transcription Tools
- Discover the Top 4 Audio Editing Programs Specifically Designed for Mac
- Updated Audio Assets Almanac Unveiling the Best Online Sources for Video Clip Melodies for 2024
- Updated Essential Auditory Backtracking Applications The Best Software Selection for 2024
- Updated Steps to Quieten Ambient Soundtracks in Films
- Updated Navigating the Soundscape of Premiere Pro Simple Strategies for Audio Layer Management for 2024
- New Creative Commons Chorus Compilation for Slideshow Synthesis
- Updated Simplified Soundscape A Modern Approach to Adding Sound Effects in Videos for 2024
- Updated Online Audiophiles MP3 Decomposer & Assembler for 2024
- How to Change your Motorola Razr 40 Ultra Location on Twitter | Dr.fone
- Updated 2024 Approved The Ultimate List of Online Video Editors with Music Integration
- New In 2024, 10 Industry-Leading Audio Editing Programs for Exceptional Results
- The Magnificent Art of Pokemon Go Streaming On Realme 12 5G? | Dr.fone
- 8 Ultimate Fixes for Google Play Your Oppo A78 5G Isnt Compatible | Dr.fone
- In 2024, Best Free Video Stabilizer Apps for Android
- Pattern Locks Are Unsafe Secure Your Infinix Hot 30 5G Phone Now with These Tips
- Easily Unlock Your Infinix Note 30 VIP Racing Edition Device SIM
- AI-Powered Video Editors for Instant Reframe for 2024
- Quick Steps to Change Weather Location on Apple iPhone 12 mini | Dr.fone
- 2024 Approved The Ultimate Color Grading Tutorial Final Cut Pro Edition
- 5 Easy Ways to Change Location on YouTube TV On OnePlus Ace 2 Pro | Dr.fone
- Updated In 2024, Create a Heartfel
- Updated In 2024, Adobe Rigger Is AWESOME
- Updated In 2024, S Best Video Merging and Collage Apps for iPhone and iPad Users
- Updated In 2024, From Zero to Hero Top Gaming Intro Software for Windows and Mac Free & Paid
- 3 Methods to Mirror Vivo S17 to Roku | Dr.fone
- Updated Bring Your Ideas to Life The Top 8 Animation Software for Mac and Windows for 2024
- Does Life360 Notify When You Log Out On Samsung Galaxy A15 5G? | Dr.fone
- 11 Ways to Fix it When My Vivo V29e Wont Charge | Dr.fone
- New 2024 Approved Master Video Editing on Mac with MKVtoolnix A Step-by-Step Guide 2023
- Hard Resetting an Samsung Galaxy S24+ Device Made Easy | Dr.fone
- New Mastering FCPX Tips and Tricks for Overcoming Common Obstacles
- In 2024, How to Transfer Contacts from Oppo Find N3 Flip to Other Android Devices Devices? | Dr.fone
- In 2024, How to Unlock Infinix Hot 30i PIN Code/Pattern Lock/Password
- Best Oppo A2 Pattern Lock Removal Tools Remove Android Pattern Lock Without Losing Data
- How to Change Spotify Location After Moving to Another Country On Tecno Pova 5 Pro | Dr.fone
- In 2024, How to Change Google Play Location On Realme C55 | Dr.fone
- Before You Learn Facebook Slideshow 5 Things You Should Know How-TOS
- S Most Popular Free 4K Video Conversion Software
- 8 Best Apps for Screen Mirroring Motorola Edge 40 Pro PC | Dr.fone
- How to use iSpoofer on Tecno Pova 5? | Dr.fone
- In 2024, How to Change Location on TikTok to See More Content On your Poco X5 Pro | Dr.fone
- Title: New In 2024, REAPER Unveiled Insights Into Advanced Recording Features & Educational Content
- Author: Kate
- Created at : 2024-05-05 08:03:17
- Updated at : 2024-05-06 08:03:17
- Link: https://audio-editing.techidaily.com/new-in-2024-reaper-unveiled-insights-into-advanced-recording-features-and-educational-content/
- License: This work is licensed under CC BY-NC-SA 4.0.
