
New In 2024, Navigating the Nuances of Audio Graphics Plotting Waveform Data & Infusing Videos with Life-Like Animations Using Premiere Pro

Navigating the Nuances of Audio Graphics: Plotting Waveform Data & Infusing Videos with Life-Like Animations Using Premiere Pro
By using waveform of the sound waves in Premiere Pro, we can better edit audio. In the following article, we’ll learn how the audio waveform auto-sync feature in Premiere Pro helps automatically align and merge clips in the Project panel, in the timeline, and when setting up a multicamera project and how to insert audio waveform on your clips using Premiere Pro.
Part 1. How to show Audio Waveform on clips in Premiere Pro? (2 ways)
Users frequently complain that the audio waveform can suddenly disappear while editing audio in Premiere Pro, which is quite annoying to deal with. In the following tutorial, I’m going to show you how to make the audio waveforms visible.
1. Click the wrench icon on settings button
If you are not seeing them on audio clips on your timeline, then you drag on an audio clip to your timeline or your sequence and just click on the wrench and check to show audio waveform.

Once you check that you should see the audio waveforms on your clip you can click it again you should see a checkmark and it is highlighted in blue and if you don’t want to see them all you have to do is click it again.

That will toggle off the audio waveforms and that is how to show the audio waveforms on your audio clips in adobe premiere pro.

2. Automatic generate audio waveform
Make sure “Automatic audio waveform creation” is selected by going to “Edit > Preferences > Audio” first. When importing files, no waveforms are generated if option is unticked. Only clips you import moving forward will be impacted by this; clips already imported won’t be affected.
Second, for creating audio waveforms on clips that don’t have them, select the clips in the Program panel and go to “Clip > Generate Audio Waveform”.

Part 2. How to add audio waveform animation in Premiere Pro?
If you want to simply add a dynamic effect to your audio, just follow the tutorial below.
Step1Click After Effects Composition
First, make sure both the video and audio are selected. Right-click and select replace with After Effects composition.

Step2Create a new solid in After Effects
After creating a new project in After Effects, you need to choose a new solid of any color in your composition.

Step3Open audio waveform effect
Search audio waveform and drag and drop this effect on your solid. The waveform will now respond to the audio in your film if you use the audio layer option for your clip in the effect parameters for your solid change.

Step4Adjust the audio waveform effect
The position of the waveform on your video can be changed by utilizing the start and end point settings. Make sure the last values for each selections are the same to maintain an even level. Next, you can change the characteristics to give your waveform the desired appearance. Here, I applied some fundamental settings that are effective for singing. Using the two-color picker options and the display options, you may also change the waveform’s inner and outer colors.

Step5Check the animation and export the video
Back in Premiere, you can pick whether you want the traditional analog lines to appear or a more contemporary digital waveform. Your clip will now be replaced with an After Effects composition that is dynamically tied to the audio waveform.

Part 3. How to change the incorrect audio waveform in Premiere Pro?
These problems typically result from corrupted cache/peak files. If you have cleared the cache from the application. I will recommend cleaning them manually by going to the location specified in “Preferences > Media Cache”.
Clean the contents of the folder named Media Cache, Media Cache files, and Peak files (Before cleaning them, please ensure to open these folders once and verify if they have any of the media files in them to avoid any accidental deletion of required media or asset).

Please make sure that the option “Save.cfa and.pek cache files next to the original media files when possible” is unchecked. If it is ticked, you will have to remove them by hand from the folders where the media files are kept.

The Audio previews can also be cleaned (File > Project Settings > Scratch Disks > Audio Previews).
The following time you open the project, these files will be cleared. Rebuilding the necessary cache and peak files could take some time.
Part 4. How to add audio waveform animation to video with Premiere Pro alternative?
In reality, based on the above process, it is clear that you must use After Effects to add audio waveform animation effects in Premiere Pro. Although you can further modify the animation, this approach is very difficult for beginners to understand, and it has a high learning cost. In this situation, we strongly advise you to try Filmora Audio Visualizer . We provide more than 25 animation effects and fixed pre-made waveform elements, and you can also adjust the color and frequency in Advanced Settings. Come and give it a try!
Conclusion
This article will help you in resolving various audio waveform issues in Premiere Pro. Additionally, you can discover how to create waveforms in your audio clips. You should try Wondershare Filmora to add the waveform animation even if Premiere Pro is one of the greatest audio and video editing programs. Beginners will find it more convenient and simpler. If you simply want to quickly polish your music video or podcast video, the Filmora audio visualizer is a better option.
Free Download For Win 7 or later(64-bit)
Free Download For macOS 10.14 or later
How to Use Audio Ducking in Adobe Premiere Pro on Mac
Tutorial on Audio Ducking in Adobe Premiere Pro on Mac

Benjamin Arango
Oct 26, 2023• Proven solutions
Too many times, while mixing voiceover with the background music in a video, the dialogues don’t seem to be audible. That’s when we follow the process of audio ducking in Premiere Pro that would automatically lower the volume of the background music whenever there is a dialogue.
The best thing about Premiere Pro audio ducking is that it is an automatic process and we don’t need to put a lot of effort. To make your job easier, I’m going to let you know how to use the Adobe Premiere Pro audio ducking feature in a step by step manner in this guide.
Part 1: How to Use Audio Ducking to Balance Music and Voiceover in Adobe Premiere Pro on Mac?
If you have been using Adobe Premiere Pro on Mac, then you would already be familiar with the wide range of editing features that it has. One of them is the Premiere Pro audio ducking option that comes inbuilt in the application. Using it, you can automatically lower the volume of the background music and amplify your dialogues.
To perform auto-ducking in Premiere Pro, we first need to define each audio track and then use the ducking feature. Here’s how you can also perform audio ducking in Premiere Pro like a pro.
Step 1: Define the Audio Types
Since Adobe Premiere Pro can’t automatically detect the type of sounds, you need to do it manually. To do audio ducking in Premiere Pro, you can first import your video clip and the voiceover to the application, and drag them to the working timeline.
Now, you can first select the voiceover file that you want to amplify, and from the sidebar on the right, click on “Dialogue” as the type of the audio file.
Once you mark the audio type, you will get different options. Here, go to the “Loudness” option and click on the “Auto Match” button.
Afterward, you can do the same for your background audio file. Select the file and choose its audio type as “Music”. You can also set its loudness to “Auto Match” if you want to.
Step 2: Perform Auto Ducking in Premiere Pro
Now when you have set the audio types, you can just find the Ducking option on the sidebar and turn it on. Here, you can first click on the dialogue icon from the top and get the needed options. You can adjust its sensitivity and set a level or improve or reduce its quality.
Apart from the dialogue icon, you can also click on the Music icon and do the same. For instance, you can reduce the quality of the background music and increase the level of the dialogue track.
Step 3: Make the Final Changes
Great! You can now preview the changes you have made and check the audio ducking results in Premiere Pro. If you want to finalize things, then you can perform keyframing and manually adjust the volume.
Furthermore, you can also perform an instant hard ducking in Premiere Pro. For this, just choose the track, go to the side panel, and select Preset > Music > Hard Vocal Ducking. While it would get instant results in Adobe Premiere audio ducking, the results might not be so effective.
Part 2: Wondershare Filmora : An Easier Way to Auto Duck Your Audios on Mac
As you can see, the Premiere Pro audio ducking feature can get a bit complicated if you are a beginner. Therefore, if you are looking for a simpler and more effective automatic ducking solution, then use Wondershare Filmora. This intuitive and diverse video/audio editing tool has an automatic audio ducking option that would make your job a whole lot easier.
To learn how to perform automatic audio ducking in your videos on Mac via Wondershare Filmora, one can follow these steps:
Step 1: Load the Video or Audio Files on Filmora
Firstly, you can just launch Wondershare Filmora on your Mac and import your videos/audios. You can drag and drop the files or just go to its Import Menu option to browse the files. Afterward, you can drag the files to the timeline at the bottom to work on them.
On the native interface of Filmora, you can also directly record voiceovers. Just click on the voiceover icon (below the preview window) and start recording any dialogue.
Not just that, you can also find a wide range of royalty-free music on Filmora that you can readily use in your projects without any copyright issues.
Step 2: Perform Automatic Audio Ducking on Filmora
Great! Now you can see your video and the audio track on the timeline of Filmora. At first, you need to select the voiceover (or any other track) that you want to amplify.
Once the desired audio track is selected, right-click it, and choose the “Adjust Audio” option.
As the dedicated Audio Editor will open, just go to the “Ducking” option at the bottom and turn on the “Lower the volume of other clips” feature. You can further select the level to lower the volume of other background clips in the video here.
Step 3: Save and Export Your Video
That’s it! After making the changes, just click on the “OK” button and Filmora would automatically adjust the volume of other clips. You can further make the needed changes in the video and click on the “Export” icon. This will let you save the project in the desired format and resolution on your computer.
Who knew it would be so easy to do auto-ducking in Premiere Pro, right? Though, if you are looking for even a simpler alternative to Adobe Premiere audio ducking, then consider using Wondershare Filmora. A user-friendly and resourceful video editor, it offers a wide range of features and other inbuilt tools that would meet every post-production requirement of yours in one place.

Benjamin Arango
Benjamin Arango is a writer and a lover of all things video.
Follow @Benjamin Arango
Benjamin Arango
Oct 26, 2023• Proven solutions
Too many times, while mixing voiceover with the background music in a video, the dialogues don’t seem to be audible. That’s when we follow the process of audio ducking in Premiere Pro that would automatically lower the volume of the background music whenever there is a dialogue.
The best thing about Premiere Pro audio ducking is that it is an automatic process and we don’t need to put a lot of effort. To make your job easier, I’m going to let you know how to use the Adobe Premiere Pro audio ducking feature in a step by step manner in this guide.
Part 1: How to Use Audio Ducking to Balance Music and Voiceover in Adobe Premiere Pro on Mac?
If you have been using Adobe Premiere Pro on Mac, then you would already be familiar with the wide range of editing features that it has. One of them is the Premiere Pro audio ducking option that comes inbuilt in the application. Using it, you can automatically lower the volume of the background music and amplify your dialogues.
To perform auto-ducking in Premiere Pro, we first need to define each audio track and then use the ducking feature. Here’s how you can also perform audio ducking in Premiere Pro like a pro.
Step 1: Define the Audio Types
Since Adobe Premiere Pro can’t automatically detect the type of sounds, you need to do it manually. To do audio ducking in Premiere Pro, you can first import your video clip and the voiceover to the application, and drag them to the working timeline.
Now, you can first select the voiceover file that you want to amplify, and from the sidebar on the right, click on “Dialogue” as the type of the audio file.
Once you mark the audio type, you will get different options. Here, go to the “Loudness” option and click on the “Auto Match” button.
Afterward, you can do the same for your background audio file. Select the file and choose its audio type as “Music”. You can also set its loudness to “Auto Match” if you want to.
Step 2: Perform Auto Ducking in Premiere Pro
Now when you have set the audio types, you can just find the Ducking option on the sidebar and turn it on. Here, you can first click on the dialogue icon from the top and get the needed options. You can adjust its sensitivity and set a level or improve or reduce its quality.
Apart from the dialogue icon, you can also click on the Music icon and do the same. For instance, you can reduce the quality of the background music and increase the level of the dialogue track.
Step 3: Make the Final Changes
Great! You can now preview the changes you have made and check the audio ducking results in Premiere Pro. If you want to finalize things, then you can perform keyframing and manually adjust the volume.
Furthermore, you can also perform an instant hard ducking in Premiere Pro. For this, just choose the track, go to the side panel, and select Preset > Music > Hard Vocal Ducking. While it would get instant results in Adobe Premiere audio ducking, the results might not be so effective.
Part 2: Wondershare Filmora : An Easier Way to Auto Duck Your Audios on Mac
As you can see, the Premiere Pro audio ducking feature can get a bit complicated if you are a beginner. Therefore, if you are looking for a simpler and more effective automatic ducking solution, then use Wondershare Filmora. This intuitive and diverse video/audio editing tool has an automatic audio ducking option that would make your job a whole lot easier.
To learn how to perform automatic audio ducking in your videos on Mac via Wondershare Filmora, one can follow these steps:
Step 1: Load the Video or Audio Files on Filmora
Firstly, you can just launch Wondershare Filmora on your Mac and import your videos/audios. You can drag and drop the files or just go to its Import Menu option to browse the files. Afterward, you can drag the files to the timeline at the bottom to work on them.
On the native interface of Filmora, you can also directly record voiceovers. Just click on the voiceover icon (below the preview window) and start recording any dialogue.
Not just that, you can also find a wide range of royalty-free music on Filmora that you can readily use in your projects without any copyright issues.
Step 2: Perform Automatic Audio Ducking on Filmora
Great! Now you can see your video and the audio track on the timeline of Filmora. At first, you need to select the voiceover (or any other track) that you want to amplify.
Once the desired audio track is selected, right-click it, and choose the “Adjust Audio” option.
As the dedicated Audio Editor will open, just go to the “Ducking” option at the bottom and turn on the “Lower the volume of other clips” feature. You can further select the level to lower the volume of other background clips in the video here.
Step 3: Save and Export Your Video
That’s it! After making the changes, just click on the “OK” button and Filmora would automatically adjust the volume of other clips. You can further make the needed changes in the video and click on the “Export” icon. This will let you save the project in the desired format and resolution on your computer.
Who knew it would be so easy to do auto-ducking in Premiere Pro, right? Though, if you are looking for even a simpler alternative to Adobe Premiere audio ducking, then consider using Wondershare Filmora. A user-friendly and resourceful video editor, it offers a wide range of features and other inbuilt tools that would meet every post-production requirement of yours in one place.

Benjamin Arango
Benjamin Arango is a writer and a lover of all things video.
Follow @Benjamin Arango
Benjamin Arango
Oct 26, 2023• Proven solutions
Too many times, while mixing voiceover with the background music in a video, the dialogues don’t seem to be audible. That’s when we follow the process of audio ducking in Premiere Pro that would automatically lower the volume of the background music whenever there is a dialogue.
The best thing about Premiere Pro audio ducking is that it is an automatic process and we don’t need to put a lot of effort. To make your job easier, I’m going to let you know how to use the Adobe Premiere Pro audio ducking feature in a step by step manner in this guide.
Part 1: How to Use Audio Ducking to Balance Music and Voiceover in Adobe Premiere Pro on Mac?
If you have been using Adobe Premiere Pro on Mac, then you would already be familiar with the wide range of editing features that it has. One of them is the Premiere Pro audio ducking option that comes inbuilt in the application. Using it, you can automatically lower the volume of the background music and amplify your dialogues.
To perform auto-ducking in Premiere Pro, we first need to define each audio track and then use the ducking feature. Here’s how you can also perform audio ducking in Premiere Pro like a pro.
Step 1: Define the Audio Types
Since Adobe Premiere Pro can’t automatically detect the type of sounds, you need to do it manually. To do audio ducking in Premiere Pro, you can first import your video clip and the voiceover to the application, and drag them to the working timeline.
Now, you can first select the voiceover file that you want to amplify, and from the sidebar on the right, click on “Dialogue” as the type of the audio file.
Once you mark the audio type, you will get different options. Here, go to the “Loudness” option and click on the “Auto Match” button.
Afterward, you can do the same for your background audio file. Select the file and choose its audio type as “Music”. You can also set its loudness to “Auto Match” if you want to.
Step 2: Perform Auto Ducking in Premiere Pro
Now when you have set the audio types, you can just find the Ducking option on the sidebar and turn it on. Here, you can first click on the dialogue icon from the top and get the needed options. You can adjust its sensitivity and set a level or improve or reduce its quality.
Apart from the dialogue icon, you can also click on the Music icon and do the same. For instance, you can reduce the quality of the background music and increase the level of the dialogue track.
Step 3: Make the Final Changes
Great! You can now preview the changes you have made and check the audio ducking results in Premiere Pro. If you want to finalize things, then you can perform keyframing and manually adjust the volume.
Furthermore, you can also perform an instant hard ducking in Premiere Pro. For this, just choose the track, go to the side panel, and select Preset > Music > Hard Vocal Ducking. While it would get instant results in Adobe Premiere audio ducking, the results might not be so effective.
Part 2: Wondershare Filmora : An Easier Way to Auto Duck Your Audios on Mac
As you can see, the Premiere Pro audio ducking feature can get a bit complicated if you are a beginner. Therefore, if you are looking for a simpler and more effective automatic ducking solution, then use Wondershare Filmora. This intuitive and diverse video/audio editing tool has an automatic audio ducking option that would make your job a whole lot easier.
To learn how to perform automatic audio ducking in your videos on Mac via Wondershare Filmora, one can follow these steps:
Step 1: Load the Video or Audio Files on Filmora
Firstly, you can just launch Wondershare Filmora on your Mac and import your videos/audios. You can drag and drop the files or just go to its Import Menu option to browse the files. Afterward, you can drag the files to the timeline at the bottom to work on them.
On the native interface of Filmora, you can also directly record voiceovers. Just click on the voiceover icon (below the preview window) and start recording any dialogue.
Not just that, you can also find a wide range of royalty-free music on Filmora that you can readily use in your projects without any copyright issues.
Step 2: Perform Automatic Audio Ducking on Filmora
Great! Now you can see your video and the audio track on the timeline of Filmora. At first, you need to select the voiceover (or any other track) that you want to amplify.
Once the desired audio track is selected, right-click it, and choose the “Adjust Audio” option.
As the dedicated Audio Editor will open, just go to the “Ducking” option at the bottom and turn on the “Lower the volume of other clips” feature. You can further select the level to lower the volume of other background clips in the video here.
Step 3: Save and Export Your Video
That’s it! After making the changes, just click on the “OK” button and Filmora would automatically adjust the volume of other clips. You can further make the needed changes in the video and click on the “Export” icon. This will let you save the project in the desired format and resolution on your computer.
Who knew it would be so easy to do auto-ducking in Premiere Pro, right? Though, if you are looking for even a simpler alternative to Adobe Premiere audio ducking, then consider using Wondershare Filmora. A user-friendly and resourceful video editor, it offers a wide range of features and other inbuilt tools that would meet every post-production requirement of yours in one place.

Benjamin Arango
Benjamin Arango is a writer and a lover of all things video.
Follow @Benjamin Arango
Benjamin Arango
Oct 26, 2023• Proven solutions
Too many times, while mixing voiceover with the background music in a video, the dialogues don’t seem to be audible. That’s when we follow the process of audio ducking in Premiere Pro that would automatically lower the volume of the background music whenever there is a dialogue.
The best thing about Premiere Pro audio ducking is that it is an automatic process and we don’t need to put a lot of effort. To make your job easier, I’m going to let you know how to use the Adobe Premiere Pro audio ducking feature in a step by step manner in this guide.
Part 1: How to Use Audio Ducking to Balance Music and Voiceover in Adobe Premiere Pro on Mac?
If you have been using Adobe Premiere Pro on Mac, then you would already be familiar with the wide range of editing features that it has. One of them is the Premiere Pro audio ducking option that comes inbuilt in the application. Using it, you can automatically lower the volume of the background music and amplify your dialogues.
To perform auto-ducking in Premiere Pro, we first need to define each audio track and then use the ducking feature. Here’s how you can also perform audio ducking in Premiere Pro like a pro.
Step 1: Define the Audio Types
Since Adobe Premiere Pro can’t automatically detect the type of sounds, you need to do it manually. To do audio ducking in Premiere Pro, you can first import your video clip and the voiceover to the application, and drag them to the working timeline.
Now, you can first select the voiceover file that you want to amplify, and from the sidebar on the right, click on “Dialogue” as the type of the audio file.
Once you mark the audio type, you will get different options. Here, go to the “Loudness” option and click on the “Auto Match” button.
Afterward, you can do the same for your background audio file. Select the file and choose its audio type as “Music”. You can also set its loudness to “Auto Match” if you want to.
Step 2: Perform Auto Ducking in Premiere Pro
Now when you have set the audio types, you can just find the Ducking option on the sidebar and turn it on. Here, you can first click on the dialogue icon from the top and get the needed options. You can adjust its sensitivity and set a level or improve or reduce its quality.
Apart from the dialogue icon, you can also click on the Music icon and do the same. For instance, you can reduce the quality of the background music and increase the level of the dialogue track.
Step 3: Make the Final Changes
Great! You can now preview the changes you have made and check the audio ducking results in Premiere Pro. If you want to finalize things, then you can perform keyframing and manually adjust the volume.
Furthermore, you can also perform an instant hard ducking in Premiere Pro. For this, just choose the track, go to the side panel, and select Preset > Music > Hard Vocal Ducking. While it would get instant results in Adobe Premiere audio ducking, the results might not be so effective.
Part 2: Wondershare Filmora : An Easier Way to Auto Duck Your Audios on Mac
As you can see, the Premiere Pro audio ducking feature can get a bit complicated if you are a beginner. Therefore, if you are looking for a simpler and more effective automatic ducking solution, then use Wondershare Filmora. This intuitive and diverse video/audio editing tool has an automatic audio ducking option that would make your job a whole lot easier.
To learn how to perform automatic audio ducking in your videos on Mac via Wondershare Filmora, one can follow these steps:
Step 1: Load the Video or Audio Files on Filmora
Firstly, you can just launch Wondershare Filmora on your Mac and import your videos/audios. You can drag and drop the files or just go to its Import Menu option to browse the files. Afterward, you can drag the files to the timeline at the bottom to work on them.
On the native interface of Filmora, you can also directly record voiceovers. Just click on the voiceover icon (below the preview window) and start recording any dialogue.
Not just that, you can also find a wide range of royalty-free music on Filmora that you can readily use in your projects without any copyright issues.
Step 2: Perform Automatic Audio Ducking on Filmora
Great! Now you can see your video and the audio track on the timeline of Filmora. At first, you need to select the voiceover (or any other track) that you want to amplify.
Once the desired audio track is selected, right-click it, and choose the “Adjust Audio” option.
As the dedicated Audio Editor will open, just go to the “Ducking” option at the bottom and turn on the “Lower the volume of other clips” feature. You can further select the level to lower the volume of other background clips in the video here.
Step 3: Save and Export Your Video
That’s it! After making the changes, just click on the “OK” button and Filmora would automatically adjust the volume of other clips. You can further make the needed changes in the video and click on the “Export” icon. This will let you save the project in the desired format and resolution on your computer.
Who knew it would be so easy to do auto-ducking in Premiere Pro, right? Though, if you are looking for even a simpler alternative to Adobe Premiere audio ducking, then consider using Wondershare Filmora. A user-friendly and resourceful video editor, it offers a wide range of features and other inbuilt tools that would meet every post-production requirement of yours in one place.

Benjamin Arango
Benjamin Arango is a writer and a lover of all things video.
Follow @Benjamin Arango
Master List: 6 Digital Hubs Offering High-Resolution Whoosh Audio Effects (Updated )
6 Best Websites to Download Whoosh Sound Effect (Easily)

Benjamin Arango
Mar 27, 2024• Proven solutions
Are you looking for a cool sound effect for your action-packed video?
There are several video editing programs, but it often becomes difficult to decide the best and the most suitable one for the genre you are focusing on.
If you want to create an intense atmosphere , editing with the cinematic whoosh sound effect is the best way to do it.
The whoosh sound effect is the best one for the war or fighting sequences. In this article, you can learn the six best websites to download the whoosh sound effect for edits.
6 Best Websites for Whoosh Sound Effect
Here is a whoosh sound effect example. Check it out.
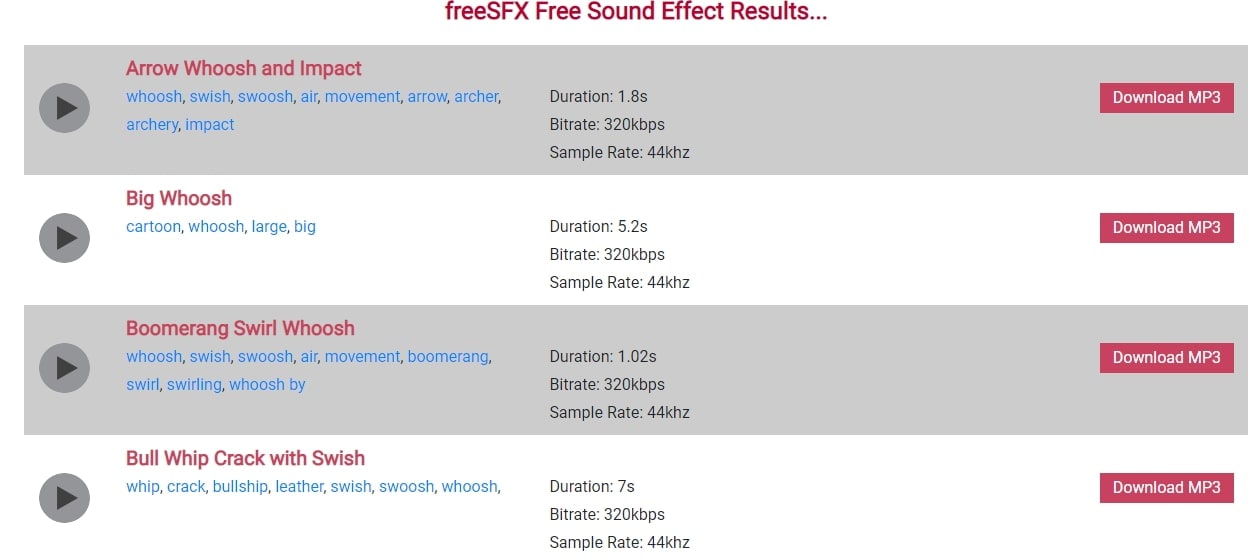
1. Whoosh - Free SFX
The brainchild of Alan McKinney, the Free SFX, has brought the sound and music companies and individuals together for contributing sounds from across the globe.
It is an excellent tool for production companies and music enthusiasts. You can find several sound effects with Free SFX, and one of the best is the whoosh.
There are various categories to choose your sound effect, and Whoosh is one among them. The cinematic whoosh sound effect includes – Arrow whoosh and impact, boomerang, bullwhip crack with a swish, double space, fast jet, fireworks, and more.
2. FILM CRUX
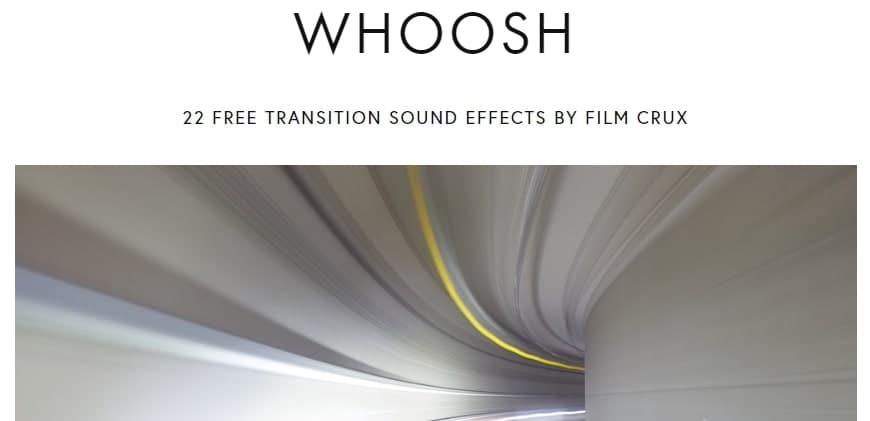
FILM CRUX offers 22 free transition sound effects. If you are a blogger, travel filmmaker, or looking to enhance your already existing transition packs, the Whooshes from FilmCrux is the best way to do it.
The whoosh sound effect is high-quality, and you can download it in aif format. You may also just drag and drop it on your timeline.
3. Sound Snap
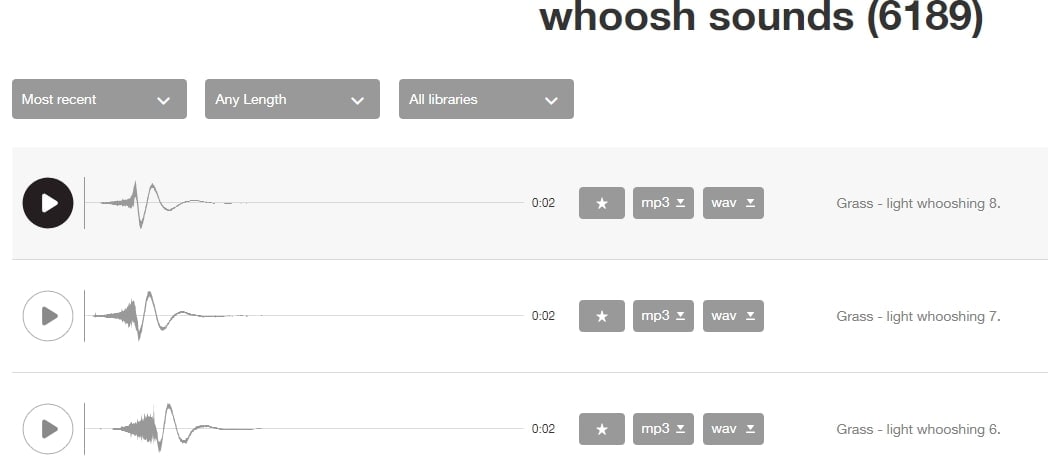
You may use the Soundsnap whoosh sound effects for editing your audio and video. There are 6189 whoosh sounds on Soundsnap under more than 50 categories.
You can filter and choose an effect from the most recent or the oldest and also select it based on the sound effect time duration.
There are less than 2 seconds to more than 1-minute time duration sound effects. You may listen to the effect, download, and share it. You may also register and login to buy the sounds.
4. Fesliyan Studios
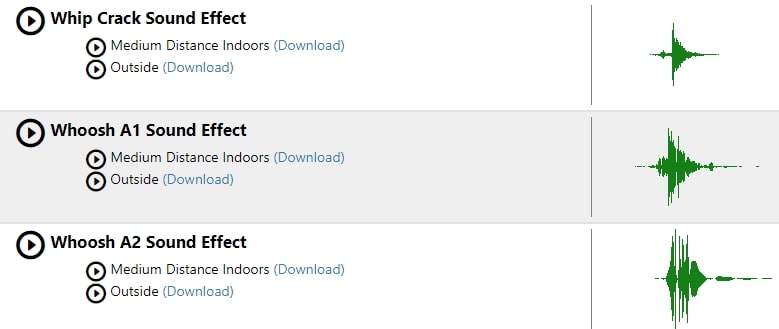
You can download free whoosh and swoosh sound effects easily from Fesliyan Studios.
For adding fighting and transition sound effects in high-quality HD to your video, download mp3 whoosh sound effects from the Fesliyan Studios.
You can download it for free and use it for the purpose of editing videos, plays, foley, YouTube, adobe premiere, video games, etc.
You don’t have to register or login to listen to the sound or download. Just visit the website and get the detail.
5. Sound Dogs
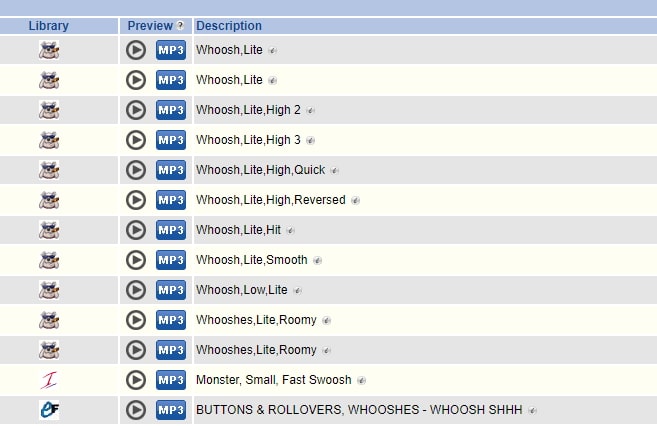
Sound Dogs is an archive only website, and there are 26 whoosh sound effects with low-resolution mp3 previews.
If you need the professional quality WAV files, you need to purchase the cinematic whoosh sound effects. It is available under the category Whoosh, and sub-category light in the old/retired Sounddogs website.
6. Zapslat
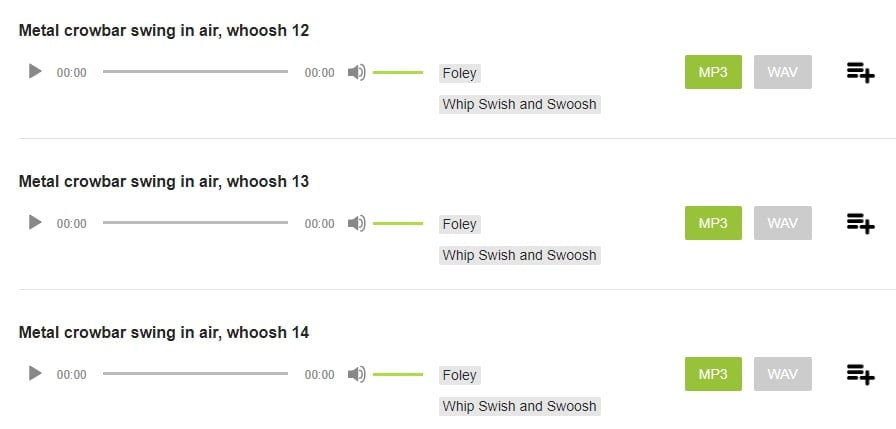
In the Zapslat site, you can find whoosh, swoosh, and swish sound effects whipped through the air to create the sound.
The whoosh sound effect is usually related to the speed as if something is being snatched or something passing quickly.
There are 110 sound effects created by using objects like bamboo cane, sticks, rods, cables, fishing ropes, and many more. You can listen and download the mp3 files for free, but the WAV files are only available to the gold members.
Conclusion
The whoosh sound effects enhance your video content especially if you need to add some fast-paced impacts of war, air, or fights to your video. Make it sound real with the cinematic whoosh sound effects added.

Benjamin Arango
Benjamin Arango is a writer and a lover of all things video.
Follow @Benjamin Arango
Benjamin Arango
Mar 27, 2024• Proven solutions
Are you looking for a cool sound effect for your action-packed video?
There are several video editing programs, but it often becomes difficult to decide the best and the most suitable one for the genre you are focusing on.
If you want to create an intense atmosphere , editing with the cinematic whoosh sound effect is the best way to do it.
The whoosh sound effect is the best one for the war or fighting sequences. In this article, you can learn the six best websites to download the whoosh sound effect for edits.
6 Best Websites for Whoosh Sound Effect
Here is a whoosh sound effect example. Check it out.
1. Whoosh - Free SFX
The brainchild of Alan McKinney, the Free SFX, has brought the sound and music companies and individuals together for contributing sounds from across the globe.
It is an excellent tool for production companies and music enthusiasts. You can find several sound effects with Free SFX, and one of the best is the whoosh.
There are various categories to choose your sound effect, and Whoosh is one among them. The cinematic whoosh sound effect includes – Arrow whoosh and impact, boomerang, bullwhip crack with a swish, double space, fast jet, fireworks, and more.

2. FILM CRUX
FILM CRUX offers 22 free transition sound effects. If you are a blogger, travel filmmaker, or looking to enhance your already existing transition packs, the Whooshes from FilmCrux is the best way to do it.
The whoosh sound effect is high-quality, and you can download it in aif format. You may also just drag and drop it on your timeline.

3. Sound Snap
You may use the Soundsnap whoosh sound effects for editing your audio and video. There are 6189 whoosh sounds on Soundsnap under more than 50 categories.
You can filter and choose an effect from the most recent or the oldest and also select it based on the sound effect time duration.
There are less than 2 seconds to more than 1-minute time duration sound effects. You may listen to the effect, download, and share it. You may also register and login to buy the sounds.

4. Fesliyan Studios
You can download free whoosh and swoosh sound effects easily from Fesliyan Studios.
For adding fighting and transition sound effects in high-quality HD to your video, download mp3 whoosh sound effects from the Fesliyan Studios.
You can download it for free and use it for the purpose of editing videos, plays, foley, YouTube, adobe premiere, video games, etc.
You don’t have to register or login to listen to the sound or download. Just visit the website and get the detail.

5. Sound Dogs
Sound Dogs is an archive only website, and there are 26 whoosh sound effects with low-resolution mp3 previews.
If you need the professional quality WAV files, you need to purchase the cinematic whoosh sound effects. It is available under the category Whoosh, and sub-category light in the old/retired Sounddogs website.

6. Zapslat
In the Zapslat site, you can find whoosh, swoosh, and swish sound effects whipped through the air to create the sound.
The whoosh sound effect is usually related to the speed as if something is being snatched or something passing quickly.
There are 110 sound effects created by using objects like bamboo cane, sticks, rods, cables, fishing ropes, and many more. You can listen and download the mp3 files for free, but the WAV files are only available to the gold members.

Conclusion
The whoosh sound effects enhance your video content especially if you need to add some fast-paced impacts of war, air, or fights to your video. Make it sound real with the cinematic whoosh sound effects added.

Benjamin Arango
Benjamin Arango is a writer and a lover of all things video.
Follow @Benjamin Arango
Benjamin Arango
Mar 27, 2024• Proven solutions
Are you looking for a cool sound effect for your action-packed video?
There are several video editing programs, but it often becomes difficult to decide the best and the most suitable one for the genre you are focusing on.
If you want to create an intense atmosphere , editing with the cinematic whoosh sound effect is the best way to do it.
The whoosh sound effect is the best one for the war or fighting sequences. In this article, you can learn the six best websites to download the whoosh sound effect for edits.
6 Best Websites for Whoosh Sound Effect
Here is a whoosh sound effect example. Check it out.
1. Whoosh - Free SFX
The brainchild of Alan McKinney, the Free SFX, has brought the sound and music companies and individuals together for contributing sounds from across the globe.
It is an excellent tool for production companies and music enthusiasts. You can find several sound effects with Free SFX, and one of the best is the whoosh.
There are various categories to choose your sound effect, and Whoosh is one among them. The cinematic whoosh sound effect includes – Arrow whoosh and impact, boomerang, bullwhip crack with a swish, double space, fast jet, fireworks, and more.

2. FILM CRUX
FILM CRUX offers 22 free transition sound effects. If you are a blogger, travel filmmaker, or looking to enhance your already existing transition packs, the Whooshes from FilmCrux is the best way to do it.
The whoosh sound effect is high-quality, and you can download it in aif format. You may also just drag and drop it on your timeline.

3. Sound Snap
You may use the Soundsnap whoosh sound effects for editing your audio and video. There are 6189 whoosh sounds on Soundsnap under more than 50 categories.
You can filter and choose an effect from the most recent or the oldest and also select it based on the sound effect time duration.
There are less than 2 seconds to more than 1-minute time duration sound effects. You may listen to the effect, download, and share it. You may also register and login to buy the sounds.

4. Fesliyan Studios
You can download free whoosh and swoosh sound effects easily from Fesliyan Studios.
For adding fighting and transition sound effects in high-quality HD to your video, download mp3 whoosh sound effects from the Fesliyan Studios.
You can download it for free and use it for the purpose of editing videos, plays, foley, YouTube, adobe premiere, video games, etc.
You don’t have to register or login to listen to the sound or download. Just visit the website and get the detail.

5. Sound Dogs
Sound Dogs is an archive only website, and there are 26 whoosh sound effects with low-resolution mp3 previews.
If you need the professional quality WAV files, you need to purchase the cinematic whoosh sound effects. It is available under the category Whoosh, and sub-category light in the old/retired Sounddogs website.

6. Zapslat
In the Zapslat site, you can find whoosh, swoosh, and swish sound effects whipped through the air to create the sound.
The whoosh sound effect is usually related to the speed as if something is being snatched or something passing quickly.
There are 110 sound effects created by using objects like bamboo cane, sticks, rods, cables, fishing ropes, and many more. You can listen and download the mp3 files for free, but the WAV files are only available to the gold members.

Conclusion
The whoosh sound effects enhance your video content especially if you need to add some fast-paced impacts of war, air, or fights to your video. Make it sound real with the cinematic whoosh sound effects added.

Benjamin Arango
Benjamin Arango is a writer and a lover of all things video.
Follow @Benjamin Arango
Benjamin Arango
Mar 27, 2024• Proven solutions
Are you looking for a cool sound effect for your action-packed video?
There are several video editing programs, but it often becomes difficult to decide the best and the most suitable one for the genre you are focusing on.
If you want to create an intense atmosphere , editing with the cinematic whoosh sound effect is the best way to do it.
The whoosh sound effect is the best one for the war or fighting sequences. In this article, you can learn the six best websites to download the whoosh sound effect for edits.
6 Best Websites for Whoosh Sound Effect
Here is a whoosh sound effect example. Check it out.
1. Whoosh - Free SFX
The brainchild of Alan McKinney, the Free SFX, has brought the sound and music companies and individuals together for contributing sounds from across the globe.
It is an excellent tool for production companies and music enthusiasts. You can find several sound effects with Free SFX, and one of the best is the whoosh.
There are various categories to choose your sound effect, and Whoosh is one among them. The cinematic whoosh sound effect includes – Arrow whoosh and impact, boomerang, bullwhip crack with a swish, double space, fast jet, fireworks, and more.

2. FILM CRUX
FILM CRUX offers 22 free transition sound effects. If you are a blogger, travel filmmaker, or looking to enhance your already existing transition packs, the Whooshes from FilmCrux is the best way to do it.
The whoosh sound effect is high-quality, and you can download it in aif format. You may also just drag and drop it on your timeline.

3. Sound Snap
You may use the Soundsnap whoosh sound effects for editing your audio and video. There are 6189 whoosh sounds on Soundsnap under more than 50 categories.
You can filter and choose an effect from the most recent or the oldest and also select it based on the sound effect time duration.
There are less than 2 seconds to more than 1-minute time duration sound effects. You may listen to the effect, download, and share it. You may also register and login to buy the sounds.

4. Fesliyan Studios
You can download free whoosh and swoosh sound effects easily from Fesliyan Studios.
For adding fighting and transition sound effects in high-quality HD to your video, download mp3 whoosh sound effects from the Fesliyan Studios.
You can download it for free and use it for the purpose of editing videos, plays, foley, YouTube, adobe premiere, video games, etc.
You don’t have to register or login to listen to the sound or download. Just visit the website and get the detail.

5. Sound Dogs
Sound Dogs is an archive only website, and there are 26 whoosh sound effects with low-resolution mp3 previews.
If you need the professional quality WAV files, you need to purchase the cinematic whoosh sound effects. It is available under the category Whoosh, and sub-category light in the old/retired Sounddogs website.

6. Zapslat
In the Zapslat site, you can find whoosh, swoosh, and swish sound effects whipped through the air to create the sound.
The whoosh sound effect is usually related to the speed as if something is being snatched or something passing quickly.
There are 110 sound effects created by using objects like bamboo cane, sticks, rods, cables, fishing ropes, and many more. You can listen and download the mp3 files for free, but the WAV files are only available to the gold members.

Conclusion
The whoosh sound effects enhance your video content especially if you need to add some fast-paced impacts of war, air, or fights to your video. Make it sound real with the cinematic whoosh sound effects added.

Benjamin Arango
Benjamin Arango is a writer and a lover of all things video.
Follow @Benjamin Arango
Also read:
- [New] 2024 Approved No Need for Apps Download YouTube Files
- [New] 2024 Approved YouTube’s Top Unboxing Houses and Their Fanbase
- [New] In 2024, Best Nature-Friendly Video Capture Tools Explained
- 2024 Approved Advanced Tips for Screenshot Management and Archiving
- 2024 Approved Scripts that Reshape Cinematic History
- Accelerating Content Consumption on Facebook for 2024
- In 2024, How To Fake GPS On OnePlus 11R For Mobile Legends? | Dr.fone
- Reinventing Yourself in the Digital Age: Changing Your Name on Facebook
- The Ultimate List of Free Haunting Noise Archives
- Updated 2024 Approved How to Remove Audio From MOV Files on Windows or Mac
- Updated Audio Integration in Motion Picture Editing A Step-by-Step Approach
- Updated In 2024, Approaches to Silence Echoes in Professional Audio Recording
- Updated In 2024, MAGIX Samplitude Is It Really The Best Music Production Software?
- Title: New In 2024, Navigating the Nuances of Audio Graphics Plotting Waveform Data & Infusing Videos with Life-Like Animations Using Premiere Pro
- Author: Kate
- Created at : 2024-10-10 19:01:10
- Updated at : 2024-10-17 17:38:46
- Link: https://audio-editing.techidaily.com/new-in-2024-navigating-the-nuances-of-audio-graphics-plotting-waveform-data-and-infusing-videos-with-life-like-animations-using-premiere-pro/
- License: This work is licensed under CC BY-NC-SA 4.0.

