
:max_bytes(150000):strip_icc():format(webp)/GettyImages-1250476440-2ff779100e984029aa752236f9791b11.jpg)
New In 2024, Enhancing Project Focus Extracting Audio From Video in iMovie on Mac
Enhancing Project Focus: Extracting Audio From Video in iMovie on Mac
How to Separate Audio from Video in iMovie on Mac?

Liza Brown
Oct 26, 2023• Proven solutions
Apple’s video editing program, iMovie, is a popular choice. By removing background noise and raising audio levels of quiet clips, iMovie may likewise modify and enhance the audio of a project.
iMovie gives you the basic, no-frills editing tools you need to make a movie out of a collection of video clips. Without using videotape, you can easily browse from scene to scene and save your edits and changes in digital format. The end product is a high-quality digital video movie that you can save as a QuickTime file or dump back to digital videotape.
Now let’s look at how to separate audio from video in iMovie on Mac.
- Part 1. How to Separate/Detach/Split Audio from Video in iMovie on Mac
- Part 2. Separate Audio from Video on Mac with the Best Alternative to iMovie
- Part 3. FAQs about Separating Audio from Video in iMovie
Part 1. How to Separate/Detach/Split Audio from Video in iMovie on Mac
The iMovie program is capable of producing high-quality movies and videos. If you’re dealing with a video that includes both sound and pictures, you may want to split the two at some point.
To separate audio from video in iMovie on Mac, just open the video and follow the steps below.
Step 1. Remove the audio clip from the video
In your iMovie timeline, find the clip that contains both video and audio.
Right-click the clip or hold Control and click it. You can also go to the menu bar and choose Detach Audio.
The audio from that clip will then show as its own “clip” in green below the video. The little line on the left, however, confirms that the video and audio are still connected. This implies that if you delete the video, you’ll lose the audio as well. As a result, you’ll either need to move the audio clip somewhere else in your video or place it in the Background Music Well at the bottom of the timeline.
Simply select, drag, and drop the green audio clip where you want it. It will be in the background of all other noises in your movie if you set it in the Background Music Well.
Step 2. Get rid of the video
You can remove the video by clicking it and utilizing one of these techniques after you disconnect the audio and unlink it from the video.
Select Delete from the shortcut menu by right-clicking.
Or hold Control while clicking and selecting Delete.
Part 2. Separate Audio from Video on Mac with the Best Alternative to iMovie
Want to extract the music file from a video clip’s audio and visual tracks? Or do you want to add another audio file to the video frame? In this part, you’ll learn how to easily separate audio from video and create your own MP3s with iMovie’s alternative - Wondershare Filmora. It’s a powerful video editing software available on both Mac and Windows.


You can make your own MP3 file of the amazing piece of music for enjoyment on the move, whether it’s from a music video, TV show, or concert footage. To separate your audio from your video, follow the steps outlined below.
Step 1. Import your media files into Filmora
To enter the editing mode, run the software and select the 16:9 or 4:3 ratio that best suits your demands. Then select Import to import video clips, audio, or photographs from your computer’s file folder.
It’s worth noting that this tool is highly compatible with a variety of formats, allowing you to edit them frame by frame while maintaining the original quality. Drag and drop videos onto the timeline after they’ve been imported. All files in the timeline are combined without any gaps by default.
Step 2. Separate the audio and video with a single click
Select “Detach Audio” from the context menu of the video file from which you wish to extract the audio track. You’ll see an audio file appearing on the audio track right away. Yes, this is the source video’s actual audio file.
You’ve successfully detached the audio track from the video file.
Step 3. Save the video or audio that has been split
Because the audio and video tracks have been split, you may simply delete the audio or video track you don’t need and replace it with the new one. Then press “Export” to save the audio track as an MP3 file, or go straight to the “iPod” preset to listen on the move.
You should first save the split video frame or audio track to a project file on your hard disk if you wish to save it separately in a new file. Reload the project file that contains the video frame after you’ve finished exporting the audio track, and then export it to a new video file.
Part 3. FAQs about Separating Audio from Video in iMovie
To learn more about separating audio from video in iMovie, you can check the FAQs below.
1. Is it possible to split audio and video in iMovie?
Yes, you certainly can. Select the video clip you want to separate after you’ve imported it into iMovie. Select “Detach Audio” from the context menu by right-clicking. You can now remove one of the tracks (audio or video), relocate it to a different location in the movie timeline, or alter it.
2. In iMovie, what does “detach audio” do?
The video clip’s audio is deleted, and an audio-only clip (with a green bar) is inserted below the video clip. The audio clip can now be linked to any other clip in your movie, or it can be relocated to the background music section.
3. How can I remove the original audio (from the camera) and lock the new audio to the video so that I don’t have to deal with two different parts (video and audio) when editing?
Make a movie in iMovie that simply mixes all the audio and visuals. You can align the video by listening to it or looking at the waveforms. After it’s all lined up, go into the clip inspector and turn off the video track’s volume. To maintain as much quality as feasible, SHARE/EXPORT using QuickTime and choose Apple Intermediate Codec as your codec. This will link the secondary audio and video tracks together. Now, into an Event, import the movie you just made in iMovie. You may now combine audio and video editing.
4. Is it feasible to simply take the video’s audio and save it as a sound file?
If you have other clips in the timeline, you can detach the audio and copy and paste it around, but if you want all the audio from a clip or set of clips, put them in a project and make a custom QT export and export “Sound to AIFF file”. Drag that into another movie clip or import it as an audio track in iTunes.
5. How do I get the audio from the clip to detach so that I may remove it and record fresh audio over it?
Only in the project timeline, not in the event pane, can you disconnect audio from a clip.
6. In iMovie for Mac, how can I mute a video?
Click the Create New button in iMovie to start a new project. From the resulting dropdown menu, pick Movie. Select the video you wish to mute by clicking the Import Media option. Drag and drop the video onto the timeline once it’s been imported. Right-click on the video in the timeline and choose Detach Audio from the dropdown menu.
The audio and video will be separated or detached as a result of this. Remove the audio from the video that you separated or disconnected in the previous step. The audio file (or layer) is located just beneath the video file on your timeline. Then you can either delete it by right-clicking on it and selecting Delete from the dropdown menu, or by simply clicking on it. It will be highlighted in yellow to indicate that it has been selected. And then press the delete key.
7. How do I view and download a preview?
By clicking the play button next to the Share button, you may see a preview of the video. The video can then be downloaded to your computer by selecting Download Video from the dropdown menu after hitting the Publish button.
Alternatively, you can share it directly from the app to other social media platforms. Apart from removing audio from videos, Animaker also includes other video editing tools that you’ll need to modify your videos for social media and your website.
Wrap Up
As seen in this instructional article, iMovie has countless amazing features as a video editor on Mac . Separating audio from a video is one of those interesting features on iMovie.
If a video has music, sounds, or voices that you’d like to separate from the video, following the above-listed steps is an easy way to do just that. One thing to always remember is to keep the app open while exporting.
And if iMovie can’t meet your need, don’t worry. Wondershare Filmora can be your better choice.
Liza Brown
Liza Brown is a writer and a lover of all things video.
Follow @Liza Brown
Liza Brown
Oct 26, 2023• Proven solutions
Apple’s video editing program, iMovie, is a popular choice. By removing background noise and raising audio levels of quiet clips, iMovie may likewise modify and enhance the audio of a project.
iMovie gives you the basic, no-frills editing tools you need to make a movie out of a collection of video clips. Without using videotape, you can easily browse from scene to scene and save your edits and changes in digital format. The end product is a high-quality digital video movie that you can save as a QuickTime file or dump back to digital videotape.
Now let’s look at how to separate audio from video in iMovie on Mac.
- Part 1. How to Separate/Detach/Split Audio from Video in iMovie on Mac
- Part 2. Separate Audio from Video on Mac with the Best Alternative to iMovie
- Part 3. FAQs about Separating Audio from Video in iMovie
Part 1. How to Separate/Detach/Split Audio from Video in iMovie on Mac
The iMovie program is capable of producing high-quality movies and videos. If you’re dealing with a video that includes both sound and pictures, you may want to split the two at some point.
To separate audio from video in iMovie on Mac, just open the video and follow the steps below.
Step 1. Remove the audio clip from the video
In your iMovie timeline, find the clip that contains both video and audio.
Right-click the clip or hold Control and click it. You can also go to the menu bar and choose Detach Audio.
The audio from that clip will then show as its own “clip” in green below the video. The little line on the left, however, confirms that the video and audio are still connected. This implies that if you delete the video, you’ll lose the audio as well. As a result, you’ll either need to move the audio clip somewhere else in your video or place it in the Background Music Well at the bottom of the timeline.
Simply select, drag, and drop the green audio clip where you want it. It will be in the background of all other noises in your movie if you set it in the Background Music Well.
Step 2. Get rid of the video
You can remove the video by clicking it and utilizing one of these techniques after you disconnect the audio and unlink it from the video.
Select Delete from the shortcut menu by right-clicking.
Or hold Control while clicking and selecting Delete.
Part 2. Separate Audio from Video on Mac with the Best Alternative to iMovie
Want to extract the music file from a video clip’s audio and visual tracks? Or do you want to add another audio file to the video frame? In this part, you’ll learn how to easily separate audio from video and create your own MP3s with iMovie’s alternative - Wondershare Filmora. It’s a powerful video editing software available on both Mac and Windows.
You can make your own MP3 file of the amazing piece of music for enjoyment on the move, whether it’s from a music video, TV show, or concert footage. To separate your audio from your video, follow the steps outlined below.
Step 1. Import your media files into Filmora
To enter the editing mode, run the software and select the 16:9 or 4:3 ratio that best suits your demands. Then select Import to import video clips, audio, or photographs from your computer’s file folder.
It’s worth noting that this tool is highly compatible with a variety of formats, allowing you to edit them frame by frame while maintaining the original quality. Drag and drop videos onto the timeline after they’ve been imported. All files in the timeline are combined without any gaps by default.
Step 2. Separate the audio and video with a single click
Select “Detach Audio” from the context menu of the video file from which you wish to extract the audio track. You’ll see an audio file appearing on the audio track right away. Yes, this is the source video’s actual audio file.
You’ve successfully detached the audio track from the video file.
Step 3. Save the video or audio that has been split
Because the audio and video tracks have been split, you may simply delete the audio or video track you don’t need and replace it with the new one. Then press “Export” to save the audio track as an MP3 file, or go straight to the “iPod” preset to listen on the move.
You should first save the split video frame or audio track to a project file on your hard disk if you wish to save it separately in a new file. Reload the project file that contains the video frame after you’ve finished exporting the audio track, and then export it to a new video file.
Part 3. FAQs about Separating Audio from Video in iMovie
To learn more about separating audio from video in iMovie, you can check the FAQs below.
1. Is it possible to split audio and video in iMovie?
Yes, you certainly can. Select the video clip you want to separate after you’ve imported it into iMovie. Select “Detach Audio” from the context menu by right-clicking. You can now remove one of the tracks (audio or video), relocate it to a different location in the movie timeline, or alter it.
2. In iMovie, what does “detach audio” do?
The video clip’s audio is deleted, and an audio-only clip (with a green bar) is inserted below the video clip. The audio clip can now be linked to any other clip in your movie, or it can be relocated to the background music section.
3. How can I remove the original audio (from the camera) and lock the new audio to the video so that I don’t have to deal with two different parts (video and audio) when editing?
Make a movie in iMovie that simply mixes all the audio and visuals. You can align the video by listening to it or looking at the waveforms. After it’s all lined up, go into the clip inspector and turn off the video track’s volume. To maintain as much quality as feasible, SHARE/EXPORT using QuickTime and choose Apple Intermediate Codec as your codec. This will link the secondary audio and video tracks together. Now, into an Event, import the movie you just made in iMovie. You may now combine audio and video editing.
4. Is it feasible to simply take the video’s audio and save it as a sound file?
If you have other clips in the timeline, you can detach the audio and copy and paste it around, but if you want all the audio from a clip or set of clips, put them in a project and make a custom QT export and export “Sound to AIFF file”. Drag that into another movie clip or import it as an audio track in iTunes.
5. How do I get the audio from the clip to detach so that I may remove it and record fresh audio over it?
Only in the project timeline, not in the event pane, can you disconnect audio from a clip.
6. In iMovie for Mac, how can I mute a video?
Click the Create New button in iMovie to start a new project. From the resulting dropdown menu, pick Movie. Select the video you wish to mute by clicking the Import Media option. Drag and drop the video onto the timeline once it’s been imported. Right-click on the video in the timeline and choose Detach Audio from the dropdown menu.
The audio and video will be separated or detached as a result of this. Remove the audio from the video that you separated or disconnected in the previous step. The audio file (or layer) is located just beneath the video file on your timeline. Then you can either delete it by right-clicking on it and selecting Delete from the dropdown menu, or by simply clicking on it. It will be highlighted in yellow to indicate that it has been selected. And then press the delete key.
7. How do I view and download a preview?
By clicking the play button next to the Share button, you may see a preview of the video. The video can then be downloaded to your computer by selecting Download Video from the dropdown menu after hitting the Publish button.
Alternatively, you can share it directly from the app to other social media platforms. Apart from removing audio from videos, Animaker also includes other video editing tools that you’ll need to modify your videos for social media and your website.
Wrap Up
As seen in this instructional article, iMovie has countless amazing features as a video editor on Mac . Separating audio from a video is one of those interesting features on iMovie.
If a video has music, sounds, or voices that you’d like to separate from the video, following the above-listed steps is an easy way to do just that. One thing to always remember is to keep the app open while exporting.
And if iMovie can’t meet your need, don’t worry. Wondershare Filmora can be your better choice.
Liza Brown
Liza Brown is a writer and a lover of all things video.
Follow @Liza Brown
Mastering Android: An Assessment of Premium Voice Recorders (Including Free Variants) for the Year 2023
10 Best Voice Recording Apps for Android Devices [Free Included]

Benjamin Arango
Mar 27, 2024• Proven solutions
Memorizing every bit of information you need to perform your daily or weekly tasks becomes increasingly difficult as your workload rises. Students, journalists, and professionals from a wide array of industries can benefit from making audio notes or even recording entire conversations with their Smartphones.
A simple Android voice recorder can make this task easy since you can just tap on the Record button and create an audio note in seconds. However, with so many voice recorder apps for Android devices out there, finding the one best suited for your needs can be more complicated than it seems. So, in this article, we are going to help you discover some best free voice recorder for an Android device you are currently using.
Want to record voiceover and audio on iPhone? Check 10 Best Voice Recorder Apps for iPhones >>
10 Best Free Voice Recording Apps for Android Devices
Recording audio is no longer a highly technical process since now you can create an audio note or record an interview with an Android phone and a voice recorder app. The question is which voice recording app should you install on your device. So, let’s take a look at some of the most potent Android voice recorders you can find at Google Play Store.
1. Easy Voice Recorder Pro
Price: $3.99
Supported OS: Varies with the device
Best for: Students, musicians, and businessmen

App in Google Play
As the app’s name suggests making recordings for a broad range of purposes is easy. All you need to do is launch the app and start a new audio recording session. Easy Voice Recorder Pro doesn’t limit the duration of your recordings, and it also allows you to compress the recorded audio . That is perfect if you need to record long lectures or conversations. Besides, you can connect an external microphone with the app in case you want to increase the quality of the sound you are recording. The app also lets you store your recordings on Dropbox or Google Drive, while it also offers the possibility to send recordings via email.
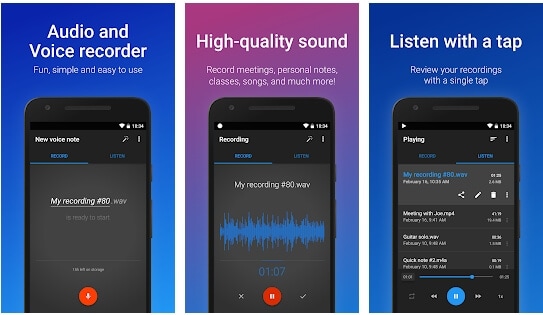
Easy Voice Recorder Pro Interface
Pros
- Allows users to manage and organize their recordings effortlessly
- Supports all standard output audio file formats
- Offers the option to record in stereo
- Recordings made with this app can be used as the ringtone
Cons
- Ads can be frustrating
- Limited basic audio editing tools
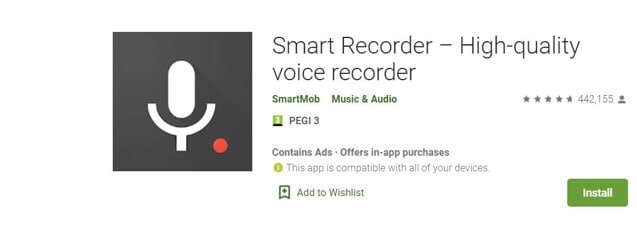
2. Smart Recorder – High-quality voice recorder
Price: Free, but contains ads and offers in-app purchases
Supported OS: Varies with the device
Best for: Students, musicians, and businessmen
App in Google Play
Capturing high-quality audio recordings effortlessly is the ultimate goal of all Android users who want to use voice recorders. As one of the best free voice recorders for Android, Smart Recorder app has a plethora of features that enable users to make high-quality audio recordings even in imperfect conditions. Options like Live Audio Spectrum Analyzer, microphone gain calibration or automatic and manual sensitivity control in Skip Silence mode are just a few reasons why this app has over 10 million installs. However, you should keep in mind that you cannot create audio files that are larger than 2 GB with this app.
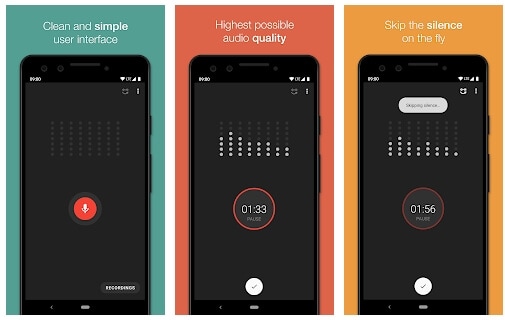
Smart Recorder – High-quality voice recorder Interface
Pros
- Provides full control over the audio recording process
- Equipped with the Wave Lock feature that prevents the device from going into the sleep mode
- Features a live audio spectrum analyzer
- Preserves battery life
Cons
- No phone call recording options
- Limited file-sharing capabilities
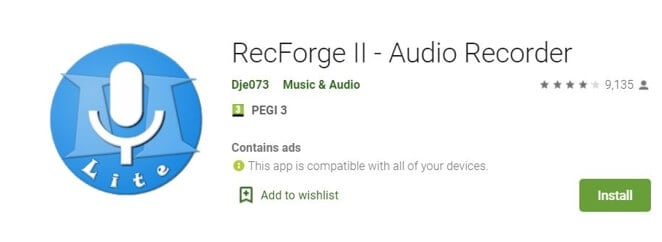
3. RecForge II Audio Recorder
Price: Free, but contains ads
Supported OS: Android 4.0 and up
Best for: Musicians
RecForge-audio-recorder App in Google Play
If you are looking for an Android voice recorder that allows you to customize bit rates, sample rates, choose codecs or record in mono or stereo mode, then you should consider installing RecForge II Audio Recorder on your device. The app allows you to schedule recordings, connect different types of external microphones or adjust the gain manually. In addition, you can also adjust the pitch , tempo and the playback rate of all audio files you record and edit with this app. RecForge II Audio Recorder continues working even while you are using other apps, and it keeps the battery consumption at the very minimum.
Pros
- Supports nearly all common audio file formats
- Offers a versatile set of audio editing tools
- Excellent file-sharing capabilities
- Allows users to increase the audio quality by disabling Automatic Gain Control
Cons
- The maximum duration of a recording is limited for some file formats
- Can be too complicated for inexperienced users
4. Hi-Q MP3 Voice Recorder
Price: Free
Supported OS: Varies with the device
Best for: Students, general use
Hi-Q MP3 Voice Recorder App in Google Play
You don’t need any previous audio recording experience to record long lectures, interviews and all other types of voice recordings with Hi-Q MP3 Voice Recorder. The free version of the app limits the maximum duration of a recording you can make to just 10 minutes. That is why you must upgrade to the Pro version of Hi-Q MP3 Voice Recorder if you want to capture hours of material directly from your phone. The best part is that all versions of the app automatically upload recordings to Google Drive or Dropbox which frees up space on your device.
Pros
- Intuitive and modernly designed interface
- Simple audio recording session setup
- Customizable audio quality
- Excellent file management capabilities
Cons
- Recording with external microphones is not an option
- The free version of the app limits the maximum duration of recordings
5. Voice Recorder
Price: Free, but contains ads
Supported OS: Android 4.1 and up
Best for: Students, musicians, and businessmen
Voice Recorder App in Google Play
If you are looking for an app you can use to record an interview, a business meeting or a lecture, then Voice Recorder may be one of your best options. You can record audio files without any restrictions and visualize the sounds with the Audio Spectrum Analyzer. The app continues recording from the background even while the phone’s screen is off which preserves battery life and enables you to perform other tasks while the recording session is in progress. Voice Recorder offers a broad range of file-sharing capabilities so that you can easily send your audio recordings via SMS, email and the Messenger app or share them on Facebook and WhatsApp.
Pros
- Available for free to all Android users
- Stopping, pausing or resuming a recording session is easy
- Allows users to adjust the sample rate
- Offers the microphone gain calibration tool
Cons
- Audio recordings can only be saved in two different file formats
- Doesn’t provide audio editing options
6. Music Maker JAM
Price: Free, but contains ads and offers in-app purchases
Supported OS: Varies with the device
Best for: Musicians
Music Maker JAM App in Google Play
With the selection of 300 mix packs, Music Maker JAM is one of the best android apps for aspiring musicians who want to compose their music even while they are on the go. You can choose from a variety of samples, audio loops and beats to create your next song or record live performances with the app’s 8-channel mixer. Music Maker JAM also enables you to record vocals, adjust the tempo of the audio files or apply effects to all recordings you edit with this app. Once your recording is ready, you can upload it to SoundCloud directly from the app or post it on Facebook and other social networks.
Pros
- Shake your Android phone to remix a song
- The app lets you choose from more than 300 mix packs
- Supports multi-channel recording
- Offers advanced audio editing options
Cons
- Music Maker JAM is not primarily a voice recorder
- No support for external microphones
7. LectureNotes
Price: Free
Supported OS: Android 3.0 and up
Best for: Students
LectureNotes App in Google Play
In case you take notes often, then this app can be an excellent choice for you as it allows you to use a stylus to create notes. However, the trial version limits the number of notebooks to just two, and neither of the notebooks can have more than eight pages. Moreover, if you would like to utilize the app’s voice recording features, you must install LectureRecordings plugin on your device. To capture videos, you must first install the LectureVideos plugin. Another disappointing thing is that you won’t be able to adjust the settings for your audio recording sessions or edit the recording you create with this app.
Pros
- An efficient tool for creating hand-written notes
- The app can be used while your Android phone is offline
- Allows users to export PDF files
- Compatible with OneNote and Evernote apps
Cons
- Underwhelming voice recording options
- You must install a plugin to record audio files
8. ASR Voice Recorder
Price: Free, but contains ads
Supported OS: Android 5.0 and up
Best for: Journalists, musicians, students

ASR Voice Recorder App in Google Play
A brief look at the list of features this app offers, you will find this is a well-rounded voice recorder because it offers all the tools you are going to need to create high-quality recordings. You can choose from a variety of file formats, add notes to recordings at recording or control the playback speed of all audio files you listen to in AVR Voice Recorder. You can also skip silences, connect a headset microphone to the app via Bluetooth or arrange your voice recordings in any way you want. The app lets you upload your audio files to Dropbox, Google Drive, and other file-hosting platforms.
Pros
- Provides excellent audio recording options for free
- Allows users to save recordings in different file formats
- Equipped with an audio playback controller
- Sharing multiple files is easy
Cons
- Offers only basic audio editing tools
- No audio transcription options
9. Call Recorder
Price: Free, but contains ads
Supported OS: Android 4.0 and up
Best for: Marketing professionals
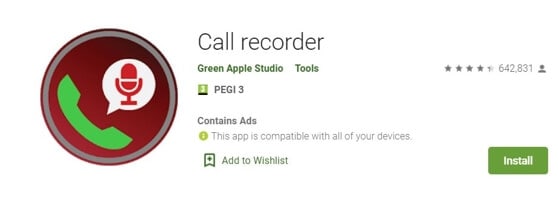
Call Recorder App in Google Play
If you would like to record all incoming and outgoing calls on your device, the Call Recorder app is one of the best options you have at your disposal. Besides recording all calls from whitelisted numbers automatically, this app also allows you to choose from a variety of different recording modes. Furthermore, Call Recorder lets you blacklist numbers from which you don’t want to receive calls and enables you to organize your recordings efficiently. All files created with this app can be sent via Skype, SMS, Dropbox and other messaging services, which makes Call Recorder app a perfect choice for marketing professionals.
Pros
- No previous experience required to start using the app
- Records an unlimited number of phone calls
- Simple audio file management
- Offers several recording modes
Cons
- No voice recording options
- Doesn’t provide audio editing tools
10. Otter Voice Meeting Notes
Price: Free, but offers in-app purchases
Supported OS: Android 5.0 and up
Best for: Large teams of professionals
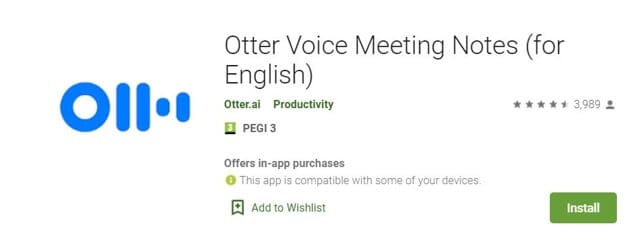
Otter Voice Meeting Notes App in Google Play
Besides being a powerful voice recorder, Otter Voice Meeting Notes is a collaborative tool that enables multiple team members to highlight and edit the transcripts this app generates in real-time. In addition to recording business meetings, you can also use Otter Voice Meeting Notes to record interviews, webinars or podcasts . Starting a new recording session takes only a second since you just have to tap on the Record button to capture the voices of all speakers in the room. What’s more, the app lets you add photos or slides to transcripts while the recording session is still in progress.
Pros
- Makes collaboration on a single transcript easier
- The app’s AI identifies different speakers automatically after the initial training
- Allows users to export MP3 audio files
- Compatible with the Call Recorder app
Cons
- In-app purchases are expensive
- Audio editing tools could be better
You may also like: 10 Best Free Discord Voice Changers
Conclusion
Creating an audio note or recording an entire interview with an Android device has never been easier. Each of the voice recorder apps we featured in this article enables you to create high-quality audio files you can share via email or store on the cloud.
Which of these Android voice recorders you are going to choose depends on a broad spectrum of factors, which range from the context in which you want to make the recording toaudio editing tools you want to use to process the audio files you created.
We’ve summarized the essential information in the table below. Hope that will help you to determine. What is your favorite Android voice recorder? Leave a comment and let us know.
| Voice recorder app | Price | Supported OS | User Rating | Best for |
|---|---|---|---|---|
| Easy Voice Recorder Pro | $3.99 | Varies with the device | 4.8 | Students, musicians, and businessmen |
| Smart Recorder – High-quality voice recorder | Free, but contains ads and offers in-app purchases | Varies with the device | 4.7 | Students, musicians, and businessmen |
| RecForge II Audio Recorder | Free, but contains ads | Android 4.0 and up | 4.0 | Musicians |
| Hi-Q MP3 Voice Recorder | Free | Varies with the device | 4.5 | Students |
| Voice Recorder | Free, but contains ads | Android 4.1 and up | 4.8 | Students, musicians, and businessmen |
| Music Maker JAM | Free, but contains ads and offers in-app purchases | Varies with the device | 4.6 | Musicians |
| LectureNotes | Free | Android 3.0 and up | 4.3 | Students |
| ASR Voice Recorder | Free, but contains ads | Android 5.0 and up | 4.4 | Journalists, musicians, students |
| Call Recorder | Free, but contains ads | Android 4.0 and up | 4.3 | Marketing professionals |
| Otter Voice Meeting Notes | Free, but offers in-app purchases | Android 5.0 and up | 4.5 | Large teams of professionals |
Benjamin Arango
Benjamin Arango is a writer and a lover of all things video.
Follow @Benjamin Arango
Benjamin Arango
Mar 27, 2024• Proven solutions
Memorizing every bit of information you need to perform your daily or weekly tasks becomes increasingly difficult as your workload rises. Students, journalists, and professionals from a wide array of industries can benefit from making audio notes or even recording entire conversations with their Smartphones.
A simple Android voice recorder can make this task easy since you can just tap on the Record button and create an audio note in seconds. However, with so many voice recorder apps for Android devices out there, finding the one best suited for your needs can be more complicated than it seems. So, in this article, we are going to help you discover some best free voice recorder for an Android device you are currently using.
Want to record voiceover and audio on iPhone? Check 10 Best Voice Recorder Apps for iPhones >>
10 Best Free Voice Recording Apps for Android Devices
Recording audio is no longer a highly technical process since now you can create an audio note or record an interview with an Android phone and a voice recorder app. The question is which voice recording app should you install on your device. So, let’s take a look at some of the most potent Android voice recorders you can find at Google Play Store.
1. Easy Voice Recorder Pro
Price: $3.99
Supported OS: Varies with the device
Best for: Students, musicians, and businessmen
App in Google Play
As the app’s name suggests making recordings for a broad range of purposes is easy. All you need to do is launch the app and start a new audio recording session. Easy Voice Recorder Pro doesn’t limit the duration of your recordings, and it also allows you to compress the recorded audio . That is perfect if you need to record long lectures or conversations. Besides, you can connect an external microphone with the app in case you want to increase the quality of the sound you are recording. The app also lets you store your recordings on Dropbox or Google Drive, while it also offers the possibility to send recordings via email.
Easy Voice Recorder Pro Interface
Pros
- Allows users to manage and organize their recordings effortlessly
- Supports all standard output audio file formats
- Offers the option to record in stereo
- Recordings made with this app can be used as the ringtone
Cons
- Ads can be frustrating
- Limited basic audio editing tools
2. Smart Recorder – High-quality voice recorder
Price: Free, but contains ads and offers in-app purchases
Supported OS: Varies with the device
Best for: Students, musicians, and businessmen
App in Google Play
Capturing high-quality audio recordings effortlessly is the ultimate goal of all Android users who want to use voice recorders. As one of the best free voice recorders for Android, Smart Recorder app has a plethora of features that enable users to make high-quality audio recordings even in imperfect conditions. Options like Live Audio Spectrum Analyzer, microphone gain calibration or automatic and manual sensitivity control in Skip Silence mode are just a few reasons why this app has over 10 million installs. However, you should keep in mind that you cannot create audio files that are larger than 2 GB with this app.
Smart Recorder – High-quality voice recorder Interface
Pros
- Provides full control over the audio recording process
- Equipped with the Wave Lock feature that prevents the device from going into the sleep mode
- Features a live audio spectrum analyzer
- Preserves battery life
Cons
- No phone call recording options
- Limited file-sharing capabilities
3. RecForge II Audio Recorder
Price: Free, but contains ads
Supported OS: Android 4.0 and up
Best for: Musicians
RecForge-audio-recorder App in Google Play
If you are looking for an Android voice recorder that allows you to customize bit rates, sample rates, choose codecs or record in mono or stereo mode, then you should consider installing RecForge II Audio Recorder on your device. The app allows you to schedule recordings, connect different types of external microphones or adjust the gain manually. In addition, you can also adjust the pitch , tempo and the playback rate of all audio files you record and edit with this app. RecForge II Audio Recorder continues working even while you are using other apps, and it keeps the battery consumption at the very minimum.
Pros
- Supports nearly all common audio file formats
- Offers a versatile set of audio editing tools
- Excellent file-sharing capabilities
- Allows users to increase the audio quality by disabling Automatic Gain Control
Cons
- The maximum duration of a recording is limited for some file formats
- Can be too complicated for inexperienced users
4. Hi-Q MP3 Voice Recorder
Price: Free
Supported OS: Varies with the device
Best for: Students, general use
Hi-Q MP3 Voice Recorder App in Google Play
You don’t need any previous audio recording experience to record long lectures, interviews and all other types of voice recordings with Hi-Q MP3 Voice Recorder. The free version of the app limits the maximum duration of a recording you can make to just 10 minutes. That is why you must upgrade to the Pro version of Hi-Q MP3 Voice Recorder if you want to capture hours of material directly from your phone. The best part is that all versions of the app automatically upload recordings to Google Drive or Dropbox which frees up space on your device.
Pros
- Intuitive and modernly designed interface
- Simple audio recording session setup
- Customizable audio quality
- Excellent file management capabilities
Cons
- Recording with external microphones is not an option
- The free version of the app limits the maximum duration of recordings
5. Voice Recorder
Price: Free, but contains ads
Supported OS: Android 4.1 and up
Best for: Students, musicians, and businessmen
Voice Recorder App in Google Play
If you are looking for an app you can use to record an interview, a business meeting or a lecture, then Voice Recorder may be one of your best options. You can record audio files without any restrictions and visualize the sounds with the Audio Spectrum Analyzer. The app continues recording from the background even while the phone’s screen is off which preserves battery life and enables you to perform other tasks while the recording session is in progress. Voice Recorder offers a broad range of file-sharing capabilities so that you can easily send your audio recordings via SMS, email and the Messenger app or share them on Facebook and WhatsApp.
Pros
- Available for free to all Android users
- Stopping, pausing or resuming a recording session is easy
- Allows users to adjust the sample rate
- Offers the microphone gain calibration tool
Cons
- Audio recordings can only be saved in two different file formats
- Doesn’t provide audio editing options
6. Music Maker JAM
Price: Free, but contains ads and offers in-app purchases
Supported OS: Varies with the device
Best for: Musicians
Music Maker JAM App in Google Play
With the selection of 300 mix packs, Music Maker JAM is one of the best android apps for aspiring musicians who want to compose their music even while they are on the go. You can choose from a variety of samples, audio loops and beats to create your next song or record live performances with the app’s 8-channel mixer. Music Maker JAM also enables you to record vocals, adjust the tempo of the audio files or apply effects to all recordings you edit with this app. Once your recording is ready, you can upload it to SoundCloud directly from the app or post it on Facebook and other social networks.
Pros
- Shake your Android phone to remix a song
- The app lets you choose from more than 300 mix packs
- Supports multi-channel recording
- Offers advanced audio editing options
Cons
- Music Maker JAM is not primarily a voice recorder
- No support for external microphones
7. LectureNotes
Price: Free
Supported OS: Android 3.0 and up
Best for: Students
LectureNotes App in Google Play
In case you take notes often, then this app can be an excellent choice for you as it allows you to use a stylus to create notes. However, the trial version limits the number of notebooks to just two, and neither of the notebooks can have more than eight pages. Moreover, if you would like to utilize the app’s voice recording features, you must install LectureRecordings plugin on your device. To capture videos, you must first install the LectureVideos plugin. Another disappointing thing is that you won’t be able to adjust the settings for your audio recording sessions or edit the recording you create with this app.
Pros
- An efficient tool for creating hand-written notes
- The app can be used while your Android phone is offline
- Allows users to export PDF files
- Compatible with OneNote and Evernote apps
Cons
- Underwhelming voice recording options
- You must install a plugin to record audio files
8. ASR Voice Recorder
Price: Free, but contains ads
Supported OS: Android 5.0 and up
Best for: Journalists, musicians, students
ASR Voice Recorder App in Google Play
A brief look at the list of features this app offers, you will find this is a well-rounded voice recorder because it offers all the tools you are going to need to create high-quality recordings. You can choose from a variety of file formats, add notes to recordings at recording or control the playback speed of all audio files you listen to in AVR Voice Recorder. You can also skip silences, connect a headset microphone to the app via Bluetooth or arrange your voice recordings in any way you want. The app lets you upload your audio files to Dropbox, Google Drive, and other file-hosting platforms.
Pros
- Provides excellent audio recording options for free
- Allows users to save recordings in different file formats
- Equipped with an audio playback controller
- Sharing multiple files is easy
Cons
- Offers only basic audio editing tools
- No audio transcription options
9. Call Recorder
Price: Free, but contains ads
Supported OS: Android 4.0 and up
Best for: Marketing professionals
Call Recorder App in Google Play
If you would like to record all incoming and outgoing calls on your device, the Call Recorder app is one of the best options you have at your disposal. Besides recording all calls from whitelisted numbers automatically, this app also allows you to choose from a variety of different recording modes. Furthermore, Call Recorder lets you blacklist numbers from which you don’t want to receive calls and enables you to organize your recordings efficiently. All files created with this app can be sent via Skype, SMS, Dropbox and other messaging services, which makes Call Recorder app a perfect choice for marketing professionals.
Pros
- No previous experience required to start using the app
- Records an unlimited number of phone calls
- Simple audio file management
- Offers several recording modes
Cons
- No voice recording options
- Doesn’t provide audio editing tools
10. Otter Voice Meeting Notes
Price: Free, but offers in-app purchases
Supported OS: Android 5.0 and up
Best for: Large teams of professionals
Otter Voice Meeting Notes App in Google Play
Besides being a powerful voice recorder, Otter Voice Meeting Notes is a collaborative tool that enables multiple team members to highlight and edit the transcripts this app generates in real-time. In addition to recording business meetings, you can also use Otter Voice Meeting Notes to record interviews, webinars or podcasts . Starting a new recording session takes only a second since you just have to tap on the Record button to capture the voices of all speakers in the room. What’s more, the app lets you add photos or slides to transcripts while the recording session is still in progress.
Pros
- Makes collaboration on a single transcript easier
- The app’s AI identifies different speakers automatically after the initial training
- Allows users to export MP3 audio files
- Compatible with the Call Recorder app
Cons
- In-app purchases are expensive
- Audio editing tools could be better
You may also like: 10 Best Free Discord Voice Changers
Conclusion
Creating an audio note or recording an entire interview with an Android device has never been easier. Each of the voice recorder apps we featured in this article enables you to create high-quality audio files you can share via email or store on the cloud.
Which of these Android voice recorders you are going to choose depends on a broad spectrum of factors, which range from the context in which you want to make the recording toaudio editing tools you want to use to process the audio files you created.
We’ve summarized the essential information in the table below. Hope that will help you to determine. What is your favorite Android voice recorder? Leave a comment and let us know.
| Voice recorder app | Price | Supported OS | User Rating | Best for |
|---|---|---|---|---|
| Easy Voice Recorder Pro | $3.99 | Varies with the device | 4.8 | Students, musicians, and businessmen |
| Smart Recorder – High-quality voice recorder | Free, but contains ads and offers in-app purchases | Varies with the device | 4.7 | Students, musicians, and businessmen |
| RecForge II Audio Recorder | Free, but contains ads | Android 4.0 and up | 4.0 | Musicians |
| Hi-Q MP3 Voice Recorder | Free | Varies with the device | 4.5 | Students |
| Voice Recorder | Free, but contains ads | Android 4.1 and up | 4.8 | Students, musicians, and businessmen |
| Music Maker JAM | Free, but contains ads and offers in-app purchases | Varies with the device | 4.6 | Musicians |
| LectureNotes | Free | Android 3.0 and up | 4.3 | Students |
| ASR Voice Recorder | Free, but contains ads | Android 5.0 and up | 4.4 | Journalists, musicians, students |
| Call Recorder | Free, but contains ads | Android 4.0 and up | 4.3 | Marketing professionals |
| Otter Voice Meeting Notes | Free, but offers in-app purchases | Android 5.0 and up | 4.5 | Large teams of professionals |
Benjamin Arango
Benjamin Arango is a writer and a lover of all things video.
Follow @Benjamin Arango
Detailed Vimeo Video Data Sheet with Emphasis on Aspect Ratio Information
Video customization does not come automatically. There is something extraordinary you need to look around. One platform that most people are aware of is YouTube that offers video sharing services. But the world is not so small. There exists a new genre picking up pace with personalized effect. The talk is about Vimeo, the latest trending video streaming site, with a vast viewer base after YouTube.

It is a beautiful platform for those professional videographers, filmmakers, event organizers, graphic designers, or those who want to expand their business and gain a viewer base. While creating videos for the platform, there are some basic requirements such as Vimeo Aspect RatioorVimeo Thumbnail Dimensions. If all these terms look unknown to you, and you are eager to discover more with Vimeo Ratio, you have landed the right place. Here, you will get all the recipe ingredients required to prepare for a professional-looking, customized video through Vimeo.
In this article
04 How big of a File can upload to Vimeo
Part 1: What is Vimeo?
Vimeo is a video streaming and hosting services provider online platform that equips a user with a powerful video customization feature. This feature distinguishes it from other video streaming sites. Vimeo reflects the vision of its founder filmmakers, who furnish advanced video customization features for Audio and Video content. Vimeo renders services from “Freemium” the free users to that of Advance business partners.

Basic features it enabled in itself are:
- Users can customize and promote their videos
- HD audio and video quality
- Freemium account for free usage
- Supports 8K Video resolution
- The pricing plan ranges from $7 to $75
- Specific sites promotion option
- Customized screen end view
- Multiple options such as color, size, or different types of buttons
- For the same URL video replacement option
- Featuring Team collaboration
- Live Streaming
In addition, additional features and services get added up with each account up-gradation.
Part 2: Vimeo Video Requirement
If you are also interested in being a part of Vimeo’s community and geared up to share the video, you must be aware of Vimeo Video requirements and Vimeo dimensions. So that you can upload the video with ease on the site without facing any issue. Let’s look at some of the critical video ratios and other requirements.

- Frame Rate:
Keep the Video Frame Rate constant. Some common frame rates are: 60, 59.94, 50, 30, 29.97, 25, 24, and 23.98. While compressing, keep the frame rate below 60.
- Codecs:
Codecs represent video encoded format. Some of the most recommended codecs are , (), Apple ProRes (HQ) 422
- Color
Most of the color display is acceptable. But the recommended ones are:
- Color Matrix Coefficients/Primaries- [BT.709 (Rec.709), BT.2020, whereas Rec.2020 HLG for Dolby Vision]
- Bit Depth- 10 or more than 10 for better quality.
- Characteristics of Color Transfer- Multiple ranges for SDR. But HLG or PQ (SMPTE 2084) for HDR
- Bit Rate- Video file size, visual quality control by data rate/Bit-rate. Go with Variable Bit Rate. That might range in different parameters, or you can choose from 2 to 50 MBPS. Where for SD (2 to 5), 720P (5 to 10), 1080p (10 to 20), 2k (20 to 30), 4k (30 to 60), 8k (50 to 80).
- Scan Type- Progressive playback is advisable before uploading de-interlace the video.
- Resolution/Aspect Ratio
Though all shapes and sizes are available, the most preferable Vimeo Video Aspect Ratio and Proportions are:
| Format | Aspect Ratio | Resolution |
|---|---|---|
| HD (720P) | 16:9 | 1280X720 |
| HD (1080P) | 16:9 | 1920X1080 |
| SD | 16:9 | 640X360 |
| SD | 4:3 | 640X480 |
| 2K | 16:9 | 2560X1440 |
| UHD (4K) | 16:9 | 3840X2160 |
| UHD (DCI 4K) | 17:9 | 4096X2160 |
| Stereoscopic 360 4K | 2:1 | 4096X2048 |
| Monoscopic 3604K | 2:1 | 4096X2048 |
| UHD 8K | 17:9 | 8192X4320 |
Here, a question that might arise. OK, these are the requirements by Vimeo Video Ratio. But, how to set the Vimeo dimensions? For this purpose, one valuable suggestion is the Wondershare Filmora Video Editing tool.
Wondershare Filmora is a friendly and effective interface if looking to adjust the Vimeo Video size ratio or pre-setting the Vimeo Aspect Ratio to make it as per the norms of Vimeo. Then we can go with the efficient, quick, and easy-to-use way to edit the Vimeo Aspect ratio.
Versatile Video Editor - Wondershare Filmora
An easy yet powerful editor
Numerous effects to choose from
Detailed tutorials provided by the official channel
Steps are simple: land the home page of Wondershare Filmora, upload your video project, and select the desired video Ratiounder project settings.
Part 3: Size Limit of Vimeo File
Are you ready to create an exciting video and about to upload that into your Vimeo account? Then, there is a precious suggestion to you. Wait for a while, as some restrictions come under Vimeo dimensions uploading. And you must be aware of that. Let’s first understand about Size Limit of the Vimeo File. In terms of duration, there is no limit, but for file size following criteria is used:
As per Vimeo, the user can upload a file of any size. For instance, it can upload videos ranging from the most minor 30 seconds to a whopping 3-hour duration epics. The maximum limit is 25GB per video.
Part 4: How big of a File can upload to Vimeo
The following important question comes out, how big a file can you upload to Vimeo? Let’s scrap out this information for you:
- Basic account- 5GB total
- Vimeo Plus- Up to 250 GB in a year
- Vimeo Pro- 1TB in a Year
- Vimeo Business- 5 TB in total
- Vimeo Premium – 7 TB in total
So, by checking the above criteria, it becomes easy for you to create and upload your video as per the mentioned guidelines. So, let you be ready with your sizzling video following Vimeo ratio and size criteria.
Part 5: Vimeo Weekly Upload Limit
Now, it is crucial to understand. What could be the weekly upload limit to your Vimeo account? As accordingly, you will plan for the appropriate tab. Here are the details:
- Free Account- 500 MB/week
- Vimeo Plus Account- 5GB/week
- Vimeo Pro Account- 20GB/week
- Vimeo Business Account- No Weekly Limit
- Vimeo Premium Account- Unlimited Live Streaming
It looks like Vimeo has divided its size criteria into different frames, usage, daily basis, weekly basis, yearly basis, and maximum limit. So, if you, as a potential user, have all this valuable information to grow your business, hobby, or any peculiar interest, it will become a bonanza to your efforts. As exemplary efforts always show the way to success. I hope that till now, all your queries, concerns such as Vimeo Thumbnail dimensions, Vimeo Video Size ratio, duration, size limit gets filled up. So, without delay, rock on in the video world of Vimeo and let the world know your potential right away.
Conclusion:
Vimeo Video Size Ratio and other requirements to upload your video to the Vimeo site are covered here. Indeed, these will be going to be the milestone to start or progress your business with Vimeo. Vimeo is trending nowadays, especially among the users who prefer a customized look to their video and a solution to grow their business with proper after support. So, doing little pre-work in terms of Vimeo Video Dimensions will pave the way to start your journey. In addition, while adjusting Vimeo Aspect Ratio, Wondershare Filmora will act as the right approach with appropriate tools to change the Vimeo Aspect Ratio and other important editing options. All the best!
04 How big of a File can upload to Vimeo
Part 1: What is Vimeo?
Vimeo is a video streaming and hosting services provider online platform that equips a user with a powerful video customization feature. This feature distinguishes it from other video streaming sites. Vimeo reflects the vision of its founder filmmakers, who furnish advanced video customization features for Audio and Video content. Vimeo renders services from “Freemium” the free users to that of Advance business partners.
Basic features it enabled in itself are:
- Users can customize and promote their videos
- HD audio and video quality
- Freemium account for free usage
- Supports 8K Video resolution
- The pricing plan ranges from $7 to $75
- Specific sites promotion option
- Customized screen end view
- Multiple options such as color, size, or different types of buttons
- For the same URL video replacement option
- Featuring Team collaboration
- Live Streaming
In addition, additional features and services get added up with each account up-gradation.
Part 2: Vimeo Video Requirement
If you are also interested in being a part of Vimeo’s community and geared up to share the video, you must be aware of Vimeo Video requirements and Vimeo dimensions. So that you can upload the video with ease on the site without facing any issue. Let’s look at some of the critical video ratios and other requirements.
- Frame Rate:
Keep the Video Frame Rate constant. Some common frame rates are: 60, 59.94, 50, 30, 29.97, 25, 24, and 23.98. While compressing, keep the frame rate below 60.
- Codecs:
Codecs represent video encoded format. Some of the most recommended codecs are , (), Apple ProRes (HQ) 422
- Color
Most of the color display is acceptable. But the recommended ones are:
- Color Matrix Coefficients/Primaries- [BT.709 (Rec.709), BT.2020, whereas Rec.2020 HLG for Dolby Vision]
- Bit Depth- 10 or more than 10 for better quality.
- Characteristics of Color Transfer- Multiple ranges for SDR. But HLG or PQ (SMPTE 2084) for HDR
- Bit Rate- Video file size, visual quality control by data rate/Bit-rate. Go with Variable Bit Rate. That might range in different parameters, or you can choose from 2 to 50 MBPS. Where for SD (2 to 5), 720P (5 to 10), 1080p (10 to 20), 2k (20 to 30), 4k (30 to 60), 8k (50 to 80).
- Scan Type- Progressive playback is advisable before uploading de-interlace the video.
- Resolution/Aspect Ratio
Though all shapes and sizes are available, the most preferable Vimeo Video Aspect Ratio and Proportions are:
| Format | Aspect Ratio | Resolution |
|---|---|---|
| HD (720P) | 16:9 | 1280X720 |
| HD (1080P) | 16:9 | 1920X1080 |
| SD | 16:9 | 640X360 |
| SD | 4:3 | 640X480 |
| 2K | 16:9 | 2560X1440 |
| UHD (4K) | 16:9 | 3840X2160 |
| UHD (DCI 4K) | 17:9 | 4096X2160 |
| Stereoscopic 360 4K | 2:1 | 4096X2048 |
| Monoscopic 3604K | 2:1 | 4096X2048 |
| UHD 8K | 17:9 | 8192X4320 |
Here, a question that might arise. OK, these are the requirements by Vimeo Video Ratio. But, how to set the Vimeo dimensions? For this purpose, one valuable suggestion is the Wondershare Filmora Video Editing tool.
Wondershare Filmora is a friendly and effective interface if looking to adjust the Vimeo Video size ratio or pre-setting the Vimeo Aspect Ratio to make it as per the norms of Vimeo. Then we can go with the efficient, quick, and easy-to-use way to edit the Vimeo Aspect ratio.
Versatile Video Editor - Wondershare Filmora
An easy yet powerful editor
Numerous effects to choose from
Detailed tutorials provided by the official channel
Steps are simple: land the home page of Wondershare Filmora, upload your video project, and select the desired video Ratiounder project settings.
Part 3: Size Limit of Vimeo File
Are you ready to create an exciting video and about to upload that into your Vimeo account? Then, there is a precious suggestion to you. Wait for a while, as some restrictions come under Vimeo dimensions uploading. And you must be aware of that. Let’s first understand about Size Limit of the Vimeo File. In terms of duration, there is no limit, but for file size following criteria is used:
As per Vimeo, the user can upload a file of any size. For instance, it can upload videos ranging from the most minor 30 seconds to a whopping 3-hour duration epics. The maximum limit is 25GB per video.
Part 4: How big of a File can upload to Vimeo
The following important question comes out, how big a file can you upload to Vimeo? Let’s scrap out this information for you:
- Basic account- 5GB total
- Vimeo Plus- Up to 250 GB in a year
- Vimeo Pro- 1TB in a Year
- Vimeo Business- 5 TB in total
- Vimeo Premium – 7 TB in total
So, by checking the above criteria, it becomes easy for you to create and upload your video as per the mentioned guidelines. So, let you be ready with your sizzling video following Vimeo ratio and size criteria.
Part 5: Vimeo Weekly Upload Limit
Now, it is crucial to understand. What could be the weekly upload limit to your Vimeo account? As accordingly, you will plan for the appropriate tab. Here are the details:
- Free Account- 500 MB/week
- Vimeo Plus Account- 5GB/week
- Vimeo Pro Account- 20GB/week
- Vimeo Business Account- No Weekly Limit
- Vimeo Premium Account- Unlimited Live Streaming
It looks like Vimeo has divided its size criteria into different frames, usage, daily basis, weekly basis, yearly basis, and maximum limit. So, if you, as a potential user, have all this valuable information to grow your business, hobby, or any peculiar interest, it will become a bonanza to your efforts. As exemplary efforts always show the way to success. I hope that till now, all your queries, concerns such as Vimeo Thumbnail dimensions, Vimeo Video Size ratio, duration, size limit gets filled up. So, without delay, rock on in the video world of Vimeo and let the world know your potential right away.
Conclusion:
Vimeo Video Size Ratio and other requirements to upload your video to the Vimeo site are covered here. Indeed, these will be going to be the milestone to start or progress your business with Vimeo. Vimeo is trending nowadays, especially among the users who prefer a customized look to their video and a solution to grow their business with proper after support. So, doing little pre-work in terms of Vimeo Video Dimensions will pave the way to start your journey. In addition, while adjusting Vimeo Aspect Ratio, Wondershare Filmora will act as the right approach with appropriate tools to change the Vimeo Aspect Ratio and other important editing options. All the best!
Also read:
- Updated Enhancing Visual Focus Techniques to Remove Unwanted Audio Elements From Videos in Desktop Settings and Online Media for 2024
- Discovering Secure Online Spaces to Connect with Others for 2024
- In 2024, Reimagining Soundscapes A Detailed Guide to Audio Track Replacement in Video Production
- Seamless Soundwave Capture Essential Techniques for Podcast Storage on Computers
- Updated 2024 Approved Ultimate Guide to Premium Feminine Vocalization Web Tools, Update
- New In 2024, Aural Journey Illustrating Sound Patterns with Waveform Graphics and Dynamic Animations in NLE Essential
- In 2024, Harmonizing Technology with Taste Your Guide to Mastering Audio Format Selection
- Updated 2024 Approved Converting Audio to Text
- Updated How to Enhance Your MKV-2023 File with Audio Content for 2024
- New Scout Audible Assets in Gaming Worlds for 2024
- Updated Mastering Acoustics for Visual Media The Most Innovative 8 Templates of Audio Patterns
- The Ultimate Guide to Auditory Data Retrieval From Multimedia Files (Video Edition)
- 2024 Approved 8 Best Intro Sound Effects for Youtubers
- New Mastering Safe Screen Time Expert Advice on Video Call Etiquette and Protection for 2024
- TalkTransformation Advanced Tools for Customizing Skype Voices
- In 2024, Accelerating Audio Tuning Efficient Speed Modification Techniques
- New Incorporating Audio Into New and Enhanced MKV Files for 2024
- Updated 2024 Approved Capturing the Essence of Cricket Soundscape
- Updated The Premier Selection of Logic Pro X Extensions 8 Plugins to Elevate Your Sound Design
- New Ideal Web Services for Reducing Noise in Audio Recordings for 2024
- In 2024, Top Choices for Lyrics Extraction Software, 2023 Edition
- In 2024, Troubleshooting Sound Quality Strategies for Easing Audio Deformation
- Stay Safe While Video Chatting Tips and Top 10 Sites
- Updated A Comprehensive Guide to Each Cast and Crews Purpose on Set for 2024
- New In 2024, Top-Ranked Internet MP3 Trimmer & Merger Tool
- New Introductory Summary to the Wave Editor Core Characteristics, Consumer Feedback, and Educational Resources for 2024
- New The Best in Live Sound Alteration Technology In-Depth Reviews to Guide Your Choices
- New In 2024, Sound Sculpting Without Spending Essential Free Online Audio Trimming Software
- The Insiders Handbook to Efficient Sound Source Isolation in Films and Videos for 2024
- Updated In 2024, Elated Acoustic Soundscape for Birthday Video Commemorating
- New 2024 Approved Guide to Mute Audio in MP4 Files Without Distorting Video Quality
- New Ultimate Guide The Finest Gratis Audio Editor Software on Windows/Mac for 2024
- New The Ultimate List of Websites to Unwind and Find Peace in Your Virtual Journey for 2024
- The Future of Soundscape Engineering Navigating Through Film and Video to Uncover Audio
- New Contemporary Voiceover Practices for Dynamic Video Creation - An Updated Guide for 2024
- Updated Perfecting Sound Quality Adding Lame to Your Audacity Setup
- New 2024 Approved The Essential Techniques for Embedding Soundtracks Into Photographs
- In 2024, The Battle for Video Editing Supremacy Sony Vegas vs Adobe Premiere
- New In 2024, 5 Key Factors to Consider When Selecting a Video to Audio Converter
- In 2024, How to Remove and Reset Face ID on Apple iPhone 12 mini | Dr.fone
- Simple and Effective Ways to Change Your Country on YouTube App Of your Samsung Galaxy A05 | Dr.fone
- New 2024 Approved How To Make Talking Emoji on iPhone in Easy Steps
- In 2024, Recommended Best Applications for Mirroring Your Xiaomi Redmi Note 12T Pro Screen | Dr.fone
- New In 2024, Unlock Professional-Looking Videos Top 10 Free Green Screen Apps
- The 6 Best SIM Unlock Services That Actually Work On Your Oppo A78 5G Device
- Guide How To Unbrick a Bricked Realme C67 5G Phone | Dr.fone
- Updated Best 7 Photo Talking AI
- How to Unlock Honor Magic V2 Phone Forgot Password
- In 2024, Learning How to Slow Down a Video on iPhone Properly
- 10 Best Free Music Recording Software for 2024
- How and Where to Find a Shiny Stone Pokémon For Apple iPhone 12? | Dr.fone
- Resolve Compile Error in Hidden Module in Excel 2023 Causes & Solutions
- Here Are Some Reliable Ways to Get Pokemon Go Friend Codes For Apple iPhone 12 | Dr.fone
- In 2024, The Most Effective Ways to Bypass Apple iPhone 6 Activation Lock
- Fix Nokia G310 Android System Webview Crash 2024 Issue | Dr.fone
- Edit and Send Fake Location on Telegram For your Honor X9a in 3 Ways | Dr.fone
- How to Upgrade iPhone 6s Plus to the Latest iOS/iPadOS Version? | Dr.fone
- Discover the Best Free Online Video Editor Jaycut Tutorial and Review
- 3 Easy Solutions to Hard Reset Lava Yuva 3 | Dr.fone
- How To Fix Unresponsive Touch Screen on Lenovo ThinkPhone | Dr.fone
- Updated Top Digital Collage Creators for Photos and Videos
- New 2024 Approved Kinetic Typography Text Effect 【EASY&FAST】
- New Ultimate Guide on How to Film Better in Public for 2024
- How to recover deleted photos on Asus ROG Phone 8
- In 2024, How to Transfer Contacts from Poco X5 Pro to Other Android Devices Devices? | Dr.fone
- Title: New In 2024, Enhancing Project Focus Extracting Audio From Video in iMovie on Mac
- Author: Kate
- Created at : 2024-05-05 07:52:01
- Updated at : 2024-05-06 07:52:01
- Link: https://audio-editing.techidaily.com/new-in-2024-enhancing-project-focus-extracting-audio-from-video-in-imovie-on-mac/
- License: This work is licensed under CC BY-NC-SA 4.0.
