
:max_bytes(150000):strip_icc():format(webp)/samsung-unveils-new-products-at-its-annual-unpacked-event-1200186175-0a17180ae84e47f488f43d3afbb7daa6.jpg)
New 2024 Approved The Sound Barrier Breakthrough Streamlining Audio Processing for Digital Users
The Sound Barrier Breakthrough: Streamlining Audio Processing for Digital Users
The AI background noise removal tools are getting more and more recognition each day. This popularity is due to the elimination of background noise that leaves behind crystal-clear audio. The machine-learning algorithm of the smart background noise removal software gives perfect results. These kinds of solutions are necessary since background noise is a big distraction.
If you have started looking for free background noise removal tools, it will take a long time to finally choose the one you like the best. Luckily, this article has all the required information, so you don’t need to go anywhere. Look at this article to learn about practical background noise removal tools.
AI Vocal Remover A cross-platform for facilitating your video editing process by offering valuable benefits!
Free Download Free Download Learn More

Part 1. What Features Should A Good Background Noise Removal Online Tool Include?
A background noise removal online tool enables users to reduce noise from audio. The following are the characteristics that a good background noise reduction tool should contain:
1. Real-Time Preview
This function enables users to adjust the parameters and assess how the noise reduction will affect their content. This is done by playing back the audio after it has been processed. You can screen your progress anytime with a click if you have the real-time preview option.
2. Presets
To make the noise reduction procedure easier, define presets for common noise reduction scenarios. It can include scenarios with background hum, wind noise, and room tone. Presets are an easy solution to edit and remove the background noise.
3. Batch Processing
Batch processing allows users to reduce noise to several files simultaneously. This helps process multiple audio records in no time. The feature is a lifesaver if you want to remove noise from many files. You can save hours of time by using a bulk processor.
4. Privacy and Security
A promising tool should always have an adequate security and privacy policy. It should be dedicated to protecting user privacy and safeguarding data. This includes the option to process audio files without saving or sharing them, which is a necessity.
5. Customization
It is an essential function for expert users if they want to adjust the noise reduction parameters. The parameters can be based on the particular type of noise and recording circumstances. You can personalize your audio by using the customization feature.
Part 2. Some Great Online Options For Background Noise Removal
Noise background removal can be super easy if you use the right tool that meets your needs. You can use a number of tools to get the background noise out of your audio recordings. Here are a few of the top choices:
1. Kapwing
Kapwing is a professional video editor used to create impressive and engaging videos. The various AI tools the app offers to change the landscape and quality of your content. With the help of Kapwing’s background noise remover, you can reduce background noise. You can also eliminate background hums and isolate speech patterns to improve the audio quality. You can choose the audio-cleaning option after uploading your media clip and remove background noise.

Key Features
- With clean audio, you can enhance the audio quality and remove the background noise with minimal effort.
- Using smart cut can remove the redundant silences from your audio.
- Kapwing has a built-in audio library that offers a range of voices so you can change the voice of your clip.
2. Media.io
Media.io is a portable, web-based AI tool that intelligently enhances your media. Noise reduction is one of its most well-liked functions. It lets users take out any unwanted background noise from their audio recordings. Podcasters, musicians, and video producers who wish to enhance the quality of their audio recordings can use this platform.

Key Features
- The noise reducer of Media.io can decrease or even cut out any background noise. You can eliminate the unpleasant sounds affecting your audio.
- You can extract, separate, or remove any instrumental or vocal sound from any song. This can be done without sacrificing quality by using the AI-powered vocal remover.
- The audio compressor of Media.io can compress numerous files at once.
3. VEED.io
VEED.io is known for its AI audio services. The tool has all the functionalities to create clear and compelling audio as it applies AI to your recordings. Unwanted noises can all be identified and eliminated by the tool. A variety of professional tools are also available from VEED.io to enhance the audio and video quality. This includes incorporating narrations, sound effects, background music, and instant voiceovers is possible.

Key Features
- With a single click, you can perform background noise removal of your audio files and Zoom meetings.
- You can translate audible words into written text with unparalleled accuracy.
- The audio editor of Veed.io allows users to cut, split, and trim the clips.
4. Aspose
Aspose is specialized in sound noise reduction online. It is a straightforward tool that requires no setting up. All you need to do is upload your file; the automated tool will do the rest of the work. Aspose is an excellent choice for free background noise removal online. It processes and increases quality by upscaling audio and removing redundant noise.

Key Features
- The tool is compatible with many platforms, so you can remove background noise from your PC or phone.
- It is a quick and easy solution to noise removal. Upload the file and hit “Process” to get a clean version of your audio within seconds.
- Aspose retains the quality of your audio so it is not distorted or cropped after the noise has been removed.
5. Podcastle
If you are a podcasting enthusiast, this app can change your podcasting experience to fun. Its AI equalizer, noise reducer, creative layouts, and personalized branding make it a great choice for many podcasters. Podcastle is an AI-powered podcasting platform that assists creators of various backgrounds. It caters to skill levels in producing, editing, and distributing high-caliber podcasts. Users can record, edit, transcribe, and export content using the platform’s intuitive interface.

Key Features
- With AI voice cloning, convert text to speech with fantastic precision and subtlety.
- To chatter, static, and other irritating sounds from your audio recordings. You can use Podcastle’s automatic noise-cancellation function. Eliminate background noise from your audio to create faultless audio.
- The AI technology can translate speech to text. Automated transcripts can simplify and understand complex terms faster than manual transcription.
6. LALAL.AI
LALAL.AI is an online tool offering an advanced music source separation and voice removal service. The tool utilizes the latest AI-powered technology to remove background noise. The tool is easily operated, and you can upload up to 20 files and clean their audio in a matter of seconds. You can also isolate the vocals and sounds with the app and create an unplugged song cover.

Key Features
- The sound noise reduction online removes noises with an AI algorithm and gives voice clarity.
- You can remove the drums, bass guitar, piano, guitar, voice, instrumental, and synthesizer sounds by using the stem splitter.
- The AI transcription and text-to-speech feature lets users create transcriptions with minimal effort.
7. MyEdit
MyEdit edits your audio like a professional. The tool has everything you need to create a high-quality sound. Its AI services quickly remove any unwanted noise and upscale the audio. You can cut audio, find the BPM of your music, alter your voice, extract instrumentals, and eliminate wind or background noise.

Key Features
- AI-generated sound effects utilize the text-to-sound capability of the AI Sound Effect Generator.
- The online vocal remover can cut out the vocals from a song and extract the instrumentals to make a fantastic karaoke version.
- The online voice changer can alter your voice using a range of voice filters and characters to express yourself.
8. Flixier
Flixier combines the newest technology and gives excellent audio quality. The AI-driven remove noise online ensures that every note in your audio is clear and resonant. When editing a video, being able to eliminate background noise and other distractions is crucial. Flixier’s online AI Audio Enhancer enables you to achieve this goal.

Key Features
- The AI voice enhancer can improve your voice notes and make you sound like a professional recording artist. This is done by adding warmth, precision, and depth to your voice.
- AI audio enhancement function transforms ordinary sounds into extraordinary listening experiences.
- You can modify your voiceover with Flixier’s video editor as with an offline video editor.
9. KwiCut
KwiCut serves as a text-based video editor that clones, enhances, and transcribes audio using AI. Users can generate talking head videos or remove filler words from transcripts. They can create advertising titles or summaries from their recordings with KwiCut’s AI technology, which is powered by GPT-4.0. The tool allows you to fine-tune recordings with 95% accuracy of auto transcription in a matter of minutes.

Key Features
- With the seamless editor of KwiCut, you can choose to highlight, edit, or remove your audio and video.
- KwiCut AI finds and removes unnecessary filler words from your transcripts.
- You can create a digital version of your voice by using the AI voice cloner.
10. Cleanvoice AI
Cleanvoice uses AI to eliminate mouth noises, stuttering, and filler sounds from your audio recordings. It can recognize and eliminate filler sounds like “ums” and “ahs” in a range of languages. To keep your audience interested, you can even shorten pauses. Cleanvoice can show and suggest what needs to be edited in voice noise removal.

Key Features
- The filler sound removal of Cleanvoice can recognize a variety of languages and accents and remove any unnecessary filler sounds from the audio.
- The tool is an expert in smoothening your audio. You can remove stutters using the stutter removal and speak with greater confidence.
- The silence remover of Cleanvoice can remove long and dead silences so the listeners and viewers won’t lose interest in your content.
Part 3. Offering Some Step-by-Step Guides For Users Seeking Background Noise Removal in Online Tools
Now that we are familiar with the top background noise removal online free tools, let’s take a look at the step-by-step guides of some of these apps.
Steps to Remove Background Noise Using Podcastle
With Podcastle, you can remove noise online in the most effortless 3-step procedure. Take a look at the steps below to reduce the background noise quickly and easily.
Step 1. Start by recording your audio straight into Podcastle’s studio or upload your audio file.

Step 2. Edit your audio by making any changes you wish, such as cutting, fading, trimming, and adding music.

Step 3. Select Magic Dust by right-clicking on your audio track and wait for the results. The Podcastle’s AI technology will enhance your audio quality within seconds.

Steps to Remove Background Noise Using Kapwing
Kapwing is an expert in audio and MP3 voice removal online. It only takes a few minutes to clean the audio perfectly.
Step 1. Upload your video and edit out the undesired background noise. After that, copy the video URL link into your workspace or upload the video file straight from your device.

Step 2. Choose “Clean Audio” from the “Edit” menu after your audio and video have been uploaded. Your background noise will be automatically eliminated once you click that. Now, make any necessary extra adjustments to your video if needed.

Step 3. When you’re done eliminating background noise from your video, click “Export Project.” In a matter of seconds, you will be able to download and share your polished video.

Steps to Remove Background Noise Using KwiCut
KwiCut is a background noise online tool that can reduce any redundant sound. Follow the easy steps below to remove the noise.
Step 1. To apply AI audio noise reduction, click “Studio Sound” once the sound file has been correctly uploaded. Select “Noise Reduction” from the available options and click “Apply.”

Step 2. KwiCut will cut off undesired parts and modify the level to improve the denoised audio. Once done, download the noiseless audio and video by clicking “Export.”

Bonus Part. Manage Vocals to Perfection with A Unique Tool
There are many apps for background sound noise reduction, but most of these tools don’t do vocal removal. It becomes difficult for users to find an app that can do vocal removal as well. Lucky for you, Wondershare Filmora can solve this dilemma since it has a specialized AI vocal remover. It is a user-friendly video editing program with a modern UI.
You can employ it to import and edit films, add transitions and special effects, and share the finished product on DVDs, mobile devices, and social media. To create a video in a few simple clicks, the software provides auto beat sync, preset templates, and instant mode. The AI Vocal Remover tool from Filmora can make soundtracks clearer by providing an easy vocal removal service.
Free Download For Win 7 or later(64-bit)
Free Download For macOS 10.14 or later
Step By Step Guide To Use The Wondershare Filmora AI Vocal Remover
Provided is a comprehensive guide showing how to remove vocals from a music or audio file. Make perfect use of Filmora’s AI features to get the finest results:
Step 1. Launch Wondershare Filmora
Begin by downloading the tool from its official website, which will only take a few minutes. Once you’ve installed the tool, open the main window of the tool and click on “New Project.” Now, look for the targeted file and import it into the tool.

Step 2. Remove Vocals
Once the video has been successfully imported, you will see it in the library section; from there, drag the file and drop it in the timeline section. After that, right-click on the file, and from the given options, select “Audio” and click on “AI Vocal Remover.” The tool will automatically remove the vocals in a few seconds.

Step 3. Export and Save the File
Preview your file, and if you are satisfied with the results, click the “Export” button to save your edited audio or video. Select the quality and format of the media file and download it. Your video will be saved and ready to use in a short time.

Conclusion
Everyone has been becoming a content creator lately, which has increased the competition. You have to create good-quality audio and video to keep your audience engaged. The podcasts and videos can only get attention if their audio is smooth and without any noise. This article introduces the top AI background noise removal tools and provides solutions for vocal removal.
You can choose any of the mentioned tools to remove the background. Wondershare Filmora is the best option if you want to remove vocals.
Free Download Free Download Learn More
Part 1. What Features Should A Good Background Noise Removal Online Tool Include?
A background noise removal online tool enables users to reduce noise from audio. The following are the characteristics that a good background noise reduction tool should contain:
1. Real-Time Preview
This function enables users to adjust the parameters and assess how the noise reduction will affect their content. This is done by playing back the audio after it has been processed. You can screen your progress anytime with a click if you have the real-time preview option.
2. Presets
To make the noise reduction procedure easier, define presets for common noise reduction scenarios. It can include scenarios with background hum, wind noise, and room tone. Presets are an easy solution to edit and remove the background noise.
3. Batch Processing
Batch processing allows users to reduce noise to several files simultaneously. This helps process multiple audio records in no time. The feature is a lifesaver if you want to remove noise from many files. You can save hours of time by using a bulk processor.
4. Privacy and Security
A promising tool should always have an adequate security and privacy policy. It should be dedicated to protecting user privacy and safeguarding data. This includes the option to process audio files without saving or sharing them, which is a necessity.
5. Customization
It is an essential function for expert users if they want to adjust the noise reduction parameters. The parameters can be based on the particular type of noise and recording circumstances. You can personalize your audio by using the customization feature.
Part 2. Some Great Online Options For Background Noise Removal
Noise background removal can be super easy if you use the right tool that meets your needs. You can use a number of tools to get the background noise out of your audio recordings. Here are a few of the top choices:
1. Kapwing
Kapwing is a professional video editor used to create impressive and engaging videos. The various AI tools the app offers to change the landscape and quality of your content. With the help of Kapwing’s background noise remover, you can reduce background noise. You can also eliminate background hums and isolate speech patterns to improve the audio quality. You can choose the audio-cleaning option after uploading your media clip and remove background noise.
Key Features
- With clean audio, you can enhance the audio quality and remove the background noise with minimal effort.
- Using smart cut can remove the redundant silences from your audio.
- Kapwing has a built-in audio library that offers a range of voices so you can change the voice of your clip.
2. Media.io
Media.io is a portable, web-based AI tool that intelligently enhances your media. Noise reduction is one of its most well-liked functions. It lets users take out any unwanted background noise from their audio recordings. Podcasters, musicians, and video producers who wish to enhance the quality of their audio recordings can use this platform.
Key Features
- The noise reducer of Media.io can decrease or even cut out any background noise. You can eliminate the unpleasant sounds affecting your audio.
- You can extract, separate, or remove any instrumental or vocal sound from any song. This can be done without sacrificing quality by using the AI-powered vocal remover.
- The audio compressor of Media.io can compress numerous files at once.
3. VEED.io
VEED.io is known for its AI audio services. The tool has all the functionalities to create clear and compelling audio as it applies AI to your recordings. Unwanted noises can all be identified and eliminated by the tool. A variety of professional tools are also available from VEED.io to enhance the audio and video quality. This includes incorporating narrations, sound effects, background music, and instant voiceovers is possible.
Key Features
- With a single click, you can perform background noise removal of your audio files and Zoom meetings.
- You can translate audible words into written text with unparalleled accuracy.
- The audio editor of Veed.io allows users to cut, split, and trim the clips.
4. Aspose
Aspose is specialized in sound noise reduction online. It is a straightforward tool that requires no setting up. All you need to do is upload your file; the automated tool will do the rest of the work. Aspose is an excellent choice for free background noise removal online. It processes and increases quality by upscaling audio and removing redundant noise.
Key Features
- The tool is compatible with many platforms, so you can remove background noise from your PC or phone.
- It is a quick and easy solution to noise removal. Upload the file and hit “Process” to get a clean version of your audio within seconds.
- Aspose retains the quality of your audio so it is not distorted or cropped after the noise has been removed.
5. Podcastle
If you are a podcasting enthusiast, this app can change your podcasting experience to fun. Its AI equalizer, noise reducer, creative layouts, and personalized branding make it a great choice for many podcasters. Podcastle is an AI-powered podcasting platform that assists creators of various backgrounds. It caters to skill levels in producing, editing, and distributing high-caliber podcasts. Users can record, edit, transcribe, and export content using the platform’s intuitive interface.
Key Features
- With AI voice cloning, convert text to speech with fantastic precision and subtlety.
- To chatter, static, and other irritating sounds from your audio recordings. You can use Podcastle’s automatic noise-cancellation function. Eliminate background noise from your audio to create faultless audio.
- The AI technology can translate speech to text. Automated transcripts can simplify and understand complex terms faster than manual transcription.
6. LALAL.AI
LALAL.AI is an online tool offering an advanced music source separation and voice removal service. The tool utilizes the latest AI-powered technology to remove background noise. The tool is easily operated, and you can upload up to 20 files and clean their audio in a matter of seconds. You can also isolate the vocals and sounds with the app and create an unplugged song cover.
Key Features
- The sound noise reduction online removes noises with an AI algorithm and gives voice clarity.
- You can remove the drums, bass guitar, piano, guitar, voice, instrumental, and synthesizer sounds by using the stem splitter.
- The AI transcription and text-to-speech feature lets users create transcriptions with minimal effort.
7. MyEdit
MyEdit edits your audio like a professional. The tool has everything you need to create a high-quality sound. Its AI services quickly remove any unwanted noise and upscale the audio. You can cut audio, find the BPM of your music, alter your voice, extract instrumentals, and eliminate wind or background noise.
Key Features
- AI-generated sound effects utilize the text-to-sound capability of the AI Sound Effect Generator.
- The online vocal remover can cut out the vocals from a song and extract the instrumentals to make a fantastic karaoke version.
- The online voice changer can alter your voice using a range of voice filters and characters to express yourself.
8. Flixier
Flixier combines the newest technology and gives excellent audio quality. The AI-driven remove noise online ensures that every note in your audio is clear and resonant. When editing a video, being able to eliminate background noise and other distractions is crucial. Flixier’s online AI Audio Enhancer enables you to achieve this goal.
Key Features
- The AI voice enhancer can improve your voice notes and make you sound like a professional recording artist. This is done by adding warmth, precision, and depth to your voice.
- AI audio enhancement function transforms ordinary sounds into extraordinary listening experiences.
- You can modify your voiceover with Flixier’s video editor as with an offline video editor.
9. KwiCut
KwiCut serves as a text-based video editor that clones, enhances, and transcribes audio using AI. Users can generate talking head videos or remove filler words from transcripts. They can create advertising titles or summaries from their recordings with KwiCut’s AI technology, which is powered by GPT-4.0. The tool allows you to fine-tune recordings with 95% accuracy of auto transcription in a matter of minutes.
Key Features
- With the seamless editor of KwiCut, you can choose to highlight, edit, or remove your audio and video.
- KwiCut AI finds and removes unnecessary filler words from your transcripts.
- You can create a digital version of your voice by using the AI voice cloner.
10. Cleanvoice AI
Cleanvoice uses AI to eliminate mouth noises, stuttering, and filler sounds from your audio recordings. It can recognize and eliminate filler sounds like “ums” and “ahs” in a range of languages. To keep your audience interested, you can even shorten pauses. Cleanvoice can show and suggest what needs to be edited in voice noise removal.
Key Features
- The filler sound removal of Cleanvoice can recognize a variety of languages and accents and remove any unnecessary filler sounds from the audio.
- The tool is an expert in smoothening your audio. You can remove stutters using the stutter removal and speak with greater confidence.
- The silence remover of Cleanvoice can remove long and dead silences so the listeners and viewers won’t lose interest in your content.
Part 3. Offering Some Step-by-Step Guides For Users Seeking Background Noise Removal in Online Tools
Now that we are familiar with the top background noise removal online free tools, let’s take a look at the step-by-step guides of some of these apps.
Steps to Remove Background Noise Using Podcastle
With Podcastle, you can remove noise online in the most effortless 3-step procedure. Take a look at the steps below to reduce the background noise quickly and easily.
Step 1. Start by recording your audio straight into Podcastle’s studio or upload your audio file.
Step 2. Edit your audio by making any changes you wish, such as cutting, fading, trimming, and adding music.
Step 3. Select Magic Dust by right-clicking on your audio track and wait for the results. The Podcastle’s AI technology will enhance your audio quality within seconds.
Steps to Remove Background Noise Using Kapwing
Kapwing is an expert in audio and MP3 voice removal online. It only takes a few minutes to clean the audio perfectly.
Step 1. Upload your video and edit out the undesired background noise. After that, copy the video URL link into your workspace or upload the video file straight from your device.
Step 2. Choose “Clean Audio” from the “Edit” menu after your audio and video have been uploaded. Your background noise will be automatically eliminated once you click that. Now, make any necessary extra adjustments to your video if needed.
Step 3. When you’re done eliminating background noise from your video, click “Export Project.” In a matter of seconds, you will be able to download and share your polished video.
Steps to Remove Background Noise Using KwiCut
KwiCut is a background noise online tool that can reduce any redundant sound. Follow the easy steps below to remove the noise.
Step 1. To apply AI audio noise reduction, click “Studio Sound” once the sound file has been correctly uploaded. Select “Noise Reduction” from the available options and click “Apply.”
Step 2. KwiCut will cut off undesired parts and modify the level to improve the denoised audio. Once done, download the noiseless audio and video by clicking “Export.”
Bonus Part. Manage Vocals to Perfection with A Unique Tool
There are many apps for background sound noise reduction, but most of these tools don’t do vocal removal. It becomes difficult for users to find an app that can do vocal removal as well. Lucky for you, Wondershare Filmora can solve this dilemma since it has a specialized AI vocal remover. It is a user-friendly video editing program with a modern UI.
You can employ it to import and edit films, add transitions and special effects, and share the finished product on DVDs, mobile devices, and social media. To create a video in a few simple clicks, the software provides auto beat sync, preset templates, and instant mode. The AI Vocal Remover tool from Filmora can make soundtracks clearer by providing an easy vocal removal service.
Free Download For Win 7 or later(64-bit)
Free Download For macOS 10.14 or later
Step By Step Guide To Use The Wondershare Filmora AI Vocal Remover
Provided is a comprehensive guide showing how to remove vocals from a music or audio file. Make perfect use of Filmora’s AI features to get the finest results:
Step 1. Launch Wondershare Filmora
Begin by downloading the tool from its official website, which will only take a few minutes. Once you’ve installed the tool, open the main window of the tool and click on “New Project.” Now, look for the targeted file and import it into the tool.
Step 2. Remove Vocals
Once the video has been successfully imported, you will see it in the library section; from there, drag the file and drop it in the timeline section. After that, right-click on the file, and from the given options, select “Audio” and click on “AI Vocal Remover.” The tool will automatically remove the vocals in a few seconds.
Step 3. Export and Save the File
Preview your file, and if you are satisfied with the results, click the “Export” button to save your edited audio or video. Select the quality and format of the media file and download it. Your video will be saved and ready to use in a short time.
Conclusion
Everyone has been becoming a content creator lately, which has increased the competition. You have to create good-quality audio and video to keep your audience engaged. The podcasts and videos can only get attention if their audio is smooth and without any noise. This article introduces the top AI background noise removal tools and provides solutions for vocal removal.
You can choose any of the mentioned tools to remove the background. Wondershare Filmora is the best option if you want to remove vocals.
The Ultimate Guide to Modifying Sound Intensity in Audacity
Audacity is a free, open access, cross-platform sound editing and recording tool. It is compatible with Windows, Mac OS X, Linux, and various other operating systems. All of these aspects have contributed to Audacity’s worldwide popularity. Audacity features an amplified effect that alters the loudness of your chosen audio and other practical tools that can change the sound in different ways.
As a result, Audacity can not only assist you in modifying the level of an audio file, but it can also help you equalize, reduce, normalize, and so on.
Yes, you have heard it right, Audacity increase volume, but the primary question is how? But don’t worry, you will get the answer after reading the article. This article will explain how you can increase or decrease the volume of a whole and a specific segment of the audio file. Let’s get started.
In this article
01 How to Increase or Decrease Volume Without Distortion and Clipping in Audacity
02 How to Increase Volume of Multiple Files in Audacity?
03 How to Increase Volume in Certain Parts of Track?
04 What’s the Difference between Normalize and Amplify?
Part 1: How to Increase or Decrease Volume Without Distortion and Clipping in Audacity
Audio clipping occurs when the audio input becomes too loud for an amplifier to produce, and the surplus signal creates distortion. When editing, you cannot add additional volume to your audio clip forever because this would result in clipping. In this case, you can use the Audacity application to emphasize your material by turning the volume up or down without distortion and clipping on a track or recording.
Learn how Audacity increase volume without distortion by following the procedure described below:
Step 1: First, download and install the Audacity software on your computer.
Step 2: Select the File from the menu above and click Open to open the audio file.

Step 3: Choose the audio track, go to the Effect menu and pick the Amplify option from the drop-down menu.

Note: You can increase or decrease the volume by double-clicking the track and using the slider under the Gain title.
Step 4: Increase or decrease the volume by sliding the slider or typing the amplification value in the text box next to it in the Amplify window as needed.

Note: Ensure that the Allow Clipping checkbox remains unchecked to avoid clipping. Moreover, keep in mind that increasing the volume to a greater extent can result in distortion.
Related: How to Change Audio Volume in Filmora
Part 2: How to Increase Volume of Multiple Files in Audacity?
Audacity is an open-source audio editing tool. It is used for various purposes, like audio recording, music creation, and audio file editing. It also allows you to increase and decrease the volume of audio files.
You may also apply the modifications to multiple files at once, rather than one at a time. Check out the instructions below to learn how to change the volume of multiple audio files:
Step 1: Select the Import option from the File menu, and then pick the Audio option. Browse to your audio files, choose all of them, and then click the Open option.

Step 2: To select all the files, press Ctrl + A, click on the Effect option in the menu bar and pick Amplify.

Step 3: Now, either enter the value in the text box next to the Amplification Decibels tab or use the slider under it. To verify the operation of increasing the volume, check the allow clipping checkbox. When you’re through with the options, click the Ok button.

Step 4: Amplification will be applied to all the tracks. Go to the File option from the above menu to export the files and then select the Export option.

If you’re running Audacity on macOS computer, you can watch the video tutorial below to apply effects to multiple files.
Part 3: How to Increase Volume in Certain Parts of Track?
The audacity software also allows you to alter a specific section of an audio file. The selection tool can assist in locating a particular area of the track. After you’ve chosen a section of the audio file, you may utilize the amplification effect to increase its loudness. Check out the instructions below to learn how you can achieve it:
Step 1: Launch the Audacity software on the computer. To open the audio file, go to the File menu and select Open. You may also open the file by dragging it.
Step 2: Ensure that the Selection tool is active now. Click and hold the mouse left-click to move from one spot on the track to another.

Step 3: After picking the part, go to the Effect option from the menu and select Amplify.

Step 4: Now, for that specific region, modify the amplification and click OK. This will only change the volume for the area you have selected.

Part 4: What’s the Difference between Normalize and Amplify?
Amplify and Normalize are two essential features of the Audacity tool. Many people think they are the same thing, they are right up to some extent, but there exists a big difference between both the features. Before discussing the differences, you need to know what the terms Normalize and Amplify imply.
Amplify
It is the quickest approach to comprehend the effect’s name if you want to know precisely what impacts are. The frequency of the vibration is enhanced to increase the amplification effect. As previously said, it raises a tiny sound.
Furthermore, because this amplification is extended to all frequencies and amplitude, the noise increases. If you choose ten sources and magnify them by ten decibels, each source will be ten decibels louder than your present sound.

Normalize
The meaning of normalizing is standardized, which is also a feature of its name. Whenever you pick an audio input and use the normalize feature, the level is adjusted automatically according to the previously indicated average volume size in Oda City.
As a result, when one sound source is normalized, there is no discernible difference between it and the amplification mechanism. Still, the effect is evident when several sound sources are performed concurrently.
By pressing Ctrl + A and selecting all ten various audio sources, you may compute the required standard of every sound source, enhance the audio input that is smaller than the normal, and create the audio signal more significant than the standard. Shrink the size of each noise source, such as the name, and normalize the sound.

Related: Best Audio Normalizers for Windows
Differences
To differentiate the meaning and impact precisely, amplification means increasing or reducing the sound, whereas normalizing means equalizing the sound. Simply defined, if you magnify ten sources by ten decibels, each of the shorter and louder noises equals ten decibels in their actual loudness.
When the ten sources are normalized, the louder sounds grow louder, conforming to the standard sound source size. Because the amplifying is done regardless, the little noises are going insane during this procedure.
Conclusion
All in all, Audacity does an excellent job at audio editing. If you simply need to modify an audio file, Audacity is a great option. For increasing and decreasing the volume of single and multiple audio files, Audacity is still one of the best bets in the market. We hope that now know how Audacity increase volume of the audio files after reading this article.
02 How to Increase Volume of Multiple Files in Audacity?
03 How to Increase Volume in Certain Parts of Track?
04 What’s the Difference between Normalize and Amplify?
Part 1: How to Increase or Decrease Volume Without Distortion and Clipping in Audacity
Audio clipping occurs when the audio input becomes too loud for an amplifier to produce, and the surplus signal creates distortion. When editing, you cannot add additional volume to your audio clip forever because this would result in clipping. In this case, you can use the Audacity application to emphasize your material by turning the volume up or down without distortion and clipping on a track or recording.
Learn how Audacity increase volume without distortion by following the procedure described below:
Step 1: First, download and install the Audacity software on your computer.
Step 2: Select the File from the menu above and click Open to open the audio file.
Step 3: Choose the audio track, go to the Effect menu and pick the Amplify option from the drop-down menu.
Note: You can increase or decrease the volume by double-clicking the track and using the slider under the Gain title.
Step 4: Increase or decrease the volume by sliding the slider or typing the amplification value in the text box next to it in the Amplify window as needed.
Note: Ensure that the Allow Clipping checkbox remains unchecked to avoid clipping. Moreover, keep in mind that increasing the volume to a greater extent can result in distortion.
Related: How to Change Audio Volume in Filmora
Part 2: How to Increase Volume of Multiple Files in Audacity?
Audacity is an open-source audio editing tool. It is used for various purposes, like audio recording, music creation, and audio file editing. It also allows you to increase and decrease the volume of audio files.
You may also apply the modifications to multiple files at once, rather than one at a time. Check out the instructions below to learn how to change the volume of multiple audio files:
Step 1: Select the Import option from the File menu, and then pick the Audio option. Browse to your audio files, choose all of them, and then click the Open option.
Step 2: To select all the files, press Ctrl + A, click on the Effect option in the menu bar and pick Amplify.
Step 3: Now, either enter the value in the text box next to the Amplification Decibels tab or use the slider under it. To verify the operation of increasing the volume, check the allow clipping checkbox. When you’re through with the options, click the Ok button.
Step 4: Amplification will be applied to all the tracks. Go to the File option from the above menu to export the files and then select the Export option.
If you’re running Audacity on macOS computer, you can watch the video tutorial below to apply effects to multiple files.
Part 3: How to Increase Volume in Certain Parts of Track?
The audacity software also allows you to alter a specific section of an audio file. The selection tool can assist in locating a particular area of the track. After you’ve chosen a section of the audio file, you may utilize the amplification effect to increase its loudness. Check out the instructions below to learn how you can achieve it:
Step 1: Launch the Audacity software on the computer. To open the audio file, go to the File menu and select Open. You may also open the file by dragging it.
Step 2: Ensure that the Selection tool is active now. Click and hold the mouse left-click to move from one spot on the track to another.
Step 3: After picking the part, go to the Effect option from the menu and select Amplify.
Step 4: Now, for that specific region, modify the amplification and click OK. This will only change the volume for the area you have selected.
Part 4: What’s the Difference between Normalize and Amplify?
Amplify and Normalize are two essential features of the Audacity tool. Many people think they are the same thing, they are right up to some extent, but there exists a big difference between both the features. Before discussing the differences, you need to know what the terms Normalize and Amplify imply.
Amplify
It is the quickest approach to comprehend the effect’s name if you want to know precisely what impacts are. The frequency of the vibration is enhanced to increase the amplification effect. As previously said, it raises a tiny sound.
Furthermore, because this amplification is extended to all frequencies and amplitude, the noise increases. If you choose ten sources and magnify them by ten decibels, each source will be ten decibels louder than your present sound.
Normalize
The meaning of normalizing is standardized, which is also a feature of its name. Whenever you pick an audio input and use the normalize feature, the level is adjusted automatically according to the previously indicated average volume size in Oda City.
As a result, when one sound source is normalized, there is no discernible difference between it and the amplification mechanism. Still, the effect is evident when several sound sources are performed concurrently.
By pressing Ctrl + A and selecting all ten various audio sources, you may compute the required standard of every sound source, enhance the audio input that is smaller than the normal, and create the audio signal more significant than the standard. Shrink the size of each noise source, such as the name, and normalize the sound.
Related: Best Audio Normalizers for Windows
Differences
To differentiate the meaning and impact precisely, amplification means increasing or reducing the sound, whereas normalizing means equalizing the sound. Simply defined, if you magnify ten sources by ten decibels, each of the shorter and louder noises equals ten decibels in their actual loudness.
When the ten sources are normalized, the louder sounds grow louder, conforming to the standard sound source size. Because the amplifying is done regardless, the little noises are going insane during this procedure.
Conclusion
All in all, Audacity does an excellent job at audio editing. If you simply need to modify an audio file, Audacity is a great option. For increasing and decreasing the volume of single and multiple audio files, Audacity is still one of the best bets in the market. We hope that now know how Audacity increase volume of the audio files after reading this article.
Top Best 10 AI Music Composers
Top Best 10 AI Music Composers in 2024

Benjamin Arango
Mar 27, 2024• Proven solutions
Robots can’t be creative, right? A number of startups that focus on the development of artificial intelligence that is capable of composing music have proved this statement wrong. AI music composers generate original, copyright-free music you can use in your latest YouTube video or social media video ad. You don’t even have to be a sound designer or a musician to produce soundtracks for your videos with AI Music Composers, because you can upload the music that has already been recorded and create variations of it. So, let’s take a look at what AI music composers have to offer in 2024.
| 1 - Amper Music | 2 - AIVA |
|---|---|
| 3 - Jukedeck | 4 - Ecrett Music |
| 5 - Melodrive | 6 - ORB Composer |
| 7 - Amadeus Code | 8 - Humtap |
| 9 - Muzeek | 10 - Brain.fm |
Ten Best AI Music Composers You Should Know About
The AI technologies that can compose music are still relatively novel, and as time passes, they can only develop and grow further. Consequently, each of the AI music composers we featured in this article offers a different range of possibilities. Here are the ten best AI music composers you shouldn’t miss out on in 2024.
Filmora AI Music Editor
Edit Audio with AI Music Editor
Experience the power of Filmora’s AI tools and make your audio or music stand out like never before! Audio Denoise, Audio Ducking, Audio Synchronization, Audio Stretch, etc…
Try It Free Try It Free Try It Free Learn More >
1. Amper Music
Price: Available upon request
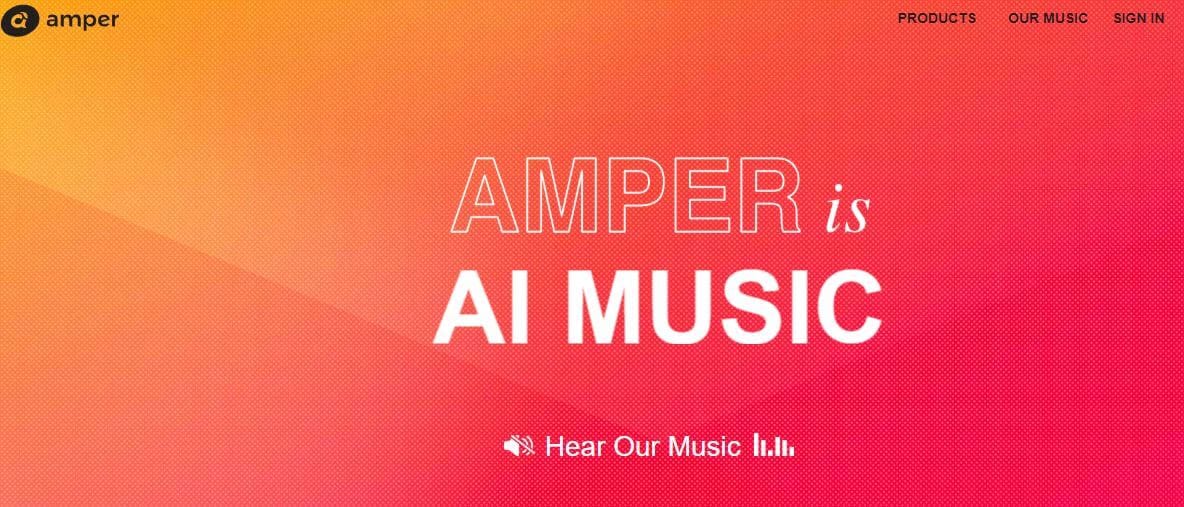
Industry professionals know just how frustrating the music licensing process can be. Amper Music is a cloud-based platform designed to simplify the process of creating soundtracks for movies and video games, as it produces AI generated algorithms that help users create music in a variety of music genres. You must first create an account on this platform, in order to be able to use the free version of Amper Music that provides only a limited amount of features. Upgrading to the pro version of Amper Music will enable you to enjoy the full potential of this rapidly growing AI Music Composer.
2. AIVA
Price: Free version available, subscription plans start from €14 p/month
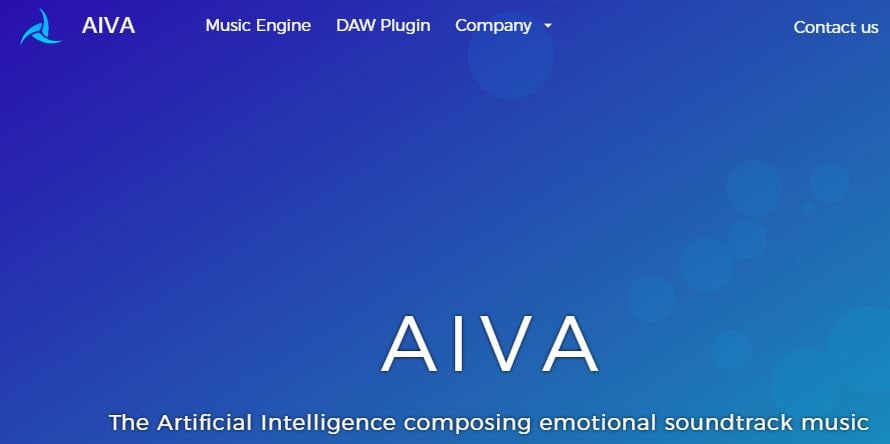
Since 2016, when AIVA Technologies was founded, its team has worked on developing an AI script that can compose emotional soundtracks for ads, video games, or movies. Soon after, the AI published its first oeuvre titled ‘Opus 1 for Piano Solo and in the subsequent years, AIVA released an album and composed music for a video game. Besides enabling its users to create music from scratch, AIVA can also be used to produce variations of existing songs. The music engine that powers this AI music composer makes the production of corporate or social media videos much easier, as it eliminates the need to go through the music licensing process.
3. Jukedeck
Price: Free version available, Pricing plans start from $0.99 per download
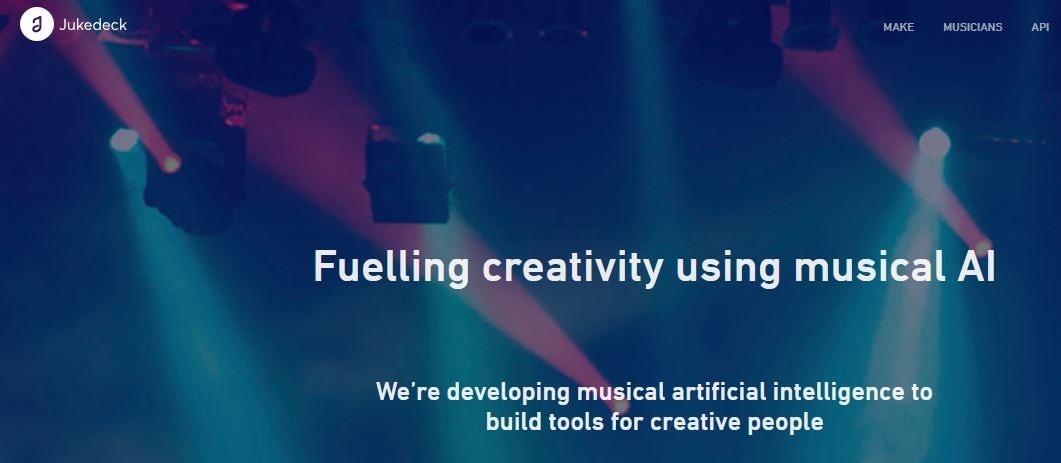
The AI music composer developed by the Jukedeck startup resembles the Amper’s music composer because they both rely on neural networks to analyze music data, that is then used by the AI to learn how to compose original music. Each track that is available through this AI music composer can be edited, so you can change its length or its tempo. You can create music with Jukedeck for free if you decide to give all the rights to the AI composer, while both individuals and small businesses can purchase the license to use the song created with Jukedeck for just $0.99.
Note: Jukedeck has been acquired by TikTok, and we are waiting for a new Jukedeck.
![]()
A cross-platform for making videos anywhere for all creators

Why your video editing isn’t good enough? How about some creative inspo?
- 100 Million+ Users
- 150+ Countries and Regions
- 4 Million+ Social Media Followers
- 5 Million+ Stock Media for Use
* Secure Download

4. Ecrett Music
Price: Subscription plans start at $5
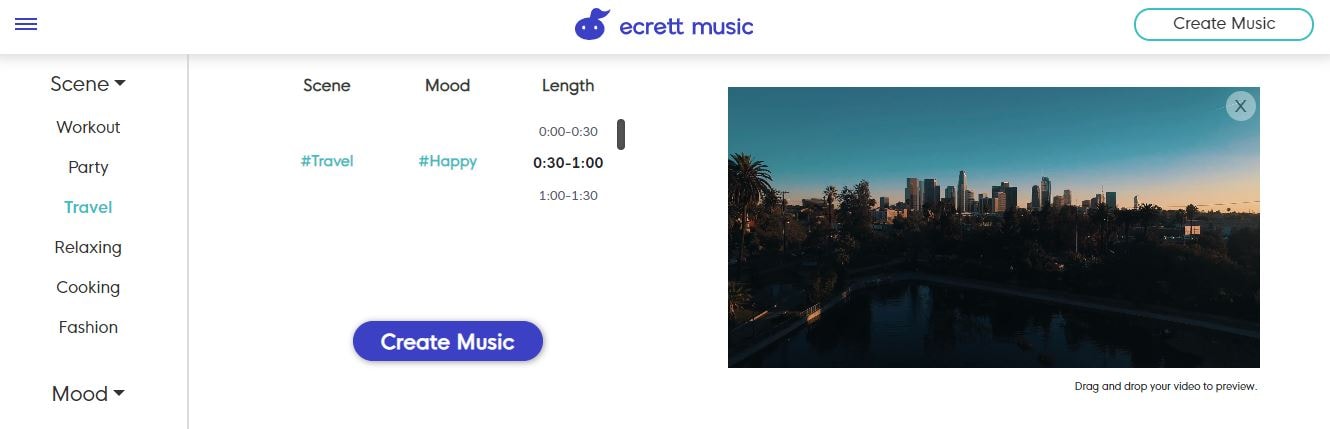
This online AI music composer makes creating stunning soundtracks for videos look easy. You just have to upload a video for which you want to generate music and select the type of scene and the mood of that scene. Party, Travel or Fashion are among the types of scenes you can choose from, while moods range from happy to serious. When done, simply click on the Create Music button, and the platform will automatically generate the soundtrack for your video. In case you are producing videos on a constant basis, you should consider purchasing one of the available subscription plans.
5. Melodrive
Price: Free
Compatibility: iOS, Windows
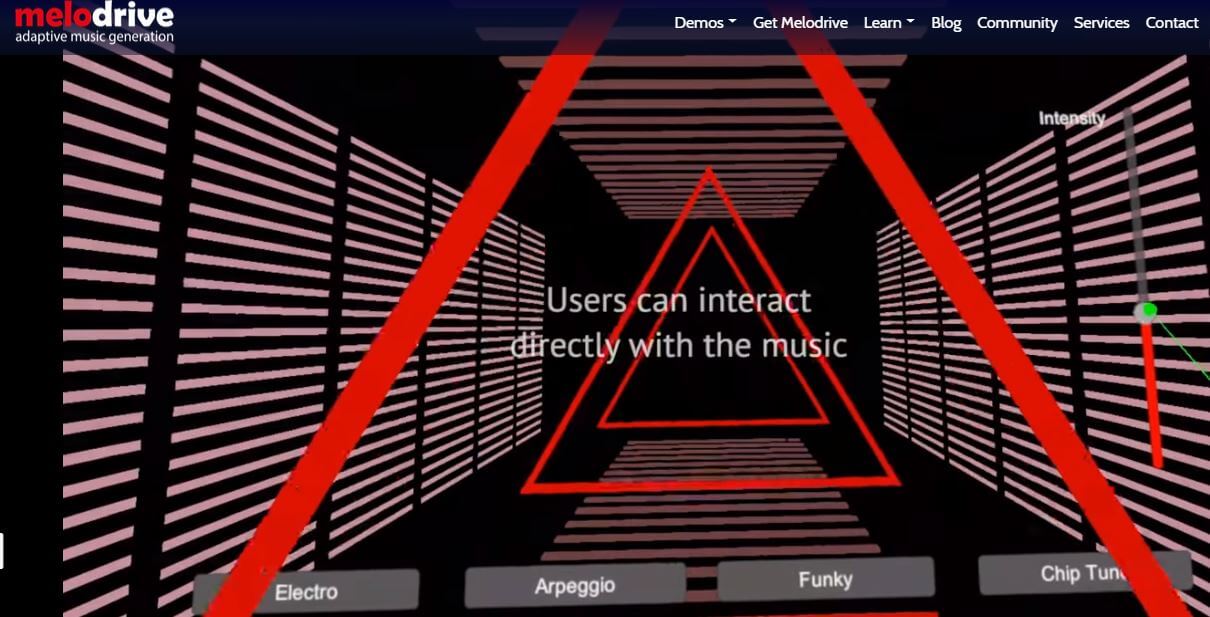
At the moment, the Lite and Indie versions of Melodrive are available for download free of charge, but the Indie version of this AI music composer still offers more options. Melodrive is one of the first AI systems that can compose emotional and unique music in real time. The AI generates music by adapting to the media environment and aims to match the mood and the style of the video. It is worth noting that Melodrive is still under development and that through time its capabilities to compose music are going to become even more refined than they already are.
6. ORB Composer
Price: Pricing plans start at $149,00
Compatibility: macOS, Windows

You can’t generate music automatically with ORB Composer, because the AI creates music based on your choices. That’s why you need to know at least the basic rules of music composition in order to be able to use the ORB Composer properly. The AI music composer comes bundled with a rich collection of chord progressions, that contains almost all chords used in popular music. This tool is aimed at artists who are interested in experimenting with the possibilities of creating music with artificial intelligence and discovering new styles of music. There are six music templates you can choose from, and you can create compositions by simply organizing different blocks of music.

Filmora AI Audio Stretcher
Wondershare Filmora - AI Audio Stretcher
• Retime any audio track to fit the duration of your video almost instantly.
• Rearrange songs without quality loss.
• Cross-platform supported - (Windows, Mac, iOS, Android)
Start Audio Stretch Start Audio Stretch Start Audio Stretch Learn More >
7. Amadeus Code
Price: Free, but the app offers in-app purchases
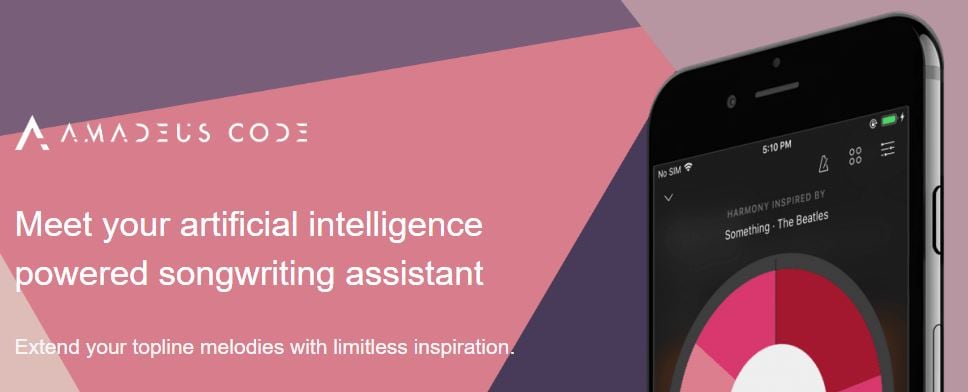
Compatibility: iOS
Both skilled musicians and music enthusiast can use this iOS-based app to create new melodies in just a few minutes. The AI engine that the Amadeus Code uses contains chord progressions of some of the most famous songs ever created and it let you use them to create new and innovative structures of music compositions. Moreover, you can use gestures to create new songs or recreate specific segments of songs you composed earlier. Even though Amadeus Code lets its users export audio and MIDI files to audio editing software, you still have to purchase all songs you want to keep.
8. Humtap
Price: Free
Compatibility: iOS
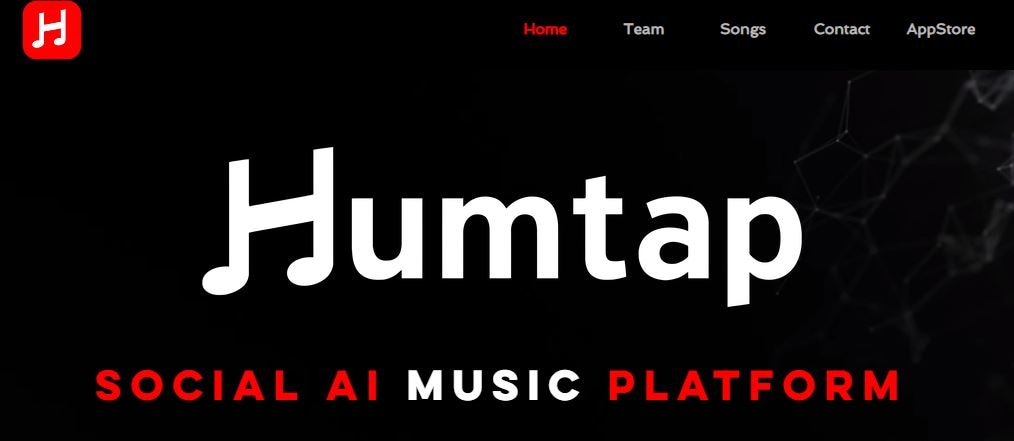
Musicians who have a tough time remembering their own ideas are going to love using Humtap because they can just hum a melody and the app will automatically generate an entire song using different instruments. What’s more, beats can be added with a single tap, and after the music is generated you can proceed to add the vocals as well. Humptap also has video making capabilities, so you can create videos for all songs you compose with this app. All tracks and videos generated with the Humtap AI music composer can be saved to your phone, but you can’t share your new creations to social media directly from the app.
9. Muzeek
Price: Free trial available, pricing plans start from $19 per month
Compatibility: macOS
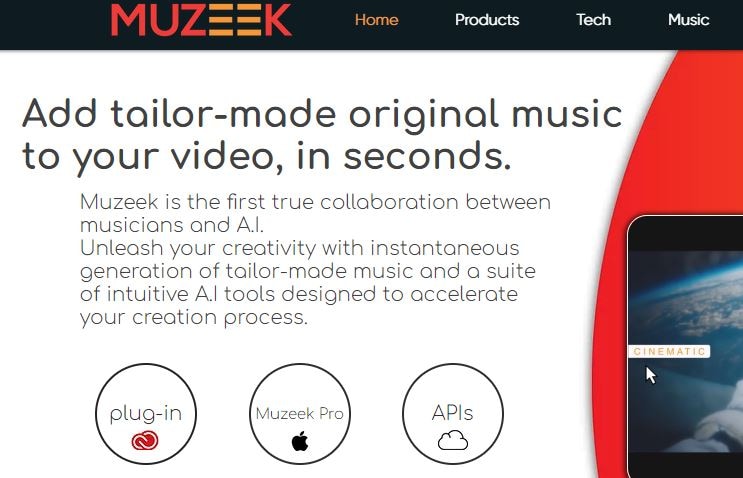
If you are in need of licensed music for the video you’re planning on sharing to social media networks, then Muzeek is one of the best choices you can make. The AI algorithm Muzeek uses analyzes the videos for which you are generating music and it creates soundtracks that perfectly fit the rhythm of the video. All content creators, including online marketing agencies or video game developers, can rely on Muzeek AI music composer to create authentic music in high quality. Moreover, Muzeek can also analyze the video’s original audio and create subtitles from it or adjust its volume automatically.
10. Brain.fm
Price: Subscription plans start from $6,95 per month
Compatibility: Android, online
The idea that music can make our brains more productive is at the very core of what Brain.fm platform is all about. A team of scientists, musicians and engineers uses artificial intelligence to generate music designed to make your brain more productive and focused. They claim that the music created with their AI music composer achieve its effects in just ten to fifteen minutes. However, you can’t use Brain.fm to create your own music, as this platform is better suited for people who spend a lot of time at work and have a tough time maintaining their focus while performing important tasks.
Conclusion
The opportunities AI music composers offer are still not properly explored, because most of these technologies are still under development. The results AI music composers we included in this article have managed to achieve so far are impressive because each of them can produce high-quality audio files for all sorts of video content. Which AI music composer do you like to use the most? Leave a comment, and let us know.
Benjamin Arango
Benjamin Arango is a writer and a lover of all things video.
Follow @Benjamin Arango
Benjamin Arango
Mar 27, 2024• Proven solutions
Robots can’t be creative, right? A number of startups that focus on the development of artificial intelligence that is capable of composing music have proved this statement wrong. AI music composers generate original, copyright-free music you can use in your latest YouTube video or social media video ad. You don’t even have to be a sound designer or a musician to produce soundtracks for your videos with AI Music Composers, because you can upload the music that has already been recorded and create variations of it. So, let’s take a look at what AI music composers have to offer in 2024.
| 1 - Amper Music | 2 - AIVA |
|---|---|
| 3 - Jukedeck | 4 - Ecrett Music |
| 5 - Melodrive | 6 - ORB Composer |
| 7 - Amadeus Code | 8 - Humtap |
| 9 - Muzeek | 10 - Brain.fm |
Ten Best AI Music Composers You Should Know About
The AI technologies that can compose music are still relatively novel, and as time passes, they can only develop and grow further. Consequently, each of the AI music composers we featured in this article offers a different range of possibilities. Here are the ten best AI music composers you shouldn’t miss out on in 2024.
Filmora AI Music Editor
Edit Audio with AI Music Editor
Experience the power of Filmora’s AI tools and make your audio or music stand out like never before! Audio Denoise, Audio Ducking, Audio Synchronization, Audio Stretch, etc…
Try It Free Try It Free Try It Free Learn More >
1. Amper Music
Price: Available upon request
Industry professionals know just how frustrating the music licensing process can be. Amper Music is a cloud-based platform designed to simplify the process of creating soundtracks for movies and video games, as it produces AI generated algorithms that help users create music in a variety of music genres. You must first create an account on this platform, in order to be able to use the free version of Amper Music that provides only a limited amount of features. Upgrading to the pro version of Amper Music will enable you to enjoy the full potential of this rapidly growing AI Music Composer.
2. AIVA
Price: Free version available, subscription plans start from €14 p/month
Since 2016, when AIVA Technologies was founded, its team has worked on developing an AI script that can compose emotional soundtracks for ads, video games, or movies. Soon after, the AI published its first oeuvre titled ‘Opus 1 for Piano Solo and in the subsequent years, AIVA released an album and composed music for a video game. Besides enabling its users to create music from scratch, AIVA can also be used to produce variations of existing songs. The music engine that powers this AI music composer makes the production of corporate or social media videos much easier, as it eliminates the need to go through the music licensing process.
3. Jukedeck
Price: Free version available, Pricing plans start from $0.99 per download
The AI music composer developed by the Jukedeck startup resembles the Amper’s music composer because they both rely on neural networks to analyze music data, that is then used by the AI to learn how to compose original music. Each track that is available through this AI music composer can be edited, so you can change its length or its tempo. You can create music with Jukedeck for free if you decide to give all the rights to the AI composer, while both individuals and small businesses can purchase the license to use the song created with Jukedeck for just $0.99.
Note: Jukedeck has been acquired by TikTok, and we are waiting for a new Jukedeck.
![]()
A cross-platform for making videos anywhere for all creators
Why your video editing isn’t good enough? How about some creative inspo?
- 100 Million+ Users
- 150+ Countries and Regions
- 4 Million+ Social Media Followers
- 5 Million+ Stock Media for Use
* Secure Download
4. Ecrett Music
Price: Subscription plans start at $5

This online AI music composer makes creating stunning soundtracks for videos look easy. You just have to upload a video for which you want to generate music and select the type of scene and the mood of that scene. Party, Travel or Fashion are among the types of scenes you can choose from, while moods range from happy to serious. When done, simply click on the Create Music button, and the platform will automatically generate the soundtrack for your video. In case you are producing videos on a constant basis, you should consider purchasing one of the available subscription plans.
5. Melodrive
Price: Free
Compatibility: iOS, Windows
At the moment, the Lite and Indie versions of Melodrive are available for download free of charge, but the Indie version of this AI music composer still offers more options. Melodrive is one of the first AI systems that can compose emotional and unique music in real time. The AI generates music by adapting to the media environment and aims to match the mood and the style of the video. It is worth noting that Melodrive is still under development and that through time its capabilities to compose music are going to become even more refined than they already are.
6. ORB Composer
Price: Pricing plans start at $149,00
Compatibility: macOS, Windows

You can’t generate music automatically with ORB Composer, because the AI creates music based on your choices. That’s why you need to know at least the basic rules of music composition in order to be able to use the ORB Composer properly. The AI music composer comes bundled with a rich collection of chord progressions, that contains almost all chords used in popular music. This tool is aimed at artists who are interested in experimenting with the possibilities of creating music with artificial intelligence and discovering new styles of music. There are six music templates you can choose from, and you can create compositions by simply organizing different blocks of music.
Filmora AI Audio Stretcher
Wondershare Filmora - AI Audio Stretcher
• Retime any audio track to fit the duration of your video almost instantly.
• Rearrange songs without quality loss.
• Cross-platform supported - (Windows, Mac, iOS, Android)
Start Audio Stretch Start Audio Stretch Start Audio Stretch Learn More >
7. Amadeus Code
Price: Free, but the app offers in-app purchases
Compatibility: iOS
Both skilled musicians and music enthusiast can use this iOS-based app to create new melodies in just a few minutes. The AI engine that the Amadeus Code uses contains chord progressions of some of the most famous songs ever created and it let you use them to create new and innovative structures of music compositions. Moreover, you can use gestures to create new songs or recreate specific segments of songs you composed earlier. Even though Amadeus Code lets its users export audio and MIDI files to audio editing software, you still have to purchase all songs you want to keep.
8. Humtap
Price: Free
Compatibility: iOS
Musicians who have a tough time remembering their own ideas are going to love using Humtap because they can just hum a melody and the app will automatically generate an entire song using different instruments. What’s more, beats can be added with a single tap, and after the music is generated you can proceed to add the vocals as well. Humptap also has video making capabilities, so you can create videos for all songs you compose with this app. All tracks and videos generated with the Humtap AI music composer can be saved to your phone, but you can’t share your new creations to social media directly from the app.
9. Muzeek
Price: Free trial available, pricing plans start from $19 per month
Compatibility: macOS
If you are in need of licensed music for the video you’re planning on sharing to social media networks, then Muzeek is one of the best choices you can make. The AI algorithm Muzeek uses analyzes the videos for which you are generating music and it creates soundtracks that perfectly fit the rhythm of the video. All content creators, including online marketing agencies or video game developers, can rely on Muzeek AI music composer to create authentic music in high quality. Moreover, Muzeek can also analyze the video’s original audio and create subtitles from it or adjust its volume automatically.
10. Brain.fm
Price: Subscription plans start from $6,95 per month
Compatibility: Android, online
The idea that music can make our brains more productive is at the very core of what Brain.fm platform is all about. A team of scientists, musicians and engineers uses artificial intelligence to generate music designed to make your brain more productive and focused. They claim that the music created with their AI music composer achieve its effects in just ten to fifteen minutes. However, you can’t use Brain.fm to create your own music, as this platform is better suited for people who spend a lot of time at work and have a tough time maintaining their focus while performing important tasks.
Conclusion
The opportunities AI music composers offer are still not properly explored, because most of these technologies are still under development. The results AI music composers we included in this article have managed to achieve so far are impressive because each of them can produce high-quality audio files for all sorts of video content. Which AI music composer do you like to use the most? Leave a comment, and let us know.
Benjamin Arango
Benjamin Arango is a writer and a lover of all things video.
Follow @Benjamin Arango
Also read:
- Updated 2024 Approved Soundscape Seeking Outstanding Claps and Cheers
- Top Spots for Accessing Avian Audio Files
- 2024 Approved A Curated Selection Top 8 Streaming Audio Tools to Enhance Your Broadcasts
- Updated In 2024, The Audio Engineers Guide to Live Sound Management with OBS Maximizing Your Broadcast Quality
- Unlocking Your Computers Potential Leading Free Voice Recording Applications for 2024
- Updated The Cutting-Edge Melancholy Music of Tomorrows Classics for 2024
- Updated In 2024, Beat-Centric Editing Mastery The Ultimate Guide to Audio and Video Coordination in Final Cut Pro X
- In 2024, The Most Advanced Linux Audio Editors Reviewed Find Your Ideal Tool
- Updated 2024 Approved The Foremost Selection of 9 Breakthrough AI Voices Shaping the Future
- New Streamline Your Sound Four Cutting-Edge Methods to Enhance Video Audio Quality
- New 2024 Approved Mastering Sounds and Visuals Discover the Best 5 Multimedia Fusion Systems
- Seeking Spooky Audio Amplifiers
- Bypassing iPhones In-App Audio Limitation Feature
- Updated Strategies for Obtaining Gentle Music Without Disturbance for 2024
- Updated 2024 Approved Expertly Curated List of Music to Text Transcription Tools
- New In 2024, Audacity Mastery Modifying Vocal Characteristics to Suit Your Style
- Updated Seamless Song Editing on Mac Unveiling the Most Acclaimed MP3 Cutter Applications
- Updated 2024 Approved The Ultimate Guide to Disabling TikTok Sounds for Focused Viewing
- New Creating MP3 Files From Textual Content on Multiple Operating Systems
- Updated In 2024, A Comprehensive Tutorial on Audio Standardization in DaVinci Resolve
- New Getting Started with LexisAudioEditor Basic Tips and Strategies
- In 2024, Mastering Mobile Sound Recording A Curated List of Top 7 Non-Audacity Apps for Android, Updated
- Vocal Variations with Siri The Ultimate Method to Change Siris Speaking Voice
- New The Professionals Review of Adobe Audition Innovative Tools, Expert Tutorials & User-Centric Design
- Updated Sovereign Soundstitcher - The Ultimate MP3 Merger for Mac Techies for 2024
- Updated 2024 Approved Choosing a Pinnacle of Auditory Experience A Modern Approach
- Updated Exploring Six Premium Voice Alteration Apps for Instant Results for 2024
- Updated Exploring the Capabilities of Adobe Audition for Professional Audio Editing
- New Pooch Pulses & Vocalizations A Comprehensive Collection for Creatives
- Updated 2024 Approved Boost Your Call Audio Quality with These Top 6 Mobile Enhancers (Android & iPhone)
- Updated Simplified Soundscape A Modern Approach to Adding Sound Effects in Videos for 2024
- Top 10 Free Browser-Based DAWs for Creatives
- 2024 Approved Synchronizing Audio with Visual Media The QuickTime Method
- Updated Mastering the Art of Implementing Audio Decline Techniques for 2024
- New In 2024, Creating an Audio-Visual Harmony Integrating Music Into Videos
- New 2024 Approved Enhancing Audio Quality Practical Methods to Eradicate Low-Frequency Rumble
- Updated In 2024, The Premier List of Windows-Compatible Automatic Speech Recognition Systems
- Updated Exploring the Best Uncopyrighted Soundscape for Compelling Video Sequences for 2024
- Updated 2024 Approved Cutting Through the Clutter Innovative AI Strategies for Signal Purification
- In 2024, Intuitive Speech Alteration Capabilities Overview, Rules, & Substitutes
- New 2024 Approved Melodic Accompaniment to Frame the 24 Birthday Spectacle
- Updated In 2024, The Ultimate Guide to Premium Audio Editors for Creative Distortion
- New In 2024, Best 10 Speech to Text Software/Converters for Windows
- New Streamlined Processes for Converting Podcasts Into MP3 Files
- In 2024, 4 Quick Ways to Transfer Contacts from Apple iPhone 13 Pro to iPhone With/Without iTunes | Dr.fone
- New Editing Videos on Mac? Try VN Video Editor or These Alternatives
- How do I reset my Nokia C32 Phone without technical knowledge? | Dr.fone
- New 2024 Approved Unleash Your Creativity 10 Top-Rated Android Video Editors
- In 2024, How to Change Honor X7b Location on Skout | Dr.fone
- Which Pokémon can Evolve with a Moon Stone For Apple iPhone 13 Pro Max? | Dr.fone
- How to Hide/Fake Snapchat Location on Your Apple iPhone 14 Pro Max | Dr.fone
- How does the stardust trade cost In pokemon go On Realme C33 2023? | Dr.fone
- Guide To Scaling and Setting Videos in Filmora | Tutorial for 2024
- Updated 2024 Approved VHS on the Go Best Mobile Apps for Retro Video Playback
- How to retrieve erased call logs from Honor Magic V2?
- In 2024, AddROM Bypass An Android Tool to Unlock FRP Lock Screen For your Xiaomi Redmi Note 12 Pro 4G
- A Guide HTC U23 Pro Wireless and Wired Screen Mirroring | Dr.fone
- Android Safe Mode - How to Turn off Safe Mode on Xiaomi 14 Pro? | Dr.fone
- In 2024, How Can We Unlock Our Xiaomi Redmi K70E Phone Screen?
- How to sign a .xlsx file document online
- In 2024, Complete Tutorial to Use VPNa to Fake GPS Location On ZTE Nubia Z60 Ultra | Dr.fone
- 3 Ways for Android Pokemon Go Spoofing On Realme 11X 5G | Dr.fone
- 8 Ultimate Fixes for Google Play Your Oppo K11 5G Isnt Compatible | Dr.fone
- How to Spy on Text Messages from Computer & Samsung Galaxy XCover 6 Pro Tactical Edition | Dr.fone
- How to Come up With the Best Pokemon Team On Vivo Y78+ (T1) Edition? | Dr.fone
- 4 Most-Known Ways to Find Someone on Tinder For Tecno Spark Go (2023) by Name | Dr.fone
- Best 10 Mock Location Apps Worth Trying On OnePlus Ace 3 | Dr.fone
- How To Reset the Security Questions of Your Apple ID From Your Apple iPhone 15 Plus
- In 2024, How to Use Google Assistant on Your Lock Screen Of Xiaomi Redmi A2+ Phone
- Top 10 Best Spy Watches For your Samsung Galaxy F15 5G | Dr.fone
- Undelete lost messages from Honor Magic5 Ultimate
- In 2024, How to Transfer/Sync Notes from Apple iPhone SE (2022) to iPad | Dr.fone
- Undelete lost music from Motorola Edge 40 Neo
- Top 10 Asus ROG Phone 7 Android SIM Unlock APK
- How To Repair iPhone 7 iOS? | Dr.fone
- In 2024, WMM Not Your Thing? Try These 13 Video Editing Solutions
- Updated In 2024, Top 10 iPad Slideshow Apps to Create a Slideshow
- 3 Methods to Mirror Oppo A1x 5G to Roku | Dr.fone
- Top 15 Augmented Reality Games Like Pokémon GO To Play On Oppo A79 5G | Dr.fone
- In 2024, How Can I Use a Fake GPS Without Mock Location On Vivo Y77t? | Dr.fone
- Title: New 2024 Approved The Sound Barrier Breakthrough Streamlining Audio Processing for Digital Users
- Author: Kate
- Created at : 2024-05-05 08:09:15
- Updated at : 2024-05-06 08:09:15
- Link: https://audio-editing.techidaily.com/new-2024-approved-the-sound-barrier-breakthrough-streamlining-audio-processing-for-digital-users/
- License: This work is licensed under CC BY-NC-SA 4.0.
