
:max_bytes(150000):strip_icc():format(webp)/GettyImages-1088144728-3a9f1bd54e994bfaa4cabea82414202e.jpg)
New 2024 Approved The AI Music Forerunners Crafting Harmonies for a New Era
The AI Music Forerunners: Crafting Harmonies for a New Era
Top Best 10 AI Music Composers in 2024

Benjamin Arango
Mar 27, 2024• Proven solutions
Robots can’t be creative, right? A number of startups that focus on the development of artificial intelligence that is capable of composing music have proved this statement wrong. AI music composers generate original, copyright-free music you can use in your latest YouTube video or social media video ad. You don’t even have to be a sound designer or a musician to produce soundtracks for your videos with AI Music Composers, because you can upload the music that has already been recorded and create variations of it. So, let’s take a look at what AI music composers have to offer in 2024.
| 1 - Amper Music | 2 - AIVA |
|---|---|
| 3 - Jukedeck | 4 - Ecrett Music |
| 5 - Melodrive | 6 - ORB Composer |
| 7 - Amadeus Code | 8 - Humtap |
| 9 - Muzeek | 10 - Brain.fm |
Ten Best AI Music Composers You Should Know About
The AI technologies that can compose music are still relatively novel, and as time passes, they can only develop and grow further. Consequently, each of the AI music composers we featured in this article offers a different range of possibilities. Here are the ten best AI music composers you shouldn’t miss out on in 2024.

Filmora AI Music Editor
Edit Audio with AI Music Editor
Experience the power of Filmora’s AI tools and make your audio or music stand out like never before! Audio Denoise, Audio Ducking, Audio Synchronization, Audio Stretch, etc…
Try It Free Try It Free Try It Free Learn More >
1. Amper Music
Price: Available upon request
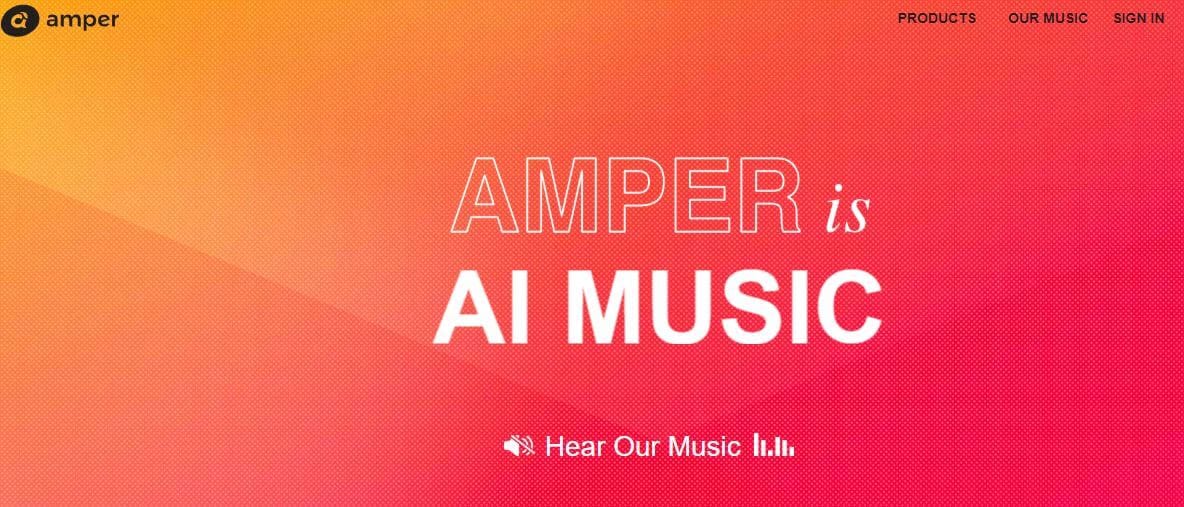
Industry professionals know just how frustrating the music licensing process can be. Amper Music is a cloud-based platform designed to simplify the process of creating soundtracks for movies and video games, as it produces AI generated algorithms that help users create music in a variety of music genres. You must first create an account on this platform, in order to be able to use the free version of Amper Music that provides only a limited amount of features. Upgrading to the pro version of Amper Music will enable you to enjoy the full potential of this rapidly growing AI Music Composer.
2. AIVA
Price: Free version available, subscription plans start from €14 p/month
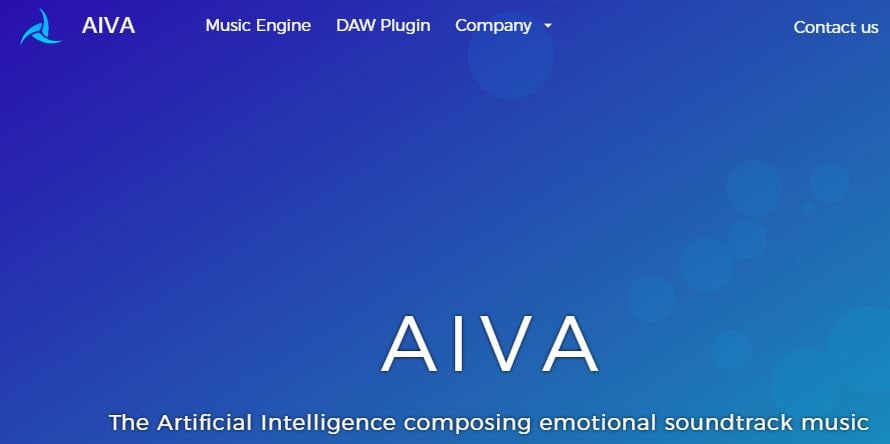
Since 2016, when AIVA Technologies was founded, its team has worked on developing an AI script that can compose emotional soundtracks for ads, video games, or movies. Soon after, the AI published its first oeuvre titled ‘Opus 1 for Piano Solo and in the subsequent years, AIVA released an album and composed music for a video game. Besides enabling its users to create music from scratch, AIVA can also be used to produce variations of existing songs. The music engine that powers this AI music composer makes the production of corporate or social media videos much easier, as it eliminates the need to go through the music licensing process.
3. Jukedeck
Price: Free version available, Pricing plans start from $0.99 per download

The AI music composer developed by the Jukedeck startup resembles the Amper’s music composer because they both rely on neural networks to analyze music data, that is then used by the AI to learn how to compose original music. Each track that is available through this AI music composer can be edited, so you can change its length or its tempo. You can create music with Jukedeck for free if you decide to give all the rights to the AI composer, while both individuals and small businesses can purchase the license to use the song created with Jukedeck for just $0.99.
Note: Jukedeck has been acquired by TikTok, and we are waiting for a new Jukedeck.
![]()
A cross-platform for making videos anywhere for all creators

Why your video editing isn’t good enough? How about some creative inspo?
- 100 Million+ Users
- 150+ Countries and Regions
- 4 Million+ Social Media Followers
- 5 Million+ Stock Media for Use
* Secure Download

4. Ecrett Music
Price: Subscription plans start at $5
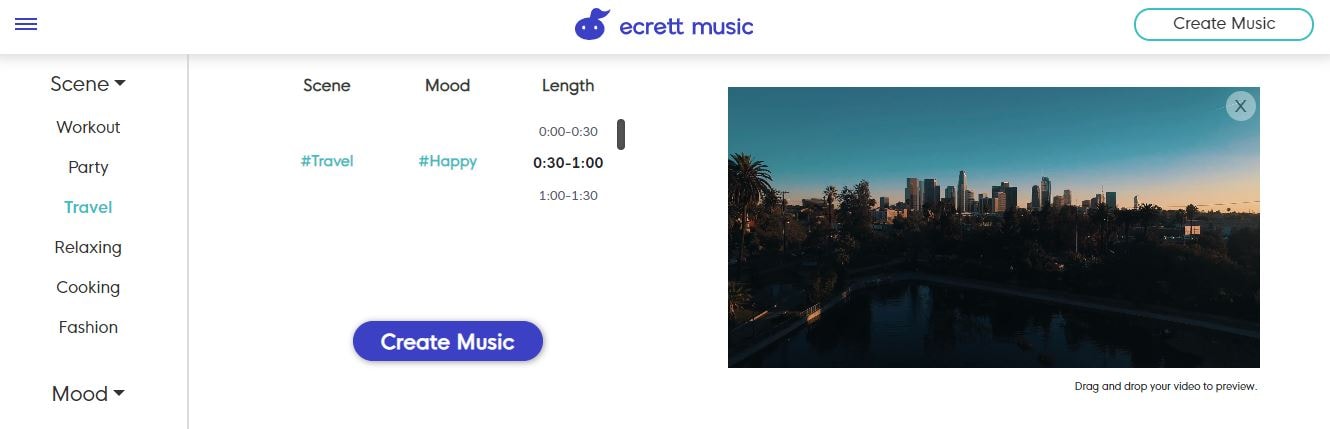
This online AI music composer makes creating stunning soundtracks for videos look easy. You just have to upload a video for which you want to generate music and select the type of scene and the mood of that scene. Party, Travel or Fashion are among the types of scenes you can choose from, while moods range from happy to serious. When done, simply click on the Create Music button, and the platform will automatically generate the soundtrack for your video. In case you are producing videos on a constant basis, you should consider purchasing one of the available subscription plans.
5. Melodrive
Price: Free
Compatibility: iOS, Windows
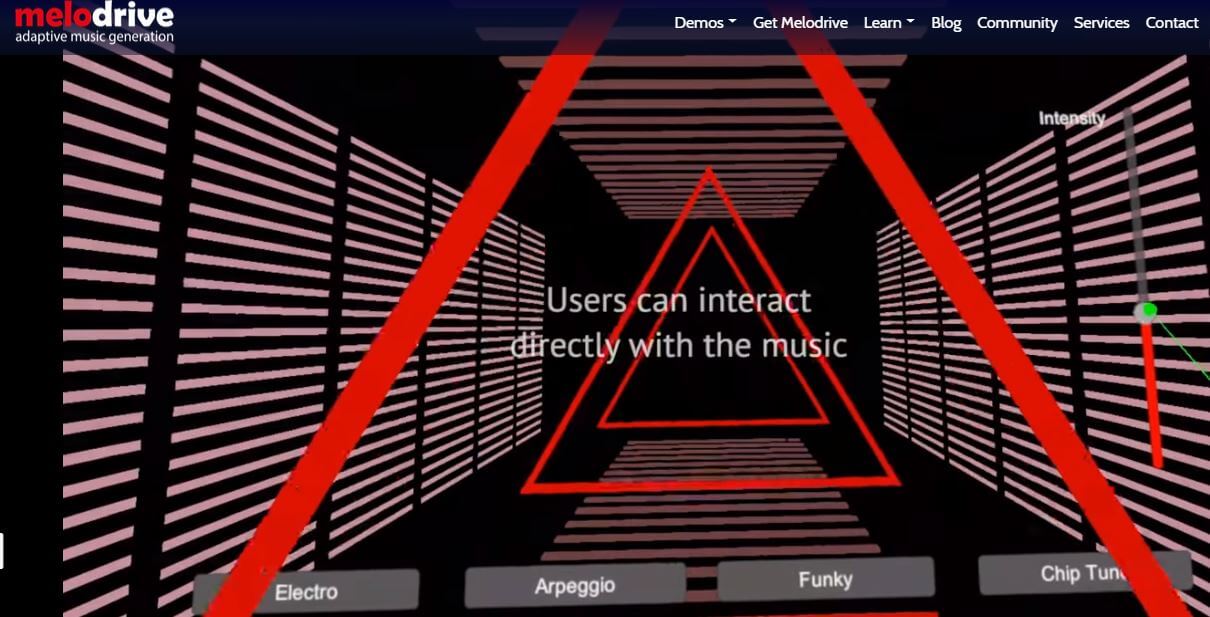
At the moment, the Lite and Indie versions of Melodrive are available for download free of charge, but the Indie version of this AI music composer still offers more options. Melodrive is one of the first AI systems that can compose emotional and unique music in real time. The AI generates music by adapting to the media environment and aims to match the mood and the style of the video. It is worth noting that Melodrive is still under development and that through time its capabilities to compose music are going to become even more refined than they already are.
6. ORB Composer
Price: Pricing plans start at $149,00
Compatibility: macOS, Windows

You can’t generate music automatically with ORB Composer, because the AI creates music based on your choices. That’s why you need to know at least the basic rules of music composition in order to be able to use the ORB Composer properly. The AI music composer comes bundled with a rich collection of chord progressions, that contains almost all chords used in popular music. This tool is aimed at artists who are interested in experimenting with the possibilities of creating music with artificial intelligence and discovering new styles of music. There are six music templates you can choose from, and you can create compositions by simply organizing different blocks of music.

Filmora AI Audio Stretcher
Wondershare Filmora - AI Audio Stretcher
• Retime any audio track to fit the duration of your video almost instantly.
• Rearrange songs without quality loss.
• Cross-platform supported - (Windows, Mac, iOS, Android)
Start Audio Stretch Start Audio Stretch Start Audio Stretch Learn More >
7. Amadeus Code
Price: Free, but the app offers in-app purchases
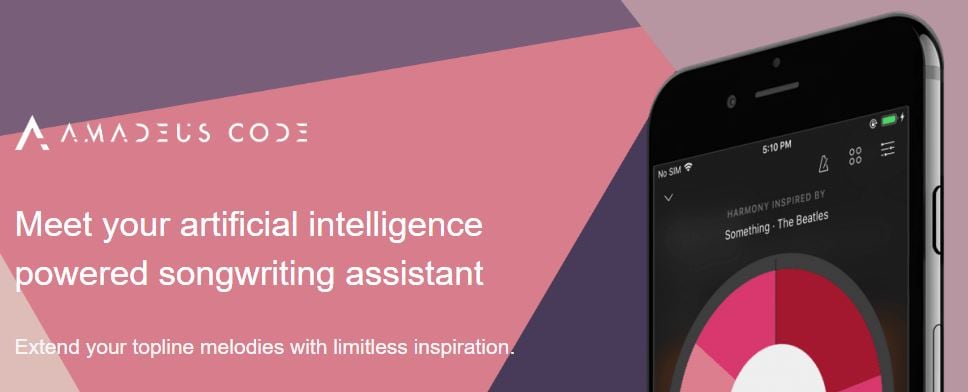
Compatibility: iOS
Both skilled musicians and music enthusiast can use this iOS-based app to create new melodies in just a few minutes. The AI engine that the Amadeus Code uses contains chord progressions of some of the most famous songs ever created and it let you use them to create new and innovative structures of music compositions. Moreover, you can use gestures to create new songs or recreate specific segments of songs you composed earlier. Even though Amadeus Code lets its users export audio and MIDI files to audio editing software, you still have to purchase all songs you want to keep.
8. Humtap
Price: Free
Compatibility: iOS
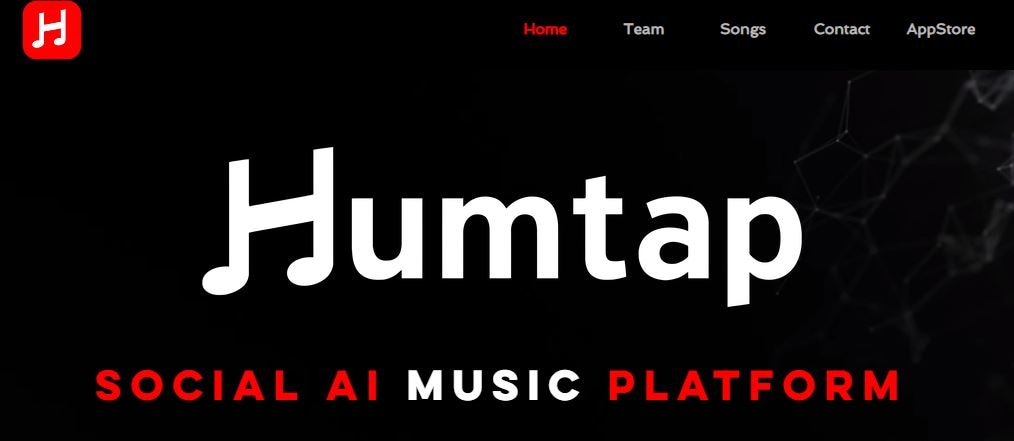
Musicians who have a tough time remembering their own ideas are going to love using Humtap because they can just hum a melody and the app will automatically generate an entire song using different instruments. What’s more, beats can be added with a single tap, and after the music is generated you can proceed to add the vocals as well. Humptap also has video making capabilities, so you can create videos for all songs you compose with this app. All tracks and videos generated with the Humtap AI music composer can be saved to your phone, but you can’t share your new creations to social media directly from the app.
9. Muzeek
Price: Free trial available, pricing plans start from $19 per month
Compatibility: macOS
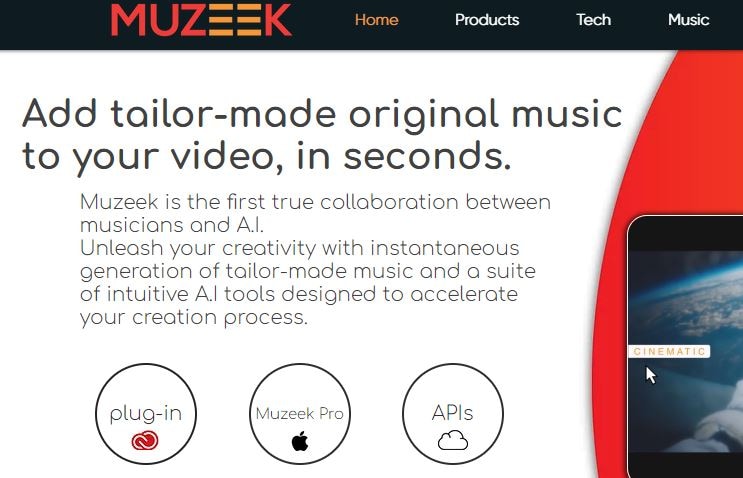
If you are in need of licensed music for the video you’re planning on sharing to social media networks, then Muzeek is one of the best choices you can make. The AI algorithm Muzeek uses analyzes the videos for which you are generating music and it creates soundtracks that perfectly fit the rhythm of the video. All content creators, including online marketing agencies or video game developers, can rely on Muzeek AI music composer to create authentic music in high quality. Moreover, Muzeek can also analyze the video’s original audio and create subtitles from it or adjust its volume automatically.
10. Brain.fm
Price: Subscription plans start from $6,95 per month
Compatibility: Android, online

The idea that music can make our brains more productive is at the very core of what Brain.fm platform is all about. A team of scientists, musicians and engineers uses artificial intelligence to generate music designed to make your brain more productive and focused. They claim that the music created with their AI music composer achieve its effects in just ten to fifteen minutes. However, you can’t use Brain.fm to create your own music, as this platform is better suited for people who spend a lot of time at work and have a tough time maintaining their focus while performing important tasks.
Conclusion
The opportunities AI music composers offer are still not properly explored, because most of these technologies are still under development. The results AI music composers we included in this article have managed to achieve so far are impressive because each of them can produce high-quality audio files for all sorts of video content. Which AI music composer do you like to use the most? Leave a comment, and let us know.
Benjamin Arango
Benjamin Arango is a writer and a lover of all things video.
Follow @Benjamin Arango
Benjamin Arango
Mar 27, 2024• Proven solutions
Robots can’t be creative, right? A number of startups that focus on the development of artificial intelligence that is capable of composing music have proved this statement wrong. AI music composers generate original, copyright-free music you can use in your latest YouTube video or social media video ad. You don’t even have to be a sound designer or a musician to produce soundtracks for your videos with AI Music Composers, because you can upload the music that has already been recorded and create variations of it. So, let’s take a look at what AI music composers have to offer in 2024.
| 1 - Amper Music | 2 - AIVA |
|---|---|
| 3 - Jukedeck | 4 - Ecrett Music |
| 5 - Melodrive | 6 - ORB Composer |
| 7 - Amadeus Code | 8 - Humtap |
| 9 - Muzeek | 10 - Brain.fm |
Ten Best AI Music Composers You Should Know About
The AI technologies that can compose music are still relatively novel, and as time passes, they can only develop and grow further. Consequently, each of the AI music composers we featured in this article offers a different range of possibilities. Here are the ten best AI music composers you shouldn’t miss out on in 2024.
Filmora AI Music Editor
Edit Audio with AI Music Editor
Experience the power of Filmora’s AI tools and make your audio or music stand out like never before! Audio Denoise, Audio Ducking, Audio Synchronization, Audio Stretch, etc…
Try It Free Try It Free Try It Free Learn More >
1. Amper Music
Price: Available upon request
Industry professionals know just how frustrating the music licensing process can be. Amper Music is a cloud-based platform designed to simplify the process of creating soundtracks for movies and video games, as it produces AI generated algorithms that help users create music in a variety of music genres. You must first create an account on this platform, in order to be able to use the free version of Amper Music that provides only a limited amount of features. Upgrading to the pro version of Amper Music will enable you to enjoy the full potential of this rapidly growing AI Music Composer.
2. AIVA
Price: Free version available, subscription plans start from €14 p/month
Since 2016, when AIVA Technologies was founded, its team has worked on developing an AI script that can compose emotional soundtracks for ads, video games, or movies. Soon after, the AI published its first oeuvre titled ‘Opus 1 for Piano Solo and in the subsequent years, AIVA released an album and composed music for a video game. Besides enabling its users to create music from scratch, AIVA can also be used to produce variations of existing songs. The music engine that powers this AI music composer makes the production of corporate or social media videos much easier, as it eliminates the need to go through the music licensing process.
3. Jukedeck
Price: Free version available, Pricing plans start from $0.99 per download
The AI music composer developed by the Jukedeck startup resembles the Amper’s music composer because they both rely on neural networks to analyze music data, that is then used by the AI to learn how to compose original music. Each track that is available through this AI music composer can be edited, so you can change its length or its tempo. You can create music with Jukedeck for free if you decide to give all the rights to the AI composer, while both individuals and small businesses can purchase the license to use the song created with Jukedeck for just $0.99.
Note: Jukedeck has been acquired by TikTok, and we are waiting for a new Jukedeck.
![]()
A cross-platform for making videos anywhere for all creators
Why your video editing isn’t good enough? How about some creative inspo?
- 100 Million+ Users
- 150+ Countries and Regions
- 4 Million+ Social Media Followers
- 5 Million+ Stock Media for Use
* Secure Download
4. Ecrett Music
Price: Subscription plans start at $5

This online AI music composer makes creating stunning soundtracks for videos look easy. You just have to upload a video for which you want to generate music and select the type of scene and the mood of that scene. Party, Travel or Fashion are among the types of scenes you can choose from, while moods range from happy to serious. When done, simply click on the Create Music button, and the platform will automatically generate the soundtrack for your video. In case you are producing videos on a constant basis, you should consider purchasing one of the available subscription plans.
5. Melodrive
Price: Free
Compatibility: iOS, Windows
At the moment, the Lite and Indie versions of Melodrive are available for download free of charge, but the Indie version of this AI music composer still offers more options. Melodrive is one of the first AI systems that can compose emotional and unique music in real time. The AI generates music by adapting to the media environment and aims to match the mood and the style of the video. It is worth noting that Melodrive is still under development and that through time its capabilities to compose music are going to become even more refined than they already are.
6. ORB Composer
Price: Pricing plans start at $149,00
Compatibility: macOS, Windows

You can’t generate music automatically with ORB Composer, because the AI creates music based on your choices. That’s why you need to know at least the basic rules of music composition in order to be able to use the ORB Composer properly. The AI music composer comes bundled with a rich collection of chord progressions, that contains almost all chords used in popular music. This tool is aimed at artists who are interested in experimenting with the possibilities of creating music with artificial intelligence and discovering new styles of music. There are six music templates you can choose from, and you can create compositions by simply organizing different blocks of music.
Filmora AI Audio Stretcher
Wondershare Filmora - AI Audio Stretcher
• Retime any audio track to fit the duration of your video almost instantly.
• Rearrange songs without quality loss.
• Cross-platform supported - (Windows, Mac, iOS, Android)
Start Audio Stretch Start Audio Stretch Start Audio Stretch Learn More >
7. Amadeus Code
Price: Free, but the app offers in-app purchases
Compatibility: iOS
Both skilled musicians and music enthusiast can use this iOS-based app to create new melodies in just a few minutes. The AI engine that the Amadeus Code uses contains chord progressions of some of the most famous songs ever created and it let you use them to create new and innovative structures of music compositions. Moreover, you can use gestures to create new songs or recreate specific segments of songs you composed earlier. Even though Amadeus Code lets its users export audio and MIDI files to audio editing software, you still have to purchase all songs you want to keep.
8. Humtap
Price: Free
Compatibility: iOS
Musicians who have a tough time remembering their own ideas are going to love using Humtap because they can just hum a melody and the app will automatically generate an entire song using different instruments. What’s more, beats can be added with a single tap, and after the music is generated you can proceed to add the vocals as well. Humptap also has video making capabilities, so you can create videos for all songs you compose with this app. All tracks and videos generated with the Humtap AI music composer can be saved to your phone, but you can’t share your new creations to social media directly from the app.
9. Muzeek
Price: Free trial available, pricing plans start from $19 per month
Compatibility: macOS
If you are in need of licensed music for the video you’re planning on sharing to social media networks, then Muzeek is one of the best choices you can make. The AI algorithm Muzeek uses analyzes the videos for which you are generating music and it creates soundtracks that perfectly fit the rhythm of the video. All content creators, including online marketing agencies or video game developers, can rely on Muzeek AI music composer to create authentic music in high quality. Moreover, Muzeek can also analyze the video’s original audio and create subtitles from it or adjust its volume automatically.
10. Brain.fm
Price: Subscription plans start from $6,95 per month
Compatibility: Android, online
The idea that music can make our brains more productive is at the very core of what Brain.fm platform is all about. A team of scientists, musicians and engineers uses artificial intelligence to generate music designed to make your brain more productive and focused. They claim that the music created with their AI music composer achieve its effects in just ten to fifteen minutes. However, you can’t use Brain.fm to create your own music, as this platform is better suited for people who spend a lot of time at work and have a tough time maintaining their focus while performing important tasks.
Conclusion
The opportunities AI music composers offer are still not properly explored, because most of these technologies are still under development. The results AI music composers we included in this article have managed to achieve so far are impressive because each of them can produce high-quality audio files for all sorts of video content. Which AI music composer do you like to use the most? Leave a comment, and let us know.
Benjamin Arango
Benjamin Arango is a writer and a lover of all things video.
Follow @Benjamin Arango
Silence the Chaos: Innovative Noise Management with Premiere Pro’s Audio Effects
It is impossible to eliminate background noises from the environment we shoot in. However, you can always remove them from recordings using different tools. These tools analyze the audio waves and detect unwanted noises for removal. They use spectral separation, filtering, and other adjustments to fine-tune audio. Some tools like noise reduction in Premiere Pro offer audio enhancements afterward.
In this article, the center of the discussion is background noise remove Premiere Pro. It is a professional video editor offering multiple functionalities with AI support. Besides Premiere Pro background noise reduction, users will find some other tools. Most of these tools use web and internet support to carry out the process. In the end, users will discover a desktop alternative to Premiere Pro for noise removal.
AI Noise Reducer A cross-platform for facilitating your video editing process by offering valuable benefits!
Free Download Free Download Learn More
Part 1: What Are the Potential Benefits of Using Noise Reduction Tools for Video Editing?
There are a handful of advantages of using noise reduction tools for video editing. These tools, including noise reduction Adobe Premiere, elevate overall video. The removal of unnecessary voices and noise brings clarity to the content. Viewers can focus on what is important instead of being irritated by noise. There are many potential benefits of noise removal tools discussed as follows:
1. Refined Audio Quality
Once you listen to a video after recording, you realize the number of unwanted noises. Such noises can irritate viewers and may decrease your content’s worth. Using noise reduction tools will assist you in dealing with such issues. You can remove unwanted audio elements like hisses, hums, or background voices. Reducing insignificant sounds will ultimately elevate the original sound quality.
2. Builds Production Value
One of the indications of high-quality content or production is its ability to manage audio. Audio management like background, wind, and hum removal counts in productions. Hence, employing such tools contributes to higher production value. They help in clarifying audio, which helps with increased audience engagement.
3. Maintains Audience Engagement
In today’s fast-paced lifestyle, hooking an audience to the screen is a fundamental task. One of the ways to achieve it is through high-quality sound. A professional video creator removes the unwanted yet distracting noises from videos. Even in outdoor shoots, using such tools can enhance the maximum sound damage. This extraction of background sounds maintains the audience’s attention and engages them.
4. Consistency Throughout the Scenes
In videos at a larger scale, combining multiple clips can cause noise havoc. Using these noise reduction tools for the overall film or separate clips brings consistency. This way, they retain the audio quality and engagement through the videos.
5. Creativity and Accessibility
Using background noise removal tools can increase the chance of creativity. A high-quality video sound without distracting noises is easy to edit. In addition, users can apply different audio drive effects to elevate content. Moreover, enhanced audio quality enhances the content reach and comprehension. It helps those who rely on something other than subtitles to understand dialogues.
Part 2: Reducing or Removing Background Noise in Premiere Pro: A Guide
Who isn’t familiar with noise reduction Adobe Premiere Pro, a professional editor? It serves as both video and audio editing software with AI abilities. Creators can bring precision to their content using its editing and trimming tools. The software assists in upgrading video visuals via transitions, effects, and titles. With its custom features, you can infuse your videos with your unique style.
Amongst its multifunctionalities, one is the Premiere Pro audio noise reduction. It is about making a few right clicks in Adobe to achieve audio clarity. Users can boost the audio by reducing unwanted and distractive sounds. It helps sharpen elements like dialogues, music, sound effects, and ambiance. Moreover, you can add depth to audio using the Reverb option and control everything.
Different Ways To Remove Background Noise in Premiere Pro
Adobe Premiere Pro is a versatile tool to denoise audio in multiple scenarios. This section emphasizes general noise reduction and some specific ones. Users can follow the step-by-step guides below to denoise audio Premiere Pro:
1. Reduce Noise
Employing noise reduction in Premiere Pro will eliminate the overall background noises. This will elevate the overall audio quality of your video. Here are the steps to perform noise reduction in Adobe Premiere Pro:
Step 1: After importing your unedited video in Adobe, navigate towards the top toolbar. From the many options there, locate and select the “Audio” option.

Step 2: An “Essential Sound” panel will appear on the right side of the preview section. From the four major audio elements appearing on this panel, select “Dialogue.”

Step 3: Further, go to the “Edit” tab, and under the “Repair” section, enable the box for “Reduce Noise.” Then, change the position of this slider to the right for maximized results. It is advised that you should not move the slider towards the right, as it can distort your own voice. Keep the slider between somewhere in the middle.

2. Reduce Rumble
When shooting outdoors, it is not uncommon to face high wind noise. This sound can be both distracting and annoying. So, if you want to free your audio of wind noise, follow the given steps:
Step 1: Upon importing the media with wind noise, move towards the upper tool panel. Select the clip in the timeline, which will feature a settings panel at the right.

Step 2: Navigate towards the right-side panel using your cursor and select the “Dialogue” option.

Step 3: Then select the “Edit” tab and locate the “Repair” segment under it. In there, enable the “Reduce Rumble” option. Then, adjust the position of its slider according to your preference.

3. Reduce Reverb
Recording in some places can cause an echo in your voice, but Premiere Pro can manage it. It has the Reverb option to manage the depth of your voice. Follow the steps given below to remove noise Premiere:
Instruction: Under the “Edit > Repair” tab, trace and activate the “Reduce Reverb” option. Further, experiment with the position of the reverb slider to adjust it.

4. Enhance Vocals
Employing any of the above actions may impact the vocal quality in videos. However, noise Premiere Pro gives you the option to adjust that as well. The next section discusses the step-by-step guide to enhance vocals:
Step 1: After setting the above options, scroll down into the “Edit” tab in the right panel. Locate and activate the “Clarity” option and adjust its slider.

Step 2: Then move towards the “Preset” section and click on the Downward Arrow icon. From the dropdown menu, choose the “Vocal Presence” option. You can also choose the “Podcast” voice to bring back vocal clarity.

Step 3: Below the “Preset” section, locate and enable the “Enhance Speech” option. Further, you can select between “High Tone” and “Low Tone” options.

5. Manual Audio Effects
An alternative method to remove audio noise in Premiere Pro is to use audio effects. These effects will improve the clarity of content to make it engaging. If you choose to use this method, here are the steps for you to follow:
Step 1: Select your media in the timeline, and from the left side of the window, locate and select “Effects.”

Step 2: In the search bar, add the name of the specific effect you are looking for. You can look for denoise, reverb, and other options. For instance, you have searched and selected the “Denoise” effect.

Step 3: Navigate towards the “Effects Control Center” and go to the “Denoise” section. Then, select the “Edit” button in this section.

Step 4: From the new window, expand the “Preset” option and choose from high or low settings. You can also play with the slider’s position to adjust it. In a similar way, you can add as many audio effects as possible and adjust their settings.

Part 3: Other Noise Reduction Tools You Can Look Out For (Online)
Although we discussed noise reduction in Premiere Pro, it can be confusing for some. It is understandable as it was designed to assist professionals. Locating and adjusting effects in its extensive editing interface can be difficult. This section mentions some online alternatives for removing noise in Premiere Pro:
1. Media.io
Media.io is a versatile tool and a substitute to reduce audio noise Premiere Pro. It has a clear-cut user interface that only requires you to upload the video. The tool uses AI assistance to remove noise from your music videos, vlogs, and more. It can remove 6 types of background noises and has a built-in audio enhancer. It covers denoise, speech enhancement, wind, reverb, hiss, and click noise.
Moreover, Media.io supports diverse audio formats, including MP3, MOV, and more. It is compatible across a wide range of devices and ensures synchronized working. Users can access it anywhere, on any device, and denoise audio with security. The AI-backed technology performs noise reduction from videos rapidly.

2. Kapwing
Does noise reduction in Premiere Pro feel like too much of a learning curve? We have brought another alternative with a minimal yet modern editing interface. The tool has AI-backed algorithms to remove background noise with precision. The AI detects and eliminates unnecessary sounds and enhances vocals. Its noise-reducer AI is free to use and only requires you to log in.
After enhancing your video’s audio, you can edit it afterward with Kapwing’s built-in resources. The fact that it operates online helps you to access it from anywhere. With its synchronization option, you can experience a streamlined workflow.

3. VEED.io
Noise reduction in Premiere Pro was manual, but this AI noise remover speeds up the task. If you must clean up noise from a voiceover or podcast, this is the tool. In addition to removing noise, you can embed music within this tool. The AI can detect wind, rain, traffic, clock ticking, and humming noises.
Moreover, you can enhance the audio quality of your Zoom and other recording by removing noise from such recorders. The tool supports all popular media formats like MP4, MOV, and more. Editing videos afterward, like adding effects or trimming in VEED.io, is an option.

4. Podcastle AI
This is another easy-to-access alternative to removing noise Adobe Premiere. It can auto-eliminate those background conversations and static noises. With this tool’s existence, record your videos without worrying about noise. You can also record voiceover within this tool and remove background noise.
In addition, the tool has built-in audio and video editing features and enhancements. Upon removing noise, you can use its effects and animations to uplift the video.

Bonus Part: Controlling the Vocals with A Fine-Tuned Video Editor: Wondershare Filmora 13
With the increasing trend of vlogs and blogs, creator’s attention shifted to such tools. Removing background noise can sometimes result in decreased vocal quality. For audio clarity through denoising and enhancing, you can use Wondershare Filmora . This is an AI-driven desktop alternative to noise reduction in Premiere Pro. Filmora is a reliable tool for enhancing both your video and audio content.
Free Download For Win 7 or later(64-bit)
Free Download For macOS 10.14 or later
It has AI-backed algorithms that keep updating according to modern needs. Recently, Filmora has launched its V13 version for efficient editing. The software can assist through text-based video editing and copilot editing. In addition to these, it introduced the AI Vocal Remover tool as an audio editing aid. Users can employ this feature to separate their vocals and background noises.
One of the applications of this tool is to assist in removing vocals from songs. Removing vocals doesn’t damage the quality of the audio. This helps you with inserting vocals as voiceovers for tutorial or explainer videos.
Steps to Employ AI Vocal Remover Tool
Since maintaining vocals is an important part of video content, Filmora offers it. Its AI vocal remover is amongst the leading tools in the market. You do not need to waste hours on understanding it since we have its user guide here:
Step 1: Initiate Filmora and Import Media
Upon downloading Filmora’s latest version from its website, launch it. Once you access its main display, click the “New Project” button. Upon entering its editing interface, click “Import” to import files. Then, use the drag-and-drop technique to bring them to the timeline.

Step 2: Access the Vocal Remover Tool
Now, select the video you added to the timeline and right-click on it. From the options panel appears, locate and select the “AI Vocal Remover” option. This will feature the AI Vocal Remover pop-up on the screen and show progress.

Step 3: Export the Vocals
Once the process is completed, you’ll see two different audios in the timeline. One is the background audio, and the other is your video’s vocals. You can export the vocals by clicking the “Export” button in Filmora. Afterward, you can use them as a voiceover for your videos, vlog, or blogs.

Conclusion
In conclusion, you are now aware of noise reduction in Premiere Pro and its features. The article shed light on different methods of removing background noise in it. It familiarized readers with some online alternatives to Adobe Premiere Pro. As a final point, we discussed a professional and multifunctional desktop tool.
Wondershare Filmora has all the options to denoise audio or save a video’s vocals. Its AI-backed features boost the productivity of editors and creators. The more you use it, the more you discover about this amazing editor. For more information, you can visit its official site and download it to explore.
Free Download For Win 7 or later(64-bit)
Free Download For macOS 10.14 or later
Free Download Free Download Learn More
Part 1: What Are the Potential Benefits of Using Noise Reduction Tools for Video Editing?
There are a handful of advantages of using noise reduction tools for video editing. These tools, including noise reduction Adobe Premiere, elevate overall video. The removal of unnecessary voices and noise brings clarity to the content. Viewers can focus on what is important instead of being irritated by noise. There are many potential benefits of noise removal tools discussed as follows:
1. Refined Audio Quality
Once you listen to a video after recording, you realize the number of unwanted noises. Such noises can irritate viewers and may decrease your content’s worth. Using noise reduction tools will assist you in dealing with such issues. You can remove unwanted audio elements like hisses, hums, or background voices. Reducing insignificant sounds will ultimately elevate the original sound quality.
2. Builds Production Value
One of the indications of high-quality content or production is its ability to manage audio. Audio management like background, wind, and hum removal counts in productions. Hence, employing such tools contributes to higher production value. They help in clarifying audio, which helps with increased audience engagement.
3. Maintains Audience Engagement
In today’s fast-paced lifestyle, hooking an audience to the screen is a fundamental task. One of the ways to achieve it is through high-quality sound. A professional video creator removes the unwanted yet distracting noises from videos. Even in outdoor shoots, using such tools can enhance the maximum sound damage. This extraction of background sounds maintains the audience’s attention and engages them.
4. Consistency Throughout the Scenes
In videos at a larger scale, combining multiple clips can cause noise havoc. Using these noise reduction tools for the overall film or separate clips brings consistency. This way, they retain the audio quality and engagement through the videos.
5. Creativity and Accessibility
Using background noise removal tools can increase the chance of creativity. A high-quality video sound without distracting noises is easy to edit. In addition, users can apply different audio drive effects to elevate content. Moreover, enhanced audio quality enhances the content reach and comprehension. It helps those who rely on something other than subtitles to understand dialogues.
Part 2: Reducing or Removing Background Noise in Premiere Pro: A Guide
Who isn’t familiar with noise reduction Adobe Premiere Pro, a professional editor? It serves as both video and audio editing software with AI abilities. Creators can bring precision to their content using its editing and trimming tools. The software assists in upgrading video visuals via transitions, effects, and titles. With its custom features, you can infuse your videos with your unique style.
Amongst its multifunctionalities, one is the Premiere Pro audio noise reduction. It is about making a few right clicks in Adobe to achieve audio clarity. Users can boost the audio by reducing unwanted and distractive sounds. It helps sharpen elements like dialogues, music, sound effects, and ambiance. Moreover, you can add depth to audio using the Reverb option and control everything.
Different Ways To Remove Background Noise in Premiere Pro
Adobe Premiere Pro is a versatile tool to denoise audio in multiple scenarios. This section emphasizes general noise reduction and some specific ones. Users can follow the step-by-step guides below to denoise audio Premiere Pro:
1. Reduce Noise
Employing noise reduction in Premiere Pro will eliminate the overall background noises. This will elevate the overall audio quality of your video. Here are the steps to perform noise reduction in Adobe Premiere Pro:
Step 1: After importing your unedited video in Adobe, navigate towards the top toolbar. From the many options there, locate and select the “Audio” option.
Step 2: An “Essential Sound” panel will appear on the right side of the preview section. From the four major audio elements appearing on this panel, select “Dialogue.”
Step 3: Further, go to the “Edit” tab, and under the “Repair” section, enable the box for “Reduce Noise.” Then, change the position of this slider to the right for maximized results. It is advised that you should not move the slider towards the right, as it can distort your own voice. Keep the slider between somewhere in the middle.
2. Reduce Rumble
When shooting outdoors, it is not uncommon to face high wind noise. This sound can be both distracting and annoying. So, if you want to free your audio of wind noise, follow the given steps:
Step 1: Upon importing the media with wind noise, move towards the upper tool panel. Select the clip in the timeline, which will feature a settings panel at the right.
Step 2: Navigate towards the right-side panel using your cursor and select the “Dialogue” option.
Step 3: Then select the “Edit” tab and locate the “Repair” segment under it. In there, enable the “Reduce Rumble” option. Then, adjust the position of its slider according to your preference.
3. Reduce Reverb
Recording in some places can cause an echo in your voice, but Premiere Pro can manage it. It has the Reverb option to manage the depth of your voice. Follow the steps given below to remove noise Premiere:
Instruction: Under the “Edit > Repair” tab, trace and activate the “Reduce Reverb” option. Further, experiment with the position of the reverb slider to adjust it.
4. Enhance Vocals
Employing any of the above actions may impact the vocal quality in videos. However, noise Premiere Pro gives you the option to adjust that as well. The next section discusses the step-by-step guide to enhance vocals:
Step 1: After setting the above options, scroll down into the “Edit” tab in the right panel. Locate and activate the “Clarity” option and adjust its slider.
Step 2: Then move towards the “Preset” section and click on the Downward Arrow icon. From the dropdown menu, choose the “Vocal Presence” option. You can also choose the “Podcast” voice to bring back vocal clarity.
Step 3: Below the “Preset” section, locate and enable the “Enhance Speech” option. Further, you can select between “High Tone” and “Low Tone” options.
5. Manual Audio Effects
An alternative method to remove audio noise in Premiere Pro is to use audio effects. These effects will improve the clarity of content to make it engaging. If you choose to use this method, here are the steps for you to follow:
Step 1: Select your media in the timeline, and from the left side of the window, locate and select “Effects.”
Step 2: In the search bar, add the name of the specific effect you are looking for. You can look for denoise, reverb, and other options. For instance, you have searched and selected the “Denoise” effect.
Step 3: Navigate towards the “Effects Control Center” and go to the “Denoise” section. Then, select the “Edit” button in this section.
Step 4: From the new window, expand the “Preset” option and choose from high or low settings. You can also play with the slider’s position to adjust it. In a similar way, you can add as many audio effects as possible and adjust their settings.
Part 3: Other Noise Reduction Tools You Can Look Out For (Online)
Although we discussed noise reduction in Premiere Pro, it can be confusing for some. It is understandable as it was designed to assist professionals. Locating and adjusting effects in its extensive editing interface can be difficult. This section mentions some online alternatives for removing noise in Premiere Pro:
1. Media.io
Media.io is a versatile tool and a substitute to reduce audio noise Premiere Pro. It has a clear-cut user interface that only requires you to upload the video. The tool uses AI assistance to remove noise from your music videos, vlogs, and more. It can remove 6 types of background noises and has a built-in audio enhancer. It covers denoise, speech enhancement, wind, reverb, hiss, and click noise.
Moreover, Media.io supports diverse audio formats, including MP3, MOV, and more. It is compatible across a wide range of devices and ensures synchronized working. Users can access it anywhere, on any device, and denoise audio with security. The AI-backed technology performs noise reduction from videos rapidly.
2. Kapwing
Does noise reduction in Premiere Pro feel like too much of a learning curve? We have brought another alternative with a minimal yet modern editing interface. The tool has AI-backed algorithms to remove background noise with precision. The AI detects and eliminates unnecessary sounds and enhances vocals. Its noise-reducer AI is free to use and only requires you to log in.
After enhancing your video’s audio, you can edit it afterward with Kapwing’s built-in resources. The fact that it operates online helps you to access it from anywhere. With its synchronization option, you can experience a streamlined workflow.
3. VEED.io
Noise reduction in Premiere Pro was manual, but this AI noise remover speeds up the task. If you must clean up noise from a voiceover or podcast, this is the tool. In addition to removing noise, you can embed music within this tool. The AI can detect wind, rain, traffic, clock ticking, and humming noises.
Moreover, you can enhance the audio quality of your Zoom and other recording by removing noise from such recorders. The tool supports all popular media formats like MP4, MOV, and more. Editing videos afterward, like adding effects or trimming in VEED.io, is an option.
4. Podcastle AI
This is another easy-to-access alternative to removing noise Adobe Premiere. It can auto-eliminate those background conversations and static noises. With this tool’s existence, record your videos without worrying about noise. You can also record voiceover within this tool and remove background noise.
In addition, the tool has built-in audio and video editing features and enhancements. Upon removing noise, you can use its effects and animations to uplift the video.
Bonus Part: Controlling the Vocals with A Fine-Tuned Video Editor: Wondershare Filmora 13
With the increasing trend of vlogs and blogs, creator’s attention shifted to such tools. Removing background noise can sometimes result in decreased vocal quality. For audio clarity through denoising and enhancing, you can use Wondershare Filmora . This is an AI-driven desktop alternative to noise reduction in Premiere Pro. Filmora is a reliable tool for enhancing both your video and audio content.
Free Download For Win 7 or later(64-bit)
Free Download For macOS 10.14 or later
It has AI-backed algorithms that keep updating according to modern needs. Recently, Filmora has launched its V13 version for efficient editing. The software can assist through text-based video editing and copilot editing. In addition to these, it introduced the AI Vocal Remover tool as an audio editing aid. Users can employ this feature to separate their vocals and background noises.
One of the applications of this tool is to assist in removing vocals from songs. Removing vocals doesn’t damage the quality of the audio. This helps you with inserting vocals as voiceovers for tutorial or explainer videos.
Steps to Employ AI Vocal Remover Tool
Since maintaining vocals is an important part of video content, Filmora offers it. Its AI vocal remover is amongst the leading tools in the market. You do not need to waste hours on understanding it since we have its user guide here:
Step 1: Initiate Filmora and Import Media
Upon downloading Filmora’s latest version from its website, launch it. Once you access its main display, click the “New Project” button. Upon entering its editing interface, click “Import” to import files. Then, use the drag-and-drop technique to bring them to the timeline.
Step 2: Access the Vocal Remover Tool
Now, select the video you added to the timeline and right-click on it. From the options panel appears, locate and select the “AI Vocal Remover” option. This will feature the AI Vocal Remover pop-up on the screen and show progress.
Step 3: Export the Vocals
Once the process is completed, you’ll see two different audios in the timeline. One is the background audio, and the other is your video’s vocals. You can export the vocals by clicking the “Export” button in Filmora. Afterward, you can use them as a voiceover for your videos, vlog, or blogs.
Conclusion
In conclusion, you are now aware of noise reduction in Premiere Pro and its features. The article shed light on different methods of removing background noise in it. It familiarized readers with some online alternatives to Adobe Premiere Pro. As a final point, we discussed a professional and multifunctional desktop tool.
Wondershare Filmora has all the options to denoise audio or save a video’s vocals. Its AI-backed features boost the productivity of editors and creators. The more you use it, the more you discover about this amazing editor. For more information, you can visit its official site and download it to explore.
Free Download For Win 7 or later(64-bit)
Free Download For macOS 10.14 or later
Precision Audio Editing: A Step-by-Step Method to Free Your Video From Distorted Sounds
Create High-Quality Video - Wondershare Filmora
An easy and powerful YouTube video editor
Numerous video and audio effects to choose from
Detailed tutorials are provided by the official channel
Whether you are in the business of shooting or editing, noisy or distorted footage is among the most frustrating roadblocks you’ll ever encounter in your workflow. The magic of filmmaking lies after the scenes in post-production. You can remove distortion from audio using various methods.
In this article
01 What Is Distortion in Audio?
02 The Difference Between Noise and Distortion
03 How to Remove Distortion From Audio for Your Video
What Is Distortion in Audio?
You have probably heard the term distortion and would like to know what it is. Distortion is a common term in music production.
Although the term is simple, there is more than meets the eye. Distortion is defined as the change or deformation of an audio waveform that results in the production of an audio output that is different from the input. Distortion can occur at a single point or multiple points in a specific signal chain.
While there are many types of audio distortion, the most common one is clipping. It occurs when an audio signal is amplified beyond the maximum allowed unit in both analog and digital systems.
A signal is distorted when an output does not record the same signal as the input. The issue can occur due to amplifier clipping, faulty equipment, overloading of a sound source, production of hot signals, and pushing speakers beyond their limit.
In the past, people perceived distortion as a bad thing. Today, however, some kinds of distortions are considered beneficial because of their positive effect on the sound. Sound engineers apply plugins, outboard gear, and other techniques to add pleasing distortions to audios. The distortions work by adding unique elements to audios, thus improving sounds in many instances.
The Difference Between Noise and Distortion
Noise and distortion can sound very similar and hard to tell apart. However, the two are different phenomena with unique characteristics. Noise is an undesired disturbance that sounds white or pink and creates an even-tempered sound wave. On the other hand, distortion is the alteration of a waveform, where some parts are amplified while others are attenuated, leading to an uneven distribution of energy among frequencies. Let’s look at the differences between noise and distortion.
1. Where It Appears in a Signal
Noise appears randomly throughout the signal, while distortion seems at the same frequency. One example of noise is an audio hiss that can be heard when no other sounds are present. An example of distortion is a sine wave with a flat top and bottom combined with different amplitudes.
2. How It Affects Signals
Noise is random and can appear when signals are quiet. Distortion is affected by the input signal and can be altered by adding or removing signal frequencies.
How It’s Measured
You can measure distortion by using an oscilloscope to display the input signal’s waveform over time. The oscilloscope measures energy distribution among different frequencies, while you can measure noise with a spectrum analyzer by displaying an audio signal’s magnitude and frequency content over time.
Despite their differences, noise and distortion are both unwanted sounds. When they are present in a signal, they can degrade its quality. For this reason, it is essential to understand the differences between them to assess signs and produce better results accurately.
How to Remove Distortion From Audio for Your Video
You can use several different methods to remove audio distortion in your video. They include:
Method 1: Use an Online Audio Distortion Tool
You can use an online distortion tool to fix this problem. One of the popular tools for removing distortion from audio is Audacity. Available for Linux, macOS, Windows, and other Unix-like operating systems, Audacity is a FOSS (free and open-source digital audio editor software). It is also a recording application software, and you can use the program for varying tasks, including conversing audio files, removing audio distortion, adding effects, and mixing audio clips.
Keeping this in mind, let’s look at how to remove distortion from audio using Audacity.
- The first step is opening the file. To do this, drag and drop the audio file into Audacity.
- Next, you need to select the distorted area before clicking on Effect. Once you have done this, click on the Noise Reduction option.

- Doing this will open the Noise reduction window.
- Go to the Noise Profile and click on it; this will allow Audacity to know what it should filter out.

- Now, select the whole audio before reopening the Noise Reduction Window. Set the values as you see necessary.
- Check the audio by clicking Preview. If you are satisfied with the results, click OK.
- Be sure to apply the filter again if your audio is still distorted. Avoid doing it excessively, as the audio could be degraded. In turn, this can lead to the voice sounding robotic and tinny.
Method 2: Software Solutions - Adobe Audition
You can remove distortion from audio using specialized audio editing software. One of the professional audio tools that you can use to fix audio distortion is Adobe Audition; this software allows you to carve out any unwanted sound for impressive results.
These steps below will allow you to remove distortion from audio with Adobe Audition.
- Double click on the track to access the Waveform.
- Go to Window, and then select the Amplitude Statistics option.
- A new window will open. Now, hit the Scan button in the left corner. The software will then scan the audio.

- Check the section written Possibly Clipped Samples.

- Head over to Effects>Diagnostics> DeClipper.

- In the Preset section, select the Restore Heavily Clipped option.

- Next, hit the Settings button, and adjust the Tolerance.

- Hit the Scan button again, and you’ll see all the problems in your audio.
- Click Repair all to fix your distorted audio.

- Alternatively, you could head to Effects Rack and click on Filter and EQ, then FFT Filter.

- Put the Preset option to Default settings. Take out a few of the frequencies where your audio is distorted.

Method 3: Video Editing Tools like VSDC
When it comes to removing distortion from audio, you can use video editing tools to fix this problem. VSDC is one of the non-linear editing applications that people use to remove audio distortion.
Follow the steps below to learn how to remove distortion from audio using VSDC.
- Upload your footage to VSDC and right-click on it.
- Select the Audio effects option, then choose Filters. Click on Gate.

- You will see the Properties window. Here, you will find all the parameters that you need to fix your audio problems, including distortion.

The Gate filter allows users to control how fast and when the gate opens and what sort of sounds can get in.
- Threshold: This is the level of the decibel at which the gate opens. Set it based on the loudness of the audio distortion.
- Attack: This parameter defines how fast the gate will open. Essentially, the higher the attack value, the slower the gate opens. /li>
- Knee: With this parameter, you can control the response of the compressor to the signal that’s crossing the threshold. That means you can apply compression with a delay or instantly.
- Make-up gain: This increases the signal level after it has been processed.
- Ratio: This value controls compression applied to the distortion. It defines how quieter the distortion will be after gating.
- Reduction: This parameter defines the level of signal reduction will be.
- Release: This value defines how fast the gate will close after opening. You can change the Release parameter to suit your preferences.
Method 4:Normalize Your Audio with Filmora Audio Equalizer
Filmora is a video editing software that you can use to shoot, edit, and share clips with other people. It provides an easy-to-use interface that has made it one of the most popular choices for independent filmmakers. Filmora also offers audio equalizer effects designed for professional sound designers who want to work on projects with their voice-over recordings.
You can normalize your audio with Filmora by following the three simple steps below:
Step 1. Open Filmora and Import your file
First, open up Filmora and open your audio file. It can be any format you have except MOV from Apple devices like iPhone or iPad. Then, select the Media tab on the top of Filmora’s main window to import your media file.
Step 2. Adjust the Levels
Next, click the Levels option on Filmora’s left panel, where you will find three options: Gain, Equalize, and Normalizer. You can use this to adjust your audio level to be loud enough without being too loud. The normalizer helps you ensure that your audio is at a consistent level throughout the recording. You can use it both for music or voice-over recordings.

Step 3. Export Your File
Finally, you may export it when you have made the necessary adjustments to your audio file. Just click the File tab in Filmora’s main window and select Export. Many options are available for exporting your media file, including an output profile setting where you may choose MP4, AVI, or WMV and upload to Facebook, Youtube, and Vimeo.
For Win 7 or later (64-bit)
For macOS 10.12 or later
Conclusion
● Normalizing your audio file is not a complicated process, but it does require some technical knowledge. However, your audio will sound excellent and professional if you follow the steps above. You can use Filmora’s audio equalizer effects to normalize your video.
Whether you are in the business of shooting or editing, noisy or distorted footage is among the most frustrating roadblocks you’ll ever encounter in your workflow. The magic of filmmaking lies after the scenes in post-production. You can remove distortion from audio using various methods.
In this article
01 What Is Distortion in Audio?
02 The Difference Between Noise and Distortion
03 How to Remove Distortion From Audio for Your Video
What Is Distortion in Audio?
You have probably heard the term distortion and would like to know what it is. Distortion is a common term in music production.
Although the term is simple, there is more than meets the eye. Distortion is defined as the change or deformation of an audio waveform that results in the production of an audio output that is different from the input. Distortion can occur at a single point or multiple points in a specific signal chain.
While there are many types of audio distortion, the most common one is clipping. It occurs when an audio signal is amplified beyond the maximum allowed unit in both analog and digital systems.
A signal is distorted when an output does not record the same signal as the input. The issue can occur due to amplifier clipping, faulty equipment, overloading of a sound source, production of hot signals, and pushing speakers beyond their limit.
In the past, people perceived distortion as a bad thing. Today, however, some kinds of distortions are considered beneficial because of their positive effect on the sound. Sound engineers apply plugins, outboard gear, and other techniques to add pleasing distortions to audios. The distortions work by adding unique elements to audios, thus improving sounds in many instances.
The Difference Between Noise and Distortion
Noise and distortion can sound very similar and hard to tell apart. However, the two are different phenomena with unique characteristics. Noise is an undesired disturbance that sounds white or pink and creates an even-tempered sound wave. On the other hand, distortion is the alteration of a waveform, where some parts are amplified while others are attenuated, leading to an uneven distribution of energy among frequencies. Let’s look at the differences between noise and distortion.
1. Where It Appears in a Signal
Noise appears randomly throughout the signal, while distortion seems at the same frequency. One example of noise is an audio hiss that can be heard when no other sounds are present. An example of distortion is a sine wave with a flat top and bottom combined with different amplitudes.
2. How It Affects Signals
Noise is random and can appear when signals are quiet. Distortion is affected by the input signal and can be altered by adding or removing signal frequencies.
How It’s Measured
You can measure distortion by using an oscilloscope to display the input signal’s waveform over time. The oscilloscope measures energy distribution among different frequencies, while you can measure noise with a spectrum analyzer by displaying an audio signal’s magnitude and frequency content over time.
Despite their differences, noise and distortion are both unwanted sounds. When they are present in a signal, they can degrade its quality. For this reason, it is essential to understand the differences between them to assess signs and produce better results accurately.
How to Remove Distortion From Audio for Your Video
You can use several different methods to remove audio distortion in your video. They include:
Method 1: Use an Online Audio Distortion Tool
You can use an online distortion tool to fix this problem. One of the popular tools for removing distortion from audio is Audacity. Available for Linux, macOS, Windows, and other Unix-like operating systems, Audacity is a FOSS (free and open-source digital audio editor software). It is also a recording application software, and you can use the program for varying tasks, including conversing audio files, removing audio distortion, adding effects, and mixing audio clips.
Keeping this in mind, let’s look at how to remove distortion from audio using Audacity.
- The first step is opening the file. To do this, drag and drop the audio file into Audacity.
- Next, you need to select the distorted area before clicking on Effect. Once you have done this, click on the Noise Reduction option.
- Doing this will open the Noise reduction window.
- Go to the Noise Profile and click on it; this will allow Audacity to know what it should filter out.
- Now, select the whole audio before reopening the Noise Reduction Window. Set the values as you see necessary.
- Check the audio by clicking Preview. If you are satisfied with the results, click OK.
- Be sure to apply the filter again if your audio is still distorted. Avoid doing it excessively, as the audio could be degraded. In turn, this can lead to the voice sounding robotic and tinny.
Method 2: Software Solutions - Adobe Audition
You can remove distortion from audio using specialized audio editing software. One of the professional audio tools that you can use to fix audio distortion is Adobe Audition; this software allows you to carve out any unwanted sound for impressive results.
These steps below will allow you to remove distortion from audio with Adobe Audition.
- Double click on the track to access the Waveform.
- Go to Window, and then select the Amplitude Statistics option.
- A new window will open. Now, hit the Scan button in the left corner. The software will then scan the audio.
- Check the section written Possibly Clipped Samples.
- Head over to Effects>Diagnostics> DeClipper.
- In the Preset section, select the Restore Heavily Clipped option.
- Next, hit the Settings button, and adjust the Tolerance.
- Hit the Scan button again, and you’ll see all the problems in your audio.
- Click Repair all to fix your distorted audio.
- Alternatively, you could head to Effects Rack and click on Filter and EQ, then FFT Filter.
- Put the Preset option to Default settings. Take out a few of the frequencies where your audio is distorted.
Method 3: Video Editing Tools like VSDC
When it comes to removing distortion from audio, you can use video editing tools to fix this problem. VSDC is one of the non-linear editing applications that people use to remove audio distortion.
Follow the steps below to learn how to remove distortion from audio using VSDC.
- Upload your footage to VSDC and right-click on it.
- Select the Audio effects option, then choose Filters. Click on Gate.
- You will see the Properties window. Here, you will find all the parameters that you need to fix your audio problems, including distortion.
The Gate filter allows users to control how fast and when the gate opens and what sort of sounds can get in.
- Threshold: This is the level of the decibel at which the gate opens. Set it based on the loudness of the audio distortion.
- Attack: This parameter defines how fast the gate will open. Essentially, the higher the attack value, the slower the gate opens. /li>
- Knee: With this parameter, you can control the response of the compressor to the signal that’s crossing the threshold. That means you can apply compression with a delay or instantly.
- Make-up gain: This increases the signal level after it has been processed.
- Ratio: This value controls compression applied to the distortion. It defines how quieter the distortion will be after gating.
- Reduction: This parameter defines the level of signal reduction will be.
- Release: This value defines how fast the gate will close after opening. You can change the Release parameter to suit your preferences.
Method 4:Normalize Your Audio with Filmora Audio Equalizer
Filmora is a video editing software that you can use to shoot, edit, and share clips with other people. It provides an easy-to-use interface that has made it one of the most popular choices for independent filmmakers. Filmora also offers audio equalizer effects designed for professional sound designers who want to work on projects with their voice-over recordings.
You can normalize your audio with Filmora by following the three simple steps below:
Step 1. Open Filmora and Import your file
First, open up Filmora and open your audio file. It can be any format you have except MOV from Apple devices like iPhone or iPad. Then, select the Media tab on the top of Filmora’s main window to import your media file.
Step 2. Adjust the Levels
Next, click the Levels option on Filmora’s left panel, where you will find three options: Gain, Equalize, and Normalizer. You can use this to adjust your audio level to be loud enough without being too loud. The normalizer helps you ensure that your audio is at a consistent level throughout the recording. You can use it both for music or voice-over recordings.
Step 3. Export Your File
Finally, you may export it when you have made the necessary adjustments to your audio file. Just click the File tab in Filmora’s main window and select Export. Many options are available for exporting your media file, including an output profile setting where you may choose MP4, AVI, or WMV and upload to Facebook, Youtube, and Vimeo.
For Win 7 or later (64-bit)
For macOS 10.12 or later
Conclusion
● Normalizing your audio file is not a complicated process, but it does require some technical knowledge. However, your audio will sound excellent and professional if you follow the steps above. You can use Filmora’s audio equalizer effects to normalize your video.
Also read:
- New In 2024, The Beat Engineers Handbook Designing Sounds for the Silver Screen
- Updated 2024 Approved Discover a World of Free Guitar Inspiration Imagery & Music Downloads
- 2024 Approved Mastering the Art of Silencing Sound in Windows 10 Videos
- Updated In 2024, Mastering Audio Extraction From Video IMovie Techniques for Mac Users
- New In 2024, Sound Sleuths Exceptional Music Detection Software to Uncover Your Favorite Tunes on Android
- New A Step-by-Step Blueprint to Enhance Videos by Merging Soundtracks Without Incurring Fees
- New 2024 Approved Silent Screens Methods to Remove Sound Tracks From MP4, MKV, AVI, MOV, WMV Videos
- Updated Voice Variation Ventures 10 Novel Approaches to Infuse Joy Into Phone Conversations for 2024
- Updated Professional Audio Techniques in DaVinci Resolve The Art of Normalization
- New In 2024, Freeware Harmonies to Accentuate Photo Stories
- In 2024, Guidelines for Exporting Audio From Audacity to MP3
- New 2024 Approved Eliminating the Noise A Step-by-Step Approach to Clearer Sound Editing in Audacity
- New In 2024, Advanced Audio File Adapter Free Conversion of High-End MPA Sounds to Universal MP3 Format (2023 Version)
- 2024 Approved How to Choose the Best Sound Editor?
- Updated In 2024, Discovering Optimal Acoustic Ambiance Sets for Video Production
- Updated Eleven Strategies of Online Bliss A Listicle for a Tranquil State of Mind
- 2024 Approved Revolutionize Your Online Gaming with Morphvox – A Voice Changers Handbook
- Updated In 2024, The Budget-Friendly Art of Audio Resurrection Free Methods for Pulling Audio From Videos
- Free Harmonies for Visuals Integrate Music Into Photos
- New Beat Decoding Utilizing Web Resources for Rhythmic Analysis of Songs for 2024
- New In 2024, Streamline Your Audio Capture with These Top 5 MP3-Specific Recording Devices
- New In 2024, Audiophiles Manual Advanced Methods for Rectifying Sound Distortion in Videos
- Updated 6 Best Voice Changer During Call Android & iPhone for 2024
- New Linuxs Leading Picks for Sound Recording An In-Depth Look at Top Tools & Proven Techniques
- Updated In 2024, Acquiring Hidden Gems of Quiet Music for an Undisturbed Atmosphere
- New In 2024, Digital Audio Tutorial Removing Drum Beats From Your Songs with Ease
- In 2024, Exploring Lexis Audio Editor Insights, Demos, and Step-by-Step Guides
- New The Ultimate Guide to Chrome Audio Recording – Top Picks Revealed for 2024
- The Invisible Touch Methods to Apply Fading Effects on Sound in iMovie for 2024
- Updated Exploring the Cost-Free Synergy of Sound and Video on the Internet
- Updated 2024 Approved From Raw Footage to Final Cut The Essential Plugin Lineup for Video Editors
- Updated In 2024, 10 Best Music Editing Apps for iPhone and Android
- In 2024, The Ultimate Guide to Separating Audio Tracks in Adobe Premiere Pro
- Pure Audio Processing The Art of Background Noise Elimination with Filmora by Wondershare for 2024
- 2024 Approved Integrating Dialogue & Effects Advanced Audio Editing with Premiere Pro
- Updated Unmissable Web-Based MP3 Metadata Manipulators – Heres the List
- Updated Audio Artistry The Step-by-Step Process of Mixing Sounds for Movie Scenes for 2024
- Updated 2024 Approved Essential Websites for Obtaining Free and Unlicensed Outro Tracks
- New Uncovering the Roar and Cry of Canid Communication for 2024
- Updated In 2024, The Top Trio of Virtual MP3 Intensity Maximizers
- Updated 10 FREE Online MP3 to Text Converters-Wondershare Filmora for 2024
- Updated 2024 Approved The Visual Harmony of Audio Editing Suite Comparing Features, Merits, Flaws, and Alternative Tools
- 3 Solutions to Hard Reset Samsung Galaxy Z Flip 5 Phone Using PC | Dr.fone
- 4 Easy Ways for Your Tecno Spark 20 Pro+ Hard Reset | Dr.fone
- Ultimate Guide on Xiaomi Civi 3 Disney 100th Anniversary Edition FRP Bypass
- In 2024, How to Unlock Samsung Galaxy F34 5G PIN Code/Pattern Lock/Password
- In 2024, How to Make the Most of Your Apple iPhone 14 Lock Screen with Notifications? | Dr.fone
- How To Change Country on App Store for iPhone 14 Pro Max With 7 Methods
- Unlocking iPhone 14 Plus Passcode without a Computer | Dr.fone
- Additional Tips About Sinnoh Stone For Lava Storm 5G | Dr.fone
- 5 Techniques to Transfer Data from Infinix Hot 40i to iPhone 15/14/13/12 | Dr.fone
- Latest Guide How To Bypass Motorola Defy 2 FRP Without Computer
- Dose Life360 Notify Me When Someone Checks My Location On Tecno Spark 20 Pro+? | Dr.fone
- How to Retrieve deleted photos on Vivo S17
- Different Methods for Resetting Vivo V29 Pro Phones with Screen Locked and Not | Dr.fone
- In 2024, The Ultimate Guide to Get the Rare Candy on Pokemon Go Fire Red On Xiaomi Redmi A2+ | Dr.fone
- Install Lumafusion on MacBook Pro/Air or Find Suitable Alternatives
- In 2024, How to Track WhatsApp Messages on Samsung Galaxy XCover 6 Pro Tactical Edition Without Them Knowing? | Dr.fone
- In 2024, How Can We Bypass Huawei Nova Y71 FRP?
- The Best 8 VPN Hardware Devices Reviewed On ZTE Blade A73 5G | Dr.fone
- New In 2024, Replace iMovie with These Excellent Windows Video Editors
- New How to Add Stickers to WhatsApp-The Ultimate Guide
- In 2024, 15 Best Strongest Pokémon To Use in Pokémon GO PvP Leagues For Lava Blaze 2 5G | Dr.fone
- List of Pokémon Go Joysticks On Vivo Y200 | Dr.fone
- Forgot Pattern Lock? Heres How You Can Unlock Vivo S18 Pattern Lock Screen
- Title: New 2024 Approved The AI Music Forerunners Crafting Harmonies for a New Era
- Author: Kate
- Created at : 2024-05-05 08:06:48
- Updated at : 2024-05-06 08:06:48
- Link: https://audio-editing.techidaily.com/new-2024-approved-the-ai-music-forerunners-crafting-harmonies-for-a-new-era/
- License: This work is licensed under CC BY-NC-SA 4.0.
