
:max_bytes(150000):strip_icc():format(webp)/switcheshero-4f3b792cb7014baf919e7c68b91e96ab.jpg)
New 2024 Approved Elevate Your Audio Altering Speech Pitch with Audacity
Elevate Your Audio: Altering Speech Pitch with Audacity
What does free open source audio software mean? Audacity voice changer is the answer. Along with being free, it is a cross-platform software, which means that it can be used with different software packages. Audacity is easy to use multi-track audio editing and recording software.
It has a simple and clean-looking interface for better user understandability. Audacity has plug-in support for multiple audio formats like LV2, AU, and VST. We will further discuss Audacity as an audio voice changer, and how to use the software under various conditions will also be discussed in the article.
In this article
01 How Can You Use Voice Changer in Audacity?
02 How to Change Pitch in Audacity?
03 How to Change Male Voice to Female Voice with Audacity?
04 How to Create Robot Voice in Audacity?
Part 1. How Can You Use Voice Changer in Audacity?
Voice changers are also commonly referred to as voice enhancers, which can completely change and transform your voice. You can pull pranks on friends with voice changers if you are bored. If you want to hide your identity, you can modify your voice and do that. With voice changers, you can change the tone and the pitch of your voice and add various voice effects.
Voice changer comes with a wide range of sound effects ranging from baby sound, kid, male, female, monster, demon, animal sounds, and a lot more than this. Some great voice changers include AV Voice Changer , MorphVOX Voice Changer , Voicemod , Clownfish Voice Changer , and others. Do you know that these voice changers can be used with Audacity? Let’s tell you how.
Step 1: If you are interested in using a voice changer in Audacity, start by downloading your favorite voice changer to your PC. Once done, install it and after successful installation, launch it.

Step 2: As we have mentioned earlier that you are offered various voice effects in voice changers, so after launching it, select your preferred voice effect, whether it be a baby voice, animal voice, or celebrity voice.

Step 3: On the other side, launch Audacity on your PC. Once it opens, you will see the top menu; just below that, a microphone icon will be seen. Tap on that icon so that the drop-down menu appears, there select the name of your voice changer.

Part 2. How to Change Pitch in Audacity?
Audacity, the audio voice changer, offers a ‘Change Pitch’ feature with which you can change the pitch of the audio without damaging its tempo. You can separately change the speed. With this feature, you can also adjust and play with the frequency and semitones.
The audio editor also features to estimate the starting pitch; for instance, if A3 is a quiet note, followed by a large and loud note like C4, Audacity will detect C4. In case both notes have the same volume, Audacity will detect A3. With Audacity, you also get the ‘To’ and ‘From’ controls if you plan to change the pitch manually. To learn more about changing pitch, follow the steps below:
Step 1: For changing pitch in Audacity, start by launching the software. After launching, you can either record the audio or else, from the ‘File’ section, you can also ‘Open’ any file from your device.

Step 2: Audacity lets you change the pitch of a whole file or else for a small portion as well. Now, to change the pitch of a small portion, click and drag the mouse along the recording. Or else, click on the name of the track to select it completely.

Step 3: After this, head over to the top menu and click on the ‘Effect’ section. A drop-down menu list will appear, locate and select the ‘Change Pitch’ option. You can either use the sliders to adjust the pitch or else write the percentage to change.

Step 4: You can preview the file and check how it sounds once done. When you are satisfied, hit the ‘OK’ button to save the changes. You can also adjust the Speed and Tempo of the track.

Part 3. How to Change Male Voice to Female Voice with Audacity?
The most fun voice transformation is from low pitch to higher pitch. In general, modifying the male voice to a female voice, as the male pitch has a negative value and changing it to a positive pitch, modifies your voice to a female voice. What else could be better to use than the amazing Audacity voice changer? Let’s share the steps that will help you change your male voice to female.
Step 1: First, start by opening the Audacity audio editor. Once it has launched successfully, you should import the audio file. You can record audio with Audacity. Along with this, you can also import files from your device from the ‘File’ section, followed by the ‘Open’ option.

Step 2: After your audio track is visible on the timeline, you have to select the part of the file that you want to edit. You can easily select it by clicking and dragging the mouse. If not this, you can also work with the whole track; for this, simply click on the track name to select it.

Step 3: After you are satisfied with the selection, head to the top menu and select the ‘Effects’ options. A drop-down list appears after this, and you have to look for the ‘Change Pitch’ option and select it.

Step 4: Normally, you can adjust the pitch by taking help from the sliders, but you can also change the pitch manually by adding a percentage. The male pitch originally will have a negative value; change it and set a positive value. You can keep changing until you are satisfied.

Step 5: Lastly, don’t forget to save the changes by hitting the ‘OK’ button at the button and saving the file to your respective device.

Part 4. How to Create Robot Voice in Audacity?
As we have mentioned, Audacity is an audio voice changer, so you must know that Audacity also can change your voice into a robotic voice. Among the different voices, the robot voice sounds interesting, and it’s fun to create. If you are excited to learn to create robot voice in Audacity, follow the guiding steps shared below:
Step 1: For creating an extraordinary robotic voice, start by launching Audacity on your device. After it opens, it’s time to record your voice to create a robot voice. Or else, head to the ‘File’ tab and import your audio file from your device to Audacity from the ‘Open’ option.

Step 2: After this, to start the editing, you need a stereo track on the timeline. For doing this, navigate ‘Tracks’ from the top menu and click on it. Next, hover on the ‘Add New’ option to open its sub-menu. You will see the ‘Stereo Track’ option, select it, and copy-paste the audio file in the new section.

Step 3: Let’s start with the fun part, the editing and adjusting different features. Start by opening the ‘Effects’ tab, and from the long list of options, select ‘Echo.’ There, you can enter the ‘Delay Time’ and change other fields as well.

Step 4: Preview the audio and move on to the next setting. Open the ‘Effects’ section and look for the ‘Change Pitch’ option. You can change and adjust the pitch according to your desire and preview the file again.

Step 5: For creating a robot voice, you can also set the tempo. For that, head to the ‘Change Tempo’ option under the ‘Effects’ section and set the value to minus. Keep adjusting the different effects until you get your perfect robot voice.

Bottom Line
Audacity is not only a great audio editor; it is also a stunning audio voice changer. The software comes with a lot of effects that can completely transform your voice to an unrecognizable level. You can sound like a robot, male, female, and whatever you want with Audacity voice changer. Do you know any video editor that offers sound effects?
If you don’t know, let us introduce Wondershare Filmora Video Editor . This wonderous software is loaded with many editing features to create the best videos. Not only trim, cut, crop, but the software also offers you features like split-screen, chroma key background, keyframing, color match, motion tracking, and whatnot.
Apart from this, this video editor is a hub for cool sound effects and editing elements from its media library, Filmstock. You get a wide range of sound effects, titles, transitions, and many more elements.
For Win 7 or later (64-bit)
For macOS 10.12 or later
02 How to Change Pitch in Audacity?
03 How to Change Male Voice to Female Voice with Audacity?
04 How to Create Robot Voice in Audacity?
Part 1. How Can You Use Voice Changer in Audacity?
Voice changers are also commonly referred to as voice enhancers, which can completely change and transform your voice. You can pull pranks on friends with voice changers if you are bored. If you want to hide your identity, you can modify your voice and do that. With voice changers, you can change the tone and the pitch of your voice and add various voice effects.
Voice changer comes with a wide range of sound effects ranging from baby sound, kid, male, female, monster, demon, animal sounds, and a lot more than this. Some great voice changers include AV Voice Changer , MorphVOX Voice Changer , Voicemod , Clownfish Voice Changer , and others. Do you know that these voice changers can be used with Audacity? Let’s tell you how.
Step 1: If you are interested in using a voice changer in Audacity, start by downloading your favorite voice changer to your PC. Once done, install it and after successful installation, launch it.
Step 2: As we have mentioned earlier that you are offered various voice effects in voice changers, so after launching it, select your preferred voice effect, whether it be a baby voice, animal voice, or celebrity voice.
Step 3: On the other side, launch Audacity on your PC. Once it opens, you will see the top menu; just below that, a microphone icon will be seen. Tap on that icon so that the drop-down menu appears, there select the name of your voice changer.
Part 2. How to Change Pitch in Audacity?
Audacity, the audio voice changer, offers a ‘Change Pitch’ feature with which you can change the pitch of the audio without damaging its tempo. You can separately change the speed. With this feature, you can also adjust and play with the frequency and semitones.
The audio editor also features to estimate the starting pitch; for instance, if A3 is a quiet note, followed by a large and loud note like C4, Audacity will detect C4. In case both notes have the same volume, Audacity will detect A3. With Audacity, you also get the ‘To’ and ‘From’ controls if you plan to change the pitch manually. To learn more about changing pitch, follow the steps below:
Step 1: For changing pitch in Audacity, start by launching the software. After launching, you can either record the audio or else, from the ‘File’ section, you can also ‘Open’ any file from your device.
Step 2: Audacity lets you change the pitch of a whole file or else for a small portion as well. Now, to change the pitch of a small portion, click and drag the mouse along the recording. Or else, click on the name of the track to select it completely.
Step 3: After this, head over to the top menu and click on the ‘Effect’ section. A drop-down menu list will appear, locate and select the ‘Change Pitch’ option. You can either use the sliders to adjust the pitch or else write the percentage to change.
Step 4: You can preview the file and check how it sounds once done. When you are satisfied, hit the ‘OK’ button to save the changes. You can also adjust the Speed and Tempo of the track.
Part 3. How to Change Male Voice to Female Voice with Audacity?
The most fun voice transformation is from low pitch to higher pitch. In general, modifying the male voice to a female voice, as the male pitch has a negative value and changing it to a positive pitch, modifies your voice to a female voice. What else could be better to use than the amazing Audacity voice changer? Let’s share the steps that will help you change your male voice to female.
Step 1: First, start by opening the Audacity audio editor. Once it has launched successfully, you should import the audio file. You can record audio with Audacity. Along with this, you can also import files from your device from the ‘File’ section, followed by the ‘Open’ option.
Step 2: After your audio track is visible on the timeline, you have to select the part of the file that you want to edit. You can easily select it by clicking and dragging the mouse. If not this, you can also work with the whole track; for this, simply click on the track name to select it.
Step 3: After you are satisfied with the selection, head to the top menu and select the ‘Effects’ options. A drop-down list appears after this, and you have to look for the ‘Change Pitch’ option and select it.
Step 4: Normally, you can adjust the pitch by taking help from the sliders, but you can also change the pitch manually by adding a percentage. The male pitch originally will have a negative value; change it and set a positive value. You can keep changing until you are satisfied.
Step 5: Lastly, don’t forget to save the changes by hitting the ‘OK’ button at the button and saving the file to your respective device.
Part 4. How to Create Robot Voice in Audacity?
As we have mentioned, Audacity is an audio voice changer, so you must know that Audacity also can change your voice into a robotic voice. Among the different voices, the robot voice sounds interesting, and it’s fun to create. If you are excited to learn to create robot voice in Audacity, follow the guiding steps shared below:
Step 1: For creating an extraordinary robotic voice, start by launching Audacity on your device. After it opens, it’s time to record your voice to create a robot voice. Or else, head to the ‘File’ tab and import your audio file from your device to Audacity from the ‘Open’ option.
Step 2: After this, to start the editing, you need a stereo track on the timeline. For doing this, navigate ‘Tracks’ from the top menu and click on it. Next, hover on the ‘Add New’ option to open its sub-menu. You will see the ‘Stereo Track’ option, select it, and copy-paste the audio file in the new section.
Step 3: Let’s start with the fun part, the editing and adjusting different features. Start by opening the ‘Effects’ tab, and from the long list of options, select ‘Echo.’ There, you can enter the ‘Delay Time’ and change other fields as well.
Step 4: Preview the audio and move on to the next setting. Open the ‘Effects’ section and look for the ‘Change Pitch’ option. You can change and adjust the pitch according to your desire and preview the file again.
Step 5: For creating a robot voice, you can also set the tempo. For that, head to the ‘Change Tempo’ option under the ‘Effects’ section and set the value to minus. Keep adjusting the different effects until you get your perfect robot voice.
Bottom Line
Audacity is not only a great audio editor; it is also a stunning audio voice changer. The software comes with a lot of effects that can completely transform your voice to an unrecognizable level. You can sound like a robot, male, female, and whatever you want with Audacity voice changer. Do you know any video editor that offers sound effects?
If you don’t know, let us introduce Wondershare Filmora Video Editor . This wonderous software is loaded with many editing features to create the best videos. Not only trim, cut, crop, but the software also offers you features like split-screen, chroma key background, keyframing, color match, motion tracking, and whatnot.
Apart from this, this video editor is a hub for cool sound effects and editing elements from its media library, Filmstock. You get a wide range of sound effects, titles, transitions, and many more elements.
For Win 7 or later (64-bit)
For macOS 10.12 or later
Synthetic Soundscape Pioneers: Unveiling the Top AI Composers
Top Best 10 AI Music Composers in 2024

Benjamin Arango
Mar 27, 2024• Proven solutions
Robots can’t be creative, right? A number of startups that focus on the development of artificial intelligence that is capable of composing music have proved this statement wrong. AI music composers generate original, copyright-free music you can use in your latest YouTube video or social media video ad. You don’t even have to be a sound designer or a musician to produce soundtracks for your videos with AI Music Composers, because you can upload the music that has already been recorded and create variations of it. So, let’s take a look at what AI music composers have to offer in 2024.
| 1 - Amper Music | 2 - AIVA |
|---|---|
| 3 - Jukedeck | 4 - Ecrett Music |
| 5 - Melodrive | 6 - ORB Composer |
| 7 - Amadeus Code | 8 - Humtap |
| 9 - Muzeek | 10 - Brain.fm |
Ten Best AI Music Composers You Should Know About
The AI technologies that can compose music are still relatively novel, and as time passes, they can only develop and grow further. Consequently, each of the AI music composers we featured in this article offers a different range of possibilities. Here are the ten best AI music composers you shouldn’t miss out on in 2024.

Filmora AI Music Editor
Edit Audio with AI Music Editor
Experience the power of Filmora’s AI tools and make your audio or music stand out like never before! Audio Denoise, Audio Ducking, Audio Synchronization, Audio Stretch, etc…
Try It Free Try It Free Try It Free Learn More >
1. Amper Music
Price: Available upon request
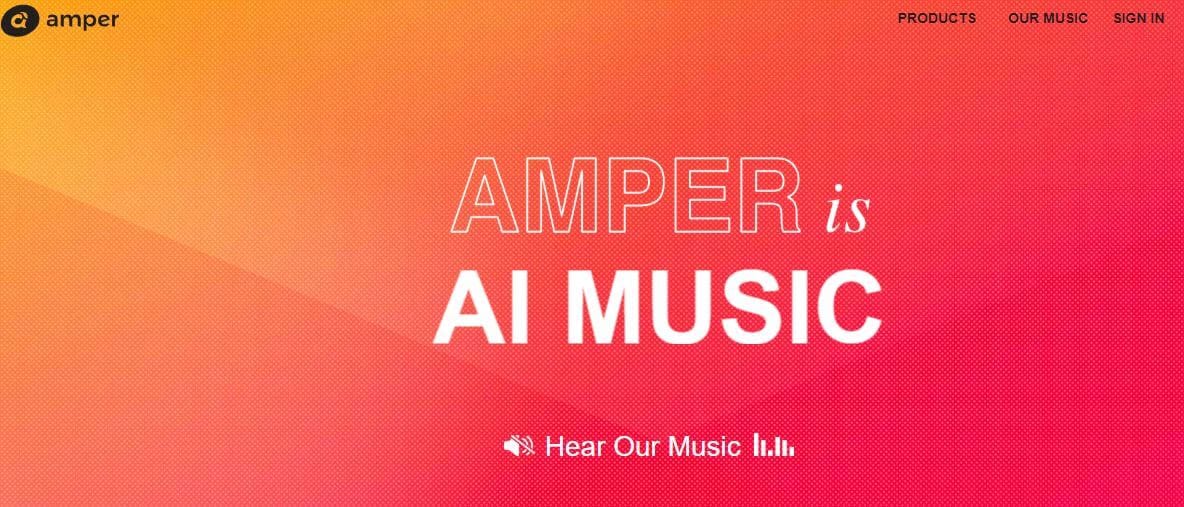
Industry professionals know just how frustrating the music licensing process can be. Amper Music is a cloud-based platform designed to simplify the process of creating soundtracks for movies and video games, as it produces AI generated algorithms that help users create music in a variety of music genres. You must first create an account on this platform, in order to be able to use the free version of Amper Music that provides only a limited amount of features. Upgrading to the pro version of Amper Music will enable you to enjoy the full potential of this rapidly growing AI Music Composer.
2. AIVA
Price: Free version available, subscription plans start from €14 p/month
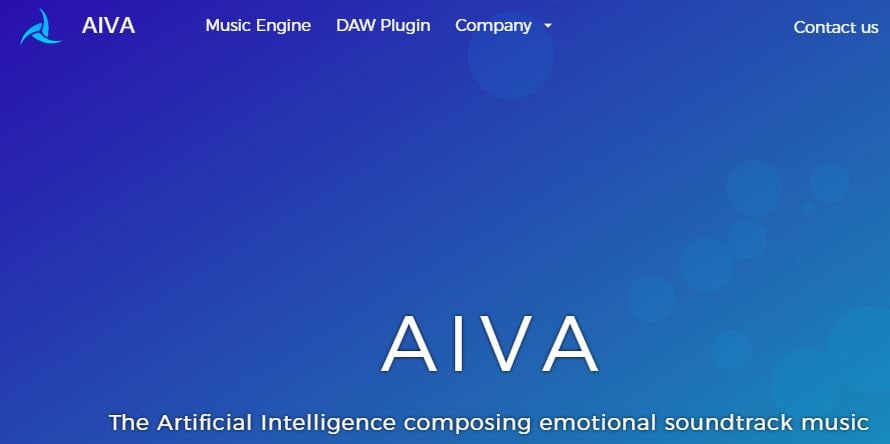
Since 2016, when AIVA Technologies was founded, its team has worked on developing an AI script that can compose emotional soundtracks for ads, video games, or movies. Soon after, the AI published its first oeuvre titled ‘Opus 1 for Piano Solo and in the subsequent years, AIVA released an album and composed music for a video game. Besides enabling its users to create music from scratch, AIVA can also be used to produce variations of existing songs. The music engine that powers this AI music composer makes the production of corporate or social media videos much easier, as it eliminates the need to go through the music licensing process.
3. Jukedeck
Price: Free version available, Pricing plans start from $0.99 per download

The AI music composer developed by the Jukedeck startup resembles the Amper’s music composer because they both rely on neural networks to analyze music data, that is then used by the AI to learn how to compose original music. Each track that is available through this AI music composer can be edited, so you can change its length or its tempo. You can create music with Jukedeck for free if you decide to give all the rights to the AI composer, while both individuals and small businesses can purchase the license to use the song created with Jukedeck for just $0.99.
Note: Jukedeck has been acquired by TikTok, and we are waiting for a new Jukedeck.
![]()
A cross-platform for making videos anywhere for all creators

Why your video editing isn’t good enough? How about some creative inspo?
- 100 Million+ Users
- 150+ Countries and Regions
- 4 Million+ Social Media Followers
- 5 Million+ Stock Media for Use
* Secure Download

4. Ecrett Music
Price: Subscription plans start at $5
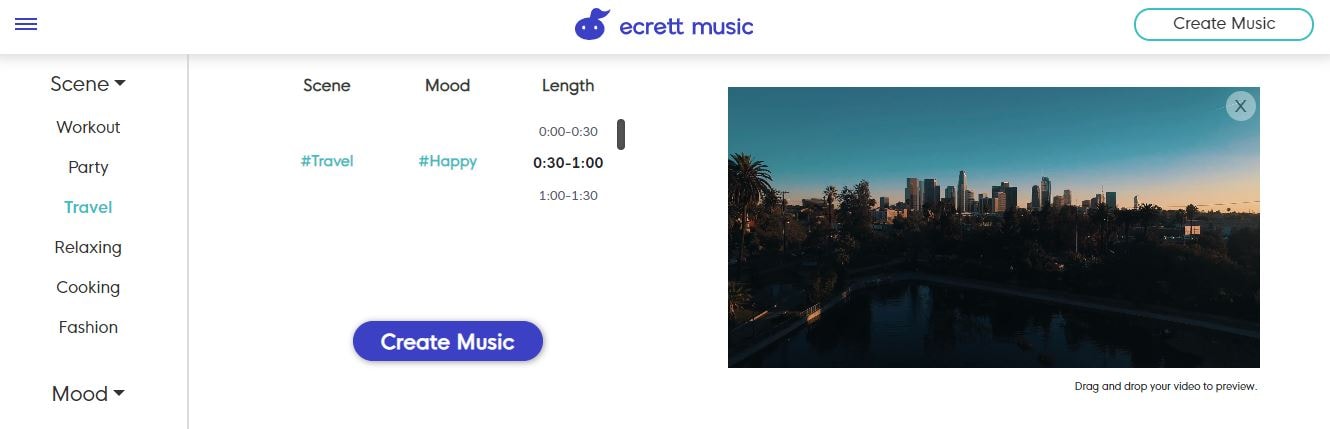
This online AI music composer makes creating stunning soundtracks for videos look easy. You just have to upload a video for which you want to generate music and select the type of scene and the mood of that scene. Party, Travel or Fashion are among the types of scenes you can choose from, while moods range from happy to serious. When done, simply click on the Create Music button, and the platform will automatically generate the soundtrack for your video. In case you are producing videos on a constant basis, you should consider purchasing one of the available subscription plans.
5. Melodrive
Price: Free
Compatibility: iOS, Windows
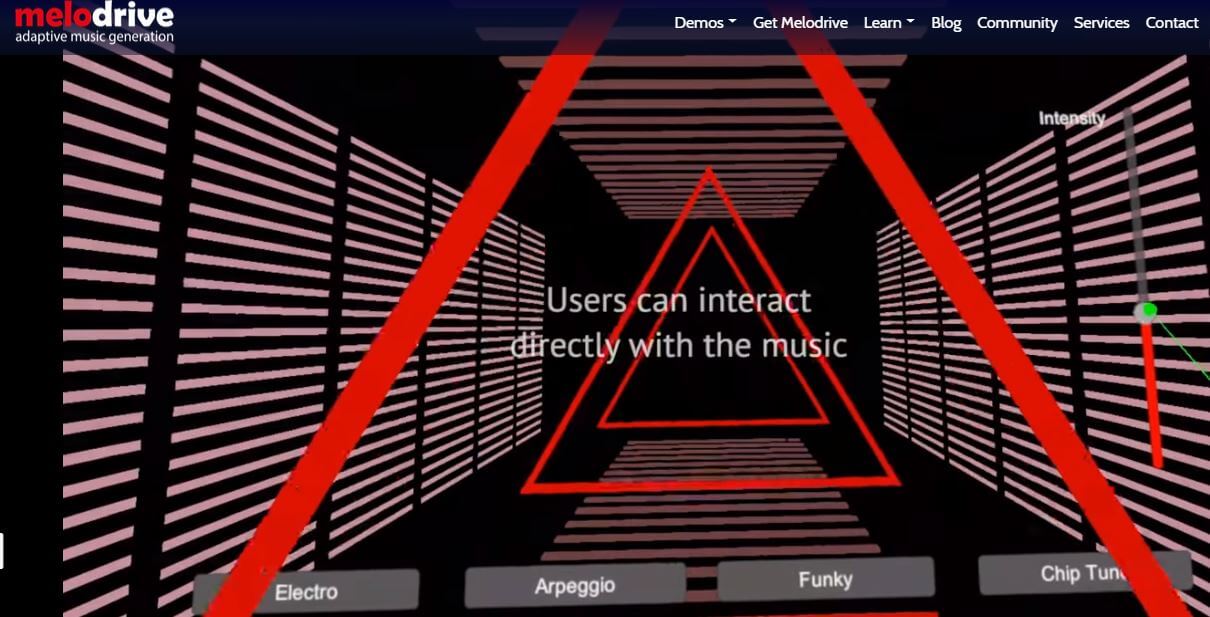
At the moment, the Lite and Indie versions of Melodrive are available for download free of charge, but the Indie version of this AI music composer still offers more options. Melodrive is one of the first AI systems that can compose emotional and unique music in real time. The AI generates music by adapting to the media environment and aims to match the mood and the style of the video. It is worth noting that Melodrive is still under development and that through time its capabilities to compose music are going to become even more refined than they already are.
6. ORB Composer
Price: Pricing plans start at $149,00
Compatibility: macOS, Windows

You can’t generate music automatically with ORB Composer, because the AI creates music based on your choices. That’s why you need to know at least the basic rules of music composition in order to be able to use the ORB Composer properly. The AI music composer comes bundled with a rich collection of chord progressions, that contains almost all chords used in popular music. This tool is aimed at artists who are interested in experimenting with the possibilities of creating music with artificial intelligence and discovering new styles of music. There are six music templates you can choose from, and you can create compositions by simply organizing different blocks of music.

Filmora AI Audio Stretcher
Wondershare Filmora - AI Audio Stretcher
• Retime any audio track to fit the duration of your video almost instantly.
• Rearrange songs without quality loss.
• Cross-platform supported - (Windows, Mac, iOS, Android)
Start Audio Stretch Start Audio Stretch Start Audio Stretch Learn More >
7. Amadeus Code
Price: Free, but the app offers in-app purchases
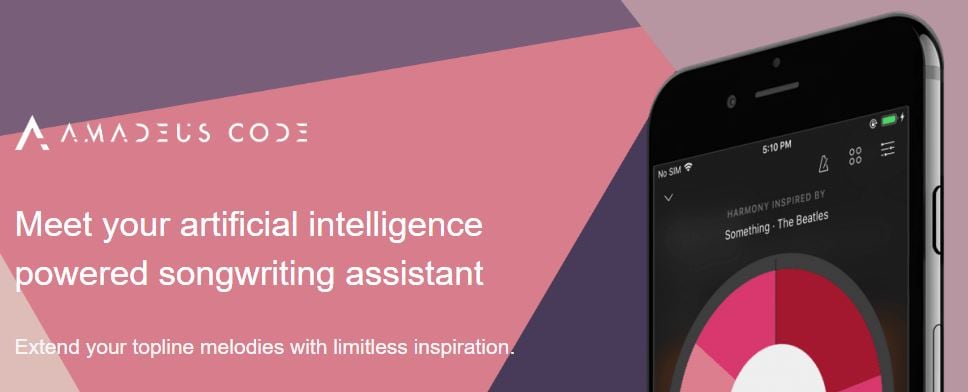
Compatibility: iOS
Both skilled musicians and music enthusiast can use this iOS-based app to create new melodies in just a few minutes. The AI engine that the Amadeus Code uses contains chord progressions of some of the most famous songs ever created and it let you use them to create new and innovative structures of music compositions. Moreover, you can use gestures to create new songs or recreate specific segments of songs you composed earlier. Even though Amadeus Code lets its users export audio and MIDI files to audio editing software, you still have to purchase all songs you want to keep.
8. Humtap
Price: Free
Compatibility: iOS
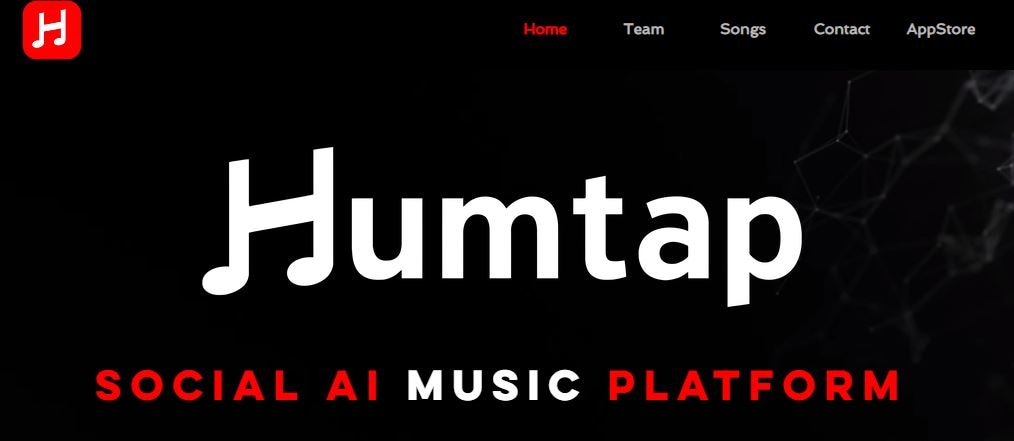
Musicians who have a tough time remembering their own ideas are going to love using Humtap because they can just hum a melody and the app will automatically generate an entire song using different instruments. What’s more, beats can be added with a single tap, and after the music is generated you can proceed to add the vocals as well. Humptap also has video making capabilities, so you can create videos for all songs you compose with this app. All tracks and videos generated with the Humtap AI music composer can be saved to your phone, but you can’t share your new creations to social media directly from the app.
9. Muzeek
Price: Free trial available, pricing plans start from $19 per month
Compatibility: macOS
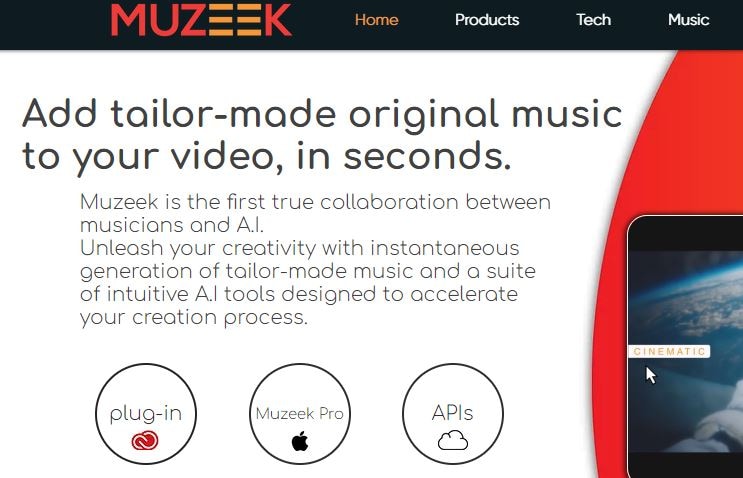
If you are in need of licensed music for the video you’re planning on sharing to social media networks, then Muzeek is one of the best choices you can make. The AI algorithm Muzeek uses analyzes the videos for which you are generating music and it creates soundtracks that perfectly fit the rhythm of the video. All content creators, including online marketing agencies or video game developers, can rely on Muzeek AI music composer to create authentic music in high quality. Moreover, Muzeek can also analyze the video’s original audio and create subtitles from it or adjust its volume automatically.
10. Brain.fm
Price: Subscription plans start from $6,95 per month
Compatibility: Android, online
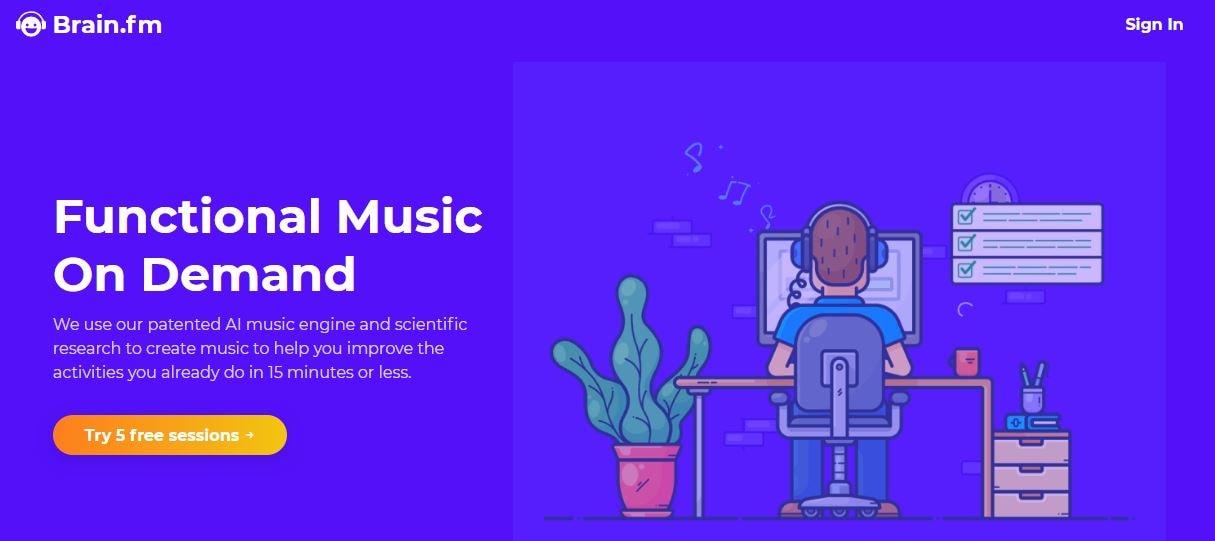
The idea that music can make our brains more productive is at the very core of what Brain.fm platform is all about. A team of scientists, musicians and engineers uses artificial intelligence to generate music designed to make your brain more productive and focused. They claim that the music created with their AI music composer achieve its effects in just ten to fifteen minutes. However, you can’t use Brain.fm to create your own music, as this platform is better suited for people who spend a lot of time at work and have a tough time maintaining their focus while performing important tasks.
Conclusion
The opportunities AI music composers offer are still not properly explored, because most of these technologies are still under development. The results AI music composers we included in this article have managed to achieve so far are impressive because each of them can produce high-quality audio files for all sorts of video content. Which AI music composer do you like to use the most? Leave a comment, and let us know.
Benjamin Arango
Benjamin Arango is a writer and a lover of all things video.
Follow @Benjamin Arango
Benjamin Arango
Mar 27, 2024• Proven solutions
Robots can’t be creative, right? A number of startups that focus on the development of artificial intelligence that is capable of composing music have proved this statement wrong. AI music composers generate original, copyright-free music you can use in your latest YouTube video or social media video ad. You don’t even have to be a sound designer or a musician to produce soundtracks for your videos with AI Music Composers, because you can upload the music that has already been recorded and create variations of it. So, let’s take a look at what AI music composers have to offer in 2024.
| 1 - Amper Music | 2 - AIVA |
|---|---|
| 3 - Jukedeck | 4 - Ecrett Music |
| 5 - Melodrive | 6 - ORB Composer |
| 7 - Amadeus Code | 8 - Humtap |
| 9 - Muzeek | 10 - Brain.fm |
Ten Best AI Music Composers You Should Know About
The AI technologies that can compose music are still relatively novel, and as time passes, they can only develop and grow further. Consequently, each of the AI music composers we featured in this article offers a different range of possibilities. Here are the ten best AI music composers you shouldn’t miss out on in 2024.
Filmora AI Music Editor
Edit Audio with AI Music Editor
Experience the power of Filmora’s AI tools and make your audio or music stand out like never before! Audio Denoise, Audio Ducking, Audio Synchronization, Audio Stretch, etc…
Try It Free Try It Free Try It Free Learn More >
1. Amper Music
Price: Available upon request
Industry professionals know just how frustrating the music licensing process can be. Amper Music is a cloud-based platform designed to simplify the process of creating soundtracks for movies and video games, as it produces AI generated algorithms that help users create music in a variety of music genres. You must first create an account on this platform, in order to be able to use the free version of Amper Music that provides only a limited amount of features. Upgrading to the pro version of Amper Music will enable you to enjoy the full potential of this rapidly growing AI Music Composer.
2. AIVA
Price: Free version available, subscription plans start from €14 p/month
Since 2016, when AIVA Technologies was founded, its team has worked on developing an AI script that can compose emotional soundtracks for ads, video games, or movies. Soon after, the AI published its first oeuvre titled ‘Opus 1 for Piano Solo and in the subsequent years, AIVA released an album and composed music for a video game. Besides enabling its users to create music from scratch, AIVA can also be used to produce variations of existing songs. The music engine that powers this AI music composer makes the production of corporate or social media videos much easier, as it eliminates the need to go through the music licensing process.
3. Jukedeck
Price: Free version available, Pricing plans start from $0.99 per download
The AI music composer developed by the Jukedeck startup resembles the Amper’s music composer because they both rely on neural networks to analyze music data, that is then used by the AI to learn how to compose original music. Each track that is available through this AI music composer can be edited, so you can change its length or its tempo. You can create music with Jukedeck for free if you decide to give all the rights to the AI composer, while both individuals and small businesses can purchase the license to use the song created with Jukedeck for just $0.99.
Note: Jukedeck has been acquired by TikTok, and we are waiting for a new Jukedeck.
![]()
A cross-platform for making videos anywhere for all creators
Why your video editing isn’t good enough? How about some creative inspo?
- 100 Million+ Users
- 150+ Countries and Regions
- 4 Million+ Social Media Followers
- 5 Million+ Stock Media for Use
* Secure Download
4. Ecrett Music
Price: Subscription plans start at $5

This online AI music composer makes creating stunning soundtracks for videos look easy. You just have to upload a video for which you want to generate music and select the type of scene and the mood of that scene. Party, Travel or Fashion are among the types of scenes you can choose from, while moods range from happy to serious. When done, simply click on the Create Music button, and the platform will automatically generate the soundtrack for your video. In case you are producing videos on a constant basis, you should consider purchasing one of the available subscription plans.
5. Melodrive
Price: Free
Compatibility: iOS, Windows
At the moment, the Lite and Indie versions of Melodrive are available for download free of charge, but the Indie version of this AI music composer still offers more options. Melodrive is one of the first AI systems that can compose emotional and unique music in real time. The AI generates music by adapting to the media environment and aims to match the mood and the style of the video. It is worth noting that Melodrive is still under development and that through time its capabilities to compose music are going to become even more refined than they already are.
6. ORB Composer
Price: Pricing plans start at $149,00
Compatibility: macOS, Windows

You can’t generate music automatically with ORB Composer, because the AI creates music based on your choices. That’s why you need to know at least the basic rules of music composition in order to be able to use the ORB Composer properly. The AI music composer comes bundled with a rich collection of chord progressions, that contains almost all chords used in popular music. This tool is aimed at artists who are interested in experimenting with the possibilities of creating music with artificial intelligence and discovering new styles of music. There are six music templates you can choose from, and you can create compositions by simply organizing different blocks of music.
Filmora AI Audio Stretcher
Wondershare Filmora - AI Audio Stretcher
• Retime any audio track to fit the duration of your video almost instantly.
• Rearrange songs without quality loss.
• Cross-platform supported - (Windows, Mac, iOS, Android)
Start Audio Stretch Start Audio Stretch Start Audio Stretch Learn More >
7. Amadeus Code
Price: Free, but the app offers in-app purchases
Compatibility: iOS
Both skilled musicians and music enthusiast can use this iOS-based app to create new melodies in just a few minutes. The AI engine that the Amadeus Code uses contains chord progressions of some of the most famous songs ever created and it let you use them to create new and innovative structures of music compositions. Moreover, you can use gestures to create new songs or recreate specific segments of songs you composed earlier. Even though Amadeus Code lets its users export audio and MIDI files to audio editing software, you still have to purchase all songs you want to keep.
8. Humtap
Price: Free
Compatibility: iOS
Musicians who have a tough time remembering their own ideas are going to love using Humtap because they can just hum a melody and the app will automatically generate an entire song using different instruments. What’s more, beats can be added with a single tap, and after the music is generated you can proceed to add the vocals as well. Humptap also has video making capabilities, so you can create videos for all songs you compose with this app. All tracks and videos generated with the Humtap AI music composer can be saved to your phone, but you can’t share your new creations to social media directly from the app.
9. Muzeek
Price: Free trial available, pricing plans start from $19 per month
Compatibility: macOS
If you are in need of licensed music for the video you’re planning on sharing to social media networks, then Muzeek is one of the best choices you can make. The AI algorithm Muzeek uses analyzes the videos for which you are generating music and it creates soundtracks that perfectly fit the rhythm of the video. All content creators, including online marketing agencies or video game developers, can rely on Muzeek AI music composer to create authentic music in high quality. Moreover, Muzeek can also analyze the video’s original audio and create subtitles from it or adjust its volume automatically.
10. Brain.fm
Price: Subscription plans start from $6,95 per month
Compatibility: Android, online
The idea that music can make our brains more productive is at the very core of what Brain.fm platform is all about. A team of scientists, musicians and engineers uses artificial intelligence to generate music designed to make your brain more productive and focused. They claim that the music created with their AI music composer achieve its effects in just ten to fifteen minutes. However, you can’t use Brain.fm to create your own music, as this platform is better suited for people who spend a lot of time at work and have a tough time maintaining their focus while performing important tasks.
Conclusion
The opportunities AI music composers offer are still not properly explored, because most of these technologies are still under development. The results AI music composers we included in this article have managed to achieve so far are impressive because each of them can produce high-quality audio files for all sorts of video content. Which AI music composer do you like to use the most? Leave a comment, and let us know.
Benjamin Arango
Benjamin Arango is a writer and a lover of all things video.
Follow @Benjamin Arango
“Step-by-Step: Integrating Tunes Into KineMaster”
Versatile Video Editor - Wondershare Filmora
An easy yet powerful editor
Numerous effects to choose from
Detailed tutorials provided by the official channel
Finding the right app to help you edit videos can be a bit of a chore. Finding a video editor that helps you seamlessly on the go can help immensely. If you’re looking for specific functions like how to add music on KineMaster.
The KineMaster app is ideally suited for beginners who have just taken an interest in learning video editing or professionals. It’s perfect if you’re just in it to create a celebratory video for special occasions like birthdays, weddings, anniversaries, or other special events.
It can also help you bring your A-game to the field if you’re a professional video editor looking to do serious work for clients. It’s easier to use than desktop video editing software.
In this article
01 [Basic introduction about KineMaster](#Part 1)
02 [How to add music to KineMaster](#Part 2)
03 [How to add Youtube/Spotify Music to KineMaster](#Part 3)
04 [Besides Adding Music, Here’s What You Can Do With KineMaster ](#Part 4)
Part 1 Basic introduction about KineMaster
KineMaster is a video editing app available for free download. It’s supported on both Android and iOS. It’s packed with many editing features, some commonplace and others advanced. This is why it’s the perfect app to learn how to add music in KineMaster.
You can download the app for free. It comes with a premium subscription that unlocks advanced features and tools. You can use KineMaster on your mobile to arrange scenes, transitions, and tools to cut, trim and edit videos as well as images. You can utilize layer support to create cinematic enhancements for your videos.

You can correct colors with color grading and create vibrant videos bursting with color and life. You can use blending modes, add effects and use graphics directly on the video with customized layers. One thing to note is that the free version of the videos comes with a watermark.
As for audio, it’s a simple matter to learn how to add music to video in KineMaster. Let’s look at how to add music in KineMaster iOS and Android. The Play Store version can help you with how to add music to KineMaster on Chromebook as well.
Part 2 How to add music to KineMaster
Follow these simple steps after downloading the app to your phone. After you enter KineMaster, you’ll be greeted by a home page that offers the chance to start a new project or continue to edit an existing one.
If you want to load an existing video on the app, then go to the media section. This means tapping on the ‘Audio’ icon option. It will allow you to browse your phone for images and videos you want to load on your phone. Tap the checkmark on the right-hand corner to add the video to the project. With the footage chosen, all that’s left is to add music to KineMaster.

Now let’s look at how to add music to a video in KineMaster. The first thing you need to do is decide if you want to choose a custom track or know how to add music to KineMaster without ‘my media.’

KineMaster’s premium edition comes with its library. In the meantime, we’ll have to use the tracks of our preference. So let’s get back to how to add music in KineMaster video.
When choosing a custom track, know what file you’re opting for. It’s simple to do when you know how to add music to video in KineMaster. It can support audio files in mp3, wav, m4v formats.

Once you’ve picked the appropriate file, you can choose the big red ‘Plus’ sign at the end of the file name. This will add audio to the video file. With this, you now know how to add music to a video on KineMaster.

Once you’re done with editing your video file, you can simply tap on the export symbol on the right-hand corner of the app.

Part 3 How to add Youtube/Spotify Music to KineMaster
How To Add Music To A KineMaster Video Using Youtube Audio Library
Now let’s tap into the knowledge for the YouTube edition of how to add music into KineMaster. You can source the free music from YouTube’s creator studio. It offers many options for copyright-free music. In all cases, you must credit the artist, and some artists may request you to contribute in exchange for their art.

YouTube allows users to download the audio file as an mp3. You can then use this mp3 file in KineMaster. To do so you. Once you’ve imported the video file, you can then choose how to add music to KineMaster.
Tap the ‘Media’ button to browse the audio file you want to include. Click on the big red plus encircled by a circle at the end of the file name.
How To Add Music To A KineMaster Video Using Spotify Audio
Unfortunately, all of Spotify’s tracks are exclusively licensed for usage only within the software. It cannot simply import Spotify audio into video editors like KineMaster for additional editing.

However, if you could export the relevant files to your mobile device. We can help you know how you can learn how to add music to KineMaster on iPad or any android device.
● Tap on ‘Media’
● Browse files until you locate the audio track
● Click on the encircled red plus sign.
● Edit track to fit your video
● Export video
That, dear readers, is how to add music to KineMaster.
Part 4 Besides Adding Music, Here’s What You Can Do With KineMaster
KineMaster is the best video editor app available for mobile devices. With extensive availability ranging from iPads to Chromebooks and everything in between. It’s easy to edit on the go.
It’s convenient when you’re editing while traveling or if you hate sitting still to work. It’s powerful to help you perform the tasks you need to while light enough to support on mobile.
Let’s look at some of the features available on KineMaster.
Trim/Split Video
You can customize a single clip from a longer video or trim the video for a highlights reel. Tap on the scissors option to open a window with four options.

The first is to trim to the ‘left of playhead’ (cuts before), trim to ‘right of playhead’ (cuts after), ‘split at playhead’ (splits the video into two). The final option is to ‘split and insert freeze frame.’ These options give you a lot of control over the video.
Video Transitions
You have many transitions ranging from 3D transitions to transitions for text or picture in picture options. Once you’ve selected the transition, tap on the tick mark at the top right corner to apply the effect.

Handwriting
This lets you handwrite messages, doodles, and more as a layer on top of your video. It can add a personal and creative flair to the video. When used in conjunction with the animation effects, you can expand the scope of use. You can enrich your videos with detailed and hand-drawn assists.

Animations
One of the better aspects of the KineMaster app is that you can animate individual elements in your video. Each animation has its layer. There are three types of animation.

For instance, ‘in animation’ guides how the animation enters. The ‘out animation’ can be used at the end of a clip or when characters exit. ‘Overall animations’ are sustained throughout the video. You have the option to customize animations.
Suppose you’re looking for a powerful video editor like KineMaster for your desktop/PC. Look no further thanWondershare Filmora. The software program is a powerful tool for video editing available for both Windows and macOS.
It’s the perfect blend of skill and automation that lets users showcase their talents. Both novices and industry professionals can use Filmora video editing with ease. It boasts a broader range of features and effects to draw on. With advanced video editing capabilities, you can never go wrong when using Wondershare Filmora.
Wondershare Filmora
Get started easily with Filmora’s powerful performance, intuitive interface, and countless effects!
Try It Free Try It Free Try It Free Learn More about Filmora>

Conclusion
KineMaster is among the greatest Android and iPhone video editing apps. This program allows users to edit films with a few basic tricks to look sophisticated. You can learn how to add music to KineMaster easily. With or without experience, everyone can spice up a video with its simple interface and robust capabilities.
Similarly, video editing from your smartphone is another one of the many methods to expand your creative horizons. Another is to use Wondershare Filmora video editing software.
Finding the right app to help you edit videos can be a bit of a chore. Finding a video editor that helps you seamlessly on the go can help immensely. If you’re looking for specific functions like how to add music on KineMaster.
The KineMaster app is ideally suited for beginners who have just taken an interest in learning video editing or professionals. It’s perfect if you’re just in it to create a celebratory video for special occasions like birthdays, weddings, anniversaries, or other special events.
It can also help you bring your A-game to the field if you’re a professional video editor looking to do serious work for clients. It’s easier to use than desktop video editing software.
In this article
01 [Basic introduction about KineMaster](#Part 1)
02 [How to add music to KineMaster](#Part 2)
03 [How to add Youtube/Spotify Music to KineMaster](#Part 3)
04 [Besides Adding Music, Here’s What You Can Do With KineMaster ](#Part 4)
Part 1 Basic introduction about KineMaster
KineMaster is a video editing app available for free download. It’s supported on both Android and iOS. It’s packed with many editing features, some commonplace and others advanced. This is why it’s the perfect app to learn how to add music in KineMaster.
You can download the app for free. It comes with a premium subscription that unlocks advanced features and tools. You can use KineMaster on your mobile to arrange scenes, transitions, and tools to cut, trim and edit videos as well as images. You can utilize layer support to create cinematic enhancements for your videos.
You can correct colors with color grading and create vibrant videos bursting with color and life. You can use blending modes, add effects and use graphics directly on the video with customized layers. One thing to note is that the free version of the videos comes with a watermark.
As for audio, it’s a simple matter to learn how to add music to video in KineMaster. Let’s look at how to add music in KineMaster iOS and Android. The Play Store version can help you with how to add music to KineMaster on Chromebook as well.
Part 2 How to add music to KineMaster
Follow these simple steps after downloading the app to your phone. After you enter KineMaster, you’ll be greeted by a home page that offers the chance to start a new project or continue to edit an existing one.
If you want to load an existing video on the app, then go to the media section. This means tapping on the ‘Audio’ icon option. It will allow you to browse your phone for images and videos you want to load on your phone. Tap the checkmark on the right-hand corner to add the video to the project. With the footage chosen, all that’s left is to add music to KineMaster.
Now let’s look at how to add music to a video in KineMaster. The first thing you need to do is decide if you want to choose a custom track or know how to add music to KineMaster without ‘my media.’
KineMaster’s premium edition comes with its library. In the meantime, we’ll have to use the tracks of our preference. So let’s get back to how to add music in KineMaster video.
When choosing a custom track, know what file you’re opting for. It’s simple to do when you know how to add music to video in KineMaster. It can support audio files in mp3, wav, m4v formats.
Once you’ve picked the appropriate file, you can choose the big red ‘Plus’ sign at the end of the file name. This will add audio to the video file. With this, you now know how to add music to a video on KineMaster.
Once you’re done with editing your video file, you can simply tap on the export symbol on the right-hand corner of the app.
Part 3 How to add Youtube/Spotify Music to KineMaster
How To Add Music To A KineMaster Video Using Youtube Audio Library
Now let’s tap into the knowledge for the YouTube edition of how to add music into KineMaster. You can source the free music from YouTube’s creator studio. It offers many options for copyright-free music. In all cases, you must credit the artist, and some artists may request you to contribute in exchange for their art.
YouTube allows users to download the audio file as an mp3. You can then use this mp3 file in KineMaster. To do so you. Once you’ve imported the video file, you can then choose how to add music to KineMaster.
Tap the ‘Media’ button to browse the audio file you want to include. Click on the big red plus encircled by a circle at the end of the file name.
How To Add Music To A KineMaster Video Using Spotify Audio
Unfortunately, all of Spotify’s tracks are exclusively licensed for usage only within the software. It cannot simply import Spotify audio into video editors like KineMaster for additional editing.
However, if you could export the relevant files to your mobile device. We can help you know how you can learn how to add music to KineMaster on iPad or any android device.
● Tap on ‘Media’
● Browse files until you locate the audio track
● Click on the encircled red plus sign.
● Edit track to fit your video
● Export video
That, dear readers, is how to add music to KineMaster.
Part 4 Besides Adding Music, Here’s What You Can Do With KineMaster
KineMaster is the best video editor app available for mobile devices. With extensive availability ranging from iPads to Chromebooks and everything in between. It’s easy to edit on the go.
It’s convenient when you’re editing while traveling or if you hate sitting still to work. It’s powerful to help you perform the tasks you need to while light enough to support on mobile.
Let’s look at some of the features available on KineMaster.
Trim/Split Video
You can customize a single clip from a longer video or trim the video for a highlights reel. Tap on the scissors option to open a window with four options.
The first is to trim to the ‘left of playhead’ (cuts before), trim to ‘right of playhead’ (cuts after), ‘split at playhead’ (splits the video into two). The final option is to ‘split and insert freeze frame.’ These options give you a lot of control over the video.
Video Transitions
You have many transitions ranging from 3D transitions to transitions for text or picture in picture options. Once you’ve selected the transition, tap on the tick mark at the top right corner to apply the effect.
Handwriting
This lets you handwrite messages, doodles, and more as a layer on top of your video. It can add a personal and creative flair to the video. When used in conjunction with the animation effects, you can expand the scope of use. You can enrich your videos with detailed and hand-drawn assists.
Animations
One of the better aspects of the KineMaster app is that you can animate individual elements in your video. Each animation has its layer. There are three types of animation.
For instance, ‘in animation’ guides how the animation enters. The ‘out animation’ can be used at the end of a clip or when characters exit. ‘Overall animations’ are sustained throughout the video. You have the option to customize animations.
Suppose you’re looking for a powerful video editor like KineMaster for your desktop/PC. Look no further thanWondershare Filmora. The software program is a powerful tool for video editing available for both Windows and macOS.
It’s the perfect blend of skill and automation that lets users showcase their talents. Both novices and industry professionals can use Filmora video editing with ease. It boasts a broader range of features and effects to draw on. With advanced video editing capabilities, you can never go wrong when using Wondershare Filmora.
Wondershare Filmora
Get started easily with Filmora’s powerful performance, intuitive interface, and countless effects!
Try It Free Try It Free Try It Free Learn More about Filmora>
Conclusion
KineMaster is among the greatest Android and iPhone video editing apps. This program allows users to edit films with a few basic tricks to look sophisticated. You can learn how to add music to KineMaster easily. With or without experience, everyone can spice up a video with its simple interface and robust capabilities.
Similarly, video editing from your smartphone is another one of the many methods to expand your creative horizons. Another is to use Wondershare Filmora video editing software.
Also read:
- Updated In 2024, Supercharge Your Windows PCs Sound Output with These Top 10 Volumetric Enhancers
- New Preserving Sound Integrity Altering Audio Tones in Audacity for 2024
- In 2024, Top-Rated Dog Howling and Growling Sounds for Filmmakers
- New Turntable Tunes Archive Stream Your DJ Favorites
- Updated From Sight to Sound Modern Methods for Pulling Audio From Visual Media for 2024
- Updated Techniques for Separating Beats in Song Arrangements for 2024
- 2024 Approved The Hasty Guide to Altering Playback Rate in Sound Files
- How to Transcribe Audio to Text Free on Android and iOS for 2024
- New Syncing Sound A Comprehensive Approach to Matching Timelines of Audio and Video in FCPX
- Adjusting Audio Speed & Pitch Through Digital Platforms
- Seek Out Dreaded Howl Effect for 2024
- New 2024 Approved Advanced Audio Filtration How to Mute Irrelevant Clips in CinemaPro
- Updated 2024 Approved Top Spots for Accessing Avian Audio Files
- In 2024, Silent Elements Unveiled Techniques for Retrieving Sound From Videos
- Updated Find Bird Sounds MP3 Effect
- Updated 2024 Approved Leading Android Audio Capturing Apps - The Ultimate List of Top 10
- Updated 2024 Approved Steps for Taking Control of Your iPhones Volume Settings by Eliminating Audio Leveling
- Updated How to Download and Install Lame for Audacity for 2024
- New In 2024, What to Look for in a Video to Audio Converter My Expert Advice
- 2024 Approved Mastering Final Cut Pro A Step-by-Step Guide to Flipping Clips
- Bypassing Google Account With vnROM Bypass For Honor 80 Pro Straight Screen Edition
- Overview of the Best Honor Magic 5 Pro Screen Mirroring App | Dr.fone
- How to Recover Deleted Screenshots on iPhone 11 Pro Max? | Stellar
- Updated In 2024, The HD Video Handbook Understanding Pixel Resolution and More
- How to Show Wi-Fi Password on Realme Narzo 60x 5G
- 2024 Approved 11 Apps To Speed Up A Video On iPhone
- 2024 Approved This Article Inroduces 10 Video Special Effects Apps for iPhone, iPad, Android to Add Special Video Effects to Video with Drag-N-Drop
- 3 Ways to Erase Apple iPhone 11 Pro Max When Its Locked Within Seconds | Dr.fone
- In 2024, How to Show Wi-Fi Password on Vivo G2
- How to Fix Pokemon Go Route Not Working On Tecno Spark Go (2024)? | Dr.fone
- In 2024, 15 Best Strongest Pokémon To Use in Pokémon GO PvP Leagues For Tecno Spark 10 4G | Dr.fone
- New Top 6 Free Talking Stock Photo Sites
- Best Subtitle Edit Replacements for Mac Users
- In 2024, Things You Should Know When Unlocking Total Wireless Of Apple iPhone 12 mini
- PassFab iPhone 13 Pro Backup Unlocker Top 4 Alternatives | Dr.fone
- Title: New 2024 Approved Elevate Your Audio Altering Speech Pitch with Audacity
- Author: Kate
- Created at : 2024-05-05 07:51:05
- Updated at : 2024-05-06 07:51:05
- Link: https://audio-editing.techidaily.com/new-2024-approved-elevate-your-audio-altering-speech-pitch-with-audacity/
- License: This work is licensed under CC BY-NC-SA 4.0.
