
:max_bytes(150000):strip_icc():format(webp)/GettyImages-545864051-5c29cf6346e0fb0001d25712.jpg)
Key Information on Utilizing YouTubes Sound Bank
Key Information on Utilizing YouTube’s Sound Bank
Versatile Video Editor - Wondershare Filmora
An easy yet powerful editor
Numerous effects to choose from
Detailed tutorials provided by the official channel
Sound and music are the whole and soul of a video. They help engage the audience, generate an emotional response, indicate mood, and much more. However, there’s one catch. As a video content creator, you must be already aware that not every sound effect or music you want to add to your video is available for free or available at all. This sometimes can be a real setback for a content creator. But what if I tell you there is a way around it? That you can get the music you want without paying extra bucks for it. Yes, a platform called YouTube Sound Library can resolve your issue. And help you find the music that you are longing for. Want to know how? Then read along.
In this article
01 [Question 1: What is YouTube Sound library?](#Part 1)
02 [Question 2: How to Find YouTube Sound Library?](#Part 2)
03 [Question 3: Is YouTube Sound Library Free?](#Part 3)
04 [Question 4: How Can I Use YouTube Sound Library?](#Part 4)
05 [Question 5: How to Add Music from Sound Library to My Video?](#Part 5)
Part 1 What is YouTube Sound library?
Content creators are always treading the tightrope when it comes to budget. They are always watching out for a way to make their work cost-efficient by cutting costs wherever possible.
Sounds and music are some fields where you cannot afford to be cost-effective, as it is bound to hamper the quality of your final product. But buying the rights of music or sound can also have adverse effects on your purse. This is where YouTube Sound Library can save the day for you.
YouTube Sound Library is a segment of YouTube Studio dedicated to presenting content creators like you with royalty-free music from different genres, moods, and artists around the globe.
Part 2 How to Find YouTube Sound Library?
It’s really easy to find YouTube sound effects library. It doesn’t matter if you are using a computer or a smartphone, it’s the same process that you need to follow. Here is how you can do it –
Step 1
First, you need to open YouTube on your browser and go to “Your Channel” by clicking on the picture icon from the top right corner.
Step 2
Then click on the “Customize Channel” button. This will open the YouTube Creator Studio. You can also directly go to this link and sign into your YouTube Creator Studio .
Step 3
Now from the left panel scroll below the options such as “Dashboard”, “Content”, “Playlists”, etc.
You’ll find the “Audio Library” option below. Select the “Audio Library” option and you’ll get to the YouTube Sound Library.
Part 3 Is YouTube Sound Library Free?
A simple answer to this question is: Yes, YouTube Sound Library is free. The sound or the music you procure from this medium is royalty-free. And using it won’t incur the risk of a copyright strike against your content.
But just like every Google and YouTube tool available on the internet, YouTube Sound Library also comes with a bunch of terms and conditions. As a content creator and user of the audio from the library, you will be required to keep those terms and conditions in mind before using the music. If you somehow breach the guidelines mapped out by YouTube, you run the risk of a copyright strike against your content.
Therefore, before using the audio, thoroughly go through the content usage guidelines. Although they are not rocket science to start with, not honoring them can bite you later on.
Part 4 How Can I Use YouTube Sound Library?
Downloading YouTube audio is very easy. All you need to do is log on to your YouTube profile and access the YouTube Studio option. Once you are at it, follow these simple instructions:
Step 1
Once you click on the “Audio Library” section, you will see tabs, namely, Free Music, Sound effects, and Starred. Right beneath it, you will be able to see a search and filter option. If you click on that, a drop-down menu with options such as: Title name, Genre, Mood, Artist name, etc., will appear in that order. You can select whatever choices suit your purpose and search.

Step 2
You can do the same if you want to search for music based on Genre or Mood.
All you need to do is select the option under Free Music and click on apply.

Step 3
Once your searched options appear on the screen, you are provided with the option of listening to them before you proceed to download.
Click on the play option next to the name of the track/music/sound for a preview. Also, if you are searching for multiple audios, you can star the audio using the Star option present on the right of your screen to revisit the audio later.

Step4
After you have “Starred” all the audios you want, head on to the starred section and download them using the download option visible on the right of your screen.
Part 5 How to Add Music from Sound Library to My Video?
Now that you have downloaded your desired music for your video, the question arises, how to integrate it into your video?
A straightforward answer to that can be, using YouTube Studio’s built-in video editor. But considering the limited features it has on offer, you might require something that can allow you to add premium features: drag and drop special effects, custom animation on the go, and much more.
So, if you are looking for such features too, then Filmora can be the answer to your requirements. Filmora is a video editing software that allows you to perform some of the most crucial editing tasks with relative ease. From integrating music to a video, to adding special effects or custom animation and color matching in your video, Filmora has got you all covered.
Features
● Adding background music to the video: Music makes everything merry. So, if you want your video to look stunning, you know that music is the key. Hence, Filmora comes with the feature of adding background music/sound to your video that will keep your -audience engaged and entertained throughout it-.
● Audio de-noise: As a content creator, it’s impossible to make sure that there is no noise distraction in the background every time you sit down to record a video. These background noises can be a huge distraction for your viewers and might even annoy them off. Therefore, Filmora has come up with the best de-noise feature to help you reduce the background noises in your video.
● Fade Audio in or out: Like the transition of the scenes in a video, the audio change is equally important. You cannot complete a perfect transition without a proper audio fade. Filmora offers you a more straightforward method to adjust the audio in your video during the transition.
● Beat Detection: Syncing a video has been a hassle for content creators over the years. Beat detection has, however, changed the game completely. In Filmora’s beat detection feature, you can analyze the music and generate beat markers to help you while syncing the audio and special effects.
● Adjust applied audio effects: This is another game-changing feature that helps you lengthen or shorten the length of an impact according to your video. Filmora’s Adjust Audio Effect feature allows you to delay the time of the effect and the factor of effects like echo, lobby, big room etc.
Step by Step Guide for How to Add Music to Video with Filmora:
Step 1 Click on the “Import” option to load your original video to the dashboard of Filmora
You can also simply drag and drop your video from the source file. Your added files will be shown in the left media pane.

Step 2 For adding music to the video(s), simply drag and drop your music over the video track and position it according to the length of the video
One most significant advantage of using Filmora is that it offers you a wide array of royalty-free sounds. To access this feature, you just have to head to the Audio Library in Filmora and drag and drop the music thumbnails you want.

If you want to add extra features to your audio track, you can double click on the track to open the editing panel. Here you can edit the add-on features of the audio like fade in and out, adjust volume, tune the pitch, etc.

Step 3 Once done, you just have to click on the “Export” option to procure your video. If you want, you can directly upload the video on YouTube

Wondershare Filmora
Get started easily with Filmora’s powerful performance, intuitive interface, and countless effects!
Try It Free Try It Free Try It Free Learn More >

AI Portrait – The best feature of Wondershare Filmora for gameplay editing
The AI Portrait is a new add-on in Wondershare Filmora. It can easily remove video backgrounds without using a green screen or chroma key, allowing you to add borders, glitch effects, pixelated, noise, or segmentation video effects.

Conclusion
Finding the right audio is not enough to create engaging content in today’s time. You might find the right kind of audio and even use it properly by remaining within the guidelines of YouTube, but it won’t guarantee success.
To be noticeable, you need to know the basics of editing your video in a particular manner to get the most out of it. And Filmora is the best option out there to create one of the most prolific video content. Filmora is your one-stop destination to deliver the best video content with a wide variety of features to choose from.
Sound and music are the whole and soul of a video. They help engage the audience, generate an emotional response, indicate mood, and much more. However, there’s one catch. As a video content creator, you must be already aware that not every sound effect or music you want to add to your video is available for free or available at all. This sometimes can be a real setback for a content creator. But what if I tell you there is a way around it? That you can get the music you want without paying extra bucks for it. Yes, a platform called YouTube Sound Library can resolve your issue. And help you find the music that you are longing for. Want to know how? Then read along.
In this article
01 [Question 1: What is YouTube Sound library?](#Part 1)
02 [Question 2: How to Find YouTube Sound Library?](#Part 2)
03 [Question 3: Is YouTube Sound Library Free?](#Part 3)
04 [Question 4: How Can I Use YouTube Sound Library?](#Part 4)
05 [Question 5: How to Add Music from Sound Library to My Video?](#Part 5)
Part 1 What is YouTube Sound library?
Content creators are always treading the tightrope when it comes to budget. They are always watching out for a way to make their work cost-efficient by cutting costs wherever possible.
Sounds and music are some fields where you cannot afford to be cost-effective, as it is bound to hamper the quality of your final product. But buying the rights of music or sound can also have adverse effects on your purse. This is where YouTube Sound Library can save the day for you.
YouTube Sound Library is a segment of YouTube Studio dedicated to presenting content creators like you with royalty-free music from different genres, moods, and artists around the globe.
Part 2 How to Find YouTube Sound Library?
It’s really easy to find YouTube sound effects library. It doesn’t matter if you are using a computer or a smartphone, it’s the same process that you need to follow. Here is how you can do it –
Step 1
First, you need to open YouTube on your browser and go to “Your Channel” by clicking on the picture icon from the top right corner.
Step 2
Then click on the “Customize Channel” button. This will open the YouTube Creator Studio. You can also directly go to this link and sign into your YouTube Creator Studio .
Step 3
Now from the left panel scroll below the options such as “Dashboard”, “Content”, “Playlists”, etc.
You’ll find the “Audio Library” option below. Select the “Audio Library” option and you’ll get to the YouTube Sound Library.
Part 3 Is YouTube Sound Library Free?
A simple answer to this question is: Yes, YouTube Sound Library is free. The sound or the music you procure from this medium is royalty-free. And using it won’t incur the risk of a copyright strike against your content.
But just like every Google and YouTube tool available on the internet, YouTube Sound Library also comes with a bunch of terms and conditions. As a content creator and user of the audio from the library, you will be required to keep those terms and conditions in mind before using the music. If you somehow breach the guidelines mapped out by YouTube, you run the risk of a copyright strike against your content.
Therefore, before using the audio, thoroughly go through the content usage guidelines. Although they are not rocket science to start with, not honoring them can bite you later on.
Part 4 How Can I Use YouTube Sound Library?
Downloading YouTube audio is very easy. All you need to do is log on to your YouTube profile and access the YouTube Studio option. Once you are at it, follow these simple instructions:
Step 1
Once you click on the “Audio Library” section, you will see tabs, namely, Free Music, Sound effects, and Starred. Right beneath it, you will be able to see a search and filter option. If you click on that, a drop-down menu with options such as: Title name, Genre, Mood, Artist name, etc., will appear in that order. You can select whatever choices suit your purpose and search.
Step 2
You can do the same if you want to search for music based on Genre or Mood.
All you need to do is select the option under Free Music and click on apply.
Step 3
Once your searched options appear on the screen, you are provided with the option of listening to them before you proceed to download.
Click on the play option next to the name of the track/music/sound for a preview. Also, if you are searching for multiple audios, you can star the audio using the Star option present on the right of your screen to revisit the audio later.
Step4
After you have “Starred” all the audios you want, head on to the starred section and download them using the download option visible on the right of your screen.
Part 5 How to Add Music from Sound Library to My Video?
Now that you have downloaded your desired music for your video, the question arises, how to integrate it into your video?
A straightforward answer to that can be, using YouTube Studio’s built-in video editor. But considering the limited features it has on offer, you might require something that can allow you to add premium features: drag and drop special effects, custom animation on the go, and much more.
So, if you are looking for such features too, then Filmora can be the answer to your requirements. Filmora is a video editing software that allows you to perform some of the most crucial editing tasks with relative ease. From integrating music to a video, to adding special effects or custom animation and color matching in your video, Filmora has got you all covered.
Features
● Adding background music to the video: Music makes everything merry. So, if you want your video to look stunning, you know that music is the key. Hence, Filmora comes with the feature of adding background music/sound to your video that will keep your -audience engaged and entertained throughout it-.
● Audio de-noise: As a content creator, it’s impossible to make sure that there is no noise distraction in the background every time you sit down to record a video. These background noises can be a huge distraction for your viewers and might even annoy them off. Therefore, Filmora has come up with the best de-noise feature to help you reduce the background noises in your video.
● Fade Audio in or out: Like the transition of the scenes in a video, the audio change is equally important. You cannot complete a perfect transition without a proper audio fade. Filmora offers you a more straightforward method to adjust the audio in your video during the transition.
● Beat Detection: Syncing a video has been a hassle for content creators over the years. Beat detection has, however, changed the game completely. In Filmora’s beat detection feature, you can analyze the music and generate beat markers to help you while syncing the audio and special effects.
● Adjust applied audio effects: This is another game-changing feature that helps you lengthen or shorten the length of an impact according to your video. Filmora’s Adjust Audio Effect feature allows you to delay the time of the effect and the factor of effects like echo, lobby, big room etc.
Step by Step Guide for How to Add Music to Video with Filmora:
Step 1 Click on the “Import” option to load your original video to the dashboard of Filmora
You can also simply drag and drop your video from the source file. Your added files will be shown in the left media pane.
Step 2 For adding music to the video(s), simply drag and drop your music over the video track and position it according to the length of the video
One most significant advantage of using Filmora is that it offers you a wide array of royalty-free sounds. To access this feature, you just have to head to the Audio Library in Filmora and drag and drop the music thumbnails you want.
If you want to add extra features to your audio track, you can double click on the track to open the editing panel. Here you can edit the add-on features of the audio like fade in and out, adjust volume, tune the pitch, etc.
Step 3 Once done, you just have to click on the “Export” option to procure your video. If you want, you can directly upload the video on YouTube
Wondershare Filmora
Get started easily with Filmora’s powerful performance, intuitive interface, and countless effects!
Try It Free Try It Free Try It Free Learn More >
AI Portrait – The best feature of Wondershare Filmora for gameplay editing
The AI Portrait is a new add-on in Wondershare Filmora. It can easily remove video backgrounds without using a green screen or chroma key, allowing you to add borders, glitch effects, pixelated, noise, or segmentation video effects.
Conclusion
Finding the right audio is not enough to create engaging content in today’s time. You might find the right kind of audio and even use it properly by remaining within the guidelines of YouTube, but it won’t guarantee success.
To be noticeable, you need to know the basics of editing your video in a particular manner to get the most out of it. And Filmora is the best option out there to create one of the most prolific video content. Filmora is your one-stop destination to deliver the best video content with a wide variety of features to choose from.
Tuning In Smoothly: Learning to Adjust Audio Volumes on Audacity
Audacity is a free, open access, cross-platform sound editing and recording tool. It is compatible with Windows, Mac OS X, Linux, and various other operating systems. All of these aspects have contributed to Audacity’s worldwide popularity. Audacity features an amplified effect that alters the loudness of your chosen audio and other practical tools that can change the sound in different ways.
As a result, Audacity can not only assist you in modifying the level of an audio file, but it can also help you equalize, reduce, normalize, and so on.
Yes, you have heard it right, Audacity increase volume, but the primary question is how? But don’t worry, you will get the answer after reading the article. This article will explain how you can increase or decrease the volume of a whole and a specific segment of the audio file. Let’s get started.
In this article
01 How to Increase or Decrease Volume Without Distortion and Clipping in Audacity
02 How to Increase Volume of Multiple Files in Audacity?
03 How to Increase Volume in Certain Parts of Track?
04 What’s the Difference between Normalize and Amplify?
Part 1: How to Increase or Decrease Volume Without Distortion and Clipping in Audacity
Audio clipping occurs when the audio input becomes too loud for an amplifier to produce, and the surplus signal creates distortion. When editing, you cannot add additional volume to your audio clip forever because this would result in clipping. In this case, you can use the Audacity application to emphasize your material by turning the volume up or down without distortion and clipping on a track or recording.
Learn how Audacity increase volume without distortion by following the procedure described below:
Step 1: First, download and install the Audacity software on your computer.
Step 2: Select the File from the menu above and click Open to open the audio file.

Step 3: Choose the audio track, go to the Effect menu and pick the Amplify option from the drop-down menu.

Note: You can increase or decrease the volume by double-clicking the track and using the slider under the Gain title.
Step 4: Increase or decrease the volume by sliding the slider or typing the amplification value in the text box next to it in the Amplify window as needed.

Note: Ensure that the Allow Clipping checkbox remains unchecked to avoid clipping. Moreover, keep in mind that increasing the volume to a greater extent can result in distortion.
Related: How to Change Audio Volume in Filmora
Part 2: How to Increase Volume of Multiple Files in Audacity?
Audacity is an open-source audio editing tool. It is used for various purposes, like audio recording, music creation, and audio file editing. It also allows you to increase and decrease the volume of audio files.
You may also apply the modifications to multiple files at once, rather than one at a time. Check out the instructions below to learn how to change the volume of multiple audio files:
Step 1: Select the Import option from the File menu, and then pick the Audio option. Browse to your audio files, choose all of them, and then click the Open option.

Step 2: To select all the files, press Ctrl + A, click on the Effect option in the menu bar and pick Amplify.

Step 3: Now, either enter the value in the text box next to the Amplification Decibels tab or use the slider under it. To verify the operation of increasing the volume, check the allow clipping checkbox. When you’re through with the options, click the Ok button.

Step 4: Amplification will be applied to all the tracks. Go to the File option from the above menu to export the files and then select the Export option.

If you’re running Audacity on macOS computer, you can watch the video tutorial below to apply effects to multiple files.
Part 3: How to Increase Volume in Certain Parts of Track?
The audacity software also allows you to alter a specific section of an audio file. The selection tool can assist in locating a particular area of the track. After you’ve chosen a section of the audio file, you may utilize the amplification effect to increase its loudness. Check out the instructions below to learn how you can achieve it:
Step 1: Launch the Audacity software on the computer. To open the audio file, go to the File menu and select Open. You may also open the file by dragging it.
Step 2: Ensure that the Selection tool is active now. Click and hold the mouse left-click to move from one spot on the track to another.

Step 3: After picking the part, go to the Effect option from the menu and select Amplify.

Step 4: Now, for that specific region, modify the amplification and click OK. This will only change the volume for the area you have selected.

Part 4: What’s the Difference between Normalize and Amplify?
Amplify and Normalize are two essential features of the Audacity tool. Many people think they are the same thing, they are right up to some extent, but there exists a big difference between both the features. Before discussing the differences, you need to know what the terms Normalize and Amplify imply.
Amplify
It is the quickest approach to comprehend the effect’s name if you want to know precisely what impacts are. The frequency of the vibration is enhanced to increase the amplification effect. As previously said, it raises a tiny sound.
Furthermore, because this amplification is extended to all frequencies and amplitude, the noise increases. If you choose ten sources and magnify them by ten decibels, each source will be ten decibels louder than your present sound.

Normalize
The meaning of normalizing is standardized, which is also a feature of its name. Whenever you pick an audio input and use the normalize feature, the level is adjusted automatically according to the previously indicated average volume size in Oda City.
As a result, when one sound source is normalized, there is no discernible difference between it and the amplification mechanism. Still, the effect is evident when several sound sources are performed concurrently.
By pressing Ctrl + A and selecting all ten various audio sources, you may compute the required standard of every sound source, enhance the audio input that is smaller than the normal, and create the audio signal more significant than the standard. Shrink the size of each noise source, such as the name, and normalize the sound.

Related: Best Audio Normalizers for Windows
Differences
To differentiate the meaning and impact precisely, amplification means increasing or reducing the sound, whereas normalizing means equalizing the sound. Simply defined, if you magnify ten sources by ten decibels, each of the shorter and louder noises equals ten decibels in their actual loudness.
When the ten sources are normalized, the louder sounds grow louder, conforming to the standard sound source size. Because the amplifying is done regardless, the little noises are going insane during this procedure.
Conclusion
All in all, Audacity does an excellent job at audio editing. If you simply need to modify an audio file, Audacity is a great option. For increasing and decreasing the volume of single and multiple audio files, Audacity is still one of the best bets in the market. We hope that now know how Audacity increase volume of the audio files after reading this article.
02 How to Increase Volume of Multiple Files in Audacity?
03 How to Increase Volume in Certain Parts of Track?
04 What’s the Difference between Normalize and Amplify?
Part 1: How to Increase or Decrease Volume Without Distortion and Clipping in Audacity
Audio clipping occurs when the audio input becomes too loud for an amplifier to produce, and the surplus signal creates distortion. When editing, you cannot add additional volume to your audio clip forever because this would result in clipping. In this case, you can use the Audacity application to emphasize your material by turning the volume up or down without distortion and clipping on a track or recording.
Learn how Audacity increase volume without distortion by following the procedure described below:
Step 1: First, download and install the Audacity software on your computer.
Step 2: Select the File from the menu above and click Open to open the audio file.
Step 3: Choose the audio track, go to the Effect menu and pick the Amplify option from the drop-down menu.
Note: You can increase or decrease the volume by double-clicking the track and using the slider under the Gain title.
Step 4: Increase or decrease the volume by sliding the slider or typing the amplification value in the text box next to it in the Amplify window as needed.
Note: Ensure that the Allow Clipping checkbox remains unchecked to avoid clipping. Moreover, keep in mind that increasing the volume to a greater extent can result in distortion.
Related: How to Change Audio Volume in Filmora
Part 2: How to Increase Volume of Multiple Files in Audacity?
Audacity is an open-source audio editing tool. It is used for various purposes, like audio recording, music creation, and audio file editing. It also allows you to increase and decrease the volume of audio files.
You may also apply the modifications to multiple files at once, rather than one at a time. Check out the instructions below to learn how to change the volume of multiple audio files:
Step 1: Select the Import option from the File menu, and then pick the Audio option. Browse to your audio files, choose all of them, and then click the Open option.
Step 2: To select all the files, press Ctrl + A, click on the Effect option in the menu bar and pick Amplify.
Step 3: Now, either enter the value in the text box next to the Amplification Decibels tab or use the slider under it. To verify the operation of increasing the volume, check the allow clipping checkbox. When you’re through with the options, click the Ok button.
Step 4: Amplification will be applied to all the tracks. Go to the File option from the above menu to export the files and then select the Export option.
If you’re running Audacity on macOS computer, you can watch the video tutorial below to apply effects to multiple files.
Part 3: How to Increase Volume in Certain Parts of Track?
The audacity software also allows you to alter a specific section of an audio file. The selection tool can assist in locating a particular area of the track. After you’ve chosen a section of the audio file, you may utilize the amplification effect to increase its loudness. Check out the instructions below to learn how you can achieve it:
Step 1: Launch the Audacity software on the computer. To open the audio file, go to the File menu and select Open. You may also open the file by dragging it.
Step 2: Ensure that the Selection tool is active now. Click and hold the mouse left-click to move from one spot on the track to another.
Step 3: After picking the part, go to the Effect option from the menu and select Amplify.
Step 4: Now, for that specific region, modify the amplification and click OK. This will only change the volume for the area you have selected.
Part 4: What’s the Difference between Normalize and Amplify?
Amplify and Normalize are two essential features of the Audacity tool. Many people think they are the same thing, they are right up to some extent, but there exists a big difference between both the features. Before discussing the differences, you need to know what the terms Normalize and Amplify imply.
Amplify
It is the quickest approach to comprehend the effect’s name if you want to know precisely what impacts are. The frequency of the vibration is enhanced to increase the amplification effect. As previously said, it raises a tiny sound.
Furthermore, because this amplification is extended to all frequencies and amplitude, the noise increases. If you choose ten sources and magnify them by ten decibels, each source will be ten decibels louder than your present sound.
Normalize
The meaning of normalizing is standardized, which is also a feature of its name. Whenever you pick an audio input and use the normalize feature, the level is adjusted automatically according to the previously indicated average volume size in Oda City.
As a result, when one sound source is normalized, there is no discernible difference between it and the amplification mechanism. Still, the effect is evident when several sound sources are performed concurrently.
By pressing Ctrl + A and selecting all ten various audio sources, you may compute the required standard of every sound source, enhance the audio input that is smaller than the normal, and create the audio signal more significant than the standard. Shrink the size of each noise source, such as the name, and normalize the sound.
Related: Best Audio Normalizers for Windows
Differences
To differentiate the meaning and impact precisely, amplification means increasing or reducing the sound, whereas normalizing means equalizing the sound. Simply defined, if you magnify ten sources by ten decibels, each of the shorter and louder noises equals ten decibels in their actual loudness.
When the ten sources are normalized, the louder sounds grow louder, conforming to the standard sound source size. Because the amplifying is done regardless, the little noises are going insane during this procedure.
Conclusion
All in all, Audacity does an excellent job at audio editing. If you simply need to modify an audio file, Audacity is a great option. For increasing and decreasing the volume of single and multiple audio files, Audacity is still one of the best bets in the market. We hope that now know how Audacity increase volume of the audio files after reading this article.
Top 10 Male to Female Voice Changer Apps
If you’ve been searching for the best android and iOS voice-changing apps around the internet, you’re on the right spot. Voice-changing applications are always fun. They’re handy when you’re pulling a prank on a friend, or you want some amazing effects to test your voice. Thus, we provide you with all the best male to female voice changer apps in the list below.
Record & Edit Voice Fast before Changing Voice
Before changing your voice from male to female, I suggest you edit your voice first. Filmora is an easy-to-use yet powerful video editor helping you quickly edit voice no matter your voice or the audio extracted from videos. Explore Filmora’s audio editing features and get ready for changing voice!
For Win 7 or later (64-bit)
For macOS 10.12 or later


Part 1: Changing Voice Online for Free with Media.io
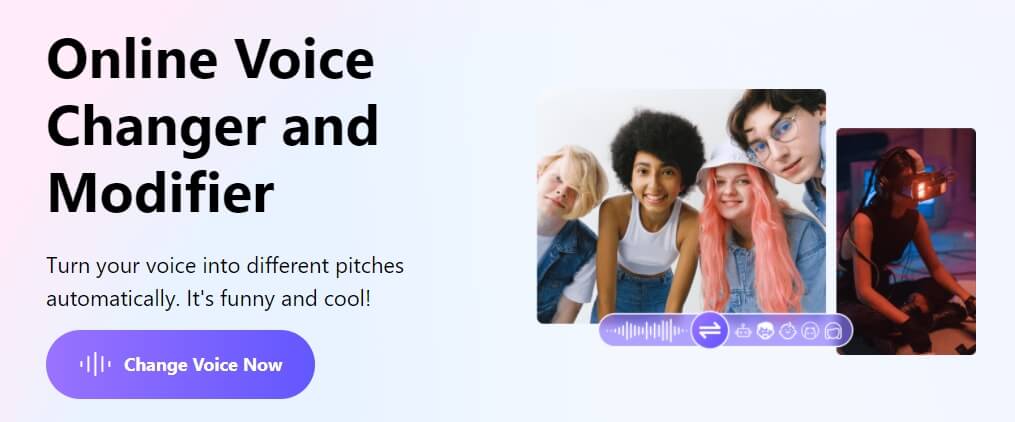
If you want to change voice without downloading and installing any app on your mobile phone, you can try some online solutions. Media.io is an all-in-one online video toolkit that allows you to edit, convert and compress video, audio and image files easily. The online voice changer from Media.io can transform your voice to a male voice, female voice, child voice, robot voice, and Donald Duck voice. If you wish to have voice filters, you won’t have any problems in the future with the Media.io voice changer.

This online voice changer works best on the Chrome browser, so you can utilize it whether using a Windows, Mac, Linux, or Chromebook device. As a result, you can deceive your family or friends by speaking in another people’s voice rather than your own. Doesn’t that sound like fun?
![]()
A cross-platform for making videos anywhere for all creators

Why your video editing isn’t good enough? How about some creative inspo?
- 100 Million+ Users
- 150+ Countries and Regions
- 4 Million+ Social Media Followers
- 5 Million+ Stock Media for Use
* Secure Download

Part 2: Best Male to Female Voice Changer Apps for iPhone and Android
- Girls Voice Changer
- Voice Changer Voice Recorder Editor & Effect
- VoiceFX
- Voice Changer
- Voice Changer - Audio effects
- Magic Call App
- Voice Changer and Sound Recorder
- Super Voice Editor
- Voice Changer with Effects
- Voice Changer - Girls Voice changer Male to Female
1. Girls Voice Changer
Available for: Android, iOS
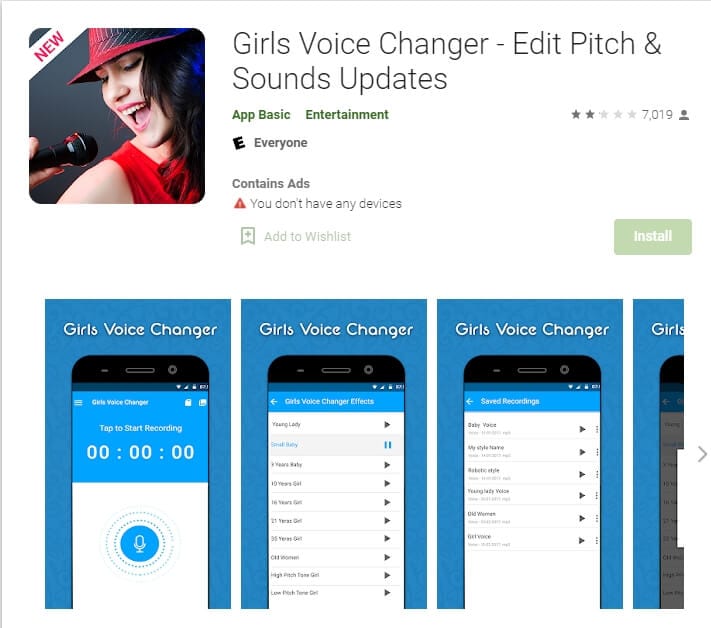
This girl voice changer app is highly portable and easy for any user to use comfortably. It is specifically more popular for changing male voice to female and for pitch adjustments. It’s completely free, so download on your android if you have a storage of about 8MB ready, and start using it!
This male-to-female voice changer app has several options in the library. Though the pitch adjustments are easy to make, some users have informed a lack of performance on very high-pitched settings. However, the smoothness of an android application also depends on how much space is readily available in the device. So next time you’re bored at a part, you have the perfect partner!
2. Voice Changer Voice Recorder Editor & Effect
Available for: Android
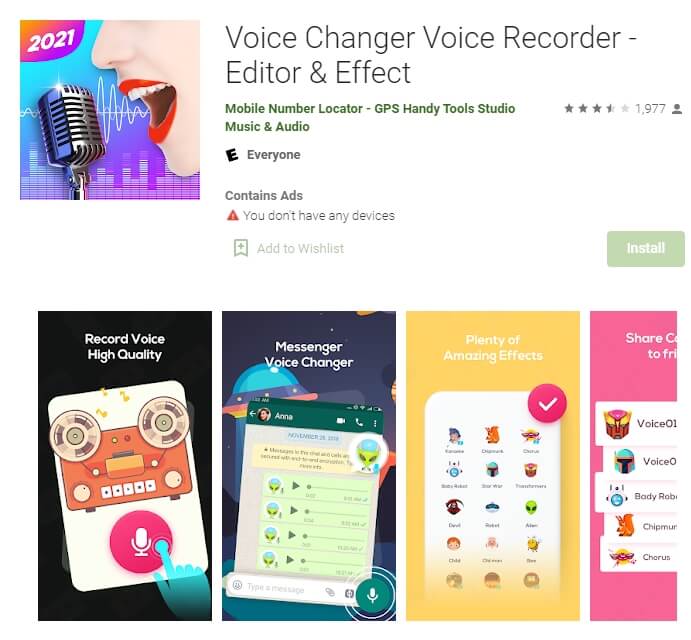
This voice changer application is for multi-purpose. Yes, you can use it as a girl voice changer smoothly and with ease. But apart from male to female voice changing, The “voice changer - voice editor application” can also be used to autotune your voice.
Now autotune is a big feature that every singer uses to make their voices tuned perfectly. With this app, you can also do the same to record your music or have fun while you are bored. The application is pretty to use and can be used as a girl voice changer not only for entertainment but also if you’re practicing. Many people who wish to seek a career in background voices might find this useful.
3. VoiceFX
Available for: Android

The VoiceFX application is filled with a lot of exciting options and features. If you are looking for an app that is more than just a male-to-female voice changer app, the voice fx is highly recommended.
You can also convert your voice into a robot or even an animal from male to female voice. Yes, you read it right. You can turn your manly voice into any of the fictional cartoons you want. This one’s a very easy and efficient way of filming a video with added effects or developing a mini-game with different voice characters. If you haven’t forgotten, there was a very big trend of converting famous music into chipmunk voices. With this app, you can convert your favorite songs into a chipmunk addition song without any problem.
4. Voice Changer
Available for: Android

The voice changer is a very famous male-to-female voice changer app. With over 10 million downloads on the google play store, the voice changer is highly recommended for users who have fun changing their voices from male to female. Compared to other voice changer applications, The Voice changer app has a very elegant and sleek design that makes it very easy to use.
Apart from the male to female voice change option, There are more than 50 other options that you can enjoy. Furthermore, you can share your creations with your friends through Bluetooth or other social media.
5. Voice Changer - Audio effects
Available for: Android

There are a lot of girl voice changer applications on the google play store. But not all of them are up to the mark. The Voice changer - audio effects is another highly recommended voice changer application.
The Voice Changer - Audio effects have a lot of other things to offer as well. Converting your voice from a male to a female has never been easier. Not only can you convert your voice into a girl, but you can also modify it. Furthermore, you can talk to your friends on the phone while you use the voice changer application. Moreover, the voices of animals and robots can also be an alternative to the female voice if you ever get bored of it.
6. Magic Call App
Available for: Android

The magic call is a real-time voice changer app that you can use for changing your voice during a call specifically. It is a really fun app which you can use with your friends to prank even your family!
This is a perfect option for people looking for a real-time girl voice changer app. The main purpose of this application is real-time calls. The magic call is ideal specifically for a male-to-female voice modification. And you can operate this application easily in call durations.
All you have to do is open the voice changer app and dial your call. Apart from Female voice, you can also convert your voice into a cartoon or an animal.
7. Voice Changer and Sound Recorder
Available for: iOS

If you are an iPhone user, then you must know that finding a voice changer on the apple store is like digging a diamond from the ground.
The Voice changer and sound recorder application is found exclusively on the apple store for people who love girl voice changer apps. It is a live call voice changer app, which means converting your voice from a male to a female in between the call. Furthermore, you can even add background voices such as traffic and echo to make your call even funnier. If you are looking for an excuse to get off from your call, then this application has got your back.
8. Super Voice Editor
Available for: Android
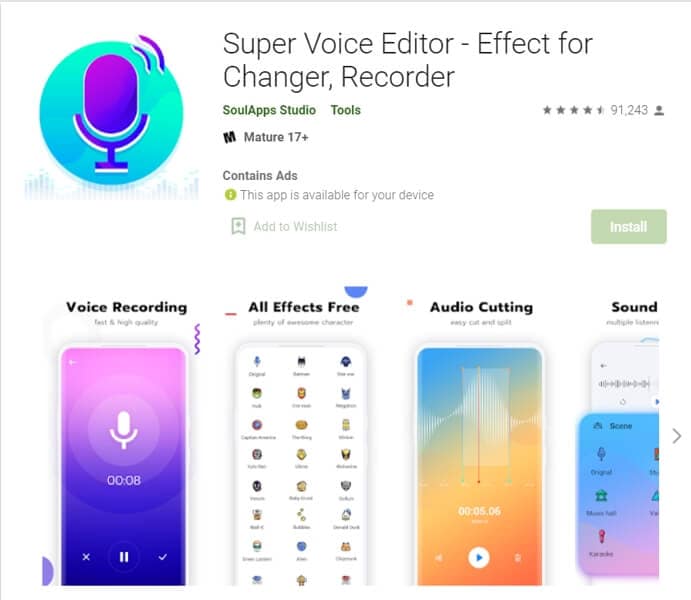
This one is a fun application for people searching for a voice changer app male to female. Not only can you record the audio that you edit, but also use it in real-time! Amazing right? Super voice editor enables you to add effects to your voice while you’re on a call as well. This feature means, next time you’re pulling a prank on the birthday boy, he won’t ever know! Sound like the wonder woman or dexter from his laboratory. The Super-Voice editor is perfect for kids playing in the house and even teenagers looking for something interesting. The SoulApps studio has made it easy for you to sound like your dream faces on the screen. With an MP3 cutter and Ringtone maker, this girl voice changer app is pure creativity.
9. Voice Changer with Effects
Available for: Android

Our list of girl voice changers, Voice changer with effects, is a very practical application that we highly recommend to our users.
With over 50 million downloads on google play, Voice changer with effects is highly suited for anyone looking for more than just a male-to-female voice changer. It has over 40 plus options such as helium, chipmunk, zombie, alien, and many more. With this application, you can even import a favorite audio clip of yours, and then you can easily convert it into a voice you like. If you want to modify your ringtone to an audio clip you just converted, then there is no better application than this one.
10. Voice Changer - Girls Voice changer Male to Female
Available for: Android

If you are looking for a girl voice changer app solely, this application perfectly fits you. The application is specifically designed only to change your voice from a male to a female. Although this application does provide options apart from female voice conversions, those features don’t function ideally. However, if you want a girl voice changer, you won’t have any trouble.
You can use this application while you are on a call. Hence, you can fool your family or friends by using a girl voice instead of your own. We recommend this as an average application that would fit your needs sufficiently.
In conclusion, you have now gone through the list of the perfect options for your android or iOS. Therefore, now you must be ready to choose the best girl voice changer app. So head on to your play store and search for your favorite app right now!
For Win 7 or later (64-bit)
For macOS 10.12 or later
Part 1: Changing Voice Online for Free with Media.io
If you want to change voice without downloading and installing any app on your mobile phone, you can try some online solutions. Media.io is an all-in-one online video toolkit that allows you to edit, convert and compress video, audio and image files easily. The online voice changer from Media.io can transform your voice to a male voice, female voice, child voice, robot voice, and Donald Duck voice. If you wish to have voice filters, you won’t have any problems in the future with the Media.io voice changer.
This online voice changer works best on the Chrome browser, so you can utilize it whether using a Windows, Mac, Linux, or Chromebook device. As a result, you can deceive your family or friends by speaking in another people’s voice rather than your own. Doesn’t that sound like fun?
![]()
A cross-platform for making videos anywhere for all creators
Why your video editing isn’t good enough? How about some creative inspo?
- 100 Million+ Users
- 150+ Countries and Regions
- 4 Million+ Social Media Followers
- 5 Million+ Stock Media for Use
* Secure Download
Part 2: Best Male to Female Voice Changer Apps for iPhone and Android
- Girls Voice Changer
- Voice Changer Voice Recorder Editor & Effect
- VoiceFX
- Voice Changer
- Voice Changer - Audio effects
- Magic Call App
- Voice Changer and Sound Recorder
- Super Voice Editor
- Voice Changer with Effects
- Voice Changer - Girls Voice changer Male to Female
1. Girls Voice Changer
Available for: Android, iOS
This girl voice changer app is highly portable and easy for any user to use comfortably. It is specifically more popular for changing male voice to female and for pitch adjustments. It’s completely free, so download on your android if you have a storage of about 8MB ready, and start using it!
This male-to-female voice changer app has several options in the library. Though the pitch adjustments are easy to make, some users have informed a lack of performance on very high-pitched settings. However, the smoothness of an android application also depends on how much space is readily available in the device. So next time you’re bored at a part, you have the perfect partner!
2. Voice Changer Voice Recorder Editor & Effect
Available for: Android
This voice changer application is for multi-purpose. Yes, you can use it as a girl voice changer smoothly and with ease. But apart from male to female voice changing, The “voice changer - voice editor application” can also be used to autotune your voice.
Now autotune is a big feature that every singer uses to make their voices tuned perfectly. With this app, you can also do the same to record your music or have fun while you are bored. The application is pretty to use and can be used as a girl voice changer not only for entertainment but also if you’re practicing. Many people who wish to seek a career in background voices might find this useful.
3. VoiceFX
Available for: Android
The VoiceFX application is filled with a lot of exciting options and features. If you are looking for an app that is more than just a male-to-female voice changer app, the voice fx is highly recommended.
You can also convert your voice into a robot or even an animal from male to female voice. Yes, you read it right. You can turn your manly voice into any of the fictional cartoons you want. This one’s a very easy and efficient way of filming a video with added effects or developing a mini-game with different voice characters. If you haven’t forgotten, there was a very big trend of converting famous music into chipmunk voices. With this app, you can convert your favorite songs into a chipmunk addition song without any problem.
4. Voice Changer
Available for: Android
The voice changer is a very famous male-to-female voice changer app. With over 10 million downloads on the google play store, the voice changer is highly recommended for users who have fun changing their voices from male to female. Compared to other voice changer applications, The Voice changer app has a very elegant and sleek design that makes it very easy to use.
Apart from the male to female voice change option, There are more than 50 other options that you can enjoy. Furthermore, you can share your creations with your friends through Bluetooth or other social media.
5. Voice Changer - Audio effects
Available for: Android
There are a lot of girl voice changer applications on the google play store. But not all of them are up to the mark. The Voice changer - audio effects is another highly recommended voice changer application.
The Voice Changer - Audio effects have a lot of other things to offer as well. Converting your voice from a male to a female has never been easier. Not only can you convert your voice into a girl, but you can also modify it. Furthermore, you can talk to your friends on the phone while you use the voice changer application. Moreover, the voices of animals and robots can also be an alternative to the female voice if you ever get bored of it.
6. Magic Call App
Available for: Android
The magic call is a real-time voice changer app that you can use for changing your voice during a call specifically. It is a really fun app which you can use with your friends to prank even your family!
This is a perfect option for people looking for a real-time girl voice changer app. The main purpose of this application is real-time calls. The magic call is ideal specifically for a male-to-female voice modification. And you can operate this application easily in call durations.
All you have to do is open the voice changer app and dial your call. Apart from Female voice, you can also convert your voice into a cartoon or an animal.
7. Voice Changer and Sound Recorder
Available for: iOS
If you are an iPhone user, then you must know that finding a voice changer on the apple store is like digging a diamond from the ground.
The Voice changer and sound recorder application is found exclusively on the apple store for people who love girl voice changer apps. It is a live call voice changer app, which means converting your voice from a male to a female in between the call. Furthermore, you can even add background voices such as traffic and echo to make your call even funnier. If you are looking for an excuse to get off from your call, then this application has got your back.
8. Super Voice Editor
Available for: Android
This one is a fun application for people searching for a voice changer app male to female. Not only can you record the audio that you edit, but also use it in real-time! Amazing right? Super voice editor enables you to add effects to your voice while you’re on a call as well. This feature means, next time you’re pulling a prank on the birthday boy, he won’t ever know! Sound like the wonder woman or dexter from his laboratory. The Super-Voice editor is perfect for kids playing in the house and even teenagers looking for something interesting. The SoulApps studio has made it easy for you to sound like your dream faces on the screen. With an MP3 cutter and Ringtone maker, this girl voice changer app is pure creativity.
9. Voice Changer with Effects
Available for: Android
Our list of girl voice changers, Voice changer with effects, is a very practical application that we highly recommend to our users.
With over 50 million downloads on google play, Voice changer with effects is highly suited for anyone looking for more than just a male-to-female voice changer. It has over 40 plus options such as helium, chipmunk, zombie, alien, and many more. With this application, you can even import a favorite audio clip of yours, and then you can easily convert it into a voice you like. If you want to modify your ringtone to an audio clip you just converted, then there is no better application than this one.
10. Voice Changer - Girls Voice changer Male to Female
Available for: Android
If you are looking for a girl voice changer app solely, this application perfectly fits you. The application is specifically designed only to change your voice from a male to a female. Although this application does provide options apart from female voice conversions, those features don’t function ideally. However, if you want a girl voice changer, you won’t have any trouble.
You can use this application while you are on a call. Hence, you can fool your family or friends by using a girl voice instead of your own. We recommend this as an average application that would fit your needs sufficiently.
In conclusion, you have now gone through the list of the perfect options for your android or iOS. Therefore, now you must be ready to choose the best girl voice changer app. So head on to your play store and search for your favorite app right now!
Also read:
- Updated Popular Sites to Free Download Guitar Background Photos and Music for 2024
- Updated In 2024, Audiovisual Excellence Unlocked – A Review of AVS Editors Innovative Features & Related Comparisons
- Updated 2024 Approved Free, Web-Based DAWs That Are Changing Music Production The Top 10
- In 2024, Best Bet AIFF to MP3 Suite Fast and Easy High-Quality Converting
- Updated 2024 Approved Anthology of Gargantuan Groans and Howls
- In 2024, Deciphering Sound Quality Improvement Leveraging Adobe Audition for Clear Music Production
- New A Beginners Guide to Setting Up Audacity in Ubuntu
- Best Free Soundtracks for Editing Creative Video Sequences
- Updated 2024 Approved Elevating Your Media Adding Compelling Audio Elements to Videos
- Updated Counteracting Sonic Overlap 3 Proven Techniques for Clear Audio for 2024
- New Hunt for Chuckling Sonic Elements
- New 2024 Approved Play M4A Audio Files on Android Devices
- New Top 10 Online Sources for Accessible Ding Tone Audio Files
- New 2024 Approved 5 Leading Digital Audio Workstation Options for Professional Guitarists, Updated
- Updated The Ultimate Song Catcher List Top Ten Products That Make Preserving Music a Breeze for 2024
- Navigating Through the Best Windows Software for Converting Speech to Text for 2024
- 8 Hilarious Tonal Adjustments for Amusing Phone Calls for 2024
- New 2024 Approved Unveiling the Most Effective 8 Software Solutions for Windows, Mac, and Cloud Platforms
- New 2024 Approved AriaAmplify Software Top Vocal Modification Suite to Boost Your Performance
- Enhancing Your Windows GIFs with Harmonious Audio Infusions
- Updated 2024 Approved Capturing Auditory Essence Waveform Visualization & Dynamic Animations in Avid Media Composer
- New 2024 Approved Expert Guide to Volume Control in Audio/Video Content
- Silent Soundscape Revolution A Deep Dive Into Eliminating Sound Interference with the Right Tools (Online & Offline) for 2024
- New Top 5 Digital Audio Organizers for Seamless MP3 Management for 2024
- Essential Windows-Compatible Speech-to-Text Solutions A List of the Leading Tools for 2024
- New Premier Selection of Inexpensive Audio Editing Utilities Available Worldwide
- Updated In 2024, Discover Chilling Screech Impact
- Updated Audio Dynamics Crafting the Ideal Listening Environment via Video Adjustments for 2024
- Updated 2024 Approved Ultimate Soundscape Creators for Immersive Video Streaming
- In 2024, Advanced Techniques to Purify Recorded Audio From Unwanted Echoes
- In 2024, Identifying Kits with Intense Grumble Implementations
- Updated 2024 Approved Tips for Smooth Installation/Uninstallation of Audacity on Your Chromebook
- 10 High-Ranking Video Volume Enhancers to Elevate Your Viewing Experience
- New In 2024, Fine-Tuning Filmic Soundtracks Integrating Music Into Your Video Projects in Premiere Pro
- New 2024 Approved Infinite Soundtracks at No Cost for Video Artisans
- New The Ultimate Guide 3 Premium Video Sound Enhancers for the Digital Age
- Updated Mastering Audio Acoustics Comprehensively Evaluating the Effectiveness of Noise Reduction in Adobe Audition
- New 2024 Approved Balancing the Scales Normalizing Sound Volume for Optimal Viewing with VLC
- Updated 2024 Approved Strategies for Minimizing Large-Scale Video and Audio Data
- In 2024, Mastering Lock Screen Settings How to Enable and Disable on Vivo Y100
- Updated Quickly Adjust Video Aspect Ratio Easy Methods
- In 2024, List of Pokémon Go Joysticks On Apple iPhone 14 Pro Max | Dr.fone
- Updated In 2024, Elevate Your Video Experience Best Resolution Enhancement Tools
- Identify malfunctioning your hardware drivers with Windows Device Manager in Windows 11/10
- Updated Online Aspect Ratio Calculators Top Picks for Accuracy
- How To Stream Anything From Samsung Galaxy M34 5G to Apple TV | Dr.fone
- How To Transfer Data From iPhone XR To Other iPhone 15 devices? | Dr.fone
- In 2024, Bypassing Google Account With vnROM Bypass For Motorola Moto G34 5G
- In 2024, How Can I Catch the Regional Pokémon without Traveling On Realme GT 5 | Dr.fone
- How to Unlock Apple iPhone 12 Pro Max Online? Here are 6 Easy Ways
- In 2024, Top 15 Apps To Hack WiFi Password On Nubia Red Magic 8S Pro+
- New 15 Iconic Cartoon Characters of All Time
- The 6 Best SIM Unlock Services That Actually Work On Your Gionee Device
- 2024 Approved The Best Way to Convert Audio Files on a Mac Top MP3 Converters
- Updated In 2024, The Ultimate List of 4K Proxy Video Editing Software
- New Video to Picture The Ultimate List of 10 Conversion Tools
- Top 10 Best Spy Watches For your Lava Yuva 2 Pro | Dr.fone
- How to recover deleted photos from Android Gallery after format on Vivo S17
- Updated 6 Websites to Free Download Motivational Video Footage for 2024
- 6 Solutions to Fix Error 505 in Google Play Store on Honor X7b | Dr.fone
- 10 Free Location Spoofers to Fake GPS Location on your Itel P55 5G | Dr.fone
- In 2024, Is GSM Flasher ADB Legit? Full Review To Bypass Your Samsung Galaxy A23 5G Phone FRP Lock
- Things You Dont Know About Xiaomi Redmi A2 Reset Code | Dr.fone
- In 2024, A Working Guide For Pachirisu Pokemon Go Map On Apple iPhone SE | Dr.fone
- How to play HEVC H.265 video on Motorola Defy 2?
- Top 10 Best Spy Watches For your Apple iPhone XR | Dr.fone
- Create Stunning Videos with Music Top Online Video Editor Picks for 2024
- In 2024, Hassle-Free Ways to Remove FRP Lock from Motorola Edge 2023 Phones with/without a PC
- How to Track Apple iPhone 14 Pro Max Location by Number | Dr.fone
- In 2024, Top 5 Car Locator Apps for Apple iPhone 12 mini | Dr.fone
- 2024 Approved Free Online Video Editing Platforms Best iMovie Substitutes
- 2024 Approved The Ultimate Jaycut Guide Tips and Tricks for Free Online Video Editing
- Updated Are You Excited to Learn About a Video Maker with a Song? Do You Want to Create a Video Embedded with Audio Tracks to Entertain the Viewers? Then, This Guide Assists You to Build Interesting Videos Along with Songs Precisely for 2024
- In 2024, 5 Techniques to Transfer Data from Vivo S18 to iPhone 15/14/13/12 | Dr.fone
- Title: Key Information on Utilizing YouTubes Sound Bank
- Author: Kate
- Created at : 2024-05-20 02:42:10
- Updated at : 2024-05-21 02:42:10
- Link: https://audio-editing.techidaily.com/key-information-on-utilizing-youtubes-sound-bank/
- License: This work is licensed under CC BY-NC-SA 4.0.
