
:max_bytes(150000):strip_icc():format(webp)/GettyImages-174294003-57c6ee043df78cc16eeab260.jpg)
In 2024, Unearth Haunting Audio Tones
Unearth Haunting Audio Tones
Versatile Video Editor - Wondershare Filmora
An easy yet powerful editor
Numerous effects to choose from
Detailed tutorials provided by the official channel
Getting sound effects for your videos or audios can be difficult, but fret not! We are here to aid you in that task. There are several ways of doing so, and you are going to learn those here on our website as you take a trip through it. We will keep this concise and brief because we care about your time. This article will teach you where to get sound effects in mp3 form. They can be scary sound effects, dialogues, scream sound effects, or whatever sound effect you need. Still, we will also teach you how to make your sound effects and add that good effect into your video or audio file.
In this article
01 [Ways to Download All Kinds of Sound Effect](#Part 1)
02 [Use Filmora to Add Background Music to Your Video](#Part 2)
Part 1 Ways to Download All Kinds of Sound Effect
Let’s get the first and probably the most important part out of the way, where to get scary scream sound effects. There are quite a few ways of doing so. We are sure you will find the desired method.
1. Download from Some YouTube Video
This one may not seem very obvious to people. Still, it is a very plausible way of downloading sound effects, but make sure that the audio clips uploaded are the original producer and have given explicit permission to use it. If not, you might want to get their permission first. Otherwise, you could get in trouble, which none of us would like.
Step 1: Firstly, go to you tube’s search bar on the top, and type in the name of the scary sounds mp3 effect you want, then type sound effect after it, and then press enter.

Doing so will show you a list of ‘videos’ that have the desired scary movie sound effects, but in reality, it will most likely be an audio clip with a still image.
Step 2: Right-click on the video and press copy video URL.

Step 3: Afterward, click on your browser’s search bar and type <www.y2mate.com>, then press enter, but be sure to use ad-block and anti-virus on such sites. On the website, press on the big search bar in the middle of the page

Step 4: Copy the video URL into it by pressing control and v together or right-clicking and pressing paste.
Step 5: Then press start. A list of options will be shown before you.

Step 6: Proceed to click on mp3 in the middle of the three options. There will be another list shown before you with only one choice this time.
Step 7: Then press start. A list of options will be shown before you.

That will download the entirety of the video in audio format only. All of this is free. Later in this article, we will show you how to cut and trim it.
2. Make Scary Sound Effect by Yourself
If you are not satisfied with other scary sound effects or want something unique, you can make your sound effects. Initially, get a good-quality microphone with a pop filter for clear audio.
Be Sure To Be In a Quiet Room with Padding:
Connect the microphone to your computer make sure it is unmuted physically by pressing its button, as some microphones have a mute button on them.
Make Sure the Microphone Is Unmuted In the Software:
Step 1: Open a recording software, such as OBS Studio or audio recorder from Windows.
Step 2: Press record and make the sound effect you want.
Step 3: End the recording by pressing stop recording. You will now have recorded a scary music sound effect saved on your computer.
This method requires money for a good microphone, a pop filter, and padding.
3. Getting Sound Effects from Free Websites
This option is attractive to many people, from beginners to people testing out the waters of audio editing. However, it should be noticed that the sound quality is not the best.
You can get free sound effects from websites such as Freesound.com or Soundeffectsplus.com.
Step 1: First of all, go to the website.
Step 2: Register an account
Step 3: Then search your desired sound effect

Step 4: Press download next to it.
Pretty straightforward, and as mentioned, these are free, but with limitations such as total download amount per month or licensing.
4. Buying Sound Effects
If you have money but not time to make your audio effects, you can buy sound effects off the internet. Usually, these sellers have excellent quality audio; they can even make specific sound effects tailored to your needs.
- Many websites sell sound effects, including the likes of – <www.prosoundeffects.com> and <www.soundsnap.com>.
- Both websites are famous among the audio effects community; soundscape even provides audio for Nickelodeon, Disney, Pixar, HBO, and Netflix.
- As per usual, you first register an account.
- Once you are done with that, you buy the package you want, whether a one-time payment, bi-annual, or annual plan.
- These plans have different terms, such as 150 downloads per 6 months. Make sure of the times you will buy before you confirm the purchase.
- Then your search for the audio you want in the search bar
- Afterward, you click download. That’s it! You got it.
Now, let’s talk about inserting them into your product; this requires an editor. And this is where Wondershare’s editing software Filmora comes in.
Part 2 Use Filmora to Add Background Music to Your Video
Filmora is Wondershare’s editing software which, at this point, everyone has heard of. Wondershare has made it an easy-to-use editor so that everyone can edit with it, from beginners to the most skilled professionals, as it has the features and tools to cater to all such users’ needs. It provides free audio effects and video effects to its buyers, and much more. Filmora allows you to cut and edit your sound effects and add any audio you want to your video. Yep, you can edit videos with it too! Filmora enables you to make quality products, whether audio or video.
For Win 7 or later (64-bit)
For macOS 10.12 or later
Filmora has some outstanding features, such as allowing you to change audio pitch and volume, obviously letting you edit videos, trimming them, and joining them together. Colour-grading, as well as subtitling.
Since Filmora has several packages, including monthly, yearly, and perpetual, you might want to give it is trial a shot before buying the real thing. This way you can confirm what package suits your requirements.
Features:
- It widely supports different formats.
- Powerful video editing features and intuitive user interface.
- Transfer to a popular device option, upload to YouTube, or burn to DVD.
- A choice of 300+ stunning effects for different niches.
- Royalty-free music, Modern and easy to use.
Step by Step Guide for How to Add Sound Effects to Video with Filmora:
Step 1: Go to the Filmora official website, install wonder share Filmora, and lunch it. Once it’s launched, you will find a tab just below the menu bar, tap media, and click import. After this, there will be a drop-down where you can click on import media files and choose the video file. You can also use build-in music tracks to add music to your video by selecting the Music tab. Repeat the process to pick the desired background music.

Step 2: Now, you can navigate the video you imported to Filmora, then tap on the sign ‘+’on it alternatively; you can drag down the media file to the timeline.
Step 3: Now, edit your music by double-tapping the audio from the timeline. It will display the audio panel at the top of the screen. You can use it to set the desired equalizer manage pitch volume and speed. You can also use the forum to fade in or fade out.

Step 4: Finally, you can now export the video that has made the desired changes by clicking ‘export’ on the toolbar to export the video. You can now save the exported in the desired format and remember to rename it directly.
Wondershare Filmora
Get started easily with Filmora’s powerful performance, intuitive interface, and countless effects!
Try It Free Try It Free Try It Free Learn More >

AI Portrait – The best feature of Wondershare Filmora for gameplay editing
The AI Portrait is a new add-on in Wondershare Filmora. It can easily remove video backgrounds without using a green screen or chroma key, allowing you to add borders, glitch effects, pixelated, noise, or segmentation video effects.

Conclusion
In the end, we can tell you that there are numerous ways of procuring sound effects, and we have listed a small but popular portion of them, whether they are scary sound effects or a different type does not matter as you can find them all with the help of our guide. That is not all, though, since you will need a good
Getting sound effects for your videos or audios can be difficult, but fret not! We are here to aid you in that task. There are several ways of doing so, and you are going to learn those here on our website as you take a trip through it. We will keep this concise and brief because we care about your time. This article will teach you where to get sound effects in mp3 form. They can be scary sound effects, dialogues, scream sound effects, or whatever sound effect you need. Still, we will also teach you how to make your sound effects and add that good effect into your video or audio file.
In this article
01 [Ways to Download All Kinds of Sound Effect](#Part 1)
02 [Use Filmora to Add Background Music to Your Video](#Part 2)
Part 1 Ways to Download All Kinds of Sound Effect
Let’s get the first and probably the most important part out of the way, where to get scary scream sound effects. There are quite a few ways of doing so. We are sure you will find the desired method.
1. Download from Some YouTube Video
This one may not seem very obvious to people. Still, it is a very plausible way of downloading sound effects, but make sure that the audio clips uploaded are the original producer and have given explicit permission to use it. If not, you might want to get their permission first. Otherwise, you could get in trouble, which none of us would like.
Step 1: Firstly, go to you tube’s search bar on the top, and type in the name of the scary sounds mp3 effect you want, then type sound effect after it, and then press enter.
Doing so will show you a list of ‘videos’ that have the desired scary movie sound effects, but in reality, it will most likely be an audio clip with a still image.
Step 2: Right-click on the video and press copy video URL.
Step 3: Afterward, click on your browser’s search bar and type <www.y2mate.com>, then press enter, but be sure to use ad-block and anti-virus on such sites. On the website, press on the big search bar in the middle of the page
Step 4: Copy the video URL into it by pressing control and v together or right-clicking and pressing paste.
Step 5: Then press start. A list of options will be shown before you.
Step 6: Proceed to click on mp3 in the middle of the three options. There will be another list shown before you with only one choice this time.
Step 7: Then press start. A list of options will be shown before you.
That will download the entirety of the video in audio format only. All of this is free. Later in this article, we will show you how to cut and trim it.
2. Make Scary Sound Effect by Yourself
If you are not satisfied with other scary sound effects or want something unique, you can make your sound effects. Initially, get a good-quality microphone with a pop filter for clear audio.
Be Sure To Be In a Quiet Room with Padding:
Connect the microphone to your computer make sure it is unmuted physically by pressing its button, as some microphones have a mute button on them.
Make Sure the Microphone Is Unmuted In the Software:
Step 1: Open a recording software, such as OBS Studio or audio recorder from Windows.
Step 2: Press record and make the sound effect you want.
Step 3: End the recording by pressing stop recording. You will now have recorded a scary music sound effect saved on your computer.
This method requires money for a good microphone, a pop filter, and padding.
3. Getting Sound Effects from Free Websites
This option is attractive to many people, from beginners to people testing out the waters of audio editing. However, it should be noticed that the sound quality is not the best.
You can get free sound effects from websites such as Freesound.com or Soundeffectsplus.com.
Step 1: First of all, go to the website.
Step 2: Register an account
Step 3: Then search your desired sound effect
Step 4: Press download next to it.
Pretty straightforward, and as mentioned, these are free, but with limitations such as total download amount per month or licensing.
4. Buying Sound Effects
If you have money but not time to make your audio effects, you can buy sound effects off the internet. Usually, these sellers have excellent quality audio; they can even make specific sound effects tailored to your needs.
- Many websites sell sound effects, including the likes of – <www.prosoundeffects.com> and <www.soundsnap.com>.
- Both websites are famous among the audio effects community; soundscape even provides audio for Nickelodeon, Disney, Pixar, HBO, and Netflix.
- As per usual, you first register an account.
- Once you are done with that, you buy the package you want, whether a one-time payment, bi-annual, or annual plan.
- These plans have different terms, such as 150 downloads per 6 months. Make sure of the times you will buy before you confirm the purchase.
- Then your search for the audio you want in the search bar
- Afterward, you click download. That’s it! You got it.
Now, let’s talk about inserting them into your product; this requires an editor. And this is where Wondershare’s editing software Filmora comes in.
Part 2 Use Filmora to Add Background Music to Your Video
Filmora is Wondershare’s editing software which, at this point, everyone has heard of. Wondershare has made it an easy-to-use editor so that everyone can edit with it, from beginners to the most skilled professionals, as it has the features and tools to cater to all such users’ needs. It provides free audio effects and video effects to its buyers, and much more. Filmora allows you to cut and edit your sound effects and add any audio you want to your video. Yep, you can edit videos with it too! Filmora enables you to make quality products, whether audio or video.
For Win 7 or later (64-bit)
For macOS 10.12 or later
Filmora has some outstanding features, such as allowing you to change audio pitch and volume, obviously letting you edit videos, trimming them, and joining them together. Colour-grading, as well as subtitling.
Since Filmora has several packages, including monthly, yearly, and perpetual, you might want to give it is trial a shot before buying the real thing. This way you can confirm what package suits your requirements.
Features:
- It widely supports different formats.
- Powerful video editing features and intuitive user interface.
- Transfer to a popular device option, upload to YouTube, or burn to DVD.
- A choice of 300+ stunning effects for different niches.
- Royalty-free music, Modern and easy to use.
Step by Step Guide for How to Add Sound Effects to Video with Filmora:
Step 1: Go to the Filmora official website, install wonder share Filmora, and lunch it. Once it’s launched, you will find a tab just below the menu bar, tap media, and click import. After this, there will be a drop-down where you can click on import media files and choose the video file. You can also use build-in music tracks to add music to your video by selecting the Music tab. Repeat the process to pick the desired background music.
Step 2: Now, you can navigate the video you imported to Filmora, then tap on the sign ‘+’on it alternatively; you can drag down the media file to the timeline.
Step 3: Now, edit your music by double-tapping the audio from the timeline. It will display the audio panel at the top of the screen. You can use it to set the desired equalizer manage pitch volume and speed. You can also use the forum to fade in or fade out.
Step 4: Finally, you can now export the video that has made the desired changes by clicking ‘export’ on the toolbar to export the video. You can now save the exported in the desired format and remember to rename it directly.
Wondershare Filmora
Get started easily with Filmora’s powerful performance, intuitive interface, and countless effects!
Try It Free Try It Free Try It Free Learn More >
AI Portrait – The best feature of Wondershare Filmora for gameplay editing
The AI Portrait is a new add-on in Wondershare Filmora. It can easily remove video backgrounds without using a green screen or chroma key, allowing you to add borders, glitch effects, pixelated, noise, or segmentation video effects.
Conclusion
In the end, we can tell you that there are numerous ways of procuring sound effects, and we have listed a small but popular portion of them, whether they are scary sound effects or a different type does not matter as you can find them all with the help of our guide. That is not all, though, since you will need a good
Perfecting Your Soundtrack: Techniques for Implementing Automatic Audio Suppression in Final Cut Pro X
How to Do Automatic Audio Ducking in Final Cut Pro X

Benjamin Arango
Oct 26, 2023• Proven solutions
If you are working in post-production, then you might be familiar with the concept of audio ducking. In nutshell, it is a process in which the background sound of a clip is reduced and the voiceover is amplified. Therefore, with the help of sound ducking, we can focus on the dialogues without a noisy background track.
Lately, a lot of people have asked us about the process to do automatic audio ducking in Final Cut Pro X. Since it is a clip-based editing tool, it lacks a dedicated mixer to help us do FCPX audio ducking. Thankfully, there are third-party plugins and tools (like the FCPX AutoDuck) that can help us do the same. In this post, I will let you know how to do audio ducking in Final Cut Pro and its best alternative.
If you don’t want to use any plugins, see this article: How to sync in FCPX.
Part 1: How to Perform Audio Ducking in Final Cut Pro X?
If you have a video in which you have background music and a voiceover, then you can perform sound ducking in it. This will automatically enhance the quality of the voiceover and would mellow down the background music selectively. Sadly, the feature of audio ducking in Final Cut Pro has to be done manually as there are no instant automatic options in the tool presently.

Therefore, you can use any reliable third-party FCPX tool like Audified or AutoDuck to meet your requirements. For instance, let’s consider the example of FCPX AutoDuck, which is a paid macOS application. To perform FCPX audio ducking, you first have to export the music and voiceover as two dedicated files. Later, you can import them to FCPX AutoDuck to perform auto-ducking of the music.
Step 1: Export the Music Files
To perform audio ducking in Final Cut Pro, you can first launch the application on Mac and open your project. Since there is no FCPX audio ducking option, you first have to export the music files.
For this, you can just go to the main menu on Final Cut Pro and select File > Share > Master File. This will help you explore and save all the media files from Final Cut Pro.

Now, once the Master File window would be opened, you can go to the “Role” tab and select “Audio Only” as the output role. This will display a list of the background music and the voiceover file.

You can now select the files of your choice and click on the “Next” button to save them to any desired location on your Mac.
Step 2: Use FCPX AutoDuck to Do Automatic Sound Ducking
Great! Now, you can just open the FCPX AutoDuck application on your Mac via its Application or Spotlight. You can just give it a project name and drag-and-drop the speaker (voiceover) and the music files here. If you want, you can also import a filler file of your choice.

FCPX will also let you select the level of music ducking from its dedication option. There are also different options to set up things like setting up the window or pre-roll for the audio.

In the end, you can click on the “Duck” button and let FCPX AutoDuck perform automatic audio ducking on the files.
Step 3: Insert the Modified File to your Project
Once the FCPX audio ducking process is completed, it will generate an XML file. You can now just drag the XML file and drop it to your project in Final Cut Pro. Here, you can choose to select the XML file in the same project.

You can now copy the modified music clip, go to the timeline, and paste it at the starting of the video. Here, you can just mute the previous music clip and let the auto-duck audio play instead.

Part 2: The Best FCPX Alternative for Mac to Perform Automatic Audio Ducking
As you can see, it is pretty tough to do audio ducking in Final Cut Pro as there is no automatic feature in the tool. Therefore, you can consider using Wondershare Filmora for Mac to perform automatic sound ducking and save your time. It is an inbuilt feature in Filmora that would perform auto-ducking instantly, and you can also mark the level of ducking in the video.


Ideally, you can perform audio ducking on voiceover or another soundtrack in Wondershare Filmora. To perform music ducking via Wondershare Filmora on Mac, you can follow these steps:
Step 1: Import the Video Clip or Record Your Audio
To begin with, just launch Wondershare Filmora on your Mac and just drag-and-drop your media files to the application. You can also go to its menu and choose to import media files.

Once your video is imported, you can drag it to the timeline at the bottom to work on it. If you want, you can click on the voiceover icon (adjacent to the preview section) to record dialogues right away.

Apart from that, you can also import music files to your video or use the extensive range of royalty-free audio files that are available in Filmora.

Step 2: Perform Automatic Audio Ducking
Great! Now, on the timeline of Filmora, you can see your video and the music track. From here, you need to select the track that you want to amplify (like the voiceover).

Afterward, right-click the audio track and select the “Adjust Audio” option from the context menu.

This will open a dedicated Audio Mixer window on the screen. Just go to the Audio tab and enable the “Ducking” option to lower the volume of other audio tracks. You can also select the desired level for music ducking to implement.

Step 3: Export the Edited Video
That’s it! After performing audio ducking on Filmora, you can preview the results and further make the needed changes. In the end, you can click on the “Export” button and save the file in the format and resolution of your choice.

There you go! After following this guide, you can easily learn how to do audio ducking in Final Cut Pro X easily. Since there is no inbuilt FCPX audio ducking option, you can use a third-party tool like FCPX AutoDuck. Apart from that, if you are looking for a better alternative to do sound ducking, then simply use Wondershare Filmora. It is a user-friendly and resourceful application that would let you perform automatic music ducking like a pro.
Benjamin Arango
Benjamin Arango is a writer and a lover of all things video.
Follow @Benjamin Arango
Benjamin Arango
Oct 26, 2023• Proven solutions
If you are working in post-production, then you might be familiar with the concept of audio ducking. In nutshell, it is a process in which the background sound of a clip is reduced and the voiceover is amplified. Therefore, with the help of sound ducking, we can focus on the dialogues without a noisy background track.
Lately, a lot of people have asked us about the process to do automatic audio ducking in Final Cut Pro X. Since it is a clip-based editing tool, it lacks a dedicated mixer to help us do FCPX audio ducking. Thankfully, there are third-party plugins and tools (like the FCPX AutoDuck) that can help us do the same. In this post, I will let you know how to do audio ducking in Final Cut Pro and its best alternative.
If you don’t want to use any plugins, see this article: How to sync in FCPX.
Part 1: How to Perform Audio Ducking in Final Cut Pro X?
If you have a video in which you have background music and a voiceover, then you can perform sound ducking in it. This will automatically enhance the quality of the voiceover and would mellow down the background music selectively. Sadly, the feature of audio ducking in Final Cut Pro has to be done manually as there are no instant automatic options in the tool presently.
Therefore, you can use any reliable third-party FCPX tool like Audified or AutoDuck to meet your requirements. For instance, let’s consider the example of FCPX AutoDuck, which is a paid macOS application. To perform FCPX audio ducking, you first have to export the music and voiceover as two dedicated files. Later, you can import them to FCPX AutoDuck to perform auto-ducking of the music.
Step 1: Export the Music Files
To perform audio ducking in Final Cut Pro, you can first launch the application on Mac and open your project. Since there is no FCPX audio ducking option, you first have to export the music files.
For this, you can just go to the main menu on Final Cut Pro and select File > Share > Master File. This will help you explore and save all the media files from Final Cut Pro.
Now, once the Master File window would be opened, you can go to the “Role” tab and select “Audio Only” as the output role. This will display a list of the background music and the voiceover file.
You can now select the files of your choice and click on the “Next” button to save them to any desired location on your Mac.
Step 2: Use FCPX AutoDuck to Do Automatic Sound Ducking
Great! Now, you can just open the FCPX AutoDuck application on your Mac via its Application or Spotlight. You can just give it a project name and drag-and-drop the speaker (voiceover) and the music files here. If you want, you can also import a filler file of your choice.
FCPX will also let you select the level of music ducking from its dedication option. There are also different options to set up things like setting up the window or pre-roll for the audio.
In the end, you can click on the “Duck” button and let FCPX AutoDuck perform automatic audio ducking on the files.
Step 3: Insert the Modified File to your Project
Once the FCPX audio ducking process is completed, it will generate an XML file. You can now just drag the XML file and drop it to your project in Final Cut Pro. Here, you can choose to select the XML file in the same project.
You can now copy the modified music clip, go to the timeline, and paste it at the starting of the video. Here, you can just mute the previous music clip and let the auto-duck audio play instead.
Part 2: The Best FCPX Alternative for Mac to Perform Automatic Audio Ducking
As you can see, it is pretty tough to do audio ducking in Final Cut Pro as there is no automatic feature in the tool. Therefore, you can consider using Wondershare Filmora for Mac to perform automatic sound ducking and save your time. It is an inbuilt feature in Filmora that would perform auto-ducking instantly, and you can also mark the level of ducking in the video.
Ideally, you can perform audio ducking on voiceover or another soundtrack in Wondershare Filmora. To perform music ducking via Wondershare Filmora on Mac, you can follow these steps:
Step 1: Import the Video Clip or Record Your Audio
To begin with, just launch Wondershare Filmora on your Mac and just drag-and-drop your media files to the application. You can also go to its menu and choose to import media files.
Once your video is imported, you can drag it to the timeline at the bottom to work on it. If you want, you can click on the voiceover icon (adjacent to the preview section) to record dialogues right away.
Apart from that, you can also import music files to your video or use the extensive range of royalty-free audio files that are available in Filmora.
Step 2: Perform Automatic Audio Ducking
Great! Now, on the timeline of Filmora, you can see your video and the music track. From here, you need to select the track that you want to amplify (like the voiceover).
Afterward, right-click the audio track and select the “Adjust Audio” option from the context menu.
This will open a dedicated Audio Mixer window on the screen. Just go to the Audio tab and enable the “Ducking” option to lower the volume of other audio tracks. You can also select the desired level for music ducking to implement.
Step 3: Export the Edited Video
That’s it! After performing audio ducking on Filmora, you can preview the results and further make the needed changes. In the end, you can click on the “Export” button and save the file in the format and resolution of your choice.
There you go! After following this guide, you can easily learn how to do audio ducking in Final Cut Pro X easily. Since there is no inbuilt FCPX audio ducking option, you can use a third-party tool like FCPX AutoDuck. Apart from that, if you are looking for a better alternative to do sound ducking, then simply use Wondershare Filmora. It is a user-friendly and resourceful application that would let you perform automatic music ducking like a pro.
Benjamin Arango
Benjamin Arango is a writer and a lover of all things video.
Follow @Benjamin Arango
“Melodic Compilation: A Comprehensive Guide to Exclusive Online Sites for Video Tune Libraries”
FREE Top 10 Best Websites to Download Sound Clips for Videos

Liza Brown
Mar 27, 2024• Proven solutions
Are you working on animation , video, game, music, or maybe some other media file? Sound is a vital factor for all. It is the effect of the sound that can make or break a project.
But it can be difficult to find perfect and quality free sound clips. There are thousands of software for creating excellent videos, adding sounds , titles, overlays, tracks, and more. But what if you don’t wish to create a piece for just jazzing up your already existing video?
Free sound clips are great resources to download for videos if you don’t want to create sound effects.
Many people want to know the source of high-quality free audio for videos. These free sound samples are easy to find on the Internet.
In this article, you will get to know the 10 best websites to download free sound clips.
10 Best Free Sound Samples to Use
1. Freesound
Licensed under the Creative Commons License , the Freesound comprises of a large sound database. You can choose from the huge collection of sounds and decide which one is free and which sound needs attribution.
You can ensure if the sound can be used in commercial products or not. If you are not a professional and just need free sound samples for personal use, you may use free sound download from any site. The features of Freesound include-
- You can search for sounds or browse by tags or geotags
- The pack feature helps you to find a bunch of similar sounds very easily
- Preview the sound without logging in
- For downloading the sound, you need to log in
- Add your audio samples to contribute to the database
- You get 5 free sound clips download
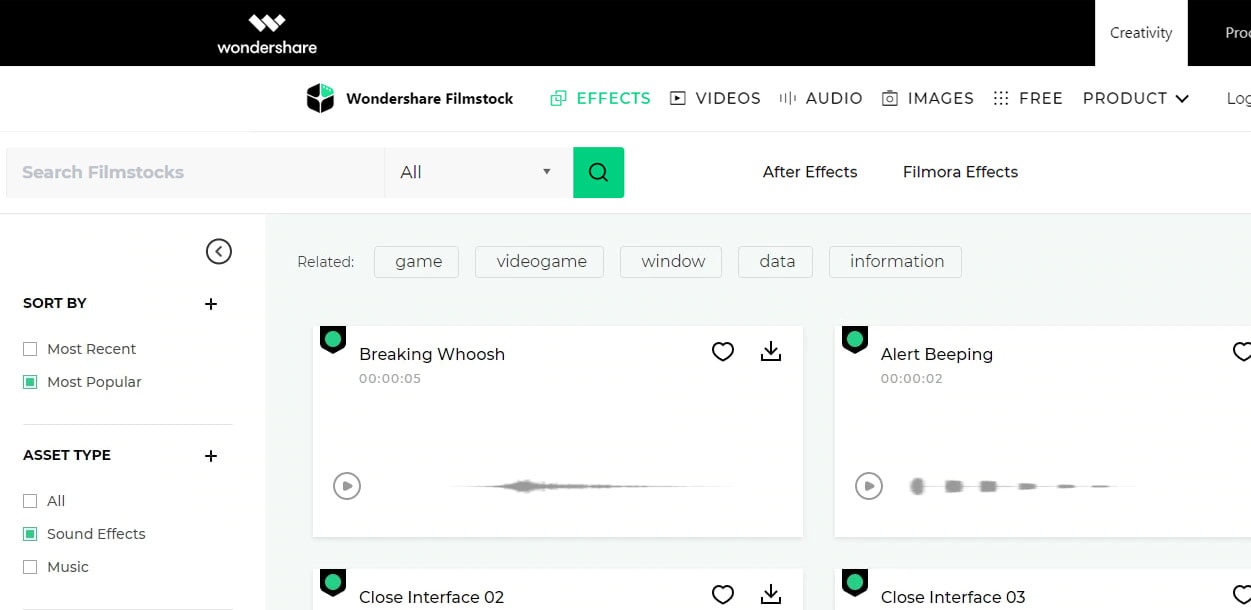
2. Filmstock
Filmstock from the house of Wondershare is one of the greatest libraries for free sound clips.
Any budget filmmaker would love to have this invaluable resource not just for free audio clips for videos but also for royalty-free sound clips.
You can bring your cinematic video to life from the Filmstock free-stuff one-stop-shop. The features of Filmstock include-
- Royalty-free video effects, audio, and stock media
- There are genres like science fiction, sci-fi, ufo, technology games
- Huge selection of curated quality stock images
- Filmstock library is continuously updated
- No attribution required for any project on Filmstock
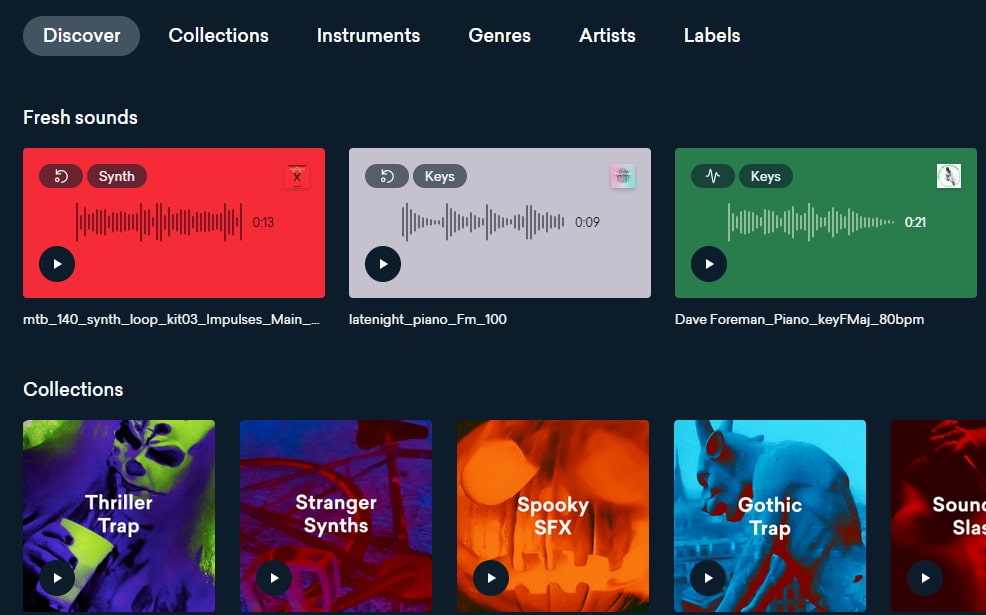
3. Landr
With a simple interface, Landr offers the best loops, packs, and samples to you. Make use of powerful Artificial Intelligence (AI) and you can spend lesser time searching and browsing. The features of Landr includes-
- You can browse free sound clips from the various collection of instruments
- Quickly find the right sound from the millions of free sound samples
- Get access to Selector tool powered by AI to make your browsing session faster
- Nourish your ideas with the curated collection and smart browsing
- The filter sounds by instrument, mood, BPM or key
- Go pro with your sampling
- Royalty-free sounds from today’s best artists, producers, and labels
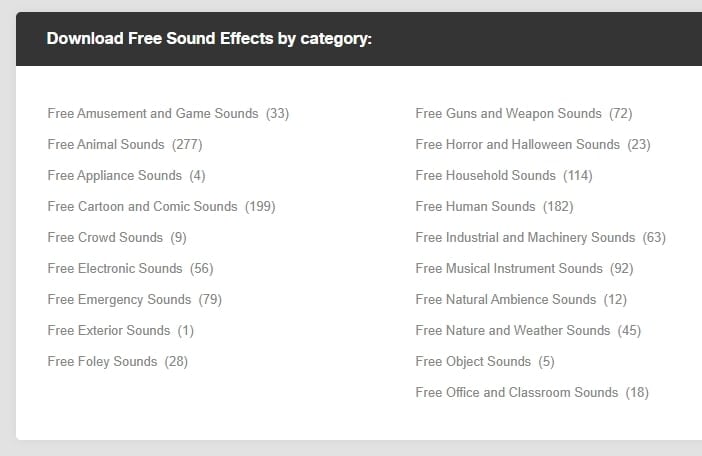
4. Audio Micro
Audio Micro is one of the best tools for downloading horror-based free sound clips. Once you register with Audio Micro, you can easily download free audio clips for videos.
For downloading sound for commercial uses like TV or mass reproduction, you must be a paid subscriber. The features of Audio Micro are-
- Get access to the collection of royalty-free music and 2000 free good quality sound effects
- High-quality audio content for commercial use, available at competitive prices without any hidden cost
- Research, locate, purchase, and download stock audio
- Easy and fast search option with free sound collection visible from the navigation bar on the homepage
5. Audio Blocks
It is an intuitive platform to download loops, sound effects, and music. It has a low-cost subscription model and the content is constantly updated based on the search results. The features of Audio Blocks are-
- Unlimited royalty-free audio
- Loop, sound effects, and music download
- Low-cost subscription offers more content at a nominal price
- There are flexible plans for every budget
- Use content multiple times for commercial and personal projects
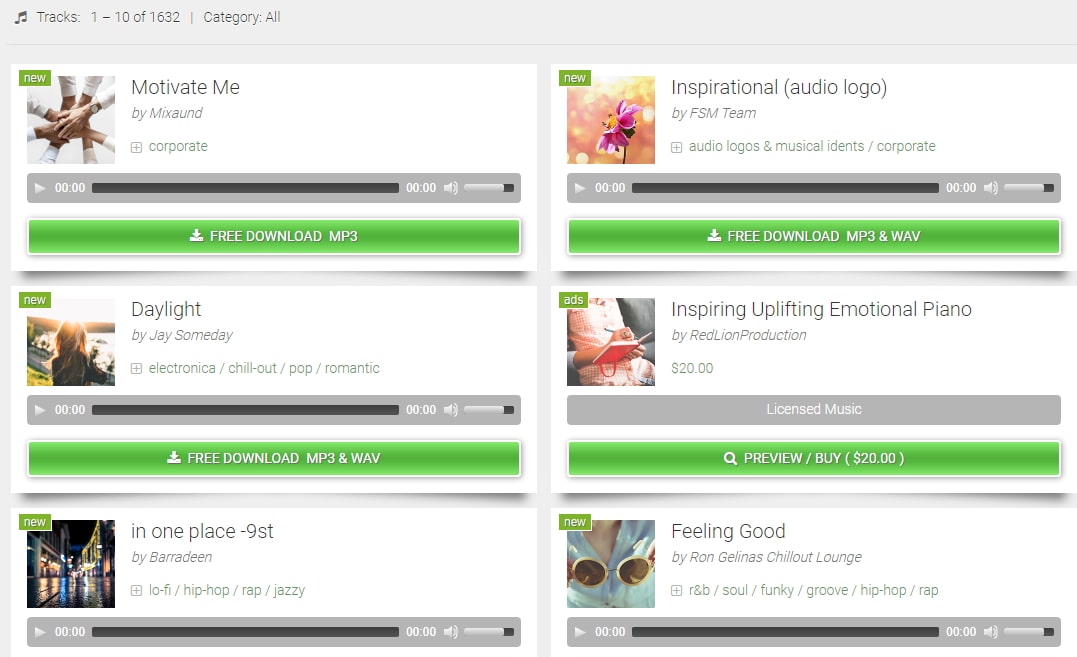
6. Free Stock Music
Whether YouTube project or your personal Vlog, Free Stock Music offers royalty-free music for a range of media platforms.
For any non-copyrighted sound clips free download, always feel free to reach Free Stock Music. The features are-
- Free access to non-copyrighted music
- Just put the attribution in credits to use the sound clips
- Unlimited royalty-free music in all moods, lengths, tempos, and categories
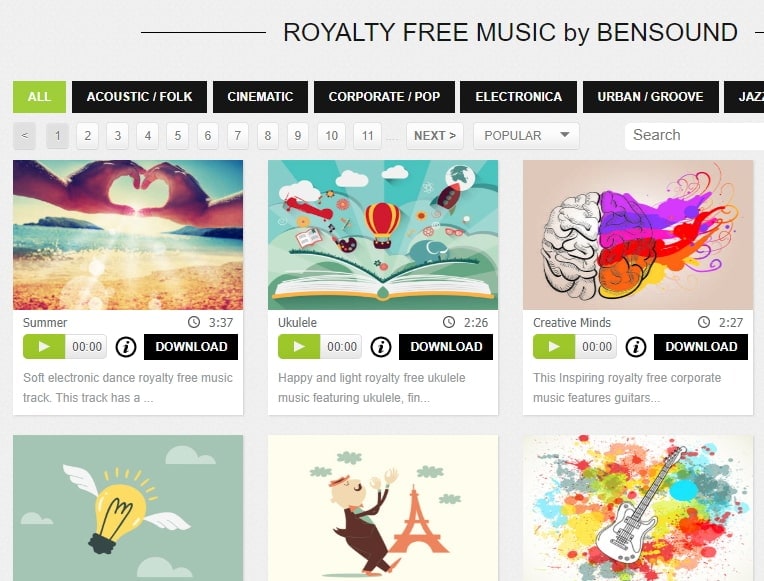
7. Bensound
Available under the Creative Common License, Bensound is used for multimedia projects like web applications or videos.
You can use the free tracks available with Bensound stock music in the various website background score, animations, web adverts, slideshows, etc. The features of Bensound include-
- Royalty-free stock music in various genres like electronica, urban, cinematic, jazz, rock, etc.
- Download free sound clips from the huge collection and add attributions in credits
- If you don’t wish to give credits and use the high-quality premium tracks, get the Bensound Pro License
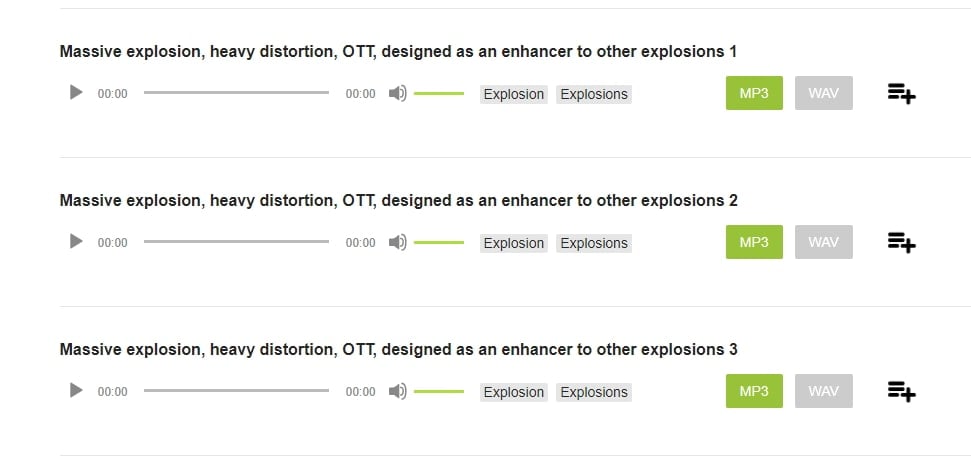
8. Sounds Crate
Are you looking for the best soundtrack for your video? Sounds Crate offers some of the best royalty-free music and sound FX.
With the tracks completely mastered for your production, Sound Crate offers 100% quality content created by industry professionals from Hollywood. The Sound Crate features include-
- Sound FX for electricity, gun, explosion, weapons, sci-fi, vehicles, movements, etc.
- Royalty-free music in diverse genres
- You can also use idents for corporate, news jingles, holiday idents, etc.
- Download and use the royalty-free sound clips easily
- Over 10000 plus HD assets
- No attribution required
- Browse from unlimited music, sound effects, etc.

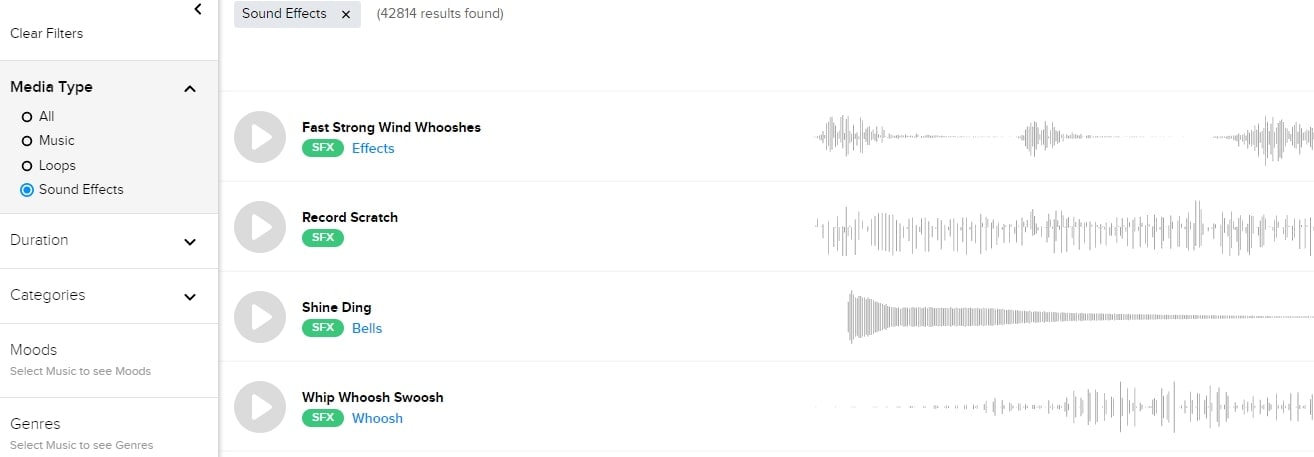
9. ZapSlat
Do your audio and video editing projects need some cool soundtracks to jazz it up? Look no further. ZapSlat is one of the best free sound download sites to make your project successful. The features of ZapSlat are-
- Comprises over 54,000 professional free sound effects and royalty-free music files
- Variety of free sound effect packs
- Download royalty-free music from a variety of genres
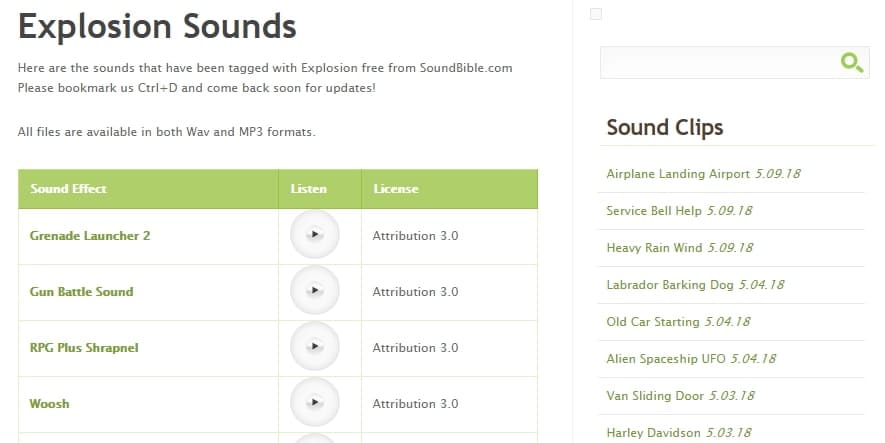
10. Sound Bible
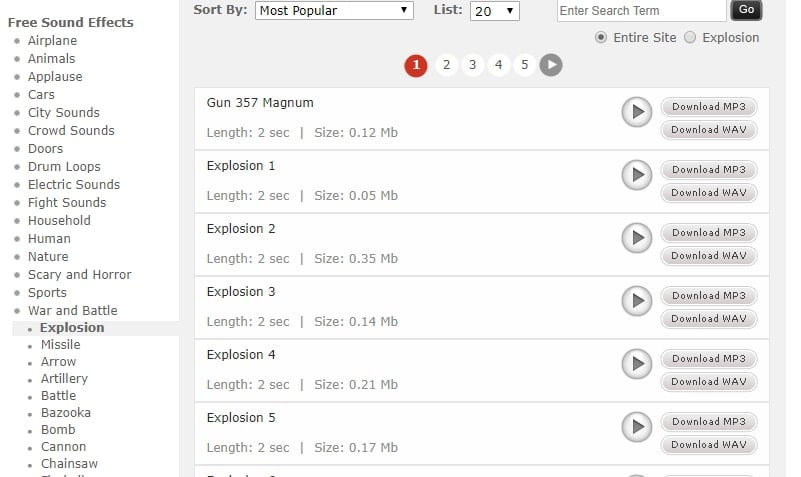
Choose the best from 2000 free sound clips licensed under Creative Commons. To use the sound effect for commercial video, you can select from the royalty-free sounds. The features of SoundBible are-
- Download free sound clips without logging in or creating an account
- 2000 free sounds
- Copyright-free sound resources are weekly updated
Conclusion
Now that you know the best 10 free sound clip download sites, make use of it in your videos. Without worrying about the expense, you can use these sites to download free sound clips.
Liza Brown
Liza Brown is a writer and a lover of all things video.
Follow @Liza Brown
Liza Brown
Mar 27, 2024• Proven solutions
Are you working on animation , video, game, music, or maybe some other media file? Sound is a vital factor for all. It is the effect of the sound that can make or break a project.
But it can be difficult to find perfect and quality free sound clips. There are thousands of software for creating excellent videos, adding sounds , titles, overlays, tracks, and more. But what if you don’t wish to create a piece for just jazzing up your already existing video?
Free sound clips are great resources to download for videos if you don’t want to create sound effects.
Many people want to know the source of high-quality free audio for videos. These free sound samples are easy to find on the Internet.
In this article, you will get to know the 10 best websites to download free sound clips.
10 Best Free Sound Samples to Use
1. Freesound
Licensed under the Creative Commons License , the Freesound comprises of a large sound database. You can choose from the huge collection of sounds and decide which one is free and which sound needs attribution.
You can ensure if the sound can be used in commercial products or not. If you are not a professional and just need free sound samples for personal use, you may use free sound download from any site. The features of Freesound include-
- You can search for sounds or browse by tags or geotags
- The pack feature helps you to find a bunch of similar sounds very easily
- Preview the sound without logging in
- For downloading the sound, you need to log in
- Add your audio samples to contribute to the database
- You get 5 free sound clips download
2. Filmstock
Filmstock from the house of Wondershare is one of the greatest libraries for free sound clips.
Any budget filmmaker would love to have this invaluable resource not just for free audio clips for videos but also for royalty-free sound clips.
You can bring your cinematic video to life from the Filmstock free-stuff one-stop-shop. The features of Filmstock include-
- Royalty-free video effects, audio, and stock media
- There are genres like science fiction, sci-fi, ufo, technology games
- Huge selection of curated quality stock images
- Filmstock library is continuously updated
- No attribution required for any project on Filmstock
3. Landr
With a simple interface, Landr offers the best loops, packs, and samples to you. Make use of powerful Artificial Intelligence (AI) and you can spend lesser time searching and browsing. The features of Landr includes-
- You can browse free sound clips from the various collection of instruments
- Quickly find the right sound from the millions of free sound samples
- Get access to Selector tool powered by AI to make your browsing session faster
- Nourish your ideas with the curated collection and smart browsing
- The filter sounds by instrument, mood, BPM or key
- Go pro with your sampling
- Royalty-free sounds from today’s best artists, producers, and labels
4. Audio Micro
Audio Micro is one of the best tools for downloading horror-based free sound clips. Once you register with Audio Micro, you can easily download free audio clips for videos.
For downloading sound for commercial uses like TV or mass reproduction, you must be a paid subscriber. The features of Audio Micro are-
- Get access to the collection of royalty-free music and 2000 free good quality sound effects
- High-quality audio content for commercial use, available at competitive prices without any hidden cost
- Research, locate, purchase, and download stock audio
- Easy and fast search option with free sound collection visible from the navigation bar on the homepage
5. Audio Blocks
It is an intuitive platform to download loops, sound effects, and music. It has a low-cost subscription model and the content is constantly updated based on the search results. The features of Audio Blocks are-
- Unlimited royalty-free audio
- Loop, sound effects, and music download
- Low-cost subscription offers more content at a nominal price
- There are flexible plans for every budget
- Use content multiple times for commercial and personal projects
6. Free Stock Music
Whether YouTube project or your personal Vlog, Free Stock Music offers royalty-free music for a range of media platforms.
For any non-copyrighted sound clips free download, always feel free to reach Free Stock Music. The features are-
- Free access to non-copyrighted music
- Just put the attribution in credits to use the sound clips
- Unlimited royalty-free music in all moods, lengths, tempos, and categories
7. Bensound
Available under the Creative Common License, Bensound is used for multimedia projects like web applications or videos.
You can use the free tracks available with Bensound stock music in the various website background score, animations, web adverts, slideshows, etc. The features of Bensound include-
- Royalty-free stock music in various genres like electronica, urban, cinematic, jazz, rock, etc.
- Download free sound clips from the huge collection and add attributions in credits
- If you don’t wish to give credits and use the high-quality premium tracks, get the Bensound Pro License
8. Sounds Crate
Are you looking for the best soundtrack for your video? Sounds Crate offers some of the best royalty-free music and sound FX.
With the tracks completely mastered for your production, Sound Crate offers 100% quality content created by industry professionals from Hollywood. The Sound Crate features include-
- Sound FX for electricity, gun, explosion, weapons, sci-fi, vehicles, movements, etc.
- Royalty-free music in diverse genres
- You can also use idents for corporate, news jingles, holiday idents, etc.
- Download and use the royalty-free sound clips easily
- Over 10000 plus HD assets
- No attribution required
- Browse from unlimited music, sound effects, etc.
9. ZapSlat
Do your audio and video editing projects need some cool soundtracks to jazz it up? Look no further. ZapSlat is one of the best free sound download sites to make your project successful. The features of ZapSlat are-
- Comprises over 54,000 professional free sound effects and royalty-free music files
- Variety of free sound effect packs
- Download royalty-free music from a variety of genres
10. Sound Bible
Choose the best from 2000 free sound clips licensed under Creative Commons. To use the sound effect for commercial video, you can select from the royalty-free sounds. The features of SoundBible are-
- Download free sound clips without logging in or creating an account
- 2000 free sounds
- Copyright-free sound resources are weekly updated
Conclusion
Now that you know the best 10 free sound clip download sites, make use of it in your videos. Without worrying about the expense, you can use these sites to download free sound clips.
Liza Brown
Liza Brown is a writer and a lover of all things video.
Follow @Liza Brown
Also read:
- New 2024 Approved Generate a Costless Film with Accompaniment of Melodies
- New 2024 Approved Cutting Edge Audio Solutions Top Online Sites for Professional-Grade MP3 Modification
- Updated Unlocking Profound Sound A Guide to Deepening Your Vocal Presence via Filmora for 2024
- 2024 Approved The Hidden Gems for Free Download Guitar Visuals and Acoustic Pieces
- In 2024, 11 Best Voice Changer That You Should Know
- Updated Exploring Options for MP3 Download Cat Noises and More for 2024
- Discovering the Top Six No-Cost DAW Programs for Novice Producers
- Updated Top Sites to Download Lofi Background Music and Wallpapers
- Essential Windows-Compatible Speech-to-Text Solutions A List of the Leading Tools for 2024
- New 2024 Approved The Ultimate Vimeo Visual Guide An In-Depth Look at Aspect Ratio Details
- New 2024 Approved Free and Easy The Premier PC Voice Recorders Unveiled
- New Premier Windows 10 Acoustic Maestro for 2024
- New 2024 Approved The Essential Guide to Equalizing Audio Volumes in VLC Media Player
- Captivating Sounds Without Breaking Your Piggy Bank The Top Six No-Cost Video Conversion Approaches for 2024
- In 2024, Mac Audio Enthusiasts Selection of Top 4 Music Editing Software
- New Top 8 Online-Based No-Cost Audio Capture Tools for 2024
- 2024 Approved 10 FREE Online MP3 to Text Converters-Wondershare Filmora
- New Searching for Dynamic Echoes From Breaking Containers for 2024
- Updated 2024 Approved Filmoras Audio Magic Transform Your Recordings with Background Noise Reduction Mastery
- In 2024, Essential Guide to the Top 8 Audio Conversion Tools for Desktop PCs, Apple Machines and Online Use - Latest Rankings
- Updated 2024 Approved Ultimate Tutorial Transforming WhatsApp Sound Files Into MP3 Quickly
- From Japanese Original to International Favorite An Exploration of Anime Voiceover Artistry for 2024
- Updated In 2024, Voice Variation Ventures 10 Novel Approaches to Infuse Joy Into Phone Conversations
- New How to Remove Audio From MP4
- New In 2024, Leading Sites for Accessing True Nature Audio Archives
- New 2024 Approved Proven Winners The Best 7 Audio Transitions You Can Download at Zero Price
- Seek Out Cheerful Sonic Enhancements
- In 2024, Augment VFX Compositions with Ambient Sounds in After Effects
- Sonic Alchemy Transforming Footage Through Piano-Inspired Soundtracks
- 2024 Approved Enhancing Audio Clarity in DIY Home Film Production
- New In 2024, Essential Introduction Audio Tracks The Top 8 for Digital Creators
- Easy Steps to Mastering Voice Transformation Apps for iPhones for 2024
- In 2024, Comprehensive Apowersoft Recording Workshop with 4 Creative Replacements
- 2024 Approved From Noisy to Silent A Filmmakers Guide to Perfecting Audio Quality with Filmora Software
- New The Premier Roundup of Win-Compatible DAWs Evaluating Free and Paid Software Options
- In 2024, Visualize Your Music Top Free Applications to Watch Out For on iPhones and Android Devices
- Discovering the Best Places for Impactful Drum Sounds
- 2024 Approved Three Free Sound Integration Techniques for DIY Filmmakers and Videographers
- Updated Adaptive Audio Quality Reduction in Adobe Rushs 2023 Version for 2024
- New Discover the Top Voice Memos Tools 5 MP3 Recorder Recommendations for 2024
- Updated The Ultimate Guide to the Top 5 Most Advanced Live Audio Modifiers
- New The Elite Tone Tweaker Guidebook Top-Notch Tools, User Guides & Backup Voice Alteration Techniques
- New 2024 Approved Where Can I Find Wolf Howling Sound Effect
- 7 Solutions to Fix Chrome Crashes or Wont Open on Nubia Red Magic 9 Pro+ | Dr.fone
- New In 2024, Breathtaking 4K Moments You Wont Want to Miss
- How to Reset OnePlus Ace 3 Without the Home Button | Dr.fone
- Updated In 2024, The Ultimate Mac Video Editing Software Comparison For
- New 2024 Approved Slow Down Time A Beginners Guide to Creating Slow-Motion Videos on Kapwing
- In 2024, Easiest Guide How to Clone Xiaomi Redmi 13C Phone? | Dr.fone
- Apple ID Unlock On iPhone 12 Pro? How to Fix it?
- A Comprehensive Guide to Apple iPhone 11 Blacklist Removal Tips and Tools
- New Rev Up Your Videos The Best Free Speed Changing Apps for iOS and Android for 2024
- In 2024, Planning to Use a Pokemon Go Joystick on Xiaomi Redmi Note 12 Pro 4G? | Dr.fone
- New 2024 Approved The Importance of Format Conversion MP3 to MP4 Explained
- Bypassing Google Account With vnROM Bypass For OnePlus Ace 2 Pro
- Title: In 2024, Unearth Haunting Audio Tones
- Author: Kate
- Created at : 2024-05-05 07:40:41
- Updated at : 2024-05-06 07:40:41
- Link: https://audio-editing.techidaily.com/in-2024-unearth-haunting-audio-tones/
- License: This work is licensed under CC BY-NC-SA 4.0.
