
:max_bytes(150000):strip_icc():format(webp)/GettyImages-1164718779-aa87dac78cd44ad7b71e76c27adc7e9a.jpg)
Discover the Best Web-Based Solutions to Elevate Your MP3 Audio Amplitude
Discover the Best Web-Based Solutions to Elevate Your MP3 Audio Amplitude
No matter how high-end your speakers are, there are certain audio files you will come across that sound uncomfortably low. Even when you put the volume at its peak, the sound seems to be dampened for those audio files. For example, if you have an old music file, you will find it sound lower in comparison to a modern music file. That is when you will need an MP3 volume booster that can be highly useful. You can boost the volume of the audio file so that the music as well as the voice becomes prominent.
Such an MP3 audio booster is useful for podcasters, music producers, and voiceover recorders. If you want to boost audio for a few files, you can opt for an online tool. But if you are making a professional video where you need to boost the audio, we recommend a professional video editor with audio booster. Here is the list of the top 3 MP3 volume booster online that you can use on your computer as well as smartphone.
Filmora Audio Editor
Edit system and microphone audio seperately
One click to match your sound with your video
Automatically lower the volume of one track to make another track clearer
1. FileConverto Boost MP3 Volume
FileConverto has the most popular mp3 volume booster online tool. This is because FileConverto has all the different tools to modify audio and video files in one place. You have to opt for Boost MP3 Volume tool to enhance the volume of your audio file. You can not only increase the volume but also decrease the volume as per your requirements. Most importantly, you can select decibel of increment or decrement. Moreover, you can select the audio channel whose volume you want to boost. Here are the key features of File Boost MP3 Volume tool.
- Allows uploading audio files of up to 150 MB.
- Option to choose decibel value as per requirement.
- Select audio channel for boosting volume.
- Increase as well as decrease volume.
- Easy user interface and quick boosting process.
How to boost audio volume with FileConverto?
Step 1: You need to visit “fileconverto.com/boost-mp3-volume” from your web browser.
Step 2: You need to click on Browse button and select the MP3 file whose volume you want to boost.
Step 3: You will have to select Increase Volume option from Select Action.
Step 4: Select the decibel value by which you want the increment.
Step 5: Select the appropriate audio channel(s) for the boost.
Step 6: Click on ‘Submit Now’ for the file to get uploaded and volume to get boosted.
Once completed, you can select the file name and download it.

2. Audio Alter Volume Changer
Audio Alter is a versatile online tool through which you can boost the volume of your audio files. The platform supports not just MP3 files but also WAV, FLAC, and OGG audio files. Therefore, it has become a preferred destination for the concerned users. You can increase or decrease volume using decibel slider. Moreover, you can listen to the modified audio file before downloading to ensure that you have the correct volume level. Here are all the key features of Audio Alter Volume Changer.
- Drag and drop files directly.
- Supports multiple file formats.
- Allows uploading audio file up to 50 MB.
- Raise or lower volume as required.
- Live preview of modifications before downloading.
- Various presets available on bass boost.

How to boost sound online with Audio Alter?
Step 1: On your web browser, you need to navigate to audioalter.com/volume
Step 2: Add your file by clicking on Browse Computer. You can even drag and drop the file on the user interface.
Step 3: Now you can use the slider and select the dB value. You can click on Play button for live preview.
Step 4: Click on Submit button to make the changes in your audio file. Once done, you can download the file.
3. Online Converter MP3 Audio Booster
This is another simple but effective online tool to boost the volume of any MP3 audio file. The best part is that you can upload an MP3 file of size 200 MB which is the largest among all online tools. You should keep in mind that the platform supports only MP3 files. You can increase as well as decrease the volume of your audio file. Besides, you can select the percentage or the decibel by which you the appreciation or depression on the audio volume. Here are the key features of Online Converter MP3 volume booster.
- Allows boost by decibel or percentage.
- Maximum upload file size of 200 MB.
- Allows increase or decreasing volume.
- Various other audio file based tools available.
How to boost audio volume with Online Converter?
Step 1: You will have visit “www.onlineconverter.com/increase-mp3-volume“ from your web browser.
Step 2: Click on Choose File button to upload MP3 file whose volume you want to boost.
Step 3: Select the Volume boost percentage or decibel as per your preference.
Step 4: Finally, click on Convert button for its volume to get boosted as per selected parameters.

Bonus: Boost Volume Of Any Audio File With A Professional Software
You can see that all these online audio booster tools have certain limitations. First of all, there is a limitation of file size. Secondly, you have to waste your internet data to upload and download files. At times, the uploading gets stuck which could be annoying. Besides, you cannot edit different aspects of audio to enhance the overall pleasantness of the audio. That is where a professional audio editor can be useful.
We recommend Wondershare Filmora where you can edit audio and video as per requirement. The software supports various types of audio files instead of just MP3 files. You can combine and sync audio and video and edit all the different aspects of audio as per requirement. Here are the steps to boost audio volume using Filmora.
For Win 7 or later (64-bit)
For macOS 10.12 or later
Step 1: Download and install Wondershare Filmora.
Step 2: Open Filmora and go to File > Import Media > Import Media Files option.

Step 3: From your hard drive select the audio file whose volume you want to boost.
Step 4: Thereafter, drag the audio file on the timeline and right-click on it to select Adjust Audio option.

Step 5: You can adjust the volume on the left side of the screen as well as tweak with other available parameters.

Step 6: Click on Export button and save the file to your hard drive.
Conclusion –
Boosting the volume of an MP3 audio file is no more an esoteric task. You do not need to download any software as there are mp3 volume booster online tools available to get the job done perfectly. Starting from boosting the background music to increasing and decreasing voice, you can modify MP3 as well as other audio files. If you are looking for a professional software to tweak various aspects of audio, we recommend Wondershare Filmora.
1. FileConverto Boost MP3 Volume
FileConverto has the most popular mp3 volume booster online tool. This is because FileConverto has all the different tools to modify audio and video files in one place. You have to opt for Boost MP3 Volume tool to enhance the volume of your audio file. You can not only increase the volume but also decrease the volume as per your requirements. Most importantly, you can select decibel of increment or decrement. Moreover, you can select the audio channel whose volume you want to boost. Here are the key features of File Boost MP3 Volume tool.
- Allows uploading audio files of up to 150 MB.
- Option to choose decibel value as per requirement.
- Select audio channel for boosting volume.
- Increase as well as decrease volume.
- Easy user interface and quick boosting process.
How to boost audio volume with FileConverto?
Step 1: You need to visit “fileconverto.com/boost-mp3-volume” from your web browser.
Step 2: You need to click on Browse button and select the MP3 file whose volume you want to boost.
Step 3: You will have to select Increase Volume option from Select Action.
Step 4: Select the decibel value by which you want the increment.
Step 5: Select the appropriate audio channel(s) for the boost.
Step 6: Click on ‘Submit Now’ for the file to get uploaded and volume to get boosted.
Once completed, you can select the file name and download it.
2. Audio Alter Volume Changer
Audio Alter is a versatile online tool through which you can boost the volume of your audio files. The platform supports not just MP3 files but also WAV, FLAC, and OGG audio files. Therefore, it has become a preferred destination for the concerned users. You can increase or decrease volume using decibel slider. Moreover, you can listen to the modified audio file before downloading to ensure that you have the correct volume level. Here are all the key features of Audio Alter Volume Changer.
- Drag and drop files directly.
- Supports multiple file formats.
- Allows uploading audio file up to 50 MB.
- Raise or lower volume as required.
- Live preview of modifications before downloading.
- Various presets available on bass boost.
How to boost sound online with Audio Alter?
Step 1: On your web browser, you need to navigate to audioalter.com/volume
Step 2: Add your file by clicking on Browse Computer. You can even drag and drop the file on the user interface.
Step 3: Now you can use the slider and select the dB value. You can click on Play button for live preview.
Step 4: Click on Submit button to make the changes in your audio file. Once done, you can download the file.
3. Online Converter MP3 Audio Booster
This is another simple but effective online tool to boost the volume of any MP3 audio file. The best part is that you can upload an MP3 file of size 200 MB which is the largest among all online tools. You should keep in mind that the platform supports only MP3 files. You can increase as well as decrease the volume of your audio file. Besides, you can select the percentage or the decibel by which you the appreciation or depression on the audio volume. Here are the key features of Online Converter MP3 volume booster.
- Allows boost by decibel or percentage.
- Maximum upload file size of 200 MB.
- Allows increase or decreasing volume.
- Various other audio file based tools available.
How to boost audio volume with Online Converter?
Step 1: You will have visit “www.onlineconverter.com/increase-mp3-volume“ from your web browser.
Step 2: Click on Choose File button to upload MP3 file whose volume you want to boost.
Step 3: Select the Volume boost percentage or decibel as per your preference.
Step 4: Finally, click on Convert button for its volume to get boosted as per selected parameters.
Bonus: Boost Volume Of Any Audio File With A Professional Software
You can see that all these online audio booster tools have certain limitations. First of all, there is a limitation of file size. Secondly, you have to waste your internet data to upload and download files. At times, the uploading gets stuck which could be annoying. Besides, you cannot edit different aspects of audio to enhance the overall pleasantness of the audio. That is where a professional audio editor can be useful.
We recommend Wondershare Filmora where you can edit audio and video as per requirement. The software supports various types of audio files instead of just MP3 files. You can combine and sync audio and video and edit all the different aspects of audio as per requirement. Here are the steps to boost audio volume using Filmora.
For Win 7 or later (64-bit)
For macOS 10.12 or later
Step 1: Download and install Wondershare Filmora.
Step 2: Open Filmora and go to File > Import Media > Import Media Files option.
Step 3: From your hard drive select the audio file whose volume you want to boost.
Step 4: Thereafter, drag the audio file on the timeline and right-click on it to select Adjust Audio option.
Step 5: You can adjust the volume on the left side of the screen as well as tweak with other available parameters.
Step 6: Click on Export button and save the file to your hard drive.
Conclusion –
Boosting the volume of an MP3 audio file is no more an esoteric task. You do not need to download any software as there are mp3 volume booster online tools available to get the job done perfectly. Starting from boosting the background music to increasing and decreasing voice, you can modify MP3 as well as other audio files. If you are looking for a professional software to tweak various aspects of audio, we recommend Wondershare Filmora.
Enhancing Cinematic Soundscape: Fading and Amplifying Audio Effectively with Keyframing in macOS Filmora
How to Fade In/Out Audio with Keyframes in Filmora for Mac

Benjamin Arango
Aug 18, 2022• Proven solutions
Not just professionals but beginners can also step into the planet of animation if one comes to know about the basics, advanced editing tips, and other associated concepts relating to video creation. Trimming, scaling, audio ducking, screen recording, masking, and yes, don’t forget the primary process that is keyframing; you should try everything to come out with bright colors. Yes, to understand and excel in animation, you must know how to execute it hassle-free.
If you have Mac, you would be familiar with Final Cut Pro X and its related audio functionalities. However, if you need a perfect alternative that could perform outstanding audio keyframing, we would like to suggest Wondershare Filmora for Mac. Yes, adding an audio keyframe in Wondershare Filmora is easy and you do not need to search for an ultimate guide as we are here to fill up the space. Alongside, you will also learn how to perform some of the functions like fade audio in/out.
Part 1: How to Add Audio Keyframes in Wondershare Filmora for Mac?
Is adding an audio keyframe in Wondershare Filmora for Mac easy? Else is the interface too tough to follow? Keep your confusion aside and take a look at the below step-by-step guide on how to perform audio keyframing in Wondershare Filmora for Mac.
Step 1: Launch to Add Media Files
Launch or open the Wondershare Filmora on your Mac. Then, add a media file or the video file into the work panel by dragging-dropping the file into the timeline.
You can also execute “File > Import Media > Import media files” to bring the files into the timeline.
Step 2: Edit Audio
Once your video reaches the timeline, double-clicking on it will take you to the editing menu to choose the “Audio” tab.
Increase or decrease the volume level based on which the clips should play.
Step 3: Adjust Volume and Add Keyframe
Place the pointer on the timeline where you want to add an audio keyframe. Then double-click the audio clip that will again redirect you to the Audio panel.
Now, click on the keyframe icon on the left side panel, make the volume adjustment on the timeline by dragging the volume envelope, and tapping the “OK” button.
To add the second audio keyframe, move the playhead to the desired spot, and once done, perform step 3 again.
Part 2: How to Modify Audio Keyframes in Filmora for Mac?
Not only adding an audio keyframe is possible in Wondershare Filmora for Mac, but modifying or adjust the audio keyframe is possible as well.
Step 1: Modify Audio Keyframe
The easy option of modifying the audio keyframe is from the Audio panel that will navigate by double-clicking on the audio keyframe created on the timeline.
Yes, from the options provided, you can slide the parameters like pitch, equalizer, ducking, and denoise if required to modify the keyframe.
Yes, in the upcoming session, we can see how to fade audio with keyframes, but here let’s look at the other options.
Step 2: Change Soundwaves
Audio is a mix up of speech, music, etc. Changing the sound waves would bring out a different keyframe. To do so, you can tap on the inverted triangle next to the Equalizer option that will offer you various options like classic, dance, soft, techno, and a lot more.
Step 3: Remove Background Noise
To remove unwanted background noise, you can tick the “Remove Background Noise” checkbox that will offer you three options: Weak, Mild, and Strong.
Step 4: Edit the Volume
If you want to lower the volume of other clips in the video, you can use the “Lower the volume of other clips” checkbox next to the ducking option.
It’s not just one, but Filmora offers five attractive choices to modify the created audio keyframe.
Part 3: How to Fade In/Out Audio with Keyframes in Filmora for Mac?
Now that you are familiar with the method to add Filmora keyframes for audio and modifying them, here is a particular part of how you can fade audio with keyframes. As it is a special effect with audio keyframe, we have framed a special session with the two methods offered by Wondershare Filmora for Mac.
Method 1
Step 1: Once you created the audio keyframe or double-clicked the video spot where you want to make the keyframe, you will land on the audio panel like the below interface.
Step 2: To fade audio in keyframe once accessing the audio settings, drag or slide the pointer on the “Fadein” option to the right to set the duration.
Step 3: To fade audio out, you can use the slider next to the “Fadeout” option to set the duration.
Method 2
- You can directly apply the fade in/out in the audio keyframe on the timeline. Once you place the video, the audio track will appear where you can see the icon - the Fade option above the audio waveform.
- Dragging the fade audio in the handle at the beginning of the clip will impose the effect and set its duration automatically. Pulling the fade audio out handle at the end of the clip will impose the fade-out effect.
Conclusion
No doubt, Wondershare Filmora is the best choice to carry over your audio keyframing process. You can customize your creations as per your requirement or need, and Filmora comes in handy as well. Along with practical interpretation on adding an audio keyframe and fading audio with keywords, I hope we have resolved the need for an external guide to proceed with the editing process. It’s not just with the process of keyframing, but Wondershare Filmora can do wonders to your design, and so, with no delay, try it out today for free!
Benjamin Arango
Benjamin Arango is a writer and a lover of all things video.
Follow @Benjamin Arango
Benjamin Arango
Aug 18, 2022• Proven solutions
Not just professionals but beginners can also step into the planet of animation if one comes to know about the basics, advanced editing tips, and other associated concepts relating to video creation. Trimming, scaling, audio ducking, screen recording, masking, and yes, don’t forget the primary process that is keyframing; you should try everything to come out with bright colors. Yes, to understand and excel in animation, you must know how to execute it hassle-free.
If you have Mac, you would be familiar with Final Cut Pro X and its related audio functionalities. However, if you need a perfect alternative that could perform outstanding audio keyframing, we would like to suggest Wondershare Filmora for Mac. Yes, adding an audio keyframe in Wondershare Filmora is easy and you do not need to search for an ultimate guide as we are here to fill up the space. Alongside, you will also learn how to perform some of the functions like fade audio in/out.
Part 1: How to Add Audio Keyframes in Wondershare Filmora for Mac?
Is adding an audio keyframe in Wondershare Filmora for Mac easy? Else is the interface too tough to follow? Keep your confusion aside and take a look at the below step-by-step guide on how to perform audio keyframing in Wondershare Filmora for Mac.
Step 1: Launch to Add Media Files
Launch or open the Wondershare Filmora on your Mac. Then, add a media file or the video file into the work panel by dragging-dropping the file into the timeline.
You can also execute “File > Import Media > Import media files” to bring the files into the timeline.
Step 2: Edit Audio
Once your video reaches the timeline, double-clicking on it will take you to the editing menu to choose the “Audio” tab.
Increase or decrease the volume level based on which the clips should play.
Step 3: Adjust Volume and Add Keyframe
Place the pointer on the timeline where you want to add an audio keyframe. Then double-click the audio clip that will again redirect you to the Audio panel.
Now, click on the keyframe icon on the left side panel, make the volume adjustment on the timeline by dragging the volume envelope, and tapping the “OK” button.
To add the second audio keyframe, move the playhead to the desired spot, and once done, perform step 3 again.
Part 2: How to Modify Audio Keyframes in Filmora for Mac?
Not only adding an audio keyframe is possible in Wondershare Filmora for Mac, but modifying or adjust the audio keyframe is possible as well.
Step 1: Modify Audio Keyframe
The easy option of modifying the audio keyframe is from the Audio panel that will navigate by double-clicking on the audio keyframe created on the timeline.
Yes, from the options provided, you can slide the parameters like pitch, equalizer, ducking, and denoise if required to modify the keyframe.
Yes, in the upcoming session, we can see how to fade audio with keyframes, but here let’s look at the other options.
Step 2: Change Soundwaves
Audio is a mix up of speech, music, etc. Changing the sound waves would bring out a different keyframe. To do so, you can tap on the inverted triangle next to the Equalizer option that will offer you various options like classic, dance, soft, techno, and a lot more.
Step 3: Remove Background Noise
To remove unwanted background noise, you can tick the “Remove Background Noise” checkbox that will offer you three options: Weak, Mild, and Strong.
Step 4: Edit the Volume
If you want to lower the volume of other clips in the video, you can use the “Lower the volume of other clips” checkbox next to the ducking option.
It’s not just one, but Filmora offers five attractive choices to modify the created audio keyframe.
Part 3: How to Fade In/Out Audio with Keyframes in Filmora for Mac?
Now that you are familiar with the method to add Filmora keyframes for audio and modifying them, here is a particular part of how you can fade audio with keyframes. As it is a special effect with audio keyframe, we have framed a special session with the two methods offered by Wondershare Filmora for Mac.
Method 1
Step 1: Once you created the audio keyframe or double-clicked the video spot where you want to make the keyframe, you will land on the audio panel like the below interface.
Step 2: To fade audio in keyframe once accessing the audio settings, drag or slide the pointer on the “Fadein” option to the right to set the duration.
Step 3: To fade audio out, you can use the slider next to the “Fadeout” option to set the duration.
Method 2
- You can directly apply the fade in/out in the audio keyframe on the timeline. Once you place the video, the audio track will appear where you can see the icon - the Fade option above the audio waveform.
- Dragging the fade audio in the handle at the beginning of the clip will impose the effect and set its duration automatically. Pulling the fade audio out handle at the end of the clip will impose the fade-out effect.
Conclusion
No doubt, Wondershare Filmora is the best choice to carry over your audio keyframing process. You can customize your creations as per your requirement or need, and Filmora comes in handy as well. Along with practical interpretation on adding an audio keyframe and fading audio with keywords, I hope we have resolved the need for an external guide to proceed with the editing process. It’s not just with the process of keyframing, but Wondershare Filmora can do wonders to your design, and so, with no delay, try it out today for free!
Benjamin Arango
Benjamin Arango is a writer and a lover of all things video.
Follow @Benjamin Arango
“Free Music Production Software: Top Picks for Windows/Mac Users “
13 Free Music Production Software for Windows/Mac/Online
Benjamin Arango
Mar 27, 2024• Proven solutions
13 Free Music Production Software for Windows/Mac/Online
Technology advances have spread through all fields of human activity, including music recording and development. The invention of music development tools has made it simpler for people engaged in the creation of music in one form or another.
Numerous applications for music development are on the market, and some are meant for musicians, and others are for educators and teachers. There is also a need to direct prospective customers to the right free music production software.
A comprehensive analysis of some of the best music development tools has been conducted to help you make the correct decision while you’re ready to purchase the app. This comprehensive Music Production Software Guide will provide solutions to many of your unanswered questions relating to the purchase of music production software.
- Part 1: Free Music Production Software for Windows
- Part 2: Free Music Production Software for Mac
- Part 3: Free Music Production Software Online
Part 1: Free Music Production Software for Windows
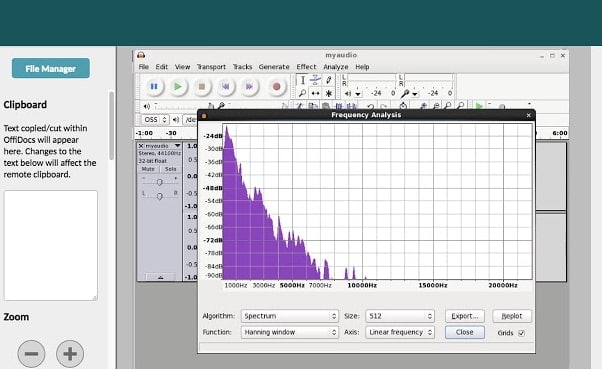
1. Audacity
The system for music development is not complete without an audio editor. Audacity is the best free music creation software available on the market. Audacity is open-source and extensive and provides a wide range of tools and effects for performing all audio editing and recording activities. It is created by a community of volunteers and provides regular notifications almost every month. It’s lightweight, safe, and intuitive enough to be used by novice music makers.
Pros
- It is open-source
- It can load VST plugins
Cons
- Only 32-bit plugins are allowed
- Limited features
2. Ardour
Ardour is a highly integrated program of music production that allows users to record and edit on Mac, Linux, and Windows operating systems. Ardour Music Production Software was created by integrating the efforts of the world’s skilled team, such as recording technicians, programmers, and musicians. Such experienced technicians make their concerted and thorough efforts to build the program. Ardour is one of the few applications in music production that respects honesty. The accessibility of this program allows app developers to concentrate on functionality that matters to consumers rather than to construct compelling apps for advertising purposes. This is a system that should be celebrated for its user-focused functionality.
Pros
- It has excellent user-friendliness
- It is available on Mac, Linux, and Windows
Cons
- It lacks a few integral features
- It is difficult to operate for people new to audio editing

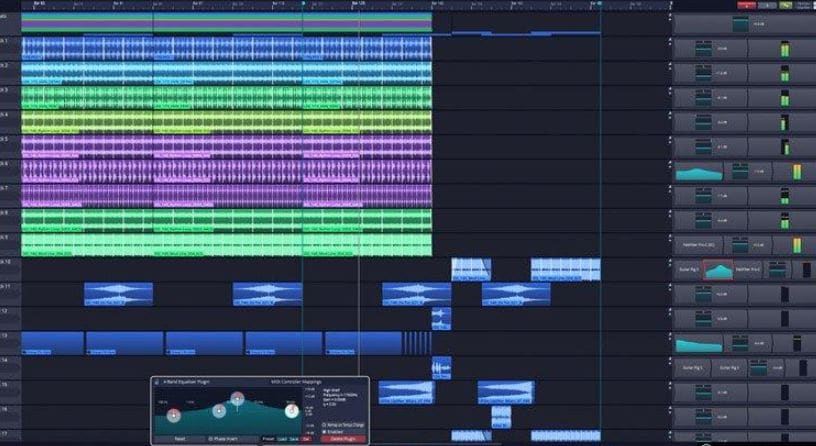
3. Tracktion T7
The people at Tracktion seem to have reached a reasonably canny business model by launching older DAW versions for free and without anything removed.
The convention appears to make it possible to access the edition without charge of two iterations before the new one. You will not be provided with all new functionality, but you will receive an update every time the company updates its flagship DAW, which it does nearly every year.
The growing section is adjustable to match the workflow, and the bottom panel adjusts so that any parameters anywhere on the screen can be seen.
Pros
- It features an unlimited number of audio and MIDI tracks
- It is able to host multiple plugin formats
Cons
- It doesn’t provide all the features at once
- It does not support many plugins
4. LMMS
LMMS is a fully free music production software for windows for music development. It is an open-source and also a project platform for the community. LMMS is a cross-platform device app. It makes it easier to manufacture beats, particularly when many music production professionals have to manufacture quality music with their computers.
Thanks to the powerful sample, beat and melody design, mixing and synthetic sound processes, and many other features, the LMMS music production software provides high-quality audio output. The product also features playback tools, plugins, and samples to produce powerful, high-quality sound.
Pros
- It is compatible with Linux, Windows, and Mac
- Hydrogen project files and MIDI can be imported easily for editing
Cons
- It eats a lot of memory and requires a high-end device to support it
- Some users complained that understanding its working is difficult

5. Cakewalk
This is an exciting app for music production to purchase. It is a fantastic tech to invest in music production. Cakewalk Sonar Artist Software is one of Cakewalk Sonar Artist ‘s great productions. Cakewalk is known for an excellent GUI, an excellent mixing console, an excellent commercial radio system, and limitless MIDI tracks.
A good device to use as part of your instruments for the development of music is the Cakewalk Sonar Artist Music Production program. It stands out as a program packed with excellent features amongst its counterparts. And the app is unmatched in the area of apps.
Pros
- You can share music compilation directly to social media
- You can easily add effects to your tracks
Cons
- It is priced, very high
- One window interface makes it hectic

6. Music Maker by Magix
This app is a special program for sound engineers, skilled musicians, and accomplished music producers, developed by US Magix Entertainment. It offers an excellent forum for creative music development in music production professionals.
In reality, the software for music production is excellent software for the Music Maker by Magix. In the field of music post-production and music mastering, mixing and arrangement, recording, and more, the software achieved remarkable breakthroughs. Thanks to the successful combination of a technical device and highly flexible workflow, the Music Maker by Magix has achieved this groundbreaking success.
With creative algorithm and superb plugin effects, the Music Maker by Magix program enables music manufacturers to develop their ideas in line with the highest quality in this industry.
Pros
- It is great for EDM producers
Cons
- It is not suitable for newbies
- The GUI feels a bit cluttered
Part 2: Free Music Production Software for Mac
7. Garageband
This is a music development studio app that is designed to function on Mac. It is a great free music production software for Mac. This software has a full sound collection, which includes virtual instruments, voice, and guitar preset.
GarageBand is a well-known app for music development and is an excellent tool for music beginners. Many people have chosen GarageBand because it does not match the ease and ease of use for recording purposes in particular.
The user-friendly interface makes you easy to create music with a more unobstructed view of what you’re recording. Apps from GarageBand captured the attention of others because of their ease-to-use and user-friendliness.
Pros
- The software offers some nicely packaged preset for vocal and guitar recording
- Productive workflow
Cons
- It has limited plugins
- It is only supported for Mac platforms

8. Ableton Live
The Ableton Live 10 Suite is a dynamic and comprehensive program for the creation and performance of musical recordings.
An essential feature of this software is that it allows you to work on your time-based workflow without affecting the live session. This means that the software gives you a rare chance to get involved with the workflow without stopping live performance.
The Multitrack Recording Technology of Ableton Live10 Suite allows music producers to adjust the speed and pacing of any audio during the recording. To make these adjustments, you don’t have to pause the recording. This is one of the striking characteristics which makes this product a good option for all.
Pros
- Adjusting the speed and pace of audio is a delight
- Sophisticated MIDI/audio routing capabilities
Cons
- It has a traditional design
- Not enough updates to fix the buggy features

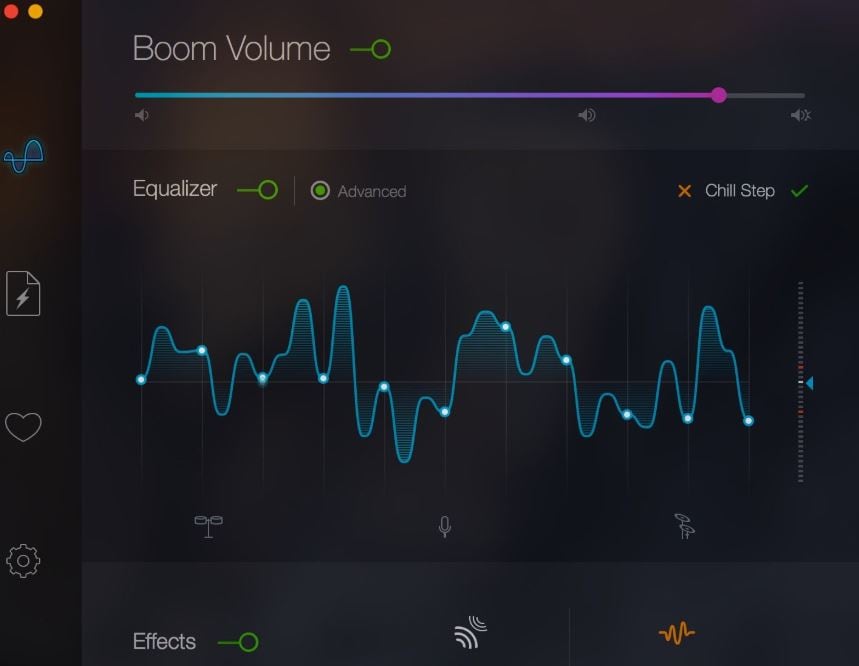
9. Boom 3D
Boom 3D for Mac & Windows is an award-winning pro sound improvement software designed to play your media content on any and all of your devices, phones, or streaming services with amazing 3D effects. No costly headphones or sound boosters will be needed to make your music feel like it! Designed in a new immersive 3D surround sound technology, Boom 3D redefines how people listen to music, watch films, or play games with some headphones on their devices. 3D sound provides the option to check the LFE (subwoofer), and the audio intensity of each Virtual 3D Surround audio system speaker.
Pros
- It comes with loads of content
- Audio quality can be enhanced
Cons
- The design is not suitable for everybody
- It does not have a Linux version
10. Mixxx
For beginners, Mixxx is just another great device. This is also one of the best free music production software downloads for your music. This software supports all Mac, Windows, and Linux platforms.
The application provides you with a DJ-mixing environment and supports all standard formats such as Mp3 and many other formats.
Pros
- It is a great app for beginners
- Supported by Mac, Windows, and Linux
Cons
- It doesn’t support many plugins
- GUI isn’t that great

Part 3: Free Music Production Software Online
11. Soundation
Soundation is a platform that provides free music production software online only capabilities. The free version and three paid versions are offered. You can use this to build your tracks unless you have the resources to do so if you need a web-based music maker and editor.
If you pay, even after you have made your music, you can always cancel. Remember first to save them to your hard drive. If you need paid characteristics, pay for the monthly plan again through PayPal, and you have to use it for a month.
Pros
- Great SSL-modelled mixer
- You can use its devices as a plugin
Cons
- It works only online

12. Audiotool
Audiotool is a popular app for music production hosted online and can be used without installation from inside your browser. It uses a cloud-based network to store all your music and files wherever you are. It is also confirmed that you will share music and tracks directly with YouTube, SoundCloud, and Facebook on its own publishing site. They have premium releases from Loopmasters and some fantastic online VSTs, for example, Heisenberg, Machiniste, Bassline, and Beatbox 8 & 9.
Pros
- No installation needed
- You can directly share it to your social media
Cons
- It works only online
- No upgrades

13. Soundtrap
Soundtrap is not only an online music studio but a training site for students and instructors. The STEAM Curriculum is an online learning resource that helps students to follow music and podcasts, incorporated into the Web app. As we mentioned earlier, in addition to the online Web App, you can also use it on different devices, share it with other users, and work in innovative projects for your music.
The interface is simple, easy to use, and easy to understand. It is simply an instrument for innovation; you don’t have to learn how to apply VST or any other technical elements to music creation. You can also record your MIDI instruments directly from your machine or device’s mic.
Pros
- It provides a great platform for teachers to teach their students
- It is very easy to use
Cons
- It only has a limited number of plugins
- It cannot be used professionally

Conclusion
If you make music on a computer, the most important resource in your artistic arsenal is your DAW; in your home recording system, you ‘re probably going to have the MIDI keyboard, audio interface, studio monitor speakers, and maybe a microphone or two. But your program is at the core of it all. Not everyone can afford expensive DAWs, but one must not worry as free music production software are present to aid us.
It is important to have a DAW with which you are pleased and, perhaps more importantly, a DAW, which allows you to turn your ideas into music as quickly and painlessly as possible. So make sure you choose the best one for you according to your needs. Hopefully, this guide will aid you!


Benjamin Arango
Benjamin Arango is a writer and a lover of all things video.
Follow @Benjamin Arango
Benjamin Arango
Mar 27, 2024• Proven solutions
13 Free Music Production Software for Windows/Mac/Online
Technology advances have spread through all fields of human activity, including music recording and development. The invention of music development tools has made it simpler for people engaged in the creation of music in one form or another.
Numerous applications for music development are on the market, and some are meant for musicians, and others are for educators and teachers. There is also a need to direct prospective customers to the right free music production software.
A comprehensive analysis of some of the best music development tools has been conducted to help you make the correct decision while you’re ready to purchase the app. This comprehensive Music Production Software Guide will provide solutions to many of your unanswered questions relating to the purchase of music production software.
- Part 1: Free Music Production Software for Windows
- Part 2: Free Music Production Software for Mac
- Part 3: Free Music Production Software Online
Part 1: Free Music Production Software for Windows
1. Audacity
The system for music development is not complete without an audio editor. Audacity is the best free music creation software available on the market. Audacity is open-source and extensive and provides a wide range of tools and effects for performing all audio editing and recording activities. It is created by a community of volunteers and provides regular notifications almost every month. It’s lightweight, safe, and intuitive enough to be used by novice music makers.
Pros
- It is open-source
- It can load VST plugins
Cons
- Only 32-bit plugins are allowed
- Limited features
2. Ardour
Ardour is a highly integrated program of music production that allows users to record and edit on Mac, Linux, and Windows operating systems. Ardour Music Production Software was created by integrating the efforts of the world’s skilled team, such as recording technicians, programmers, and musicians. Such experienced technicians make their concerted and thorough efforts to build the program. Ardour is one of the few applications in music production that respects honesty. The accessibility of this program allows app developers to concentrate on functionality that matters to consumers rather than to construct compelling apps for advertising purposes. This is a system that should be celebrated for its user-focused functionality.
Pros
- It has excellent user-friendliness
- It is available on Mac, Linux, and Windows
Cons
- It lacks a few integral features
- It is difficult to operate for people new to audio editing
3. Tracktion T7
The people at Tracktion seem to have reached a reasonably canny business model by launching older DAW versions for free and without anything removed.
The convention appears to make it possible to access the edition without charge of two iterations before the new one. You will not be provided with all new functionality, but you will receive an update every time the company updates its flagship DAW, which it does nearly every year.
The growing section is adjustable to match the workflow, and the bottom panel adjusts so that any parameters anywhere on the screen can be seen.
Pros
- It features an unlimited number of audio and MIDI tracks
- It is able to host multiple plugin formats
Cons
- It doesn’t provide all the features at once
- It does not support many plugins
4. LMMS
LMMS is a fully free music production software for windows for music development. It is an open-source and also a project platform for the community. LMMS is a cross-platform device app. It makes it easier to manufacture beats, particularly when many music production professionals have to manufacture quality music with their computers.
Thanks to the powerful sample, beat and melody design, mixing and synthetic sound processes, and many other features, the LMMS music production software provides high-quality audio output. The product also features playback tools, plugins, and samples to produce powerful, high-quality sound.
Pros
- It is compatible with Linux, Windows, and Mac
- Hydrogen project files and MIDI can be imported easily for editing
Cons
- It eats a lot of memory and requires a high-end device to support it
- Some users complained that understanding its working is difficult
5. Cakewalk
This is an exciting app for music production to purchase. It is a fantastic tech to invest in music production. Cakewalk Sonar Artist Software is one of Cakewalk Sonar Artist ‘s great productions. Cakewalk is known for an excellent GUI, an excellent mixing console, an excellent commercial radio system, and limitless MIDI tracks.
A good device to use as part of your instruments for the development of music is the Cakewalk Sonar Artist Music Production program. It stands out as a program packed with excellent features amongst its counterparts. And the app is unmatched in the area of apps.
Pros
- You can share music compilation directly to social media
- You can easily add effects to your tracks
Cons
- It is priced, very high
- One window interface makes it hectic
6. Music Maker by Magix
This app is a special program for sound engineers, skilled musicians, and accomplished music producers, developed by US Magix Entertainment. It offers an excellent forum for creative music development in music production professionals.
In reality, the software for music production is excellent software for the Music Maker by Magix. In the field of music post-production and music mastering, mixing and arrangement, recording, and more, the software achieved remarkable breakthroughs. Thanks to the successful combination of a technical device and highly flexible workflow, the Music Maker by Magix has achieved this groundbreaking success.
With creative algorithm and superb plugin effects, the Music Maker by Magix program enables music manufacturers to develop their ideas in line with the highest quality in this industry.
Pros
- It is great for EDM producers
Cons
- It is not suitable for newbies
- The GUI feels a bit cluttered
Part 2: Free Music Production Software for Mac
7. Garageband
This is a music development studio app that is designed to function on Mac. It is a great free music production software for Mac. This software has a full sound collection, which includes virtual instruments, voice, and guitar preset.
GarageBand is a well-known app for music development and is an excellent tool for music beginners. Many people have chosen GarageBand because it does not match the ease and ease of use for recording purposes in particular.
The user-friendly interface makes you easy to create music with a more unobstructed view of what you’re recording. Apps from GarageBand captured the attention of others because of their ease-to-use and user-friendliness.
Pros
- The software offers some nicely packaged preset for vocal and guitar recording
- Productive workflow
Cons
- It has limited plugins
- It is only supported for Mac platforms
8. Ableton Live
The Ableton Live 10 Suite is a dynamic and comprehensive program for the creation and performance of musical recordings.
An essential feature of this software is that it allows you to work on your time-based workflow without affecting the live session. This means that the software gives you a rare chance to get involved with the workflow without stopping live performance.
The Multitrack Recording Technology of Ableton Live10 Suite allows music producers to adjust the speed and pacing of any audio during the recording. To make these adjustments, you don’t have to pause the recording. This is one of the striking characteristics which makes this product a good option for all.
Pros
- Adjusting the speed and pace of audio is a delight
- Sophisticated MIDI/audio routing capabilities
Cons
- It has a traditional design
- Not enough updates to fix the buggy features
9. Boom 3D
Boom 3D for Mac & Windows is an award-winning pro sound improvement software designed to play your media content on any and all of your devices, phones, or streaming services with amazing 3D effects. No costly headphones or sound boosters will be needed to make your music feel like it! Designed in a new immersive 3D surround sound technology, Boom 3D redefines how people listen to music, watch films, or play games with some headphones on their devices. 3D sound provides the option to check the LFE (subwoofer), and the audio intensity of each Virtual 3D Surround audio system speaker.
Pros
- It comes with loads of content
- Audio quality can be enhanced
Cons
- The design is not suitable for everybody
- It does not have a Linux version
10. Mixxx
For beginners, Mixxx is just another great device. This is also one of the best free music production software downloads for your music. This software supports all Mac, Windows, and Linux platforms.
The application provides you with a DJ-mixing environment and supports all standard formats such as Mp3 and many other formats.
Pros
- It is a great app for beginners
- Supported by Mac, Windows, and Linux
Cons
- It doesn’t support many plugins
- GUI isn’t that great
Part 3: Free Music Production Software Online
11. Soundation
Soundation is a platform that provides free music production software online only capabilities. The free version and three paid versions are offered. You can use this to build your tracks unless you have the resources to do so if you need a web-based music maker and editor.
If you pay, even after you have made your music, you can always cancel. Remember first to save them to your hard drive. If you need paid characteristics, pay for the monthly plan again through PayPal, and you have to use it for a month.
Pros
- Great SSL-modelled mixer
- You can use its devices as a plugin
Cons
- It works only online
12. Audiotool
Audiotool is a popular app for music production hosted online and can be used without installation from inside your browser. It uses a cloud-based network to store all your music and files wherever you are. It is also confirmed that you will share music and tracks directly with YouTube, SoundCloud, and Facebook on its own publishing site. They have premium releases from Loopmasters and some fantastic online VSTs, for example, Heisenberg, Machiniste, Bassline, and Beatbox 8 & 9.
Pros
- No installation needed
- You can directly share it to your social media
Cons
- It works only online
- No upgrades
13. Soundtrap
Soundtrap is not only an online music studio but a training site for students and instructors. The STEAM Curriculum is an online learning resource that helps students to follow music and podcasts, incorporated into the Web app. As we mentioned earlier, in addition to the online Web App, you can also use it on different devices, share it with other users, and work in innovative projects for your music.
The interface is simple, easy to use, and easy to understand. It is simply an instrument for innovation; you don’t have to learn how to apply VST or any other technical elements to music creation. You can also record your MIDI instruments directly from your machine or device’s mic.
Pros
- It provides a great platform for teachers to teach their students
- It is very easy to use
Cons
- It only has a limited number of plugins
- It cannot be used professionally
Conclusion
If you make music on a computer, the most important resource in your artistic arsenal is your DAW; in your home recording system, you ‘re probably going to have the MIDI keyboard, audio interface, studio monitor speakers, and maybe a microphone or two. But your program is at the core of it all. Not everyone can afford expensive DAWs, but one must not worry as free music production software are present to aid us.
It is important to have a DAW with which you are pleased and, perhaps more importantly, a DAW, which allows you to turn your ideas into music as quickly and painlessly as possible. So make sure you choose the best one for you according to your needs. Hopefully, this guide will aid you!
Benjamin Arango
Benjamin Arango is a writer and a lover of all things video.
Follow @Benjamin Arango
Also read:
- 2024 Approved The Ultimate Guide to Musical Matchmaking Top Tunes for Dynamic Montage Videos
- The Ultimate List of Preferred Linux Audio Recorders and How to Make the Most Out of Your Sessions for 2024
- New In 2024, Voice Changing Revolutionized Top 7 of the Freestanding Audio Modification Apps
- New Audit Findings on Sound Forges Integration and Workflow Efficiency for 2024
- New Cost-Effective Mac Sound Editor Software
- Achieve Balanced Soundscape with Rapid Audio Regulation Strategies for 2024
- Combine Music with Visual Content at Zero Expense
- New Tech Tip Turning Off Your Mic in Zoom Conferences Across Platforms
- New Exploring the Pinnacle of Free & Paid Audio Creation on Linux
- New Essential Insights Into the Workflow of TwistedWave Editing Software for 2024
- Updated Convert Videos Into High-Quality Audio - The 10 Best Tools at Your Fingertips (Free)
- Updated In 2024, Lyric Locators Discovering Hit Songs of the Year, Updated
- Updated Practices for Detaching Soundtracks in Film Clips for 2024
- 2024 Approved Utilizing Mystery and Intrigue Through Suspense Music for Film Scoring Excellence
- Updated Uncovering Natural Beast Cries Aural Library
- Purity of Music Step-by-Step Processes for Eliminating Vocal Elements From Songs
- New Where to Locate High-Quality Recorded Bird Calls on the Web
- Integrate Songs Seamlessly Into Videos Without Paying
- Updated In 2024, Key Components of a Quality Audio Editor on macOS
- Stepping Up the Game How to Tweak Audio Levels in Audacity for 2024
- New In 2024, Top Podcast Hosting Services A Comprehensive Ranking
- Updated 2024 Approved Elite Voice Mimicry Suite - Windows & Apple Harmonization
- Updated Streamlining Audio Dynamics A Comprehensive Approach to Volume Normalization with VLC for 2024
- New Quieting the Gusts Innovative Approaches for Wind Noise Reduction in Acoustic Files for 2024
- New Mastering Sound Quality on Your Technology for 2024
- Updated 2024 Approved Enhance Your IGTV Content with Tunes
- Updated 2024 Approved Video Editors Best Picks 10 Innovative Reaper Extraction Solutions You Cant Ignore
- New Transforming Your Speech Into Powerful Bass with Filmora Filmmaking for 2024
- New 2024 Approved Exploring the Best MacDAWs An Extensive Review of the Top 8 Software
- The Ultimate Technique for Disabling Background Sounds From Digital Media Streams
- New 2024 Approved Tips of Playing M4A Audio Files on Android Devices
- New Embed Soundtrack Into Animated Snapshot for Windows Users
- 2024 Approved What Is Audio Ducking and How to Use It in Filmora A Beginner-Friendly Guide
- 2024 Approved Achieving Balanced Sound with VLC An In-Depth Look at Volume Normalization
- New No. 1 Maker to Animate Your Logo Online Free
- How to Change/Add Location Filters on Snapchat For your Tecno Spark 10 5G | Dr.fone
- Prank Your Friends! Easy Ways to Fake and Share Google Maps Location On Apple iPhone 15 | Dr.fone
- List of Pokémon Go Joysticks On Google Pixel 8 | Dr.fone
- 3 Best Tools to Hard Reset Lava Storm 5G | Dr.fone
- In 2024, Unova Stone Pokémon Go Evolution List and How Catch Them For Tecno Spark 10 4G | Dr.fone
- How Do I Stop Someone From Tracking My Motorola Moto G23? | Dr.fone
- How to Transfer Photos from Vivo S17 to New Android? | Dr.fone
- Best Android Data Recovery - Retrieve Lost Pictures from Reno 11 Pro 5G.
- 3 Ways to Change Location on Facebook Marketplace for Vivo V30 Pro | Dr.fone
- New In 2024, The Best Web-Based Video Editors for Chromebook Users
- The Ultimate Guide to Realme GT Neo 5 Pattern Lock Screen Everything You Need to Know
- In 2024, How Can We Unlock Our Samsung Galaxy S23 Tactical Edition Phone Screen?
- New In 2024, Audio Conversion Made Simple Our Top 6 Picks
- Does Airplane Mode Turn off GPS Location On Realme 12+ 5G? | Dr.fone
- Mastering Lock Screen Settings How to Enable and Disable on Xiaomi 14 Ultra
- Bypass iCloud Activation Lock with IMEI Code On iPhone XS Max
- MOD Video Editing on a Shoestring Top Free Editors for 2024
- In 2024, Life360 Circle Everything You Need to Know On Itel P40+ | Dr.fone
- In 2024, Simple and Effective Ways to Change Your Country on YouTube App Of your Oppo Find X7 Ultra | Dr.fone
- Complete Review & Guide to Techeligible FRP Bypass and More For Samsung Galaxy F15 5G
- How to Track Apple iPhone 6 Plus Location by Number | Dr.fone
- In 2024, How To Remove or Bypass Knox Enrollment Service On Vivo Y78+
- 2024 Approved Get Noticed on Instagram The Perfect Video Dimensions and Aspect Ratios
- Title: Discover the Best Web-Based Solutions to Elevate Your MP3 Audio Amplitude
- Author: Kate
- Created at : 2024-05-20 02:42:07
- Updated at : 2024-05-21 02:42:07
- Link: https://audio-editing.techidaily.com/discover-the-best-web-based-solutions-to-elevate-your-mp3-audio-amplitude/
- License: This work is licensed under CC BY-NC-SA 4.0.
