
:max_bytes(150000):strip_icc():format(webp)/TheWolfAmongUsBigby-793544cded2749488ae1d20113d8d73a.jpg)
Captivating Sounds Without Breaking Your Piggy Bank The Top Six No-Cost Video Conversion Approaches
“Captivating Sounds Without Breaking Your Piggy Bank: The Top Six No-Cost Video Conversion Approaches “
If you have the footage in which only the sound has all the meat, you might want to remove the visuals from the clip and keep only the audio track to save some space on your storage media. Because the videos nowadays are usually in MP4 format, and the most commonly used audio type is MP3, it becomes imperative to learn how to convert MP4 to MP3.
It is also important to know which tools are best for such kind of conversion and what benefits and downsides they come with if installed on your PC.
That said, here, you will learn how to convert video to audio using six extremely popular and widely used programs.
| 1 - Filmora | 2 - VLC media player | 3 - Audacity |
|---|---|---|
| 4 - QuickTime | 5 - Media Converter | 6 - Video to MP3 Converter |
Watch a Video First to Take a Quick View of These Programs
For Win 7 or later (64-bit)
For macOS 10.14 or later


1 Filmora - [Windows, Mac, iPhone & Android]
A product by Wondershare that is one of the most versatile development organizations, Filmora , is available for Windows and Mac platforms. The tool is a full-fledged post-production program that many professionals use because it is lightweight and due to its simple UI and not-so-steep learning curve.
The instructions given below explain how to convert video to audio with Filmora:
Step 1: Import Source Media
Launch Wondershare Filmora (a Windows computer here used here), click anywhere inside the Media window present at the upper-left section, and select and import a source video file to the program.
For Win 7 or later (64-bit)
For macOS 10.14 or later

Step 2: Add Media to Timeline
Drag the imported footage to the Timeline at the bottom of the window. Optionally, right-click the media in the Timeline itself, and click Detach Audio to separate the audio track from the video. Trim off the unwanted sections from the clip if need be.

Step 3: Convert Video to Audio
Click EXPORT from the top-center of the window, go to the Video tab on the Export box, select MP3 from the bottom of the Format list in the left pane, choose other preferences by clicking the SETTINGS button from the right, and click EXPORT from the bottom-right corner.

Benefits of Using Filmora
Some of the advantages of using Filmora to convert video clips to audio are:
- Easy audio separation from the video
- Ability to export videos directly to audio
- Ability to adjust the audio and remove the background noise
- Ability to record voice and integrate it into the audio clip
Disadvantages: Doesn’t have many audio formats for exporting.
Supported Audio Formats: At the time of this writing, Filmora supports only MP3 audio format while exporting directly.
For Win 7 or later (64-bit)
For macOS 10.14 or later
2 VLC Media Player [Windows, Mac & Linux]
A well-known application that supports almost all media formats and is available for Windows, Mac, and Linux platforms, the VLC media player has its built-in Converter that can transcode your video clips to audio for free.
The steps given below explain how to convert video to audio with VLC media player:
Step 1: Import Source Video

Launch VLC media player, click Media from the menu bar at the top, and click Convert / Save from the menu. Make sure that the File tab is selected on the Open Media box, click Add from the right side of the File Selection field, and click Convert / Save from the bottom.

Step 2: Select Output Format and Preferences
On the Convert box, make sure that the Convert radio button is selected, choose an audio format from the Profile drop-down list, optionally click the Settings (Wrench) icon present next to the drop-down list itself, choose other output preferences for the audio and click Save to get back to the Convert box.
Step 3: Choose Output Folder and Convert

Click Browse from the Destination section to select an output folder, enter a name for the exported file in the Destination file field, and click Start to convert audio to video with VLC media player.
Benefits of Using VLC media player
Some advantages that VLC offers include:
- Doesn’t require any other application to be installed for conversion
- Makes the process quite simple and absolutely free
Disadvantages: Doesn’t have editing tools to manipulate the clips before converting.
Supported Audio Formats: VLC media player supports OGG (Vorbis), MP3, and FLAC format while exporting.
3 Audacity [Windows, Mac & Linux]
Audacity is yet another cross-platform tool that is specifically dedicated to audio formats and is also used by many professionals to produce industry-standard audio clips. Even though Audacity is an open-source and free program, some new users may find it challenging to understand the interface.
The steps are given below explain the process of converting video to audio with Audacity:
Step 1: Install Supported Tools
Assuming that Audacity is already installed on your PC, to import video files to the program, go to https://lame.buanzo.org/#lamewindl and download and install ffmpeg for Windows for Audacity if it is not already installed. You can do a quick online search for other platforms and see if your copy of Audacity needs the tools or plugins required to import the videos.
Step 2: Import Source Video
Go to file> Open from the menu bar and select and import the video that you want to convert to audio.
Step 3: Convert Video to Audio

Make the required manipulations to the audio, go to file> Export, and choose your preferred audio format from the list. Choose a destination folder and other output preferences on the Export Audio box, and click Save to convert video to audio with Audacity.
Benefits of Using Audacity
Some benefits that Audacity offers include:
- Granular editing and fine-tuning of audio tracks
- Wide range of output preferences
- Ability to produce industry-standard outputs
- Offers plethora of options and tools to add various effects to the sounds
Disadvantages: Some new users may find it challenging to understand the interface. Audacity also needs additional tools to be installed to support video files as inputs.
Supported Audio Formats: Audacity supports almost all major audio formats including MP3, OGG, WAV, etc.
4 QuickTime [Mac]
QuickTime is the default media player that comes along with macOS and is installed automatically. Being a proprietary of Apple Inc., QuickTime natively supports all the formats developed by the company, along with some other most popular file types such as MP4, MP3, etc.
To convert a video file to audio with QuickTime on Mac, you can follow the instructions given below:
Step 1: Import Source Video
Launch QuickTime on your Mac computer, go to file from the menu bar, click Open File, use the box that opens to locate and select the video that you want to convert, and click Open from the bottom-right corner.
Step 2: Convert to Audio

Click file again, go to Export this time, and then click audio Only from the sub menu that appears. On the next box, enter a name for the output file in the Export As field, choose a destination folder from the Where drop-down list, optionally click the drop-down button from the right side of the Where field to configure other preferences, and click Save to convert video to audio with QuickTime.
Benefits of Using QuickTime
Some advantages of using QuickTime to convert video to audio include:
- Mac users don’t need to install any third-party conversion tool or additional plugin
- Conversion process is easy and almost seamless
Disadvantages: Doesn’t give any option to choose an output format and doesn’t allow editing the clips either.
Supported Audio Formats: By default, QuickTime player converts videos files to M4A audio format.
5 Media Converter – video to mp3 [iPhone]
Among several iOS apps that have been developed for video to audio conversion, Media Converter – video to mp3 is one of those that has decent star ratings and user reviews. The app is around 66MB in size and can be obtained from the App Store.
The process on how to convert video to audio with Media Converter is explained below:
- Launch Media Converter
- Import the source video to the app
- Choose Extract Audio from the Conversion Type menu
- Select your preferred output audio format
- Begin the conversion process

Benefits of Using Media Converter
A couple of advantages of using Media Converter to convert video to audio are listed below:
- Eliminates the use of PC or laptop
- Can be obtained easily
- Can be used even while moving
Disadvantages: Doesn’t have the flexibility of granular editing as it is there when using a computer program.
Supported Audio Formats: The audio formats that Media Converter supports include MP3, M4A, OGG, WAV, FLAC, etc.
6 Video to MP3 Converter [Android]
With around 4.5-star rating on Play Store, Video to MP3 Converter is another app that can convert your video files to audio right on your Android smartphone. In addition, the app also allows basic video trimming that may come in handy while making the entire clip more informative by removing unwanted sections from it.

You can learn how to convert video to audio with Video to MP3 Converter by following the instructions given below:
- Launch Video to MP3 Converter
- Import the source video clip from your Android smart device’s storage
- Trim the footage to keep only the important part
- Set output preferences
- Extract the audio from the video
Benefits of Using Video to MP3 Converter
Some advantages of using Video to MP3 Converter include:
- It supports every popular video format such as MP4, 3GP, WMV, etc.
- Has simple UI
- Offers various audio bitrates to choose from while exporting
- Allows basic trimming
Disadvantages: Doesn’t have many editing options thus, no granular manipulations can be done to the media files while using the app.
Supported Audio Formats: Video to MP3 Converter supports MP3 formats at this writing.
Conclusion
Learning how to convert MP4 to MP3 is a simple process, and as long as you have a decent computer or an iOS or Android smartphone, you can extract the audio in the format of your choice from the video clips almost instantly. Furthermore, if you are a professional and want to prepare media clips for the clients or your channel, using advanced tools like Wondershare Filmora or Audacity would give you the best conversion experience.
For Win 7 or later (64-bit)
For macOS 10.14 or later
Watch a Video First to Take a Quick View of These Programs
For Win 7 or later (64-bit)
For macOS 10.14 or later
1 Filmora - [Windows, Mac, iPhone & Android]
A product by Wondershare that is one of the most versatile development organizations, Filmora , is available for Windows and Mac platforms. The tool is a full-fledged post-production program that many professionals use because it is lightweight and due to its simple UI and not-so-steep learning curve.
The instructions given below explain how to convert video to audio with Filmora:
Step 1: Import Source Media
Launch Wondershare Filmora (a Windows computer here used here), click anywhere inside the Media window present at the upper-left section, and select and import a source video file to the program.
For Win 7 or later (64-bit)
For macOS 10.14 or later
Step 2: Add Media to Timeline
Drag the imported footage to the Timeline at the bottom of the window. Optionally, right-click the media in the Timeline itself, and click Detach Audio to separate the audio track from the video. Trim off the unwanted sections from the clip if need be.
Step 3: Convert Video to Audio
Click EXPORT from the top-center of the window, go to the Video tab on the Export box, select MP3 from the bottom of the Format list in the left pane, choose other preferences by clicking the SETTINGS button from the right, and click EXPORT from the bottom-right corner.
Benefits of Using Filmora
Some of the advantages of using Filmora to convert video clips to audio are:
- Easy audio separation from the video
- Ability to export videos directly to audio
- Ability to adjust the audio and remove the background noise
- Ability to record voice and integrate it into the audio clip
Disadvantages: Doesn’t have many audio formats for exporting.
Supported Audio Formats: At the time of this writing, Filmora supports only MP3 audio format while exporting directly.
For Win 7 or later (64-bit)
For macOS 10.14 or later
2 VLC Media Player [Windows, Mac & Linux]
A well-known application that supports almost all media formats and is available for Windows, Mac, and Linux platforms, the VLC media player has its built-in Converter that can transcode your video clips to audio for free.
The steps given below explain how to convert video to audio with VLC media player:
Step 1: Import Source Video
Launch VLC media player, click Media from the menu bar at the top, and click Convert / Save from the menu. Make sure that the File tab is selected on the Open Media box, click Add from the right side of the File Selection field, and click Convert / Save from the bottom.
Step 2: Select Output Format and Preferences
On the Convert box, make sure that the Convert radio button is selected, choose an audio format from the Profile drop-down list, optionally click the Settings (Wrench) icon present next to the drop-down list itself, choose other output preferences for the audio and click Save to get back to the Convert box.
Step 3: Choose Output Folder and Convert
Click Browse from the Destination section to select an output folder, enter a name for the exported file in the Destination file field, and click Start to convert audio to video with VLC media player.
Benefits of Using VLC media player
Some advantages that VLC offers include:
- Doesn’t require any other application to be installed for conversion
- Makes the process quite simple and absolutely free
Disadvantages: Doesn’t have editing tools to manipulate the clips before converting.
Supported Audio Formats: VLC media player supports OGG (Vorbis), MP3, and FLAC format while exporting.
3 Audacity [Windows, Mac & Linux]
Audacity is yet another cross-platform tool that is specifically dedicated to audio formats and is also used by many professionals to produce industry-standard audio clips. Even though Audacity is an open-source and free program, some new users may find it challenging to understand the interface.
The steps are given below explain the process of converting video to audio with Audacity:
Step 1: Install Supported Tools
Assuming that Audacity is already installed on your PC, to import video files to the program, go to https://lame.buanzo.org/#lamewindl and download and install ffmpeg for Windows for Audacity if it is not already installed. You can do a quick online search for other platforms and see if your copy of Audacity needs the tools or plugins required to import the videos.
Step 2: Import Source Video
Go to file> Open from the menu bar and select and import the video that you want to convert to audio.
Step 3: Convert Video to Audio
Make the required manipulations to the audio, go to file> Export, and choose your preferred audio format from the list. Choose a destination folder and other output preferences on the Export Audio box, and click Save to convert video to audio with Audacity.
Benefits of Using Audacity
Some benefits that Audacity offers include:
- Granular editing and fine-tuning of audio tracks
- Wide range of output preferences
- Ability to produce industry-standard outputs
- Offers plethora of options and tools to add various effects to the sounds
Disadvantages: Some new users may find it challenging to understand the interface. Audacity also needs additional tools to be installed to support video files as inputs.
Supported Audio Formats: Audacity supports almost all major audio formats including MP3, OGG, WAV, etc.
4 QuickTime [Mac]
QuickTime is the default media player that comes along with macOS and is installed automatically. Being a proprietary of Apple Inc., QuickTime natively supports all the formats developed by the company, along with some other most popular file types such as MP4, MP3, etc.
To convert a video file to audio with QuickTime on Mac, you can follow the instructions given below:
Step 1: Import Source Video
Launch QuickTime on your Mac computer, go to file from the menu bar, click Open File, use the box that opens to locate and select the video that you want to convert, and click Open from the bottom-right corner.
Step 2: Convert to Audio
Click file again, go to Export this time, and then click audio Only from the sub menu that appears. On the next box, enter a name for the output file in the Export As field, choose a destination folder from the Where drop-down list, optionally click the drop-down button from the right side of the Where field to configure other preferences, and click Save to convert video to audio with QuickTime.
Benefits of Using QuickTime
Some advantages of using QuickTime to convert video to audio include:
- Mac users don’t need to install any third-party conversion tool or additional plugin
- Conversion process is easy and almost seamless
Disadvantages: Doesn’t give any option to choose an output format and doesn’t allow editing the clips either.
Supported Audio Formats: By default, QuickTime player converts videos files to M4A audio format.
5 Media Converter – video to mp3 [iPhone]
Among several iOS apps that have been developed for video to audio conversion, Media Converter – video to mp3 is one of those that has decent star ratings and user reviews. The app is around 66MB in size and can be obtained from the App Store.
The process on how to convert video to audio with Media Converter is explained below:
- Launch Media Converter
- Import the source video to the app
- Choose Extract Audio from the Conversion Type menu
- Select your preferred output audio format
- Begin the conversion process
Benefits of Using Media Converter
A couple of advantages of using Media Converter to convert video to audio are listed below:
- Eliminates the use of PC or laptop
- Can be obtained easily
- Can be used even while moving
Disadvantages: Doesn’t have the flexibility of granular editing as it is there when using a computer program.
Supported Audio Formats: The audio formats that Media Converter supports include MP3, M4A, OGG, WAV, FLAC, etc.
6 Video to MP3 Converter [Android]
With around 4.5-star rating on Play Store, Video to MP3 Converter is another app that can convert your video files to audio right on your Android smartphone. In addition, the app also allows basic video trimming that may come in handy while making the entire clip more informative by removing unwanted sections from it.
You can learn how to convert video to audio with Video to MP3 Converter by following the instructions given below:
- Launch Video to MP3 Converter
- Import the source video clip from your Android smart device’s storage
- Trim the footage to keep only the important part
- Set output preferences
- Extract the audio from the video
Benefits of Using Video to MP3 Converter
Some advantages of using Video to MP3 Converter include:
- It supports every popular video format such as MP4, 3GP, WMV, etc.
- Has simple UI
- Offers various audio bitrates to choose from while exporting
- Allows basic trimming
Disadvantages: Doesn’t have many editing options thus, no granular manipulations can be done to the media files while using the app.
Supported Audio Formats: Video to MP3 Converter supports MP3 formats at this writing.
Conclusion
Learning how to convert MP4 to MP3 is a simple process, and as long as you have a decent computer or an iOS or Android smartphone, you can extract the audio in the format of your choice from the video clips almost instantly. Furthermore, if you are a professional and want to prepare media clips for the clients or your channel, using advanced tools like Wondershare Filmora or Audacity would give you the best conversion experience.
For Win 7 or later (64-bit)
For macOS 10.14 or later
The Ultimate Guide to Purified Soundtracks: Techniques and Software for Distraction-Free Voices Online
Normally, video recordings should have clean audio, but that’s not always possible. A noisy environment may need you to remove unwanted background noise from your video. Background noise or inferior equipment can cause hissy or otherwise noisy audio.
You can experience background noise when you record a podcast, make videos, or host meetings. Various online tools are available to remove background noise from your audio recordings. This article will explore the online tools for background noise removal from audio in this article. Bringing your audio projects to life with a crisp, professional sound, free of distractions and errors.
Wondershare Filmora A cross-platform for making videos anywhere for all creators!
Free Download Free Download Learn More

Part 1. Enhance Sound Quality: Online Tools To Remove Audio Background Noise
There are a lot of voice cleaners online out there to remove background noise from audio recordings. Removing noise from audio has become extremely easy because of the applications available today. Below mentioned are some tools available to clean up audio.
1. Veed.io
One of the best online video editors for beginners is VEED, which eliminates background interference with a single click. You don’t need to rerecord your audio. It is not necessary to purchase expensive sound-blocking microphones. VEED’s background noise remover eliminates all undesirable background noise from your audio files. Audio files such as MP3, WMA, and more can be made noise-free with VEED.

Key Features of Veed.io
- AI Noise Removal: Instantly removes background noise with AI.
- File Compatibility: Works with various audio formats.
- Enhanced Quality: Improves audio for professional results.
- User-Friendly: Easy and quick one-click solution.
- Full Editing Suite: Comprehensive audio and video editing tools.
Pros
- Accurate noise detection and removal.
- Supports a wide range of formats.
- Quick processing for efficient editing.
- Improves audio clarity and quality.
- Easy for beginners and experts alike.
Cons
- Full features require a subscription.
- Effectiveness depends on original recording.
2. Media.io
Media.io empowers you to work smarter with the cutting-edge capabilities of AI. Say goodbye to unwanted background noise in your audio and video files and experience a new level of audio quality. With Media.io, you can eliminate distractions and transform your recordings into clean sound in a matter of seconds.

Key Features of Media.io
- Speech Enhancement: Improve speech clarity for clearer communication.
- Denoise: Remove various types of background noise, from subtle hiss to annoying clicks.
- Wind Noise Reduction: Minimize the impact of wind conditions on your recordings.
- Reverb Noise Control: Enhance audio by reducing reverb and echo effects.
- Hiss Noise Removal: Say farewell to bothersome hissing noises in your audio.
Pros
- AI technology ensures accurate and effective noise reduction.
- Swiftly produces cleaner audio with minimal effort.
- It can be used for a variety of audio applications.
- Elevates your recordings to a professional standard.
Cons
- Full access to premium features may require a subscription.
- In the case of a poor quality recording, results may vary.
3. Kapwing
Distractions, such as unexpected planes overhead or chaotic children at home, can hinder your message. The Automatic Background Remover from Kapwing harnesses audio intelligence to remove backgrounds. As well as reducing noise, it isolates speech amidst all other noise and corrects loud noises. By using Kapwing, reducing background noise in your videos becomes a seamless process. From beginning to end, you have complete control.

Key Features of Kapwing
- Online Convenience: Eliminate background noise without the need for downloads or installations.
- Audio Intelligence: Kapwing’s tool uses advanced audio intelligence to isolate and reduce noise.
- User-Friendly: No complex audio editors required; it’s a one-click solution.
- Versatile Application: Ideal for content creators, podcasters, and livestreamers.
- Time Efficiency: Let the tool handle the heavy lifting, allowing you to focus on content creation.
Pros
- Simplifies the process of cleaning audio in videos.
- As an online tool, it offers the flexibility to work from anywhere.
- Improves speech clarity and reduces background hums.
- Streamlines the editing process with its user-friendly one-click feature.
Cons
- Recording quality can affect the effectiveness.
- Internet access is necessary for using Kapwing.
4. Podcastle
In the world of audio production, clean, professional audio is paramount. If you have a noisy recording environment, what should you do to ensure that your audio quality remains good? Introducing Podcastle, your one-click solution to eliminating static, chatter, and other pesky noises. With Podcastle’s automatic noise cancellation tool, you can create flawless audio. No fancy noise-cancelling equipment or advanced technical skills are required.

Key Features of Podcastle
- AI-Powered Noise Cancellation: Harness the power of AI to effortlessly remove background noise.
- Professional Sound: Achieve studio-quality audio, making it seem like you recorded in a professional studio.
- User-Friendly: No sound engineers or complex software required; Podcastle streamlines the process.
Pros
- Clean audio with a simple click, regardless of your recording environment.
- Ideal for both professional and amateur podcasters, offering production-quality results.
- Podcastle’s mission is to make broadcast storytelling accessible to everyone.
- A one-stop platform for podcast creation, from recording to distribution.
Cons
- Access to the tool requires an internet connection.
5. Audio Denoise
Among the array of tools at our disposal, Audio Denoise stands as a reliable champion in the quest for pristine audio. This online noise removal tool is your swift user-friendly companion. It quipped to handle multiple files and to liberate your audio from the unwanted noise. No more compromising your recordings due to background distractions. It’s time to experience audio clarity like never before.

Key Features of Audio Denoise
- User-Friendly: A quick and hassle-free tool for noise removal.
- Multi-File Support: Effortlessly process and enhance multiple audio files.
- Customization Options: Tailor your noise reduction with settings like time soothing, noise modulation tracking, and more.
Pros
- Savе timе with a tool that’s еasy to usе, еvеn for bеginnеrs.
- Pеrfеct for handling multiplе audio filеs for a variеty of projеcts.
- Tailor the noise reduction process to meet your specific needs.
Cons
- Requires an internet connection for use.
Part 2. Audio Noise Reduction Tutorial: Remove Background Noise Online with Media.io
Are you tired of dealing with unwanted background noise in your audio recordings? Mеdia. io, with its online AI-basеd noise rеduction tool, offеrs a quick and hasslе-frее solution. In this stеp-by-stеp tutorial, wе’ll show you how to get clean audio in just a fеw simplе stеps.

Step 1: Import Your Audio File
Begin by clicking the “Upload” button to import your audio and video files directly into the online AI-based noise reducer app. Whether your file is in MP3 or MP4 format, Media.io has you covered, ensuring a seamless start to the noise reduction process.

Step 2: Remove Background Noise
Nеxt, sеlеct thе typе of noise you want to rеmovе from thе availablе noisе list. You can choosе from a variеty of noisе catеgoriеs, including spееch enhancement, dеnoising, wind noisе, rеvеrb noisе, click noisе, and hiss noisе. Aftеr making your sеlеction, click thе “Rеducе Noisе Now ‘ button to initiatе thе noisе removal process.

Stеp 3: Download Your Dеnoisеd Filе
Oncе the background noise rеduction procеss is complеtе, you’ll have thе opportunity to prеviеw thе results. Aftеr еnsuring that your audio sounds just the way you want it, click thе “Download” button to savе thе clеanеd audio filе in MP3 format.
And that’s it! You’ve successfully removed background noise from your audio using Media.io’s online AI Noise Reducer. You can produce studio-quality sound with minimal effort in a matter of seconds. Experience the difference for yourself and enjoy cleaner, more professional audio recordings.

Whether it’s denoising or eliminating various noise types, Media.io’s noise reduction tool has you covered. Elevate the quality of your audio recordings and create content that truly stands out.
Part 3. Sneak Peek: Unveiling Wondershare Filmora’s New Features
In the ever-evolving landscape of video editing, Wondershare Filmora has consistently stood out as a powerful and user-friendly software that caters to both beginners and professionals. With the recent release of Filmora V13, it’s time to delve into the exciting new features that make it an exceptional choice for video creators and editors.
Wondershare Filmora V13 : Your Video Editing Powerhouse
Wondershare Filmora is renowned for its versatility and ease of use, making video editing a creative and enjoyable process. Now, with the upcoming Filmora V13, it’s set to redefine the possibilities of video editing once again. Filmora V13’s have new Key Features that can elevate your editing experience. Below mentioned is a tool that can help you clean up the audio with background noise removed.
Free Download For Win 7 or later(64-bit)
Free Download For macOS 10.14 or later
AI Vocal Removal
One of the standout features of Filmora V13 is the introduction of AI Vocal Removal. This cutting-edge technology empowers you to remove vocals. or specific audio elements from your videos or music tracks effortlessly. all while maintaining the pristine quality of your music. Whether you’re a content creator looking to enhance your videos with background music or a music enthusiast seeking to remix and customize your favorite tracks, Filmora V13’s AI Vocal Removal feature offers you unparalleled creative freedom. Check this step-by-step tutorial on how to use this incredible feature.
In this stеp-by-stеp tutorial, we’ll show you how to achieve thе perfect balancе bеtwееn vidеo and audio.
Step 1Upload the Video
Open Wondershare Filmora and start by uploading the video file that needs audio adjustment. Drag and drop your vidеo onto thе timeline, a process that takеs just a fеw sеconds.

Step 2Take Video to the Timeline
Oncе your vidеo is uploadеd, it’s timе to takе it to thе timеlinе. This is where magic happеns. But before we proceed, you need to enable the AI Vocal Removal functionality.

Step 3Enable AI Vocal Removal
With your video in thе timеlinе, sеlеct thе music clip or audio еlеmеnt that you want to modify. Now, head to thе “Tools” tab in thе top toolbar, and click it. From thе dropdown mеnu, sеlеct “Audio” and thеn choose “AI Vocal Remover.”

Step 4Make Adjustments and Export
The AI Vocal Removal feature opens up a world of possibilities. You’ll find options to adjust thе intеnsity of thе vocal rеmoval. Hеrе, you can fine-tunе thе settings to mееt your spеcific nееds, whеthеr you want to rеducе vocals or othеr audio еlеmеnts.
Once you’vе achieved thе pеrfеct balancе bеtwееn audio and vidеo, you’re rеady to еxport your vidеo with thе enhanced audio. Simply sеlеct thе “Export” option, and you’rе on your way to sharing your crеation with thе world.
The V13 version of Filmora does more than just remove vocals. It has a variety of additional features to make editing seamless and your videos more captivating. Filmora v13 offers many features, including audio denoise, audio stretch, keyframe, AI smart cutout, and more.
Conclusion
A journey to find clean audio is worthwhile in today’s digital soundscape filled with noise and distractions. Online tools and platforms make removing background noise and enhancing audio quality easy. Thе path to flawlеss sound is clеar for anyonе, be a content crеator, studеnt, or еnthusiast.
As mеntionеd abovе, thеrе аrе many tools that can help you producе profеssional-gradе audio. Wondershare Filmora V13 gives you even more power to shape your audio and video content with the AI Vocal Removal feature. The content you create will captivate your audience, tell your story clearly and elevate your sonic and visual appeal.
Free Download Free Download Learn More
Part 1. Enhance Sound Quality: Online Tools To Remove Audio Background Noise
There are a lot of voice cleaners online out there to remove background noise from audio recordings. Removing noise from audio has become extremely easy because of the applications available today. Below mentioned are some tools available to clean up audio.
1. Veed.io
One of the best online video editors for beginners is VEED, which eliminates background interference with a single click. You don’t need to rerecord your audio. It is not necessary to purchase expensive sound-blocking microphones. VEED’s background noise remover eliminates all undesirable background noise from your audio files. Audio files such as MP3, WMA, and more can be made noise-free with VEED.
Key Features of Veed.io
- AI Noise Removal: Instantly removes background noise with AI.
- File Compatibility: Works with various audio formats.
- Enhanced Quality: Improves audio for professional results.
- User-Friendly: Easy and quick one-click solution.
- Full Editing Suite: Comprehensive audio and video editing tools.
Pros
- Accurate noise detection and removal.
- Supports a wide range of formats.
- Quick processing for efficient editing.
- Improves audio clarity and quality.
- Easy for beginners and experts alike.
Cons
- Full features require a subscription.
- Effectiveness depends on original recording.
2. Media.io
Media.io empowers you to work smarter with the cutting-edge capabilities of AI. Say goodbye to unwanted background noise in your audio and video files and experience a new level of audio quality. With Media.io, you can eliminate distractions and transform your recordings into clean sound in a matter of seconds.
Key Features of Media.io
- Speech Enhancement: Improve speech clarity for clearer communication.
- Denoise: Remove various types of background noise, from subtle hiss to annoying clicks.
- Wind Noise Reduction: Minimize the impact of wind conditions on your recordings.
- Reverb Noise Control: Enhance audio by reducing reverb and echo effects.
- Hiss Noise Removal: Say farewell to bothersome hissing noises in your audio.
Pros
- AI technology ensures accurate and effective noise reduction.
- Swiftly produces cleaner audio with minimal effort.
- It can be used for a variety of audio applications.
- Elevates your recordings to a professional standard.
Cons
- Full access to premium features may require a subscription.
- In the case of a poor quality recording, results may vary.
3. Kapwing
Distractions, such as unexpected planes overhead or chaotic children at home, can hinder your message. The Automatic Background Remover from Kapwing harnesses audio intelligence to remove backgrounds. As well as reducing noise, it isolates speech amidst all other noise and corrects loud noises. By using Kapwing, reducing background noise in your videos becomes a seamless process. From beginning to end, you have complete control.
Key Features of Kapwing
- Online Convenience: Eliminate background noise without the need for downloads or installations.
- Audio Intelligence: Kapwing’s tool uses advanced audio intelligence to isolate and reduce noise.
- User-Friendly: No complex audio editors required; it’s a one-click solution.
- Versatile Application: Ideal for content creators, podcasters, and livestreamers.
- Time Efficiency: Let the tool handle the heavy lifting, allowing you to focus on content creation.
Pros
- Simplifies the process of cleaning audio in videos.
- As an online tool, it offers the flexibility to work from anywhere.
- Improves speech clarity and reduces background hums.
- Streamlines the editing process with its user-friendly one-click feature.
Cons
- Recording quality can affect the effectiveness.
- Internet access is necessary for using Kapwing.
4. Podcastle
In the world of audio production, clean, professional audio is paramount. If you have a noisy recording environment, what should you do to ensure that your audio quality remains good? Introducing Podcastle, your one-click solution to eliminating static, chatter, and other pesky noises. With Podcastle’s automatic noise cancellation tool, you can create flawless audio. No fancy noise-cancelling equipment or advanced technical skills are required.
Key Features of Podcastle
- AI-Powered Noise Cancellation: Harness the power of AI to effortlessly remove background noise.
- Professional Sound: Achieve studio-quality audio, making it seem like you recorded in a professional studio.
- User-Friendly: No sound engineers or complex software required; Podcastle streamlines the process.
Pros
- Clean audio with a simple click, regardless of your recording environment.
- Ideal for both professional and amateur podcasters, offering production-quality results.
- Podcastle’s mission is to make broadcast storytelling accessible to everyone.
- A one-stop platform for podcast creation, from recording to distribution.
Cons
- Access to the tool requires an internet connection.
5. Audio Denoise
Among the array of tools at our disposal, Audio Denoise stands as a reliable champion in the quest for pristine audio. This online noise removal tool is your swift user-friendly companion. It quipped to handle multiple files and to liberate your audio from the unwanted noise. No more compromising your recordings due to background distractions. It’s time to experience audio clarity like never before.
Key Features of Audio Denoise
- User-Friendly: A quick and hassle-free tool for noise removal.
- Multi-File Support: Effortlessly process and enhance multiple audio files.
- Customization Options: Tailor your noise reduction with settings like time soothing, noise modulation tracking, and more.
Pros
- Savе timе with a tool that’s еasy to usе, еvеn for bеginnеrs.
- Pеrfеct for handling multiplе audio filеs for a variеty of projеcts.
- Tailor the noise reduction process to meet your specific needs.
Cons
- Requires an internet connection for use.
Part 2. Audio Noise Reduction Tutorial: Remove Background Noise Online with Media.io
Are you tired of dealing with unwanted background noise in your audio recordings? Mеdia. io, with its online AI-basеd noise rеduction tool, offеrs a quick and hasslе-frее solution. In this stеp-by-stеp tutorial, wе’ll show you how to get clean audio in just a fеw simplе stеps.
Step 1: Import Your Audio File
Begin by clicking the “Upload” button to import your audio and video files directly into the online AI-based noise reducer app. Whether your file is in MP3 or MP4 format, Media.io has you covered, ensuring a seamless start to the noise reduction process.
Step 2: Remove Background Noise
Nеxt, sеlеct thе typе of noise you want to rеmovе from thе availablе noisе list. You can choosе from a variеty of noisе catеgoriеs, including spееch enhancement, dеnoising, wind noisе, rеvеrb noisе, click noisе, and hiss noisе. Aftеr making your sеlеction, click thе “Rеducе Noisе Now ‘ button to initiatе thе noisе removal process.
Stеp 3: Download Your Dеnoisеd Filе
Oncе the background noise rеduction procеss is complеtе, you’ll have thе opportunity to prеviеw thе results. Aftеr еnsuring that your audio sounds just the way you want it, click thе “Download” button to savе thе clеanеd audio filе in MP3 format.
And that’s it! You’ve successfully removed background noise from your audio using Media.io’s online AI Noise Reducer. You can produce studio-quality sound with minimal effort in a matter of seconds. Experience the difference for yourself and enjoy cleaner, more professional audio recordings.
Whether it’s denoising or eliminating various noise types, Media.io’s noise reduction tool has you covered. Elevate the quality of your audio recordings and create content that truly stands out.
Part 3. Sneak Peek: Unveiling Wondershare Filmora’s New Features
In the ever-evolving landscape of video editing, Wondershare Filmora has consistently stood out as a powerful and user-friendly software that caters to both beginners and professionals. With the recent release of Filmora V13, it’s time to delve into the exciting new features that make it an exceptional choice for video creators and editors.
Wondershare Filmora V13 : Your Video Editing Powerhouse
Wondershare Filmora is renowned for its versatility and ease of use, making video editing a creative and enjoyable process. Now, with the upcoming Filmora V13, it’s set to redefine the possibilities of video editing once again. Filmora V13’s have new Key Features that can elevate your editing experience. Below mentioned is a tool that can help you clean up the audio with background noise removed.
Free Download For Win 7 or later(64-bit)
Free Download For macOS 10.14 or later
AI Vocal Removal
One of the standout features of Filmora V13 is the introduction of AI Vocal Removal. This cutting-edge technology empowers you to remove vocals. or specific audio elements from your videos or music tracks effortlessly. all while maintaining the pristine quality of your music. Whether you’re a content creator looking to enhance your videos with background music or a music enthusiast seeking to remix and customize your favorite tracks, Filmora V13’s AI Vocal Removal feature offers you unparalleled creative freedom. Check this step-by-step tutorial on how to use this incredible feature.
In this stеp-by-stеp tutorial, we’ll show you how to achieve thе perfect balancе bеtwееn vidеo and audio.
Step 1Upload the Video
Open Wondershare Filmora and start by uploading the video file that needs audio adjustment. Drag and drop your vidеo onto thе timeline, a process that takеs just a fеw sеconds.
Step 2Take Video to the Timeline
Oncе your vidеo is uploadеd, it’s timе to takе it to thе timеlinе. This is where magic happеns. But before we proceed, you need to enable the AI Vocal Removal functionality.
Step 3Enable AI Vocal Removal
With your video in thе timеlinе, sеlеct thе music clip or audio еlеmеnt that you want to modify. Now, head to thе “Tools” tab in thе top toolbar, and click it. From thе dropdown mеnu, sеlеct “Audio” and thеn choose “AI Vocal Remover.”
Step 4Make Adjustments and Export
The AI Vocal Removal feature opens up a world of possibilities. You’ll find options to adjust thе intеnsity of thе vocal rеmoval. Hеrе, you can fine-tunе thе settings to mееt your spеcific nееds, whеthеr you want to rеducе vocals or othеr audio еlеmеnts.
Once you’vе achieved thе pеrfеct balancе bеtwееn audio and vidеo, you’re rеady to еxport your vidеo with thе enhanced audio. Simply sеlеct thе “Export” option, and you’rе on your way to sharing your crеation with thе world.
The V13 version of Filmora does more than just remove vocals. It has a variety of additional features to make editing seamless and your videos more captivating. Filmora v13 offers many features, including audio denoise, audio stretch, keyframe, AI smart cutout, and more.
Conclusion
A journey to find clean audio is worthwhile in today’s digital soundscape filled with noise and distractions. Online tools and platforms make removing background noise and enhancing audio quality easy. Thе path to flawlеss sound is clеar for anyonе, be a content crеator, studеnt, or еnthusiast.
As mеntionеd abovе, thеrе аrе many tools that can help you producе profеssional-gradе audio. Wondershare Filmora V13 gives you even more power to shape your audio and video content with the AI Vocal Removal feature. The content you create will captivate your audience, tell your story clearly and elevate your sonic and visual appeal.
“Creative Freedom at No Cost: Top Free Audio Engineering Tools of the Year “
Top 10 Best Audio Mixer Software for FREE

Benjamin Arango
Mar 27, 2024• Proven solutions
You may be a musician who wants to record their music, or just a person wanting to develop his custom ringtone. In either case, a physical or virtual audio mixer is required, whether it be analog or a dedicated audio mixer software.
But you need to have some technical knowledge to make optimal use and funk up your music/sound.
Here we are to give you the knowledge you need and some amazing audio mixer software that could be perfect for you. So buckle up, and get ready to level up the harmoniousness of your creativity!
You will Learn :
- Part 1. 10 Best Sound/Audio Mixer Software - [Video Guide]
- Part 2. All You Know About Audio Mixer
- Part 3. What to Consider While Choosing an Audio Mixer Software?
- Part 4. Basic Audio Mixer Settings You Should Know
- Part 5. Why Audio Mixer Software?
Part 1. 10 Best Sound/Audio Mixer Software
Whether you are pursuing a music career, making a video for a movie clip, or merely creating some hard-core beats for fun, you’ll be needing good sound mixing software.
Selecting an audio mixer software perfect for your requirements and available resources is not an easy task.
Some of them are for free while some charge for it, some offer limited features. At the same time, some are specific to a certain operating system, the options and availabilities are endless, and choosing among them is a hell of a daunting task.
But no need to stress out because we are here to take your burden on our shoulders and help you choose exactly what you want! So sit back and relax!
| 1 - Wondershare Filmora | 2 - Adobe Audition |
|---|---|
| 3 - Logic Pro X | 4 - Audacity |
| 5 - Reaper | 6 - Fl Studio |
| 7 - SoundAtion | 8 - HyaWave |
| 9 - Twisted Wave Online | 10 - Bear Audio Tool |
1. Wondershare Filmora
Filmora Audio Mixer is professional in audio mixing and video editing. This is used for mixing, balancing, and combining different sounds, and audio signals, sources like microphones, instruments, and synthesizers, or previously recorded audio.


Pros
- Imports audio file in the original format and mix the audio with built-in tools.
- Split, rearrange, and apply remix effects on added audio clips.
- Auto remix music to change audio length with high quality.
- Export audio files in MP3, FLAC, M4A, OGG, etc…
- Audio sync option while editing.
- Audio ducking features to lowers the background volume.
Audio formats support: all (import/export and audio/video) file formats.
Compatibility: Windows 7 to windows 10 sound mixer and mac OS.
Price: free and paid.
If you are facing any trouble regarding audio mixing through an audio mixer software, then here’s a video tutorial for Filmora software.
You can download it for free and follow the video guide step by step. Check the below video:
2. Adobe Audition

It is primarily designed for professional users having several features like multi-track editing and mixing, Auto Ducking, clip editing.
Pros:
- Availability of a vast range of features.
- Attractive user interface.
- Good for video sounds or voice-over editing overall, including sound mixing.
Cons:
- A little too complex for a newbie to understand.
- Not good enough for music productions.
- This software is subscription-based.
Audio formats support: MP3, WMA, WAV, AIFF, AC-3, PCM, AIFC, and more.
Compatibility: Mac OS, Windows.
Price: free and paid for both.
3. Logic Pro X

This software is suitable for both professional users and beginners. It combines all the basic and advanced features, including Flex Time, automatic time matching of different tracks, Flex Pitch, arpeggiator, etc.
Pros
- Works wonderfully on Mac.
- Rich Featured software and several plugins.
- Singular notes control.
- Tutorial easily available.
Cons:
- Mac only.
- Expensive.
Audio formats support: WAV, AIFF, CAF, PCM, ALAC, MP3, and more.
Compatibility: macOS.
Price: Paid
4. Audacity

A free, open-source, and features rich software perfect for both professional and beginner users. Its offers multiple effects and tolls like analysis, envelope, time-shift tools, etc.
Pros
- Free.
- Cross-platform.
- Easy to use.
- Features for beginner and pro-level, both.
- Online community available for help.
Cons:
- Not very appealing UI.
- May face crashes on Mac.
Audio formats support: MP3, MP4, AIFF, PCM, WMA, AC3, AMR, and more.
Compatibility: Linux, Windows, and macOS.
Price : free.

Filmora Audio Mixer
Wondershare Filmora - Audio Mixer
• Easily mix audio, sound, music or song as your need
• Edit audio files like denoise, crop, audio ducking, audio auto synchronization, etc…
• Cross-platform supported - (Windows, Mac, iOS, Android)
Mix Your Audio Now Mix Your Audio Now Mix Your Audio Now Learn More >
5. Reaper

This is one of the few software facilities with a bunch of features at such an affordable price. It has multiple tracks, multichannel support, real-time, non-destructive effect application, pitch-shifting, and time-shifting features.
Pros
- Feature-rich.
- More affordable than other audio mixer software.
- Detailed tutorials are available online.
Cons:
- Not very appealing UI as of LPX or Audition.
- Not suitable for beginners.
Audio formats support ACID, AIFF, MP3, MPEG WMV, and more.
Compatibility: Linux, Windows, and macOS.
Price: free and paid.
6. Fl Studio
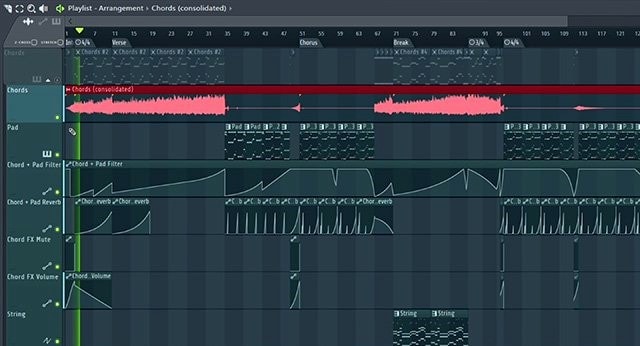
It is one of the top-notch software used for sound mixer and editing purposes. It supports pitch shifting, time stretching and multi-track recording, 80 plugins, VST standards, delay compensation, etc.
Pros
- Comes with abundant Features.
- Works great for music productions.
- Supports 3rd party plugin.
Cons:
- Not very appealing UI.
- May be intimidating for beginners.
Audio formats support: AIFF, DS, MP3, OGG, WAV and more.
Compatibility : Windows and macOS.
Price: free and paid.
7. SoundAtion
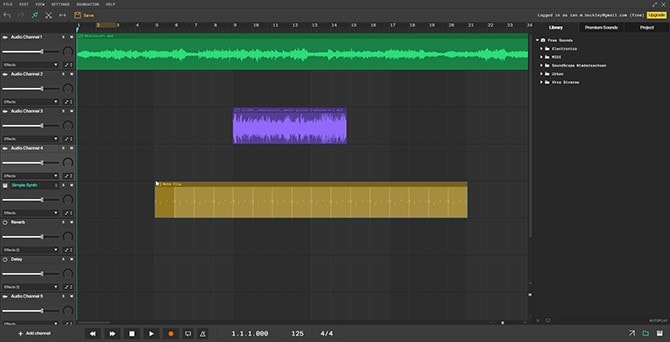
It is a browser-based software that facilitates non-destructive Multi-track audio editing, dynamic mixing, several effects selection, and EQ across multiple tracks.
Pros
- Free digital audio Workstation (DAW).
- Works wonderfully for sound effects, podcasting, and general-purpose sound task.
- Supports 3rd party plugin.
Cons:
- Automation not featured in a free trial.
- Limited audio quality in a trial version.
Audio Formats Support: MP3 and WAV.
Compatibility: any operating system.
Price : free and paid.
8. HyaWave
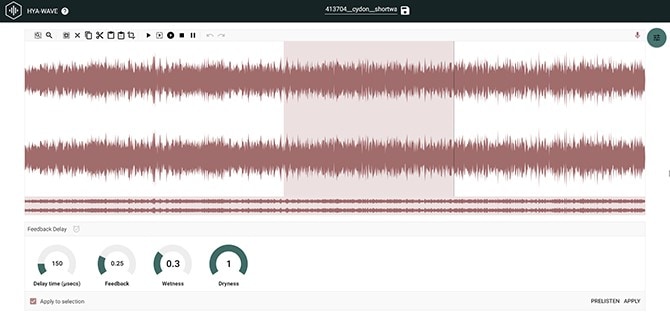
It offers functions like cutting with an online audio cutter, paste and trim audio, and supports 18 filters, effects, and publication through URL and social media with the minimalistic user interface.
Pros
- Easy and simple user interface.
- Audio filter customization.
- Has a built-in audio player, recorder, and editor.
Audio formats support: MP3, WAV, and more.
Compatibility : any operating system.
Price : free.
9. Twisted Wave Online

It is an online software almost equally compatible with many paid sound mixer and editing tools. It also supports uncompressed audio recording, VST effects, and several core effects.
Pros
- Cloud storage of edited audio, saving the disk space.
- Sampling rate conversation.
- Online and free.
Cons:
- Upload file in mono in a trial version.
- Supports 5 minutes audio clip in a trial version.
Audio formats support : MP3.
Compatibility: any operating system.
Price: free and paid.
10. Bear Audio Tool
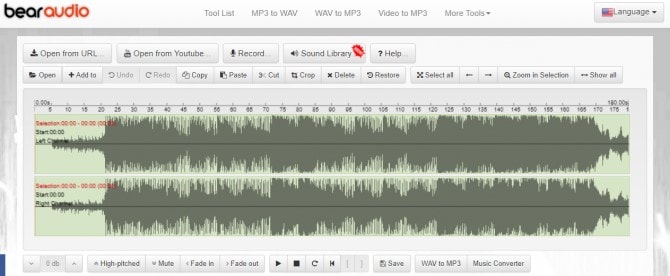
This is online browser-based software that can edit the files from our local storage, and you don’t have to upload the audio to their server. It can cut, apply effects, trim, etc. It has ample own music library, effects and import options.
Pros
- Copyright-free.
- Import audio directly from URL or social media domains.
- Features rich.
Cons:
- Not suitable for very advanced usage.
Audio formats support : MP3, OGG, WAV, WMA, M4R and OGG.
Compatibility : any operating system.
Price: free and paid.
Part 2. All You Know About Audio Mixer
[1] What is an audio mixer?
An audio mixer is used for several significant purposes. It is known with several names. Whether a mixing desk, soundboard, mixing board, audio mixer, or mixing console, all have a coherent purpose. The sole purpose of an audio mixer is to manage either the live or recorded event.
As the name suggests, audio mixing is the process of mixing multiple sounds and consolidating them into one or more channels.
This process is performed in a way that manipulates or enhances the dynamics, source’s volume level, panoramic position, and frequency content. The end moto of this creative and aesthetic treatment is to present the audio appealing to the listeners.
[2] What does an audio mixer do?
As mentioned above, the primary function of an audio mixer is to mix more than one audio signal and combine them into one or more output signals.
As an example, you may think of an audio mixing engineer, let’s say, orchestra conductor, who ensures that all the segregated sound sources mix into one harmonious soundtrack.
For this, they will use an audio mixer for filtering and optimizing sound by level adjusting, developing monitor feeds, using equalization and effects for sound enhancement.
This process is performed by a mixing engineer who operates either a digital audio workstation or a mixing console .
[3] What is audio mixing used for?
Audio mixing can be used in many fields, and it’s very common in our daily life, such as:
- 1. Music
- 2. Live sound
- 3. Film
- 4. Television
Filmora Audio Mixer
Wondershare Filmora - Audio Mixer
• Easily mix audio, sound, music or song as your need
• Edit audio files like denoise, crop, audio ducking, audio auto synchronization, etc…
• Cross-platform supported - (Windows, Mac, iOS, Android)
Mix Your Audio Now Mix Your Audio Now Mix Your Audio Now Learn More >
Part 3. What to consider while choosing an audio mixer software?
Before starting off with the audio mixing activity itself, one must be able to determine which audio mixer software is best for them with respect to their availability of resources or usability. Here are some of the factors to consider while opting for an audio mixer software:
- Check whether the software is paid or free.
- Check whether the limited features offered in a trial/free audio mixer software are enough to satisfy all your needs.
- Choose the paid or the free one depending on the extent of audio mixing quality you want.
- Look for an easy user interface.
- Look for software compatibility with your existing operating system.
- Check for the availability of tutorials related to the use of audio mixer software that you want to opt for better guidance.
- Look for the basic or advanced functions support in the audio mixer software that you choose depending upon your usability.
- Whether the software is available online or you need to install the version.
Part 4. Basic audio mixer settings you should know
It is necessary to know at least somewhat about the fundamental terminologies to decipher the specifications and features of an audio mixer. Here you’ll get to know what it takes to be able to distinguish among different audio mixers and their respective software.
Channel:
It is a signal path. Channels are made to accept microphones, preamps, amplifiers, and signal processors. A mixer with several channels integrated with it allows several things to be integrated and routed through it.
Channel Strip:
It is a cluster of controls and circuits that works together on a specified mixing channel to manipulate the audio that passes through it. Some of which includes the following:
Input jack:
It is the jack where any external instrument, like guitar, microphone etc., integrates with the mixer. The noise and interface are minimized to maximum extent by balancing the XLR inputs. A quarter-inch TRS connector or RCA are connected to other inputs.
Microphone preamp:
It produces weak mic signals by the raise of line-level strength for processing.
Equalization:
Often abbreviated as “EQ”, is used to adjust the frequency response of a signal.
Dynamics:
This process is used to perform grating and compressing.
Routing:
It directs the incoming signals to external devices or mixer circuitry.
Fader:
Its fundamental objective is to control the inputs and outputs of a channel.
Meter:
Kind of a gauge or interface that presents the channel output.
I/O:
I/O is abbreviated as inputs/outputs on a mixer in this regards. The number and category of I/O will depend on the use of a mixer.
Now, let’s understand the scenario of live mixing.
Such a mixer is needed which is enough to handle the outputs needed to connect the mains, microphones, other devices that connect to it and monitor speakers. The devices that are a part of a recording process or signal chain must also be included while calculating I/O for studio mixers.
Such inputs/outputs include headphones, effects processors, monitor speakers, signal processors and other instruments as well that uses direct injection (DI) boxes to connect to the mixer.
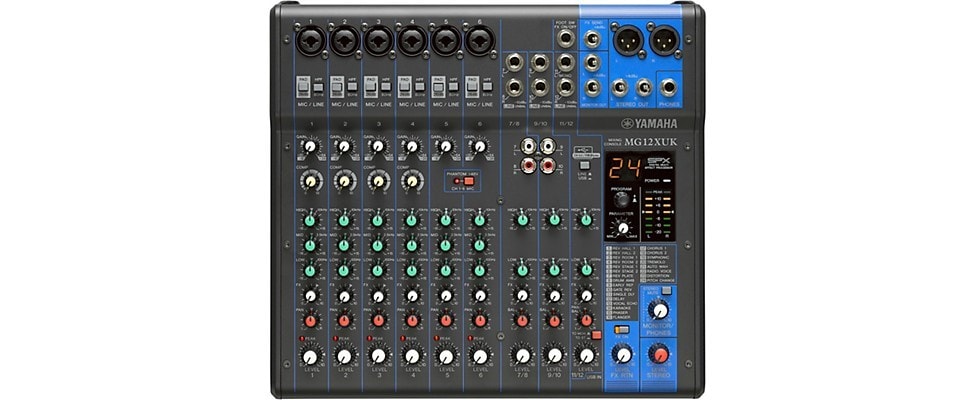
Buses:
It can be understood as a circuit intersection where the outputs from different channels meet. The signal channels are routed to a specific bus or set of busses. The main mixer output to a recorder or a speaker by the master mix bus.
Auxiliary buses, often known as aux buses or aux sends, are usually fed by the channel’s volume controls with which they are connected and then send those signals through their own output jacks. This is called as post-fader sends which are used to send the mixes of monitor speakers, signals to headphones or effects processors.
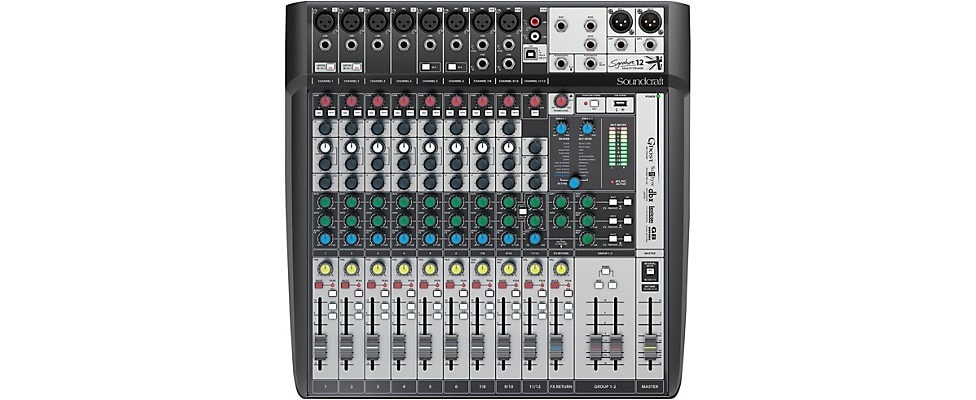
Groups:
Several channels in a mixer often offer a group function that allows one to simultaneously process and control various channels. Its works are similar to that of sub-mixer that shares the coherent signal routing and processing and provides the ease in controlling master bus since a single fader is used to control all the channels.
Inserts:
External and add-on sound processors, such as equalizers and compressors, are connected with the help of a channel insert.
Direct Output:
These feed mixer’s preamplifiers output to recording systems and external sound interfaces.
Cue System:
Cue systems allow listening on the specified channels without affecting the mixer’s output. This usually allows the signal to listen either before fading manipulation or after.
Part 5. Why audio mixer software?
In the early days, analog audio mixers were the only option available to perform sounding mixing. But the rise of the era of the 21st century brings more opportunities for easy and optimized audio mixing by sound mixer software.
All you need is a configured laptop, audio mixer software, and merely a control surface to jump into this world while being within the budget!
This audio mixer software is easily available to do everything or even more than what a physical mixer could have done. Several sound mixer applications are available to start with basic sound mixing using your smartphones or even tablets.
For the sake of recording, software-based mixers allow easy integration with the virtual instruments, drum loops, samples, and several other additions in your productions. The use of advanced MIDI functions with a digital audio workstation (DAW) lets you enlighten with a whole new world of possibilities to elevate your sounds/music to the next level.
Final verdict: Have you decided on your audio mixer software?
The usability and optimality of a sound mixer online software depend solely on the extent of application, available resources, and OS compatibility.
But, it can be said without a doubt that Wondershare Filmora is the most user-friendly, with immense flexibility in terms of uses and compatibility. Its broad-scale usability and promising results make it outshine the most among other audio mixing software.
Benjamin Arango
Benjamin Arango is a writer and a lover of all things video.
Follow @Benjamin Arango
Benjamin Arango
Mar 27, 2024• Proven solutions
You may be a musician who wants to record their music, or just a person wanting to develop his custom ringtone. In either case, a physical or virtual audio mixer is required, whether it be analog or a dedicated audio mixer software.
But you need to have some technical knowledge to make optimal use and funk up your music/sound.
Here we are to give you the knowledge you need and some amazing audio mixer software that could be perfect for you. So buckle up, and get ready to level up the harmoniousness of your creativity!
You will Learn :
- Part 1. 10 Best Sound/Audio Mixer Software - [Video Guide]
- Part 2. All You Know About Audio Mixer
- Part 3. What to Consider While Choosing an Audio Mixer Software?
- Part 4. Basic Audio Mixer Settings You Should Know
- Part 5. Why Audio Mixer Software?
Part 1. 10 Best Sound/Audio Mixer Software
Whether you are pursuing a music career, making a video for a movie clip, or merely creating some hard-core beats for fun, you’ll be needing good sound mixing software.
Selecting an audio mixer software perfect for your requirements and available resources is not an easy task.
Some of them are for free while some charge for it, some offer limited features. At the same time, some are specific to a certain operating system, the options and availabilities are endless, and choosing among them is a hell of a daunting task.
But no need to stress out because we are here to take your burden on our shoulders and help you choose exactly what you want! So sit back and relax!
| 1 - Wondershare Filmora | 2 - Adobe Audition |
|---|---|
| 3 - Logic Pro X | 4 - Audacity |
| 5 - Reaper | 6 - Fl Studio |
| 7 - SoundAtion | 8 - HyaWave |
| 9 - Twisted Wave Online | 10 - Bear Audio Tool |
1. Wondershare Filmora
Filmora Audio Mixer is professional in audio mixing and video editing. This is used for mixing, balancing, and combining different sounds, and audio signals, sources like microphones, instruments, and synthesizers, or previously recorded audio.
Pros
- Imports audio file in the original format and mix the audio with built-in tools.
- Split, rearrange, and apply remix effects on added audio clips.
- Auto remix music to change audio length with high quality.
- Export audio files in MP3, FLAC, M4A, OGG, etc…
- Audio sync option while editing.
- Audio ducking features to lowers the background volume.
Audio formats support: all (import/export and audio/video) file formats.
Compatibility: Windows 7 to windows 10 sound mixer and mac OS.
Price: free and paid.
If you are facing any trouble regarding audio mixing through an audio mixer software, then here’s a video tutorial for Filmora software.
You can download it for free and follow the video guide step by step. Check the below video:
2. Adobe Audition
It is primarily designed for professional users having several features like multi-track editing and mixing, Auto Ducking, clip editing.
Pros:
- Availability of a vast range of features.
- Attractive user interface.
- Good for video sounds or voice-over editing overall, including sound mixing.
Cons:
- A little too complex for a newbie to understand.
- Not good enough for music productions.
- This software is subscription-based.
Audio formats support: MP3, WMA, WAV, AIFF, AC-3, PCM, AIFC, and more.
Compatibility: Mac OS, Windows.
Price: free and paid for both.
3. Logic Pro X
This software is suitable for both professional users and beginners. It combines all the basic and advanced features, including Flex Time, automatic time matching of different tracks, Flex Pitch, arpeggiator, etc.
Pros
- Works wonderfully on Mac.
- Rich Featured software and several plugins.
- Singular notes control.
- Tutorial easily available.
Cons:
- Mac only.
- Expensive.
Audio formats support: WAV, AIFF, CAF, PCM, ALAC, MP3, and more.
Compatibility: macOS.
Price: Paid
4. Audacity
A free, open-source, and features rich software perfect for both professional and beginner users. Its offers multiple effects and tolls like analysis, envelope, time-shift tools, etc.
Pros
- Free.
- Cross-platform.
- Easy to use.
- Features for beginner and pro-level, both.
- Online community available for help.
Cons:
- Not very appealing UI.
- May face crashes on Mac.
Audio formats support: MP3, MP4, AIFF, PCM, WMA, AC3, AMR, and more.
Compatibility: Linux, Windows, and macOS.
Price : free.
Filmora Audio Mixer
Wondershare Filmora - Audio Mixer
• Easily mix audio, sound, music or song as your need
• Edit audio files like denoise, crop, audio ducking, audio auto synchronization, etc…
• Cross-platform supported - (Windows, Mac, iOS, Android)
Mix Your Audio Now Mix Your Audio Now Mix Your Audio Now Learn More >
5. Reaper
This is one of the few software facilities with a bunch of features at such an affordable price. It has multiple tracks, multichannel support, real-time, non-destructive effect application, pitch-shifting, and time-shifting features.
Pros
- Feature-rich.
- More affordable than other audio mixer software.
- Detailed tutorials are available online.
Cons:
- Not very appealing UI as of LPX or Audition.
- Not suitable for beginners.
Audio formats support ACID, AIFF, MP3, MPEG WMV, and more.
Compatibility: Linux, Windows, and macOS.
Price: free and paid.
6. Fl Studio
It is one of the top-notch software used for sound mixer and editing purposes. It supports pitch shifting, time stretching and multi-track recording, 80 plugins, VST standards, delay compensation, etc.
Pros
- Comes with abundant Features.
- Works great for music productions.
- Supports 3rd party plugin.
Cons:
- Not very appealing UI.
- May be intimidating for beginners.
Audio formats support: AIFF, DS, MP3, OGG, WAV and more.
Compatibility : Windows and macOS.
Price: free and paid.
7. SoundAtion
It is a browser-based software that facilitates non-destructive Multi-track audio editing, dynamic mixing, several effects selection, and EQ across multiple tracks.
Pros
- Free digital audio Workstation (DAW).
- Works wonderfully for sound effects, podcasting, and general-purpose sound task.
- Supports 3rd party plugin.
Cons:
- Automation not featured in a free trial.
- Limited audio quality in a trial version.
Audio Formats Support: MP3 and WAV.
Compatibility: any operating system.
Price : free and paid.
8. HyaWave
It offers functions like cutting with an online audio cutter, paste and trim audio, and supports 18 filters, effects, and publication through URL and social media with the minimalistic user interface.
Pros
- Easy and simple user interface.
- Audio filter customization.
- Has a built-in audio player, recorder, and editor.
Audio formats support: MP3, WAV, and more.
Compatibility : any operating system.
Price : free.
9. Twisted Wave Online
It is an online software almost equally compatible with many paid sound mixer and editing tools. It also supports uncompressed audio recording, VST effects, and several core effects.
Pros
- Cloud storage of edited audio, saving the disk space.
- Sampling rate conversation.
- Online and free.
Cons:
- Upload file in mono in a trial version.
- Supports 5 minutes audio clip in a trial version.
Audio formats support : MP3.
Compatibility: any operating system.
Price: free and paid.
10. Bear Audio Tool
This is online browser-based software that can edit the files from our local storage, and you don’t have to upload the audio to their server. It can cut, apply effects, trim, etc. It has ample own music library, effects and import options.
Pros
- Copyright-free.
- Import audio directly from URL or social media domains.
- Features rich.
Cons:
- Not suitable for very advanced usage.
Audio formats support : MP3, OGG, WAV, WMA, M4R and OGG.
Compatibility : any operating system.
Price: free and paid.
Part 2. All You Know About Audio Mixer
[1] What is an audio mixer?
An audio mixer is used for several significant purposes. It is known with several names. Whether a mixing desk, soundboard, mixing board, audio mixer, or mixing console, all have a coherent purpose. The sole purpose of an audio mixer is to manage either the live or recorded event.
As the name suggests, audio mixing is the process of mixing multiple sounds and consolidating them into one or more channels.
This process is performed in a way that manipulates or enhances the dynamics, source’s volume level, panoramic position, and frequency content. The end moto of this creative and aesthetic treatment is to present the audio appealing to the listeners.
[2] What does an audio mixer do?
As mentioned above, the primary function of an audio mixer is to mix more than one audio signal and combine them into one or more output signals.
As an example, you may think of an audio mixing engineer, let’s say, orchestra conductor, who ensures that all the segregated sound sources mix into one harmonious soundtrack.
For this, they will use an audio mixer for filtering and optimizing sound by level adjusting, developing monitor feeds, using equalization and effects for sound enhancement.
This process is performed by a mixing engineer who operates either a digital audio workstation or a mixing console .
[3] What is audio mixing used for?
Audio mixing can be used in many fields, and it’s very common in our daily life, such as:
- 1. Music
- 2. Live sound
- 3. Film
- 4. Television
Filmora Audio Mixer
Wondershare Filmora - Audio Mixer
• Easily mix audio, sound, music or song as your need
• Edit audio files like denoise, crop, audio ducking, audio auto synchronization, etc…
• Cross-platform supported - (Windows, Mac, iOS, Android)
Mix Your Audio Now Mix Your Audio Now Mix Your Audio Now Learn More >
Part 3. What to consider while choosing an audio mixer software?
Before starting off with the audio mixing activity itself, one must be able to determine which audio mixer software is best for them with respect to their availability of resources or usability. Here are some of the factors to consider while opting for an audio mixer software:
- Check whether the software is paid or free.
- Check whether the limited features offered in a trial/free audio mixer software are enough to satisfy all your needs.
- Choose the paid or the free one depending on the extent of audio mixing quality you want.
- Look for an easy user interface.
- Look for software compatibility with your existing operating system.
- Check for the availability of tutorials related to the use of audio mixer software that you want to opt for better guidance.
- Look for the basic or advanced functions support in the audio mixer software that you choose depending upon your usability.
- Whether the software is available online or you need to install the version.
Part 4. Basic audio mixer settings you should know
It is necessary to know at least somewhat about the fundamental terminologies to decipher the specifications and features of an audio mixer. Here you’ll get to know what it takes to be able to distinguish among different audio mixers and their respective software.
Channel:
It is a signal path. Channels are made to accept microphones, preamps, amplifiers, and signal processors. A mixer with several channels integrated with it allows several things to be integrated and routed through it.
Channel Strip:
It is a cluster of controls and circuits that works together on a specified mixing channel to manipulate the audio that passes through it. Some of which includes the following:
Input jack:
It is the jack where any external instrument, like guitar, microphone etc., integrates with the mixer. The noise and interface are minimized to maximum extent by balancing the XLR inputs. A quarter-inch TRS connector or RCA are connected to other inputs.
Microphone preamp:
It produces weak mic signals by the raise of line-level strength for processing.
Equalization:
Often abbreviated as “EQ”, is used to adjust the frequency response of a signal.
Dynamics:
This process is used to perform grating and compressing.
Routing:
It directs the incoming signals to external devices or mixer circuitry.
Fader:
Its fundamental objective is to control the inputs and outputs of a channel.
Meter:
Kind of a gauge or interface that presents the channel output.
I/O:
I/O is abbreviated as inputs/outputs on a mixer in this regards. The number and category of I/O will depend on the use of a mixer.
Now, let’s understand the scenario of live mixing.
Such a mixer is needed which is enough to handle the outputs needed to connect the mains, microphones, other devices that connect to it and monitor speakers. The devices that are a part of a recording process or signal chain must also be included while calculating I/O for studio mixers.
Such inputs/outputs include headphones, effects processors, monitor speakers, signal processors and other instruments as well that uses direct injection (DI) boxes to connect to the mixer.
Buses:
It can be understood as a circuit intersection where the outputs from different channels meet. The signal channels are routed to a specific bus or set of busses. The main mixer output to a recorder or a speaker by the master mix bus.
Auxiliary buses, often known as aux buses or aux sends, are usually fed by the channel’s volume controls with which they are connected and then send those signals through their own output jacks. This is called as post-fader sends which are used to send the mixes of monitor speakers, signals to headphones or effects processors.
Groups:
Several channels in a mixer often offer a group function that allows one to simultaneously process and control various channels. Its works are similar to that of sub-mixer that shares the coherent signal routing and processing and provides the ease in controlling master bus since a single fader is used to control all the channels.
Inserts:
External and add-on sound processors, such as equalizers and compressors, are connected with the help of a channel insert.
Direct Output:
These feed mixer’s preamplifiers output to recording systems and external sound interfaces.
Cue System:
Cue systems allow listening on the specified channels without affecting the mixer’s output. This usually allows the signal to listen either before fading manipulation or after.
Part 5. Why audio mixer software?
In the early days, analog audio mixers were the only option available to perform sounding mixing. But the rise of the era of the 21st century brings more opportunities for easy and optimized audio mixing by sound mixer software.
All you need is a configured laptop, audio mixer software, and merely a control surface to jump into this world while being within the budget!
This audio mixer software is easily available to do everything or even more than what a physical mixer could have done. Several sound mixer applications are available to start with basic sound mixing using your smartphones or even tablets.
For the sake of recording, software-based mixers allow easy integration with the virtual instruments, drum loops, samples, and several other additions in your productions. The use of advanced MIDI functions with a digital audio workstation (DAW) lets you enlighten with a whole new world of possibilities to elevate your sounds/music to the next level.
Final verdict: Have you decided on your audio mixer software?
The usability and optimality of a sound mixer online software depend solely on the extent of application, available resources, and OS compatibility.
But, it can be said without a doubt that Wondershare Filmora is the most user-friendly, with immense flexibility in terms of uses and compatibility. Its broad-scale usability and promising results make it outshine the most among other audio mixing software.
Benjamin Arango
Benjamin Arango is a writer and a lover of all things video.
Follow @Benjamin Arango
Also read:
- In 2024, Collecting Serene Melodies A Comprehensive Approach
- 2024 Approved Ultimate List of No-Cost, Web-Based Digital Audio Workstations (DAWs) - Updated
- In 2024, How to Use Autotune in Audacity with Plugins for Free?
- PolyTuneHub Syncing Audio Across Scenes in Adobe Premiere Pro with Precision New 2023 Features
- Updated IMovie Essentials Integrating Audio Elements in Your Projects for 2024
- New Where to Locate High-Quality Recorded Bird Calls on the Web
- In 2024, Elite 4 Music Editing Tools for macOS The Ultimate Guide
- New In 2024, Voice Modification Innovations Product Introduction, Reviews, & Comparisons
- Updated Best Songs Logging Top Tools for Quickly Preserving Your Cherished Tunes for 2024
- In 2024, Superior Online MP3 Arrangement & Trimming Service
- New 2024 Approved Essential Voice Dampening Tech A List of the Top 10 Tools
- New 2024 Approved Steps for Extracting Audio From an MP4 Clip
- Updated In 2024, Dynamic Sound Mixing Implementing Audio Ducking Techniques to Subtly Reduce Background Tracks
- Updated 2024 Approved How to Remove Audio From AVI
- New The Ultimate List of Preferred Linux Audio Recorders and How to Make the Most Out of Your Sessions
- How to Record a Podcast Effortlessly A Step-by-Step Guide for 2024
- Updated Elite Cyber MP3 Splitter & Combine Software
- In 2024, A Filmmakers Choice The Top Five Free Audio Jokes for Creative Videos
- New In 2024, How to Acquire Rare Bird Sound Samples in Digital Audio Format
- Updated In 2024, Top 8 Must-Try Audio Capture Apps for Live Broadcasting
- New In 2024, How to Reverse Audio with Best Audio Reversers
- New 2024 Approved Dive Into Journalisms Auditory World A 15 Song Radio Mix
- Updated 2024 Approved Vocal Variety Made Easy Implementing Voice Changer Plus on Your iPhone Device
- Updated 2024 Approved The Essential List Top 8 Android DAWs Revolutionizing Music
- Updated In 2024, Approaches to Disable Audio Elements Within a Video
- Updated The Editors Handbook to Dynamic Ducking Implementing Complex Auditory Effects with Windows Adobe Premiere Pro
- Updated In 2024, Exploring the Wilderness on Your Phone 10 Premium Nature Sounds Apps
- 2024 Approved Leading the Way The Best 8 Chromebook Audio Workstations for Music Creation
- Updated In 2024, Locating High-Quality Brush Stroke Reverb Tones
- New 2024 Approved Explore Comical Noise Samples
- Updated Achieving Sonic Excellence Incorporating Auto-Tune Into Your Audacity Workflow
- New Directory Exploration for Podcast Submission and Upload
- Three Free Sound Integration Techniques for DIY Filmmakers and Videographers for 2024
- Turn Off iPhone Audio Ducking
- How to Reset a Tecno Phantom V Fold Phone That Is Locked | Dr.fone
- How to Screen Mirror on Apple iPhone 13 Pro Max? | Dr.fone
- The Most Useful Tips for Pokemon Go Ultra League On Apple iPhone 12 mini | Dr.fone
- What Legendaries Are In Pokemon Platinum On Tecno Phantom V Flip? | Dr.fone
- Pokemon Go Error 12 Failed to Detect Location On Realme C33 2023? | Dr.fone
- App Wont Open on Your Samsung Galaxy A23 5G? Here Are All Fixes | Dr.fone
- 2024 Approved Whiteboard Animation Made Easy Top 5 Hand-Drawn Video Creators
- Latest way to get Shiny Meltan Box in Pokémon Go Mystery Box On Vivo V29e | Dr.fone
- In 2024, How to Change/Add Location Filters on Snapchat For your Poco F5 5G | Dr.fone
- Possible solutions to restore deleted contacts from 14.
- 4 Feasible Ways to Fake Location on Facebook For your Vivo S17 | Dr.fone
- Planning to Use a Pokemon Go Joystick on Apple iPhone 6? | Dr.fone
- In 2024, How to Send and Fake Live Location on Facebook Messenger Of your Samsung Galaxy S23 Ultra | Dr.fone
- How to Intercept Text Messages on Infinix Smart 7 | Dr.fone
- How to Easily Hard reset my Infinix Note 30 VIP Racing Edition | Dr.fone
- In 2024, Effortless YouTube to MP3 Conversion Tips, Tricks, and Tool Reviews
- In 2024, A Quick Guide to Motorola Moto G04 FRP Bypass Instantly
- Recover your photos after Yuva 2 Pro has been deleted.
- In 2024, 5 Ways to Move Contacts From ZTE Nubia Flip 5G to iPhone (13/14/15) | Dr.fone
- What is Geo-Blocking and How to Bypass it On Xiaomi Redmi Note 13 5G? | Dr.fone
- Simple ways to get lost messages back from Nokia
- How to Fake GPS on Android without Mock Location For your Xiaomi 13 Ultra | Dr.fone
- Unlock Apple ID without Phone Number From Apple iPhone 15 Plus
- In 2024, Things You Should Know When Unlocking Total Wireless Of Apple iPhone 6
- New Scale Images Online Fast and Easy Ratio Changers for 2024
- Updated In 2024, Top iMovie Replacements for Windows 11 and 10
- In 2024, How to Mirror Honor Magic 6 Lite to Mac? | Dr.fone
- New From YouTube to MP3 How to Find the Best Conversion Software for 2024
- In 2024, Top 10 AirPlay Apps in Xiaomi Civi 3 Disney 100th Anniversary Edition for Streaming | Dr.fone
- Top 5 Tracking Apps to Track Samsung Galaxy XCover 7 without Them Knowing | Dr.fone
- Title: Captivating Sounds Without Breaking Your Piggy Bank The Top Six No-Cost Video Conversion Approaches
- Author: Kate
- Created at : 2024-05-20 02:42:07
- Updated at : 2024-05-21 02:42:07
- Link: https://audio-editing.techidaily.com/captivating-sounds-without-breaking-your-piggy-bank-the-top-six-no-cost-video-conversion-approaches/
- License: This work is licensed under CC BY-NC-SA 4.0.
