
:max_bytes(150000):strip_icc():format(webp)/bestfirestickapps-5bcba08546e0fb005177a983-0591296fac8241ccb8497f9f29901acd.jpg)
Advanced Audio Manipulation in Adobe Premiere Pro (Windows Platform) for 2024
Advanced Audio Manipulation in Adobe Premiere Pro (Windows Platform)
The audio ducking technology aids the editors in creating a precise video as per their needs. In this article, you will discuss audio ducking Premiere Pro of Adobe to enhance the video’s audio quality optimally. Audio ducking is a feature that helps the audience to listen to every detail on the video flawlessly.

Here, you will be using Adobe Premiere Pro to establish this audio ducking feature precisely. This functionality is applicable on the Windows platform. To try on the Mac system, you can use the Filmora application to acquire precise results. In this article, you will learn how to use audio ducking concepts on Windows and Mac systems with the help of incredible tools in the digital space.
In this article
02 Use Audio Ducking in Adobe Premiere Pro on Win
03 Alternative ways to use Audio Ducking with Filmora
Part 1: What is audio ducking?
The concept of audio ducking is simple. In a soundtrack, you can find a wide range of music playing in the background. Audio ducking is the process of suppressing one type of audio signal and increasing the other movement simultaneously without causing any issues. Mostly audio ducking is processed for movies or any live sessions that reduce the background music when the characters or person speaks on the screen and increases the speaker’s volume. The scenario happens vice versa when the speaker completes its conversation. Here, the background music increases, and the speaker’s audio is reduced drastically. This type of audio ducking occurs to enhance the audio quality and reach the target audience without any issues.

The automatic changes with the audio volume are triggered by a common control using the audio ducking settings. When you enable this option in your device, this module is programmed to balance the volume settings as per the requirements. The audio ducking process allows the audio files to sound better by improving the quality of the audio signals. The audio parameters are adjusted at the specific track in the audio clippings to enhance the overall quality of the audio file.
You will be able to feel the difference when the audio tracks are played. Use the audio ducking feature optimally to strengthen the crucial audio signals when required. Identify the perfect sound spots at the audio file that requires this ducking feature. Implement this feature at particular spots to enjoy the benefits of this audio ducking functionality. It serves as a boon for sound editors and creates a positive impact on the audio files.
Part 2: Use Audio Ducking in Adobe Premiere Pro on Win
The Adobe Premiere Pro app helps to edit your media files professionally, and you can explore a wide range of settings to enhance the overall performance of the files. In the following content, you will study how to perform audio ducking in Adobe Premiere Pro at Windows space.
Step 1: Import the audio file and assign the audio type to the Essential Sound Panel. Next, auto-match the loudness level at the Essential Sound panel section.

Step 2: Choose the audio clip that requires audio ducking settings and adjusts values for sensitivity, amount of volume reduction, and the duration of fades along with the audio levels. These parameters determine the quality of audio ducking on the selected audio clips. Assign the perfect values as per your needs.

**Step 3: Finally, click Generate Keyframes to save the audio ducking settings on the chosen audio clips.

To modify the audio ducking settings, it is enough if you tap the Generate Keyframes option to create new audio ducking attributes. When you click Generate Keyframe, the older settings are erased and prompt for the new settings to be assigned for the audio ducking feature.
You can use the above instructions to perform the desired audio ducking feature at the selected audio clips.
Part 3: Alternative ways to use Audio Ducking with Filmora
If you are working with the Mac systems, worry not here is an incredible application that assists in performing the audio ducking at audio files in the Mac platform. The Filmora app from Wondershare is a sophisticated tool that carries out professional edits on media files based on your needs. The quality factors of the audio and video signals are retained, and the desired changes are implemented on the files precisely.
Versatile Video Editor - Wondershare Filmora
An easy yet powerful editor
Numerous effects to choose from
Detailed tutorials provided by the official channel
The Filmora application offers powerful features while editing audio files. You can apply audio ducking to enhance the vocals and use 100 audio effects to add flavors to the existing audio files. This app allows you to make any constructive changes to the file without disturbing the original elements set at the time of recording.
The remarkable features of the Filmora
- An exclusive audio file editor and improves the vocals using Audio Ducking strategy
- You can access the 100 audio effects built-in at its working ambiance to enhance your imported media files.
- The simple user interface helps you to discover awesome editing features effortlessly.
- All the changes in the audio signals are embedded without affecting the quality factors.
- The easy export option helps you to move the edited audio files to any storage space flawlessly.
These are the stunning functionalities of the Filmora app concerning audio files. You can perform a wide range of miraculous edits on the media tracks precisely in a professional way.
Here, you will be surfing the discussion about the effective usage of Filmora in implementing audio ducking functionality on the audio files. The Filmora offers an Audio Adjust module to perform the ducking operation efficiently without affecting the audio quality. It helps the audio to sound better and improves the clarity of vocals. The auto-adjust function modifies the volume of the audio files precisely as per the programmed algorithm. You do not have to write any code or perform manual adjustments in embedding this setting to your audio file. Few clicks are enough to enable the ducking functionality at the audio files.

The stepwise procedure to enable the audio ducking feature at Filmora application.
Step 1: Install the app and import the file.
First, download the application from its official webpage based on your system OS. Then, install the app and import the audio files into the working space of Filmora.

Step 2: Set Ducking parameters
Drag it to the timeline and choose the audio track that requires the audio ducking feature. After selecting the audio clip, right-click on it and choose ‘Adjust Audio’ from the pop-up message. The Audio Editor window appears, go to the Ducking menu and turn on ‘Lower the Volume of other clips. You can repeat this step to other audio clippings effortlessly.

Step 3: Save and Export
Next, save the changes by tapping the ‘OK’ button and clicking the Export button to store the edited audio files at any storage space. Filmora will adjust the volume on other audio clips as per the settings and export the file precisely.

The above guidelines help you to establish the audio ducking feature on your audio clips using the Filmora. Perform the appropriate clicks and set the attributes according to your needs to refine the audio ducking feature.
Conclusion
Thus, this article had given valuable insights on **audio ducking Premiere Pro of Adobe. Use Adobe Premiere Pro to perform the desired audio adjustments to enhance the vocal signal on your Windows system. The Filmora application assists in editing the audio clips at the Mac system effortlessly. The above instructions aid you in performing the audio ducking feature successfully. Connect with this article to discover unique editing options on media files to enhance their overall performance. Stay tuned to explore the features of the Filmora application in detail.
02 Use Audio Ducking in Adobe Premiere Pro on Win
03 Alternative ways to use Audio Ducking with Filmora
Part 1: What is audio ducking?
The concept of audio ducking is simple. In a soundtrack, you can find a wide range of music playing in the background. Audio ducking is the process of suppressing one type of audio signal and increasing the other movement simultaneously without causing any issues. Mostly audio ducking is processed for movies or any live sessions that reduce the background music when the characters or person speaks on the screen and increases the speaker’s volume. The scenario happens vice versa when the speaker completes its conversation. Here, the background music increases, and the speaker’s audio is reduced drastically. This type of audio ducking occurs to enhance the audio quality and reach the target audience without any issues.
The automatic changes with the audio volume are triggered by a common control using the audio ducking settings. When you enable this option in your device, this module is programmed to balance the volume settings as per the requirements. The audio ducking process allows the audio files to sound better by improving the quality of the audio signals. The audio parameters are adjusted at the specific track in the audio clippings to enhance the overall quality of the audio file.
You will be able to feel the difference when the audio tracks are played. Use the audio ducking feature optimally to strengthen the crucial audio signals when required. Identify the perfect sound spots at the audio file that requires this ducking feature. Implement this feature at particular spots to enjoy the benefits of this audio ducking functionality. It serves as a boon for sound editors and creates a positive impact on the audio files.
Part 2: Use Audio Ducking in Adobe Premiere Pro on Win
The Adobe Premiere Pro app helps to edit your media files professionally, and you can explore a wide range of settings to enhance the overall performance of the files. In the following content, you will study how to perform audio ducking in Adobe Premiere Pro at Windows space.
Step 1: Import the audio file and assign the audio type to the Essential Sound Panel. Next, auto-match the loudness level at the Essential Sound panel section.
Step 2: Choose the audio clip that requires audio ducking settings and adjusts values for sensitivity, amount of volume reduction, and the duration of fades along with the audio levels. These parameters determine the quality of audio ducking on the selected audio clips. Assign the perfect values as per your needs.
**Step 3: Finally, click Generate Keyframes to save the audio ducking settings on the chosen audio clips.
To modify the audio ducking settings, it is enough if you tap the Generate Keyframes option to create new audio ducking attributes. When you click Generate Keyframe, the older settings are erased and prompt for the new settings to be assigned for the audio ducking feature.
You can use the above instructions to perform the desired audio ducking feature at the selected audio clips.
Part 3: Alternative ways to use Audio Ducking with Filmora
If you are working with the Mac systems, worry not here is an incredible application that assists in performing the audio ducking at audio files in the Mac platform. The Filmora app from Wondershare is a sophisticated tool that carries out professional edits on media files based on your needs. The quality factors of the audio and video signals are retained, and the desired changes are implemented on the files precisely.
Versatile Video Editor - Wondershare Filmora
An easy yet powerful editor
Numerous effects to choose from
Detailed tutorials provided by the official channel
The Filmora application offers powerful features while editing audio files. You can apply audio ducking to enhance the vocals and use 100 audio effects to add flavors to the existing audio files. This app allows you to make any constructive changes to the file without disturbing the original elements set at the time of recording.
The remarkable features of the Filmora
- An exclusive audio file editor and improves the vocals using Audio Ducking strategy
- You can access the 100 audio effects built-in at its working ambiance to enhance your imported media files.
- The simple user interface helps you to discover awesome editing features effortlessly.
- All the changes in the audio signals are embedded without affecting the quality factors.
- The easy export option helps you to move the edited audio files to any storage space flawlessly.
These are the stunning functionalities of the Filmora app concerning audio files. You can perform a wide range of miraculous edits on the media tracks precisely in a professional way.
Here, you will be surfing the discussion about the effective usage of Filmora in implementing audio ducking functionality on the audio files. The Filmora offers an Audio Adjust module to perform the ducking operation efficiently without affecting the audio quality. It helps the audio to sound better and improves the clarity of vocals. The auto-adjust function modifies the volume of the audio files precisely as per the programmed algorithm. You do not have to write any code or perform manual adjustments in embedding this setting to your audio file. Few clicks are enough to enable the ducking functionality at the audio files.
The stepwise procedure to enable the audio ducking feature at Filmora application.
Step 1: Install the app and import the file.
First, download the application from its official webpage based on your system OS. Then, install the app and import the audio files into the working space of Filmora.
Step 2: Set Ducking parameters
Drag it to the timeline and choose the audio track that requires the audio ducking feature. After selecting the audio clip, right-click on it and choose ‘Adjust Audio’ from the pop-up message. The Audio Editor window appears, go to the Ducking menu and turn on ‘Lower the Volume of other clips. You can repeat this step to other audio clippings effortlessly.
Step 3: Save and Export
Next, save the changes by tapping the ‘OK’ button and clicking the Export button to store the edited audio files at any storage space. Filmora will adjust the volume on other audio clips as per the settings and export the file precisely.
The above guidelines help you to establish the audio ducking feature on your audio clips using the Filmora. Perform the appropriate clicks and set the attributes according to your needs to refine the audio ducking feature.
Conclusion
Thus, this article had given valuable insights on **audio ducking Premiere Pro of Adobe. Use Adobe Premiere Pro to perform the desired audio adjustments to enhance the vocal signal on your Windows system. The Filmora application assists in editing the audio clips at the Mac system effortlessly. The above instructions aid you in performing the audio ducking feature successfully. Connect with this article to discover unique editing options on media files to enhance their overall performance. Stay tuned to explore the features of the Filmora application in detail.
Where to Submit Your Show: Complete List of Podcast Directories
Submitting your podcast show on different platforms is essential to get the right audiences. As we all know, the more podcast directories you publish your show, the more listeners you get.
Yet, finding the ideal choices can take time and effort with many podcast directories available online. Worry less. We’ve compiled a list of the best podcast directories you can always count on to publish your podcast show anytime.
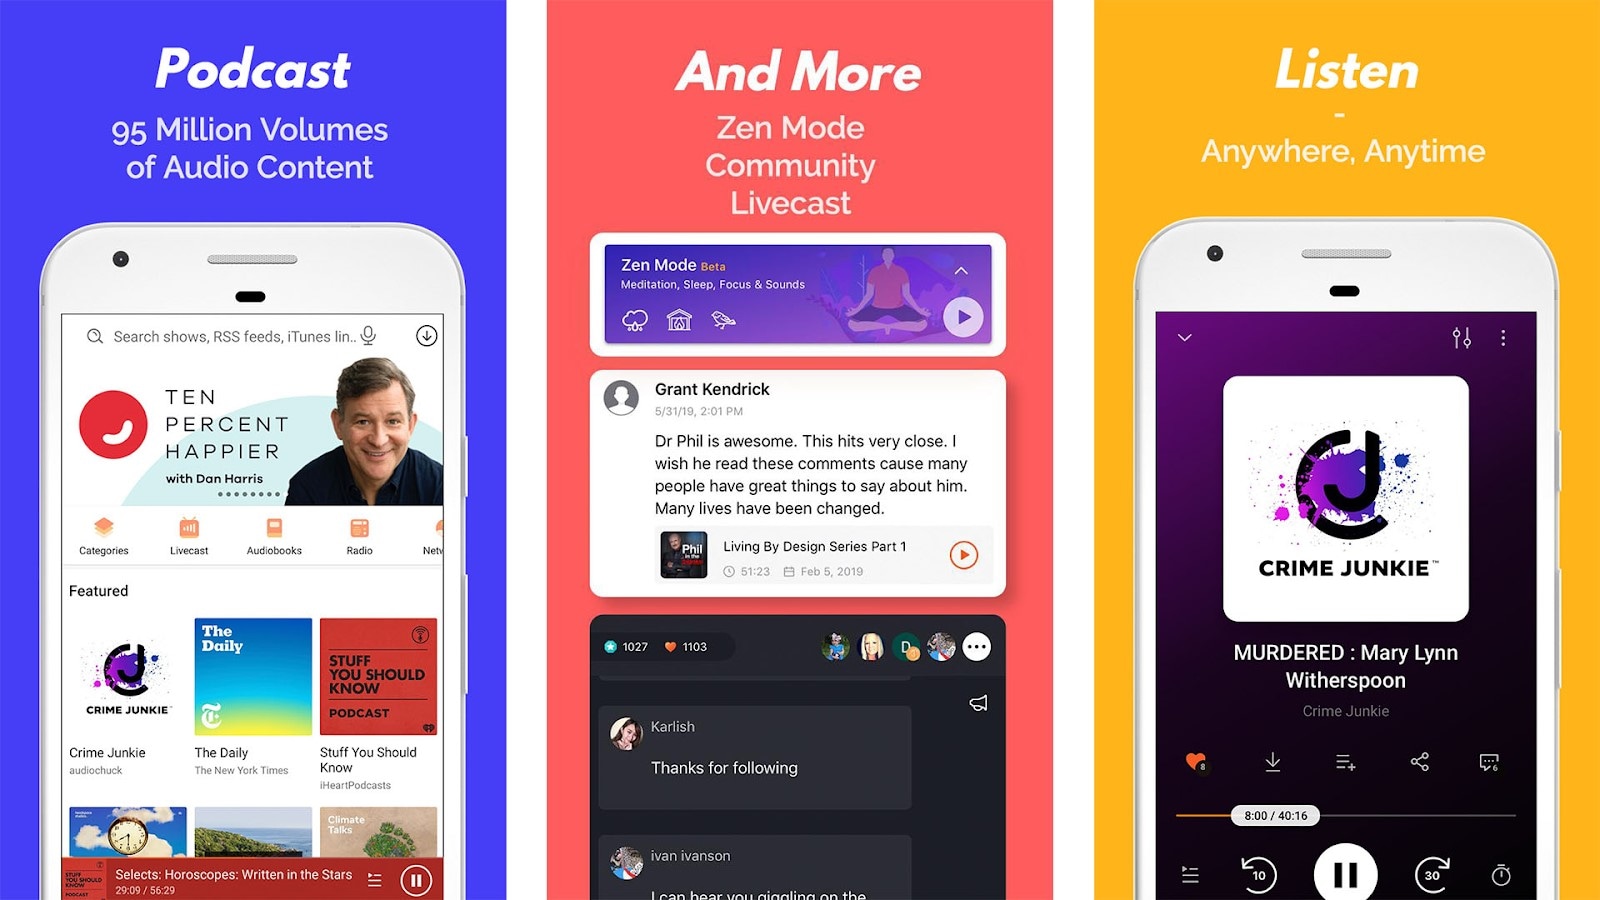
- YouTube
- Spotify
- Apple Podcasts
- Google Podcasts
- Pandora
- Audible
- NPR One
- Tune In
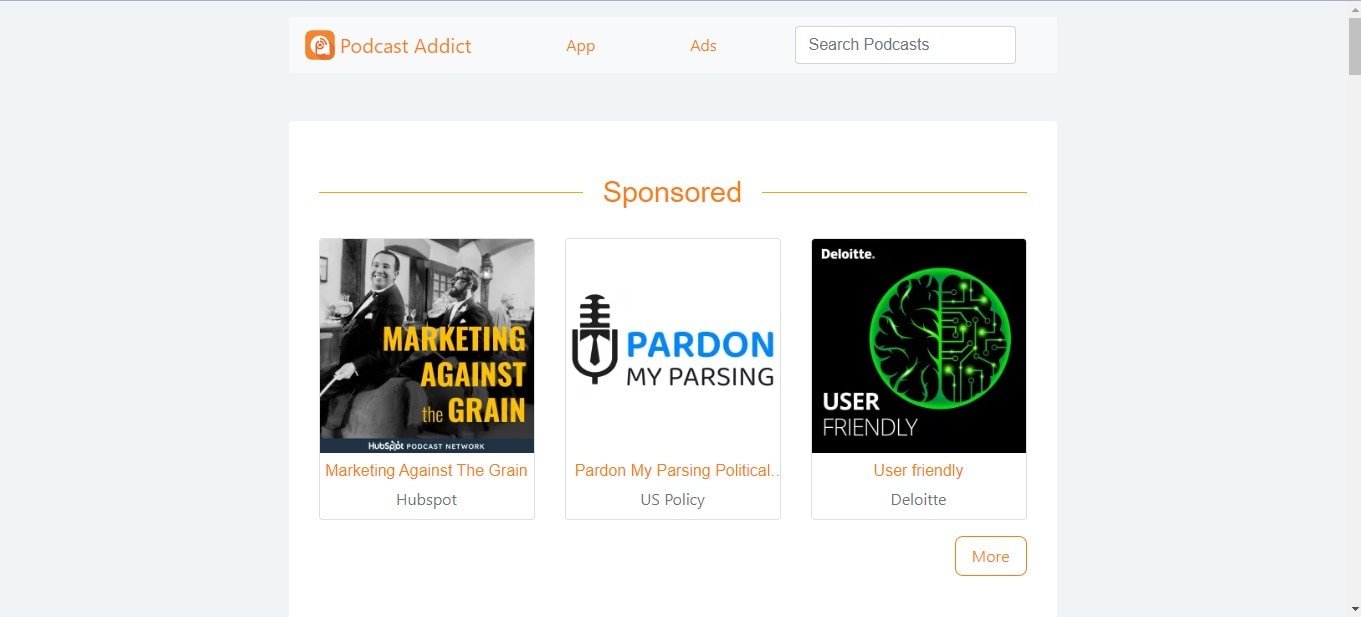
- Podcast Addict
- RadioPublic
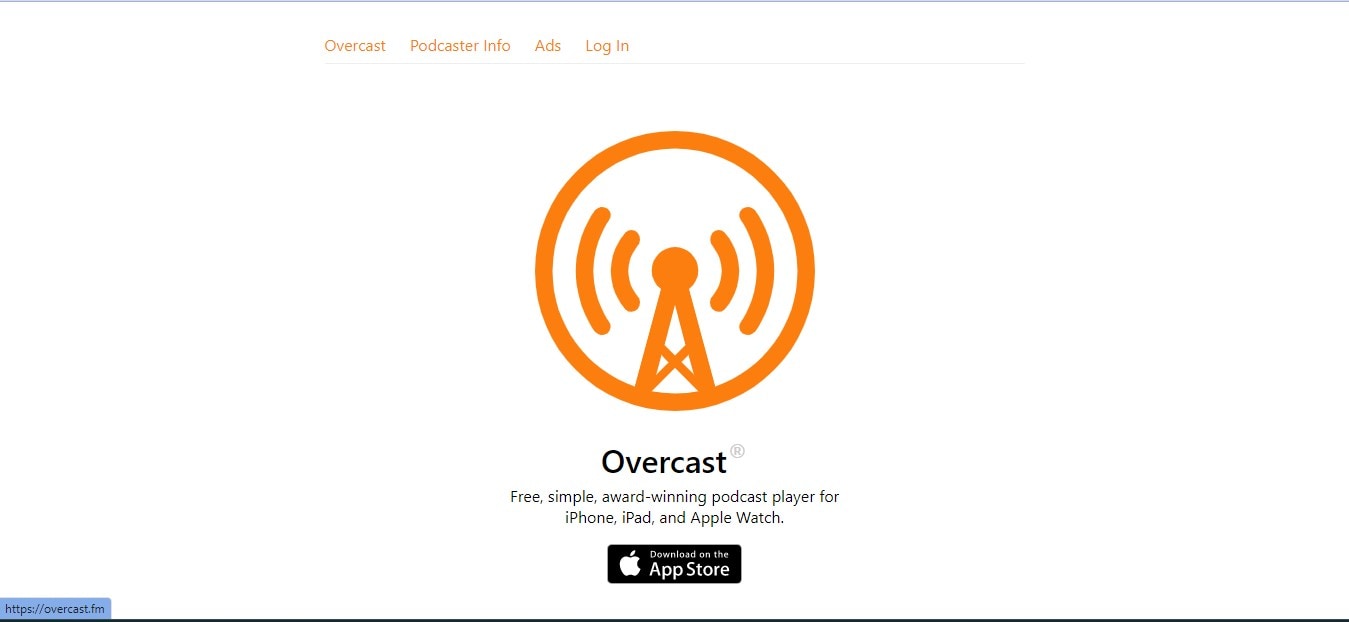
- Overcast
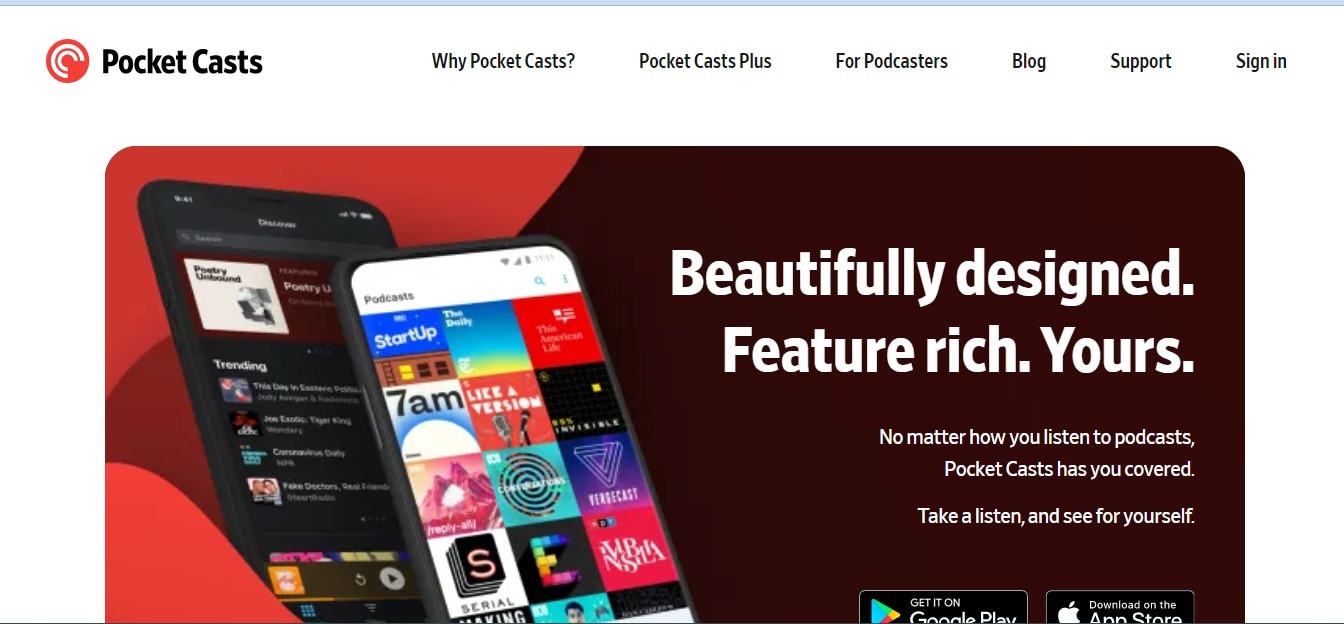
- Pocket Casts
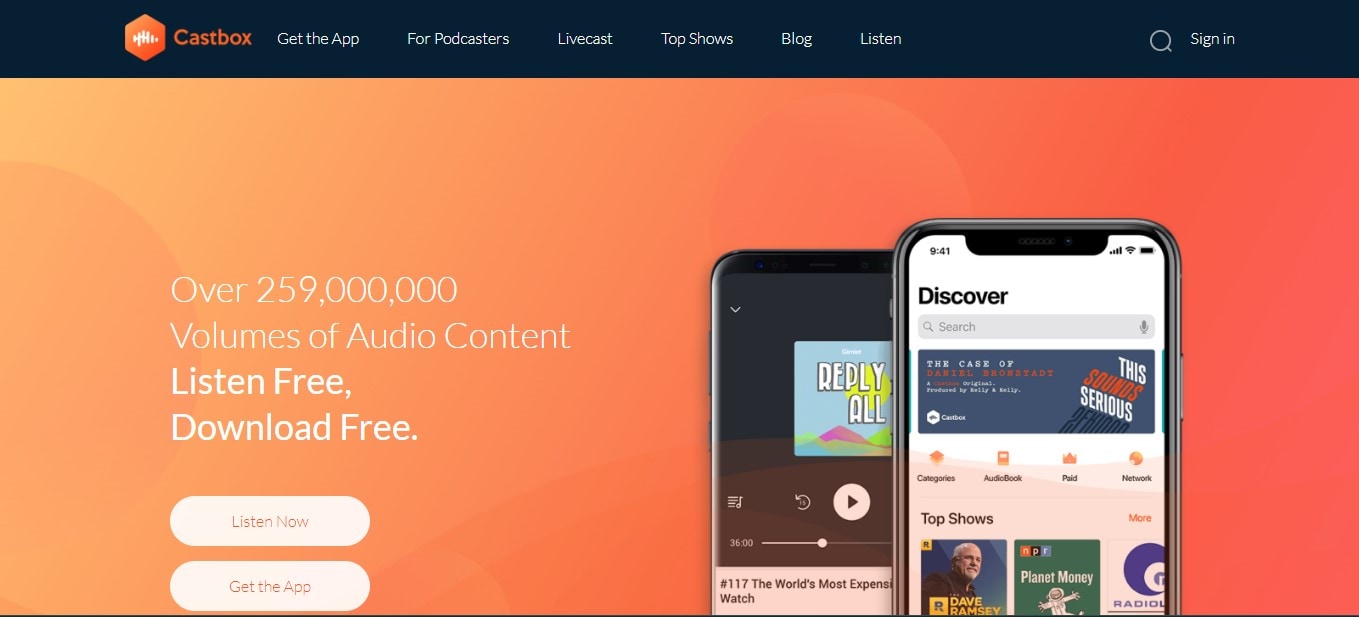
- CastBox
- Stitcher
- More choices to submit your podcast shows
- How to submit a show to podcast directories?
- Hot FAQs on Podcast Directories
Part 1. What are podcast directories?
A podcast directory is a listening app. It’s the place where podcasts and their listeners meet. Podcast listeners search for, subscribe to, and listen to your Podcast using their podcast directory of choice. Popular podcast directories include Apple Podcasts, Spotify, and Google Podcasts.
Part 2. 15 Top podcast directories to focus on in 2024
Thankfully, research conducted by EdisonResearch shows the weekly audience reach of top podcast directories. So this list will help us locate the best podcasting directories. And it can multiply your audience size and quickly reach a more extensive user base.
According to Edison Research, the top 15 Podcast Networks are:
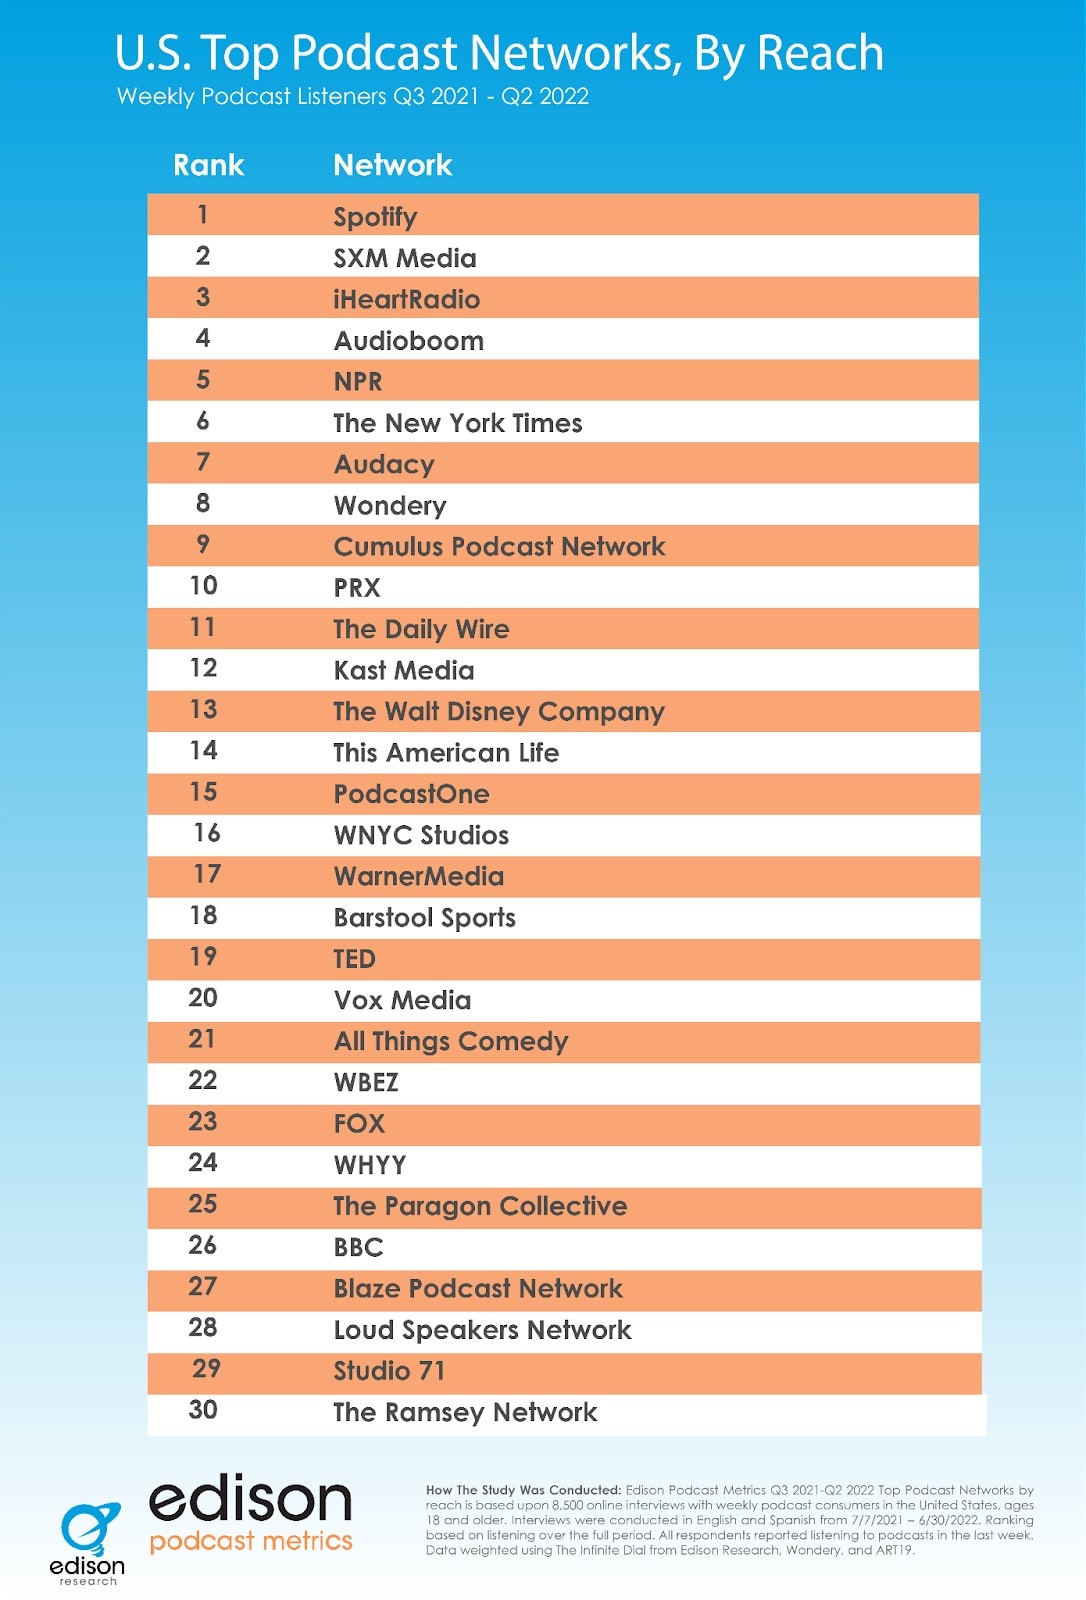
You must retain that Edison’s research only analyzes the US podcast services. Yet, our guide has compiled the best podcasting directories to connect with users worldwide.
Below you will find the list of top podcast directories and their reviews. But keep in mind that when it comes to podcast directories, there is no such thing as best or worse. Instead, it’s all about the user base and audience reach. So, it is best to submit your podcasts to multiple podcasting directories.
1. YouTube
With a monthly active user base of 2.5 billion, YouTube should be the top choice of any podcast creator. According to a recent survey by Statista, YouTube took over Spotify to become the largest platform for podcast consumption worldwide. Additionally, 47.7% of the US audience prefers YouTube over other platforms for listening to podcasts.
Not to forget, YouTube comes pre-installed on all smartphones and is also accessible via the Web to users worldwide. Another benefit of YouTube is that it is free for creators and users. Plus, once you grow your user base, it also allows you to get surplus revenue.

Of course, YouTube is a video-only platform. Still, you can use tools like Wondershare Filmora to create video-based podcasts seamlessly. You can simply convert the video podcasts into an audio format using Filmora itself and then reupload the same Podcast to even audio-based podcast directories.
Free Download For Win 7 or later(64-bit)
Free Download For macOS 10.14 or later
Tools like Fimora also allow you to directly publish the created Podcast on YouTube (so you do not have to worry about video requirements mandatory for YouTube).
- User Review of YouTube on G2: “YouTube is one of those sites that you can’t live without for a business. Everyone knows what YouTube is, and users (globally) use the platform daily.”
- Monthly User Base: Over 2.5 billion active users.
- Supported OS: All major OS and web browsers.
2. Spotify
Spotify has over 389 million listeners across 187 markets worldwide. Available on all major OS and its web presence makes it one of the best directories of podcasts on the internet.
Aside from its audience base, Spotify also provides real-time insights, like who your audience is, what they like, which episodes they prefer, and even what songs they want. All these insights will also help you plan your future content according to the audience.
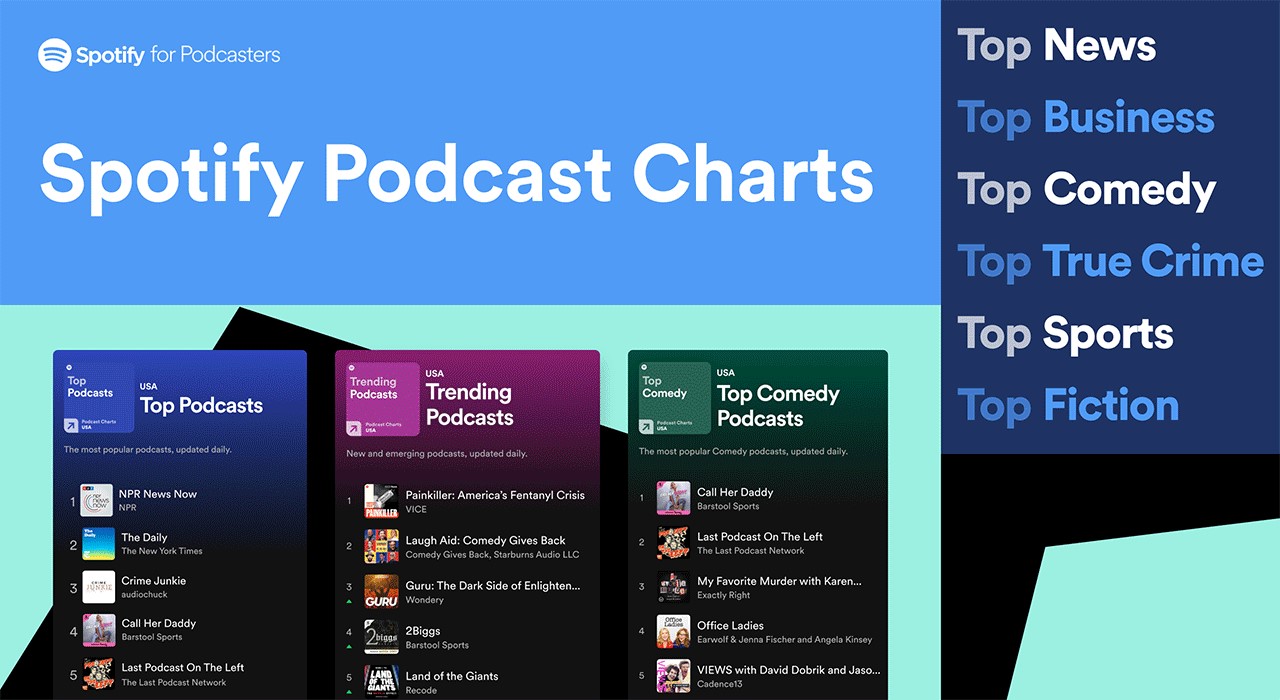
Spotify’s personalized recommendations and algorithms are another pluses, given you can get discovered easily/ Like YouTube, Spotify allows you to upload even video podcasts. While you can also create and upload podcasts in audio format only.
- User Review of Spotify on G2: “I can find any song, artist, album, and even podcasts at any time and no commercials.”
- Monthly User Base: Over 360 million active users.
- Supported OS: All major OS and web browsers.
3. Apple Podcasts
Apple Podcast is another top directory for a podcast that creators cannot ignore. Given it is an exclusive-podcast platform, its 28.5 million active user base in more than 170 countries and regions is enough to tell its greatness.
It is essential to understand that YouTube and Spotify are not exclusive podcast platforms like Apple Podcasts. And while Spotify and YouTube are best for connecting novice podcast listeners, Apple Podcast is the way to go if you want to connect with a dedicated podcast community.
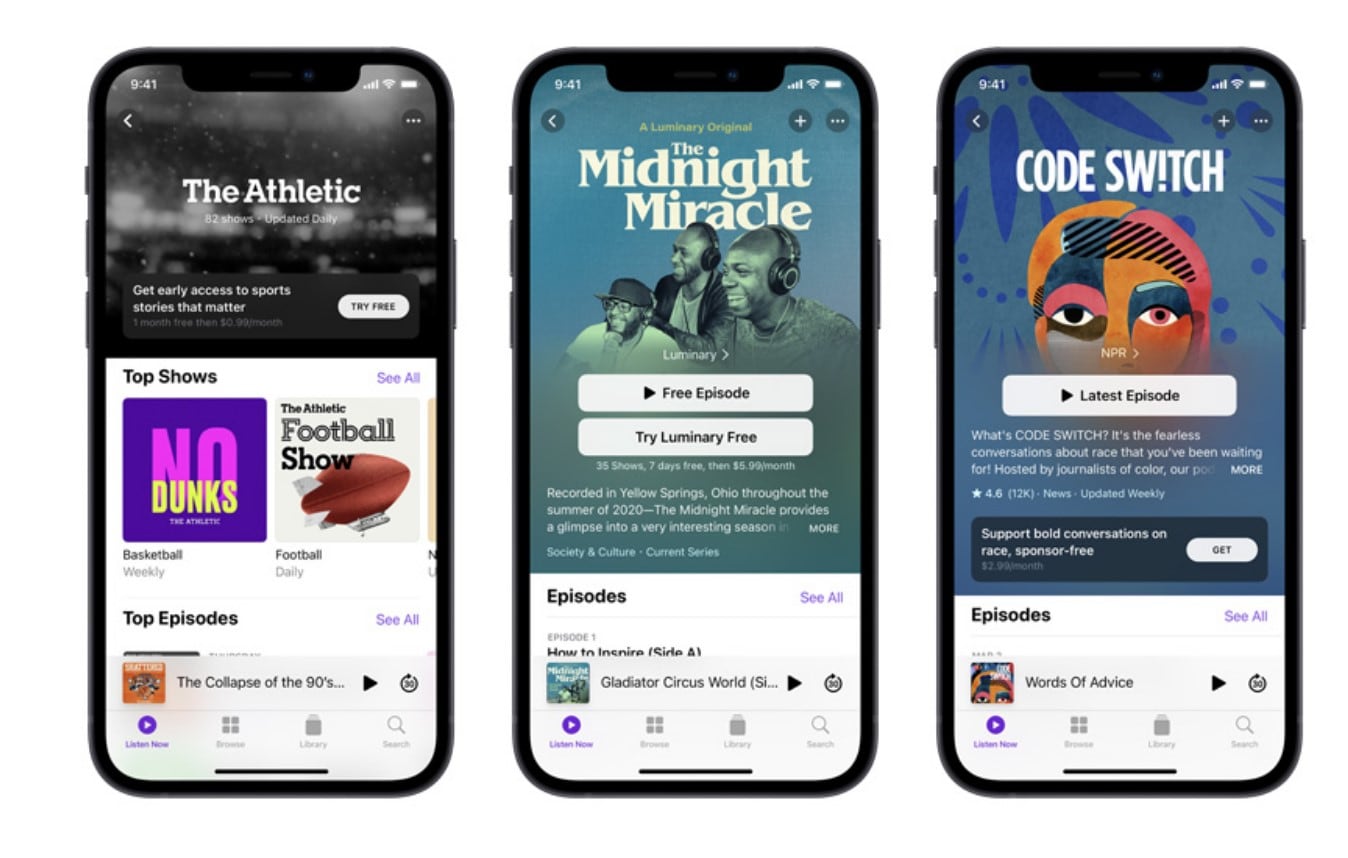
The best thing about the Apple Podcast directory is it allows you to create a podcast (via Apple Podcast Connect), but you must be an Apple user. However, you can submit your podcasts to Apple Podcast via RSS feed even if you are not an Apple user.
In all, given Apple Podcast is available for Apple users and is known by default on all Apple devices (the most prominent smartphone company in the world), Apple Podcast is a must-use podcast directory.
- User Review of Apple Podcast: “Apple once again nails with simplicity, millions of shows of my interest, and freemium service.”
- Monthly User Base: Over 28.5 million active users.
- Supported OS: All Apple devices.
4. Google Podcasts
Google Podcasts has over 100 million downloads on Play Store alone and is also available on the web, App Store, Blackberry, and ChromeOS users. A completely subscription-free and ad-free platform, Google Podcasts is one of the top podcasting directories among users.
However, unlike the Apple Podcast directory, it does not have a studio, so you can only submit your podcasts via RSS feeds. Still, its user base and the advanced algorithms are an opportunity to connect with users who like the subjects you discuss.
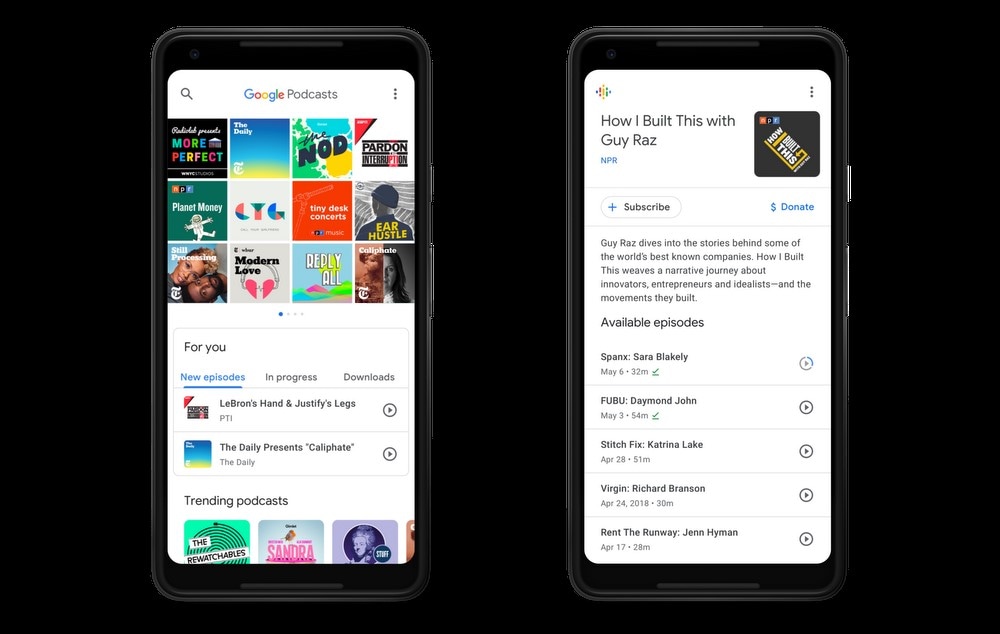
Like Spotify and Apple Podcast directories, Google Podcasts also show you real-time analytics and guide you about users so that you can plan your content accordingly. Given that it only requires a Google account to start, it is another top podcast directory you cannot ignore.
- User Review of Google Podcast
“Google Podcast includes everything that a podcast listener wants. It’s simple, free, and includes valuable options like Sleep Timer, Playback speed, and more.”
- Monthly User Base: Over 30 million active users.
- Supported OS: Dedicated apps for all major OS and web presence.
5. Pandora
Pandora has over 64 million monthly active users, with a listener spending up to 24 hours/monthly on the platform. It explains that users spend up to 45 minutes on the Pandora platform tuning in to their favorite podcasts. Again, its search-based algorithms allow you to get discovered by users that like subjects and topics on which you’re creating podcasts, meaning it is simple to connect with a large user base conveniently.
Pandora only accepts podcasts via RSS feed, which should be in MP3 format. But recent notifications have shown more audio formats will be added.
However, it is vital to retain that Pandora Podcast’s team critically analyzes all submissions manually. So, it might take up to 4-6 weeks for your first Podcast to appear on the platform.
- User Review of Pandora Podcast
“Pandora Podcasts recommendations are a blessing for me, who always finds it confusing to locate the right episode to spend my time on.”
- Monthly User Base: Over 64 million active users.
- Supported OS: Dedicated apps for all major OS and web presence.
6. Audible
Although popular among audiobook lovers, Audible has a considerable podcast following too. Its monthly active user base is around 41 million. The biggest benefit of registering your Podcast on the Audible directory of podcasts is that it connects with users who use Alexa to discover new podcasts.
Besides Audible, the Podcast will also be available for users of the Amazon Music app. That means you can connect with even more users via one submission only. Not to forget, Amazon Prime Video (a massive following) users get a free subscription to Amazon Music, so there’s a perfect chance that you will connect with users conveniently.
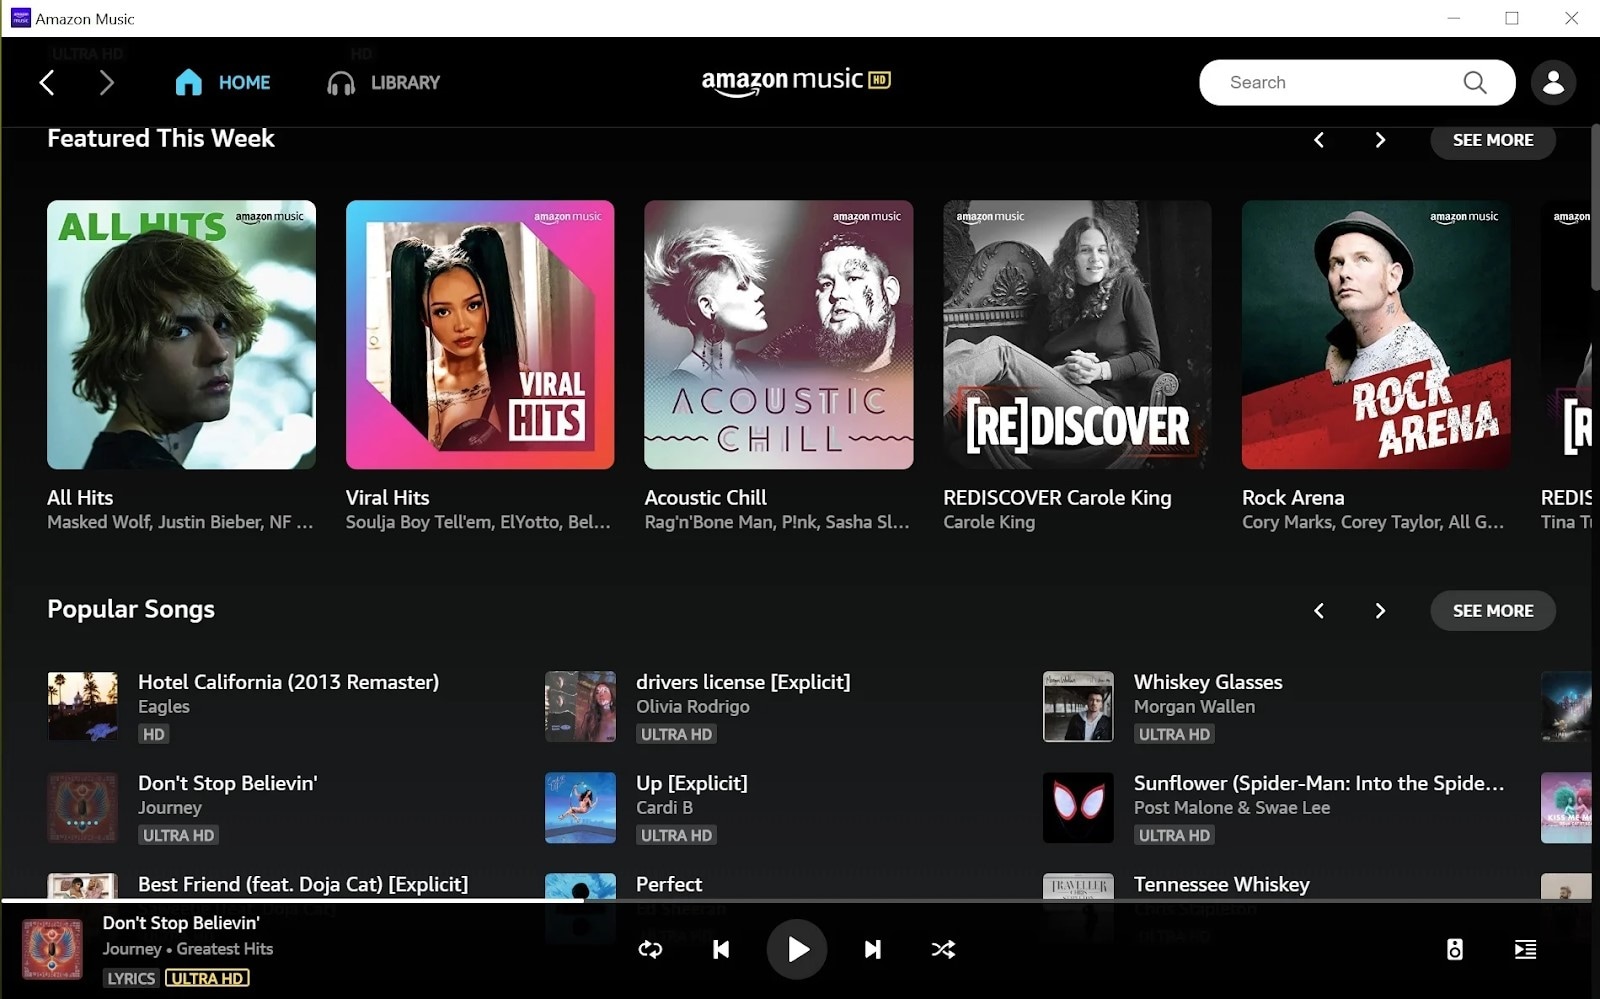
It is important to note that both Amazon Music and Audible offer podcasts for entirely free to users, so a more extensive user base prefers these platforms over paid platforms.
- User Review of Pandora Podcast
“You get to listen to any audiobook in the “included” library no matter which subscription you purchase..”
- Monthly User Base: Over 64 million active users.
- Supported OS: Android, iOS,
7. NPR One
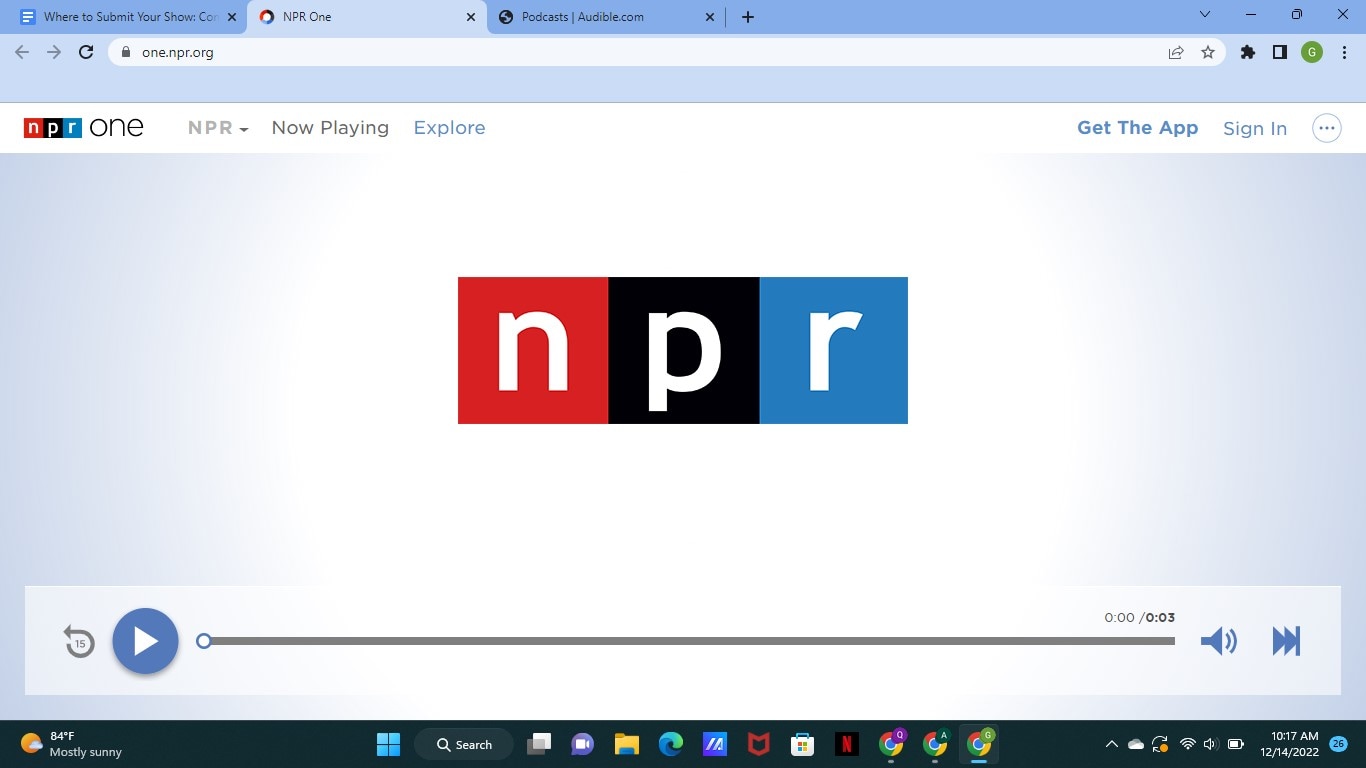
With an average listener spending up to 145 minutes weekly, the NPR One podcast directory is one of the best podcast directories you can trust to submit your show online. The podcast directory has a userbase of over 500 thousand users globally, and
- User Review of NPR One Podcast
“I’ve been using this app for years now. It’s been my trusty companion to give me the news. I primarily use it with the sleep timer. I’m not a super picky consumer, especially when I don’t pay for the app!
But for many months now, the sleep timer will frequently think the time is up and shut off the player well before it should. The player will often shut off within 5 minutes of using the 30 min sleep timer. It’s annoying to open the player hit resume, and reset the sleep timer.”
- Monthly User Base: 500 thousand
- Supported OS: Android, iOS
8. Tune In
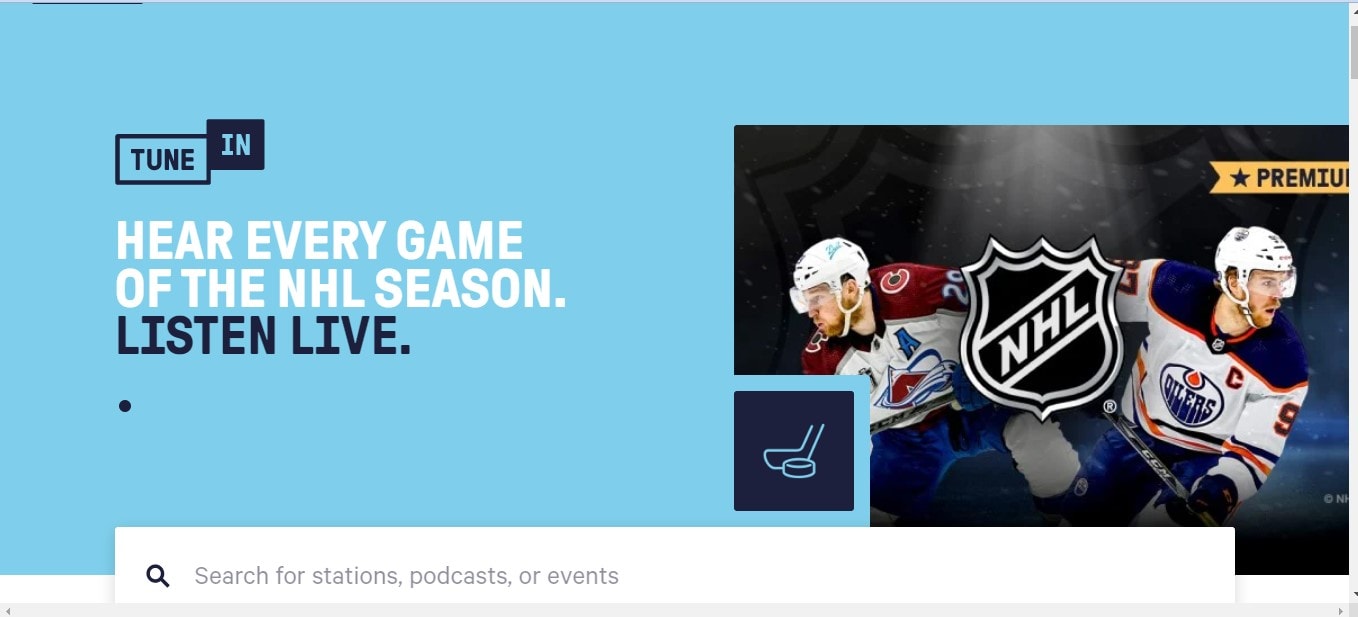
Technically, TuneIn is a radio. But lately, it has become prevalent amongst podcast listeners to find their favorite shows and also listen to music. The podcast directory has a global user base of over 75 million and a monthly visit of 7million+, which makes it a great spot for any podcaster to publish their show.
- User Review of Tune In Podcast
“I’ve been using the app for 4 years. I like it, but there are some annoying “features.”
the screen won’t time out when the app is active.
the developers must have recently made a change. I used to search through my list of “recent” (there were about 20) to look for new episodes of my favorite podcasts.
Now, the app only allows me to see the last four podcasts or stations I have listened to. So it is not helpful.’
- Monthly User Base: Over 7 million active users
- Supported OS: Dedicated apps for all major OS and web presence.
9. Podcast Addict
With over 10 million downloads on Google Playstore, Podcast Addict is one of Android’s most popular podcast apps. You can publish your podcast show, as it allows you to connect with the ideal audience quickly and easily.
Also, Podcast Addict is one of the few podcast directories available in various languages, including French and German. So it’s a perfect choice non-English podcasters.
- User Review of PodcastAddit
**”**Been using this for years. It does everything I could ever want when listening/ referencing/ re-listening to my favorite podcasts and a lot more.
I’ve suffered through having to use other podcast players (e.g., listening to something “exclusive”), but I couldn’t stand the inane simplicity of other players long enough to finish their content.
Also, it takes a bit to get used to (especially if you’re coming from other stripped-down players), but very worth the small effort for a powerful app.”
- Monthly User Base: Over 750 thousand active users.
- Supported OS: Dedicated Android App and web presence.
10. RadioPublic

Having been in the game for over 15 years, RadioPublic is another excellent podcast directory you can count on to submit your show. Although the platform does not have a massive user base compared to its competitors, it will help you grow your listeners and business by getting your podcast show to the right audience.
On RadioPublic, an average listener spends up to 72 minutes every day finding new podcast shows and listening to new episodes from their favorite podcasts. And given that the platform offers many robust features, listeners can enjoy a seamless listening experience on any device.
Overall, the RadioPublic podcast directory offers you a smart way to publish your show and grow your audience without going through stress.
- User Review of RadioPublic
“Glad I waited a while to find a podcast website provider. Starting from scratch in WordPress seemed too much hassle. Luckily the site came along while I was dithering about what to do.
The RadioPublic team onboarded the other 5 billion podcasts as one of the first examples, and I’m delighted to have chosen this option. Already, my pod site feels “complete” to look at, and more features are coming soon that will help with marketing, understanding listeners, and building a podcast brand.”
- Monthly User Base: Over 300 Thousand active users
- Supported OS: Dedicated apps for all major OS and web presence.
11. Overcast
Overcast is a dedicated podcast app for Apple devices, and what makes it a great podcast directory is that it offers unique features that attract many listeners.
On this platform, you’ll be allowed to display advertising slots, enabling listeners to subscribe to your podcast show within a few clicks. Plus, unlike many of its competitors, listeners have control over what podcast show is displayed in the featured podcast section. It is helpful as it lets listeners quickly discover every new episode you publish.
Overall, many incredible features make Overcast a good choice, and chances are your Podcast will get to real listeners when you publish them here.
- User Review of Overcast
**”**Nice alternative to Apple’s. I’ve been well pleased so far. It isn’t always the most intuitive, but I’ve eventually figured out how to achieve almost everything I’ve wanted to. The benefits of adding a show via RSS have become immediately clear.
Being a subscriber to a show and getting early access episodes and bonus material right in my podcast manager makes it easy to stay up with all my shows.”
- Monthly User Base: Over 70 Thousand active users.
- Supported OS: Dedicated app for iOS and web presence.
12. Pocket Casts
If you’re looking for a free podcast directory to publish your Podcast show, Pocket Casts is the ideal one for you. This podcast directory is packed with many rich features that podcasters will find very helpful. In addition, thanks to its beautifully designed website interface, you won’t find the platform difficult to use.
Besides, many listeners love Pocket Podcasts as it offers them incredible features—for example, improved discovery options, playback speed options, and lots more. In addition, they’ve enhanced how they find and listen to podcasts on the platform. You can’t go wrong publishing your show on a platform like this one.
- User Review of Pocket Casts
“Wonderful app, the most reliable one I’ve found. Even with accounts, most others lose all your progress data which hasn’t happened once with this, and I’ve switched phones 3 times. The progress tracker is so accurate you can pause on one device, open the same account and continue listening. Most apps can’t even keep things downloaded. Search does take a minute but finds stuff no other app does.”
- Monthly User Base: Over 1 Million active users.
- Supported OS: Dedicated apps for all major OS and web presence.
13. CastBox
CastBox is another unique podcast directory that podcasters trust to publish their show online. The platform boasts an optimized SEO and artificial intelligence that lets listeners find new podcast shows. Thanks to its massive user base of up to 20 Million users, your Podcast could reach a wide range of audiences quickly and easily.
Also, CastBox offers social media features that allow listeners to comment and share your podcast show on their social media page, thus helping you get your show to more listeners and potentially increase your fanbase.
- User Review of CastBox
“I’ve been a podcaster for years and an avid podcast listener for a while. So I searched high and low for the best podcast app and distribution service, Castbox. They have a great app and website, a huge content library, and a superb feature set. Also, their app allows offline listening, as I can download my favorite podcast show.”
- Monthly User Base: Over 1 million active users
- Supported OS: Dedicated apps for all major OS and web presence.
14. Stitcher
Last but not least podcast directory on our list is Stitcher. The platform boasts more than 14.5 Million active listeners, with an average listener having up to 25 hours of listening duration per month.
Stitcher helps you alleviate the stress of getting your show to the right audience, and thanks to the platform’s easy podcast submission requirements, you only need to have at least one podcast episode on your RSS Feed to get approved.
Also, Stitcher offers a unique analytic tool that allows you to track the performance of your show on the platform, and what more impressive is that it’s integrated into more than fifty car models. In addition, it works with any vehicle that supports Apple’s CarPlay and Android Auto, which makes it a great choice for podcasters who believe their audience loves to listen to their show while driving.
- User Review of Stitcher
“So glad I switched! I have my podcasts but didn’t listen to them much - partially because Apple Podcasts is so hard to use. I switched to Stitcher to listen to The Magnus Archives, and I love it!”
- Monthly User Base: Over 1.5 million active users.
- Supported OS: Dedicated apps for all major OS and web presence.
Part 3. More choices to submit your podcast shows
The above Podcast directories are great choices you can always count on any day. However, if you’re looking for more options, the following are reliable podcasting directories to choose from;
Part 4. How to submit a show to podcast directories?
Submitting a podcast show to podcast directories is pretty simple. Here, we used Spotify as an example to show you how you can easily submit your podcast show within a few clicks. The steps are as follows;
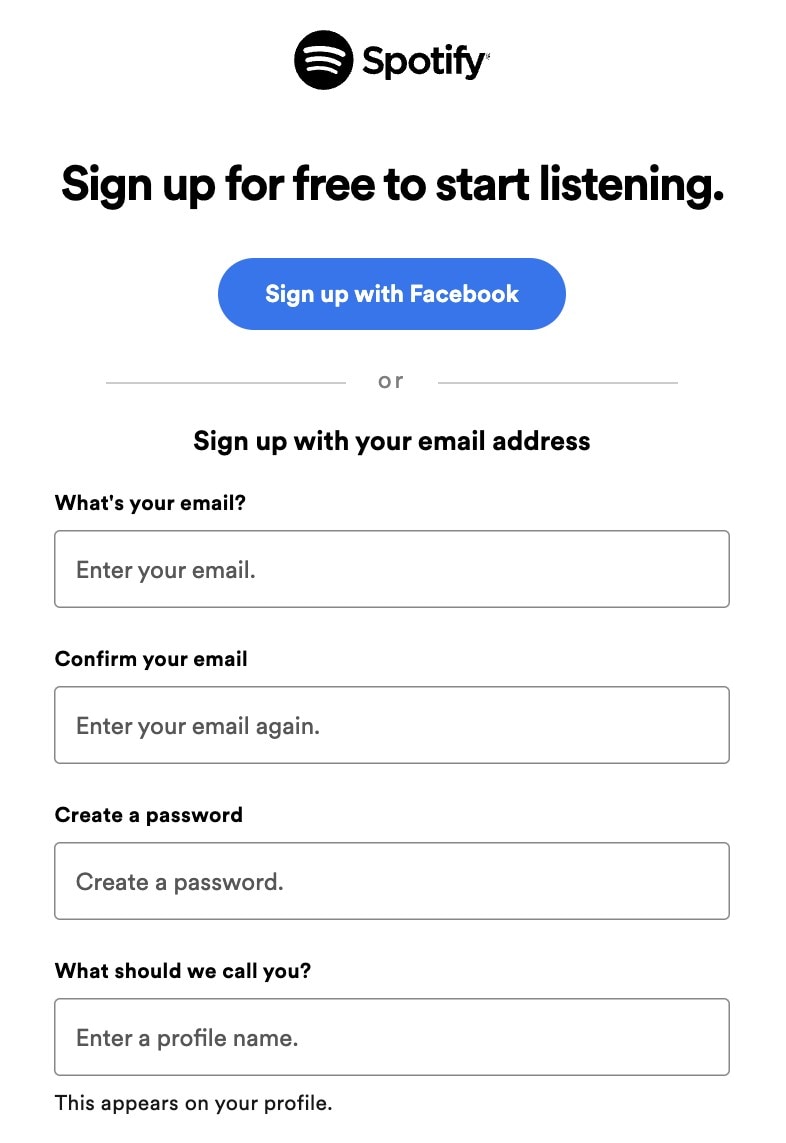
Step1 Create a Spotify account using the email attached to your podcast host.
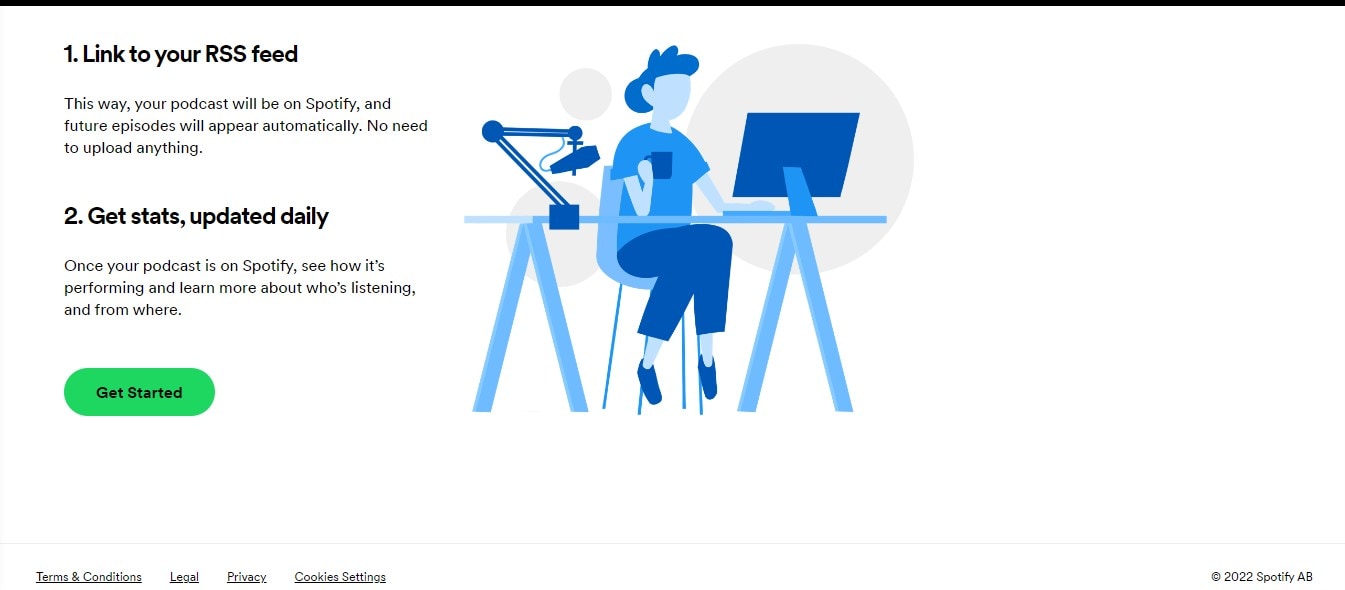
Step2 Open Spotify for Podcasters in your browser and login into your account. Then, click Get Started on the new screen.
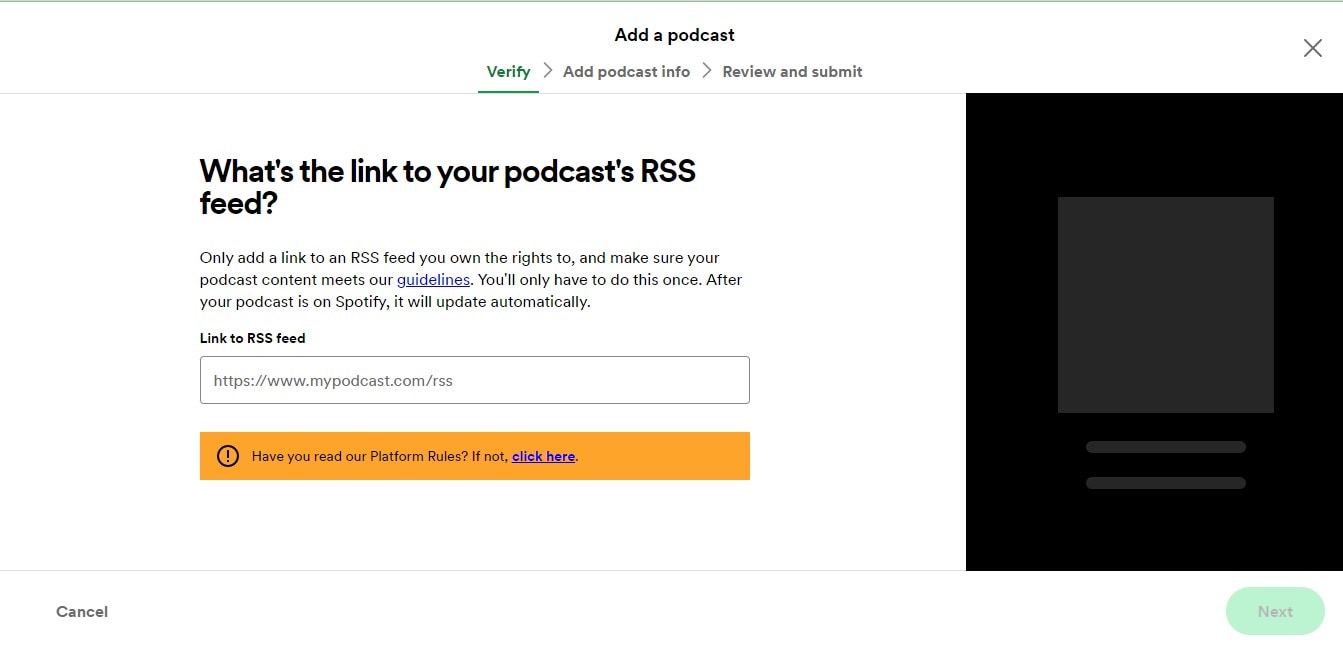
Step3 Provide your Podcast’s RSS Feed and click Next to proceed.
Step4 You’ll be asked to add information about your Podcast, from its description to the title, artwork, etc.
Step5 Verify the Podcast by submitting the code sent to your email.
Step6 Review the information you’ve provided so far and submit it to Spotify for review.
Once you complete the steps, keep an eye on the submitted Podcast, as Spotify won’t message you even if your Podcast has been published.
Hot FAQs on Podcast Directories
1. Are podcast directories free?
Almost all top podcast directories are entirely free for creators. All you have to do is sign up on the platforms. Then, check the platform’s requirements to submit your podcast episodes, like the format, cover photos, and description. Of course, the requirements vary depending on the platform.
2. Can any podcast be on a directory of podcasts?
Yes, you can choose from any podcast directory to publish your Podcast. There’s no limitation. When submitting, you must select the ideal category for your podcast show so it can be displayed to the right audience.
3. Does it cost to join a podcast directory?
Yes, and the cost of joining a podcast directory varies depending on your platform.
Conclusion
The podcast directories introduced above are reliable for submitting podcast shows. So, chances are there, no matter what your podcast show is about. It’ll help you connect with the right audience. However, one thing is vital you need to make sure you choose the podcast directory that suits you.
Part 1. What are podcast directories?
A podcast directory is a listening app. It’s the place where podcasts and their listeners meet. Podcast listeners search for, subscribe to, and listen to your Podcast using their podcast directory of choice. Popular podcast directories include Apple Podcasts, Spotify, and Google Podcasts.
Part 2. 15 Top podcast directories to focus on in 2024
Thankfully, research conducted by EdisonResearch shows the weekly audience reach of top podcast directories. So this list will help us locate the best podcasting directories. And it can multiply your audience size and quickly reach a more extensive user base.
According to Edison Research, the top 15 Podcast Networks are:
You must retain that Edison’s research only analyzes the US podcast services. Yet, our guide has compiled the best podcasting directories to connect with users worldwide.
Below you will find the list of top podcast directories and their reviews. But keep in mind that when it comes to podcast directories, there is no such thing as best or worse. Instead, it’s all about the user base and audience reach. So, it is best to submit your podcasts to multiple podcasting directories.
1. YouTube
With a monthly active user base of 2.5 billion, YouTube should be the top choice of any podcast creator. According to a recent survey by Statista, YouTube took over Spotify to become the largest platform for podcast consumption worldwide. Additionally, 47.7% of the US audience prefers YouTube over other platforms for listening to podcasts.
Not to forget, YouTube comes pre-installed on all smartphones and is also accessible via the Web to users worldwide. Another benefit of YouTube is that it is free for creators and users. Plus, once you grow your user base, it also allows you to get surplus revenue.
Of course, YouTube is a video-only platform. Still, you can use tools like Wondershare Filmora to create video-based podcasts seamlessly. You can simply convert the video podcasts into an audio format using Filmora itself and then reupload the same Podcast to even audio-based podcast directories.
Free Download For Win 7 or later(64-bit)
Free Download For macOS 10.14 or later
Tools like Fimora also allow you to directly publish the created Podcast on YouTube (so you do not have to worry about video requirements mandatory for YouTube).
- User Review of YouTube on G2: “YouTube is one of those sites that you can’t live without for a business. Everyone knows what YouTube is, and users (globally) use the platform daily.”
- Monthly User Base: Over 2.5 billion active users.
- Supported OS: All major OS and web browsers.
2. Spotify
Spotify has over 389 million listeners across 187 markets worldwide. Available on all major OS and its web presence makes it one of the best directories of podcasts on the internet.
Aside from its audience base, Spotify also provides real-time insights, like who your audience is, what they like, which episodes they prefer, and even what songs they want. All these insights will also help you plan your future content according to the audience.
Spotify’s personalized recommendations and algorithms are another pluses, given you can get discovered easily/ Like YouTube, Spotify allows you to upload even video podcasts. While you can also create and upload podcasts in audio format only.
- User Review of Spotify on G2: “I can find any song, artist, album, and even podcasts at any time and no commercials.”
- Monthly User Base: Over 360 million active users.
- Supported OS: All major OS and web browsers.
3. Apple Podcasts
Apple Podcast is another top directory for a podcast that creators cannot ignore. Given it is an exclusive-podcast platform, its 28.5 million active user base in more than 170 countries and regions is enough to tell its greatness.
It is essential to understand that YouTube and Spotify are not exclusive podcast platforms like Apple Podcasts. And while Spotify and YouTube are best for connecting novice podcast listeners, Apple Podcast is the way to go if you want to connect with a dedicated podcast community.
The best thing about the Apple Podcast directory is it allows you to create a podcast (via Apple Podcast Connect), but you must be an Apple user. However, you can submit your podcasts to Apple Podcast via RSS feed even if you are not an Apple user.
In all, given Apple Podcast is available for Apple users and is known by default on all Apple devices (the most prominent smartphone company in the world), Apple Podcast is a must-use podcast directory.
- User Review of Apple Podcast: “Apple once again nails with simplicity, millions of shows of my interest, and freemium service.”
- Monthly User Base: Over 28.5 million active users.
- Supported OS: All Apple devices.
4. Google Podcasts
Google Podcasts has over 100 million downloads on Play Store alone and is also available on the web, App Store, Blackberry, and ChromeOS users. A completely subscription-free and ad-free platform, Google Podcasts is one of the top podcasting directories among users.
However, unlike the Apple Podcast directory, it does not have a studio, so you can only submit your podcasts via RSS feeds. Still, its user base and the advanced algorithms are an opportunity to connect with users who like the subjects you discuss.
Like Spotify and Apple Podcast directories, Google Podcasts also show you real-time analytics and guide you about users so that you can plan your content accordingly. Given that it only requires a Google account to start, it is another top podcast directory you cannot ignore.
- User Review of Google Podcast
“Google Podcast includes everything that a podcast listener wants. It’s simple, free, and includes valuable options like Sleep Timer, Playback speed, and more.”
- Monthly User Base: Over 30 million active users.
- Supported OS: Dedicated apps for all major OS and web presence.
5. Pandora
Pandora has over 64 million monthly active users, with a listener spending up to 24 hours/monthly on the platform. It explains that users spend up to 45 minutes on the Pandora platform tuning in to their favorite podcasts. Again, its search-based algorithms allow you to get discovered by users that like subjects and topics on which you’re creating podcasts, meaning it is simple to connect with a large user base conveniently.
Pandora only accepts podcasts via RSS feed, which should be in MP3 format. But recent notifications have shown more audio formats will be added.
However, it is vital to retain that Pandora Podcast’s team critically analyzes all submissions manually. So, it might take up to 4-6 weeks for your first Podcast to appear on the platform.
- User Review of Pandora Podcast
“Pandora Podcasts recommendations are a blessing for me, who always finds it confusing to locate the right episode to spend my time on.”
- Monthly User Base: Over 64 million active users.
- Supported OS: Dedicated apps for all major OS and web presence.
6. Audible
Although popular among audiobook lovers, Audible has a considerable podcast following too. Its monthly active user base is around 41 million. The biggest benefit of registering your Podcast on the Audible directory of podcasts is that it connects with users who use Alexa to discover new podcasts.
Besides Audible, the Podcast will also be available for users of the Amazon Music app. That means you can connect with even more users via one submission only. Not to forget, Amazon Prime Video (a massive following) users get a free subscription to Amazon Music, so there’s a perfect chance that you will connect with users conveniently.
It is important to note that both Amazon Music and Audible offer podcasts for entirely free to users, so a more extensive user base prefers these platforms over paid platforms.
- User Review of Pandora Podcast
“You get to listen to any audiobook in the “included” library no matter which subscription you purchase..”
- Monthly User Base: Over 64 million active users.
- Supported OS: Android, iOS,
7. NPR One
With an average listener spending up to 145 minutes weekly, the NPR One podcast directory is one of the best podcast directories you can trust to submit your show online. The podcast directory has a userbase of over 500 thousand users globally, and
- User Review of NPR One Podcast
“I’ve been using this app for years now. It’s been my trusty companion to give me the news. I primarily use it with the sleep timer. I’m not a super picky consumer, especially when I don’t pay for the app!
But for many months now, the sleep timer will frequently think the time is up and shut off the player well before it should. The player will often shut off within 5 minutes of using the 30 min sleep timer. It’s annoying to open the player hit resume, and reset the sleep timer.”
- Monthly User Base: 500 thousand
- Supported OS: Android, iOS
8. Tune In
Technically, TuneIn is a radio. But lately, it has become prevalent amongst podcast listeners to find their favorite shows and also listen to music. The podcast directory has a global user base of over 75 million and a monthly visit of 7million+, which makes it a great spot for any podcaster to publish their show.
- User Review of Tune In Podcast
“I’ve been using the app for 4 years. I like it, but there are some annoying “features.”
the screen won’t time out when the app is active.
the developers must have recently made a change. I used to search through my list of “recent” (there were about 20) to look for new episodes of my favorite podcasts.
Now, the app only allows me to see the last four podcasts or stations I have listened to. So it is not helpful.’
- Monthly User Base: Over 7 million active users
- Supported OS: Dedicated apps for all major OS and web presence.
9. Podcast Addict
With over 10 million downloads on Google Playstore, Podcast Addict is one of Android’s most popular podcast apps. You can publish your podcast show, as it allows you to connect with the ideal audience quickly and easily.
Also, Podcast Addict is one of the few podcast directories available in various languages, including French and German. So it’s a perfect choice non-English podcasters.
- User Review of PodcastAddit
**”**Been using this for years. It does everything I could ever want when listening/ referencing/ re-listening to my favorite podcasts and a lot more.
I’ve suffered through having to use other podcast players (e.g., listening to something “exclusive”), but I couldn’t stand the inane simplicity of other players long enough to finish their content.
Also, it takes a bit to get used to (especially if you’re coming from other stripped-down players), but very worth the small effort for a powerful app.”
- Monthly User Base: Over 750 thousand active users.
- Supported OS: Dedicated Android App and web presence.
10. RadioPublic
Having been in the game for over 15 years, RadioPublic is another excellent podcast directory you can count on to submit your show. Although the platform does not have a massive user base compared to its competitors, it will help you grow your listeners and business by getting your podcast show to the right audience.
On RadioPublic, an average listener spends up to 72 minutes every day finding new podcast shows and listening to new episodes from their favorite podcasts. And given that the platform offers many robust features, listeners can enjoy a seamless listening experience on any device.
Overall, the RadioPublic podcast directory offers you a smart way to publish your show and grow your audience without going through stress.
- User Review of RadioPublic
“Glad I waited a while to find a podcast website provider. Starting from scratch in WordPress seemed too much hassle. Luckily the site came along while I was dithering about what to do.
The RadioPublic team onboarded the other 5 billion podcasts as one of the first examples, and I’m delighted to have chosen this option. Already, my pod site feels “complete” to look at, and more features are coming soon that will help with marketing, understanding listeners, and building a podcast brand.”
- Monthly User Base: Over 300 Thousand active users
- Supported OS: Dedicated apps for all major OS and web presence.
11. Overcast
Overcast is a dedicated podcast app for Apple devices, and what makes it a great podcast directory is that it offers unique features that attract many listeners.
On this platform, you’ll be allowed to display advertising slots, enabling listeners to subscribe to your podcast show within a few clicks. Plus, unlike many of its competitors, listeners have control over what podcast show is displayed in the featured podcast section. It is helpful as it lets listeners quickly discover every new episode you publish.
Overall, many incredible features make Overcast a good choice, and chances are your Podcast will get to real listeners when you publish them here.
- User Review of Overcast
**”**Nice alternative to Apple’s. I’ve been well pleased so far. It isn’t always the most intuitive, but I’ve eventually figured out how to achieve almost everything I’ve wanted to. The benefits of adding a show via RSS have become immediately clear.
Being a subscriber to a show and getting early access episodes and bonus material right in my podcast manager makes it easy to stay up with all my shows.”
- Monthly User Base: Over 70 Thousand active users.
- Supported OS: Dedicated app for iOS and web presence.
12. Pocket Casts
If you’re looking for a free podcast directory to publish your Podcast show, Pocket Casts is the ideal one for you. This podcast directory is packed with many rich features that podcasters will find very helpful. In addition, thanks to its beautifully designed website interface, you won’t find the platform difficult to use.
Besides, many listeners love Pocket Podcasts as it offers them incredible features—for example, improved discovery options, playback speed options, and lots more. In addition, they’ve enhanced how they find and listen to podcasts on the platform. You can’t go wrong publishing your show on a platform like this one.
- User Review of Pocket Casts
“Wonderful app, the most reliable one I’ve found. Even with accounts, most others lose all your progress data which hasn’t happened once with this, and I’ve switched phones 3 times. The progress tracker is so accurate you can pause on one device, open the same account and continue listening. Most apps can’t even keep things downloaded. Search does take a minute but finds stuff no other app does.”
- Monthly User Base: Over 1 Million active users.
- Supported OS: Dedicated apps for all major OS and web presence.
13. CastBox
CastBox is another unique podcast directory that podcasters trust to publish their show online. The platform boasts an optimized SEO and artificial intelligence that lets listeners find new podcast shows. Thanks to its massive user base of up to 20 Million users, your Podcast could reach a wide range of audiences quickly and easily.
Also, CastBox offers social media features that allow listeners to comment and share your podcast show on their social media page, thus helping you get your show to more listeners and potentially increase your fanbase.
- User Review of CastBox
“I’ve been a podcaster for years and an avid podcast listener for a while. So I searched high and low for the best podcast app and distribution service, Castbox. They have a great app and website, a huge content library, and a superb feature set. Also, their app allows offline listening, as I can download my favorite podcast show.”
- Monthly User Base: Over 1 million active users
- Supported OS: Dedicated apps for all major OS and web presence.
14. Stitcher
Last but not least podcast directory on our list is Stitcher. The platform boasts more than 14.5 Million active listeners, with an average listener having up to 25 hours of listening duration per month.
Stitcher helps you alleviate the stress of getting your show to the right audience, and thanks to the platform’s easy podcast submission requirements, you only need to have at least one podcast episode on your RSS Feed to get approved.
Also, Stitcher offers a unique analytic tool that allows you to track the performance of your show on the platform, and what more impressive is that it’s integrated into more than fifty car models. In addition, it works with any vehicle that supports Apple’s CarPlay and Android Auto, which makes it a great choice for podcasters who believe their audience loves to listen to their show while driving.
- User Review of Stitcher
“So glad I switched! I have my podcasts but didn’t listen to them much - partially because Apple Podcasts is so hard to use. I switched to Stitcher to listen to The Magnus Archives, and I love it!”
- Monthly User Base: Over 1.5 million active users.
- Supported OS: Dedicated apps for all major OS and web presence.
Part 3. More choices to submit your podcast shows
The above Podcast directories are great choices you can always count on any day. However, if you’re looking for more options, the following are reliable podcasting directories to choose from;
Part 4. How to submit a show to podcast directories?
Submitting a podcast show to podcast directories is pretty simple. Here, we used Spotify as an example to show you how you can easily submit your podcast show within a few clicks. The steps are as follows;
Step1 Create a Spotify account using the email attached to your podcast host.
Step2 Open Spotify for Podcasters in your browser and login into your account. Then, click Get Started on the new screen.
Step3 Provide your Podcast’s RSS Feed and click Next to proceed.
Step4 You’ll be asked to add information about your Podcast, from its description to the title, artwork, etc.
Step5 Verify the Podcast by submitting the code sent to your email.
Step6 Review the information you’ve provided so far and submit it to Spotify for review.
Once you complete the steps, keep an eye on the submitted Podcast, as Spotify won’t message you even if your Podcast has been published.
Hot FAQs on Podcast Directories
1. Are podcast directories free?
Almost all top podcast directories are entirely free for creators. All you have to do is sign up on the platforms. Then, check the platform’s requirements to submit your podcast episodes, like the format, cover photos, and description. Of course, the requirements vary depending on the platform.
2. Can any podcast be on a directory of podcasts?
Yes, you can choose from any podcast directory to publish your Podcast. There’s no limitation. When submitting, you must select the ideal category for your podcast show so it can be displayed to the right audience.
3. Does it cost to join a podcast directory?
Yes, and the cost of joining a podcast directory varies depending on your platform.
Conclusion
The podcast directories introduced above are reliable for submitting podcast shows. So, chances are there, no matter what your podcast show is about. It’ll help you connect with the right audience. However, one thing is vital you need to make sure you choose the podcast directory that suits you.
Learn How To Fix Distorted Audio Using Different Methods
Create High-Quality Video - Wondershare Filmora
An easy and powerful YouTube video editor
Numerous video and audio effects to choose from
Detailed tutorials are provided by the official channel
So you’re all set: you’ve sat down, grabbed your microphone, fired up your recording software, and started pouring out the content of your mind. Once finished, you listen back to the recording, thinking you’re about to hear the silky-smooth undertones of your voice resonating through your ears, but something odd occurs — it sounds terrible. Distorted audio is very unwelcoming since you want the sound to be natural. This guide will explain how to fix distorted audio using various methods.
In this article
01 What Causes Distorted Audio?
02 How To Fix Distorted Audio Using Different Methods
What Causes Distorted Audio?
Distorted audio is the main culprit in ruined audio clips. Here are some of the causes of distorted sound.
1. Recording Environment
Not recording dialogue and voice-over in a studio can cause distorted audio. However, audio quality can be out of control if you conduct an onsite interview. Getting a meaningful and cinematic shot should come first. If you do not use a studio-quality microphone that comes with directional controls, you’ll likely have distorted audio. You might want to go for a unidirectional stereo channel if you want boom movements to be undetectable.
When a cheap, low-quality microphone is moving, you’ll hear the unsteadiness in your recording, leading to distorted audio. Recording audio in an echo chamber or an overly large room can also result in distorted audio.
2. Touching the Mic While Recording
If you hand the microphone to someone who does not know how to use it, they might hold it too loosely or close. Microphones feature sensitive parts that should not be dropped, shaken, or breathed on. When you are interviewing people unfamiliar with industry standards, you should hold the microphone, not the person you are interviewing. The mic is not within the range of 6” to 12 “ away from the speaker, this could lead to distorted audio.
3. Using the Wrong Mic
A reliable mic comes with audio controls and captures room tone and timbre. It should be portable, compact, and have a wind sleeve. In outdoor situations where ADR is not an option, you might want to use a wind sleeve.
Podcast showrunners and content creators often use Blue Yeti mics connected to a soundboard. While these are cheaper options, they can cause distorted audio. Content creators who are not stationary should purchase a lavalier, and wireless is a more high-end and expensive option.
4. Positioning Your Microphones Incorrectly
You have to be careful if you’ll be mounting a mic on your DSLR. Filming events with a one-mic setup is a promise to record everything you hear again. You’ll inevitably film some moments at a distance and leave the audio compromised to distortion.
5. Faulty Equipment
Your equipment can fail in different ways. For instance, your effects processor can fail, meaning that you won’t hear any sound passing through it. It can also fail, and you end up hearing a distorted sound passing out of the processor. Essentially, this might or might not be linked to the component’s capability of handling the signal as much as the busted internals result.
How To Fix Distorted Audio Using Different Methods
You can fix distorted audio using various methods. They include:
Method 1: How To Fix Distorted Audio in Audacity
Audacity is the bread and butter for individuals who adore a crisp audio quality. Audacity helps users finetune various attributes of their recordings. It is a free and intuitive software suite suitable for newbies and individuals who don’t interact with computers. With that in mind, here is how to fix distorted audio using Audacity.
- Open the audio file by dragging and dropping it into Audacity.
- Select the distorted part and click on the Effect option. Then, select Noise Reduction.


- The Noise Reduction window will open.

- Now, click on Noise Profile, and Audacity will know what to filter out.
- Next, select the entire audio and open the Noise Reduction Window again ( Effect > Noise Reduction ). Then, set the values to suit your preferences.
- Hit preview to check the audio, then the Click OK button.
If the audio is still distorted, apply the filter again. Don’t overdo the process numerous times to ensure your audio is not degraded, making the voice sound robotic and tinny.
Now, use compression to your advantage. If compression confuses you, think of it as a tool that adjusts your audio for the listener’s benefit. Compression not only quiets the background minutiae that creeps into your recording, but it also boosts your voice and gives it a full, captivating resonance.
- To start the compression process, select your audio track, press CTRL + A, click “Effect” and then click “Compressor.”

- Adjust the values in the compressor to meet your needs and make your voice “pop” from the background.
- Once you have set the values, hit the Preview button to check the audio. Then, click on OK.
That is how to fix distorted audio using Audacity.
You May Be Interested In
How To Fix Distorted Audio in Garageband
Garageband is one of the most popular audio recording software available. Though you can use it for various purposes, it is mainly intended to be used to create music. However, many people have the problem of distorted audio files, making production difficult when trying to perfect a project. To learn how to fix distorted audio in Garageband, follow the steps below:
- Launch GarageBand, then open your audio file. Once your audio file finishes loading, select the audio file from which you want to remove distortion by clicking it.
- Click on the “i” symbol encapsulated in a blue circle positioned on the lower-right portion of your screen. This icon sits in the middle of two other icons: a set of notes and an eye.
- Select the “Real Instrument” tab located on the top right side of your screen. You’ll see two tabs: Master Tracks and Real Instrument.
- Click the Edit tab to activate it, and a list of effects will pop up.
- Select Distortion from the list, and you’ll see a drop-down menu.
- Next, select the None option to remove distortion.
If you have distorted audio due to poor recording quality, navigate to the Real Instrument”Edit menu and select AULowpass from the boxes available. Doing this will remove frequencies above a certain range, and this will fix the distorted audio.
Method 3: How To Fix Distorted Audio in Windows 10
Several actions can cause problems or distort sound on your Windows 10 application. Some of the common causes include:
- When upgrading your computer from an older version to a new one
- In case your computer gets corrupted with a virus
- If your computer or device doesn’t the right sound drivers
So how do you fix distorted audio in Windows 10? There are several ways you can fix distorted audio in Windows 10. Here is how to fix distorted audio using some of the best ways.
1. Reinstall drivers
- Right-click the start button and choose device manager.
- Navigate through sound, video, and game controllers.
- Click on the Details tab.
- Select hardware Ids from the drop-down menu.

- Copy and first the first value of drivers in your browser and search the internet.

- Open the official site and download the correct driver。
- Install and restart your PC。
2. Update drivers
- Right-click on the start button.
- Scroll to the sound, video, and game controllers option.
- Right-click on the sound device and select uninstall the device.

- Restart your PC after the uninstall process is finished.
- Open the device manager.
- Select and click on the scan for hardware changes option.

Windows will automatically install a new version of sound drivers
3. Run Windows Audio Troubleshooter
- To use this method, open Start and click the cog-like icon. This will open the Settings app.
- Select Update & security.
- Choose Troubleshoot in the left pane.
- Expand the Playing Audio by clicking it.
- Hit the Run the troubleshooter button, then follow the further instructions.

4. Take Exclusive Control of Your Device Option by Disabling Allow Applications
- Navigate to the notification area and right-click on the sound icon. Open Playback devices.
- Next, right-click on the default Playback Device, then open Properties.
- Choose the Advanced tab option.
- Navigate to the Exclusive mode section and check the box that says disable Allow applications to control your device.

When it comes to editing or performing audio editing in the video, Wondershare Filmora is a powerful video editing software that can help you with reducing the voiceover volume, mute the audio in the video, or cut, copy, paste or insert your audio files. Learn more about the audio editing features of Filmora from the below video & download Filmora to try!
For Win 7 or later (64-bit)
For macOS 10.12 or later
Conclusion
● Whether you’re an amateur audio enthusiast or produce a podcast with thousands of listeners, the quality of your audio can “make or break” your results. When your audience is listening to an audio recording, the last thing they want to notice or hear is a distortion because it is very distracting. When recording, it is almost impossible to find an environment that removes audio distortion without access to a recording studio. Luckily, you can use the above methods to fix distorted audio and make it look professional.
So you’re all set: you’ve sat down, grabbed your microphone, fired up your recording software, and started pouring out the content of your mind. Once finished, you listen back to the recording, thinking you’re about to hear the silky-smooth undertones of your voice resonating through your ears, but something odd occurs — it sounds terrible. Distorted audio is very unwelcoming since you want the sound to be natural. This guide will explain how to fix distorted audio using various methods.
In this article
01 What Causes Distorted Audio?
02 How To Fix Distorted Audio Using Different Methods
What Causes Distorted Audio?
Distorted audio is the main culprit in ruined audio clips. Here are some of the causes of distorted sound.
1. Recording Environment
Not recording dialogue and voice-over in a studio can cause distorted audio. However, audio quality can be out of control if you conduct an onsite interview. Getting a meaningful and cinematic shot should come first. If you do not use a studio-quality microphone that comes with directional controls, you’ll likely have distorted audio. You might want to go for a unidirectional stereo channel if you want boom movements to be undetectable.
When a cheap, low-quality microphone is moving, you’ll hear the unsteadiness in your recording, leading to distorted audio. Recording audio in an echo chamber or an overly large room can also result in distorted audio.
2. Touching the Mic While Recording
If you hand the microphone to someone who does not know how to use it, they might hold it too loosely or close. Microphones feature sensitive parts that should not be dropped, shaken, or breathed on. When you are interviewing people unfamiliar with industry standards, you should hold the microphone, not the person you are interviewing. The mic is not within the range of 6” to 12 “ away from the speaker, this could lead to distorted audio.
3. Using the Wrong Mic
A reliable mic comes with audio controls and captures room tone and timbre. It should be portable, compact, and have a wind sleeve. In outdoor situations where ADR is not an option, you might want to use a wind sleeve.
Podcast showrunners and content creators often use Blue Yeti mics connected to a soundboard. While these are cheaper options, they can cause distorted audio. Content creators who are not stationary should purchase a lavalier, and wireless is a more high-end and expensive option.
4. Positioning Your Microphones Incorrectly
You have to be careful if you’ll be mounting a mic on your DSLR. Filming events with a one-mic setup is a promise to record everything you hear again. You’ll inevitably film some moments at a distance and leave the audio compromised to distortion.
5. Faulty Equipment
Your equipment can fail in different ways. For instance, your effects processor can fail, meaning that you won’t hear any sound passing through it. It can also fail, and you end up hearing a distorted sound passing out of the processor. Essentially, this might or might not be linked to the component’s capability of handling the signal as much as the busted internals result.
How To Fix Distorted Audio Using Different Methods
You can fix distorted audio using various methods. They include:
Method 1: How To Fix Distorted Audio in Audacity
Audacity is the bread and butter for individuals who adore a crisp audio quality. Audacity helps users finetune various attributes of their recordings. It is a free and intuitive software suite suitable for newbies and individuals who don’t interact with computers. With that in mind, here is how to fix distorted audio using Audacity.
- Open the audio file by dragging and dropping it into Audacity.
- Select the distorted part and click on the Effect option. Then, select Noise Reduction.
- The Noise Reduction window will open.
- Now, click on Noise Profile, and Audacity will know what to filter out.
- Next, select the entire audio and open the Noise Reduction Window again ( Effect > Noise Reduction ). Then, set the values to suit your preferences.
- Hit preview to check the audio, then the Click OK button.
If the audio is still distorted, apply the filter again. Don’t overdo the process numerous times to ensure your audio is not degraded, making the voice sound robotic and tinny.
Now, use compression to your advantage. If compression confuses you, think of it as a tool that adjusts your audio for the listener’s benefit. Compression not only quiets the background minutiae that creeps into your recording, but it also boosts your voice and gives it a full, captivating resonance.
- To start the compression process, select your audio track, press CTRL + A, click “Effect” and then click “Compressor.”
- Adjust the values in the compressor to meet your needs and make your voice “pop” from the background.
- Once you have set the values, hit the Preview button to check the audio. Then, click on OK.
That is how to fix distorted audio using Audacity.
You May Be Interested In
How To Fix Distorted Audio in Garageband
Garageband is one of the most popular audio recording software available. Though you can use it for various purposes, it is mainly intended to be used to create music. However, many people have the problem of distorted audio files, making production difficult when trying to perfect a project. To learn how to fix distorted audio in Garageband, follow the steps below:
- Launch GarageBand, then open your audio file. Once your audio file finishes loading, select the audio file from which you want to remove distortion by clicking it.
- Click on the “i” symbol encapsulated in a blue circle positioned on the lower-right portion of your screen. This icon sits in the middle of two other icons: a set of notes and an eye.
- Select the “Real Instrument” tab located on the top right side of your screen. You’ll see two tabs: Master Tracks and Real Instrument.
- Click the Edit tab to activate it, and a list of effects will pop up.
- Select Distortion from the list, and you’ll see a drop-down menu.
- Next, select the None option to remove distortion.
If you have distorted audio due to poor recording quality, navigate to the Real Instrument”Edit menu and select AULowpass from the boxes available. Doing this will remove frequencies above a certain range, and this will fix the distorted audio.
Method 3: How To Fix Distorted Audio in Windows 10
Several actions can cause problems or distort sound on your Windows 10 application. Some of the common causes include:
- When upgrading your computer from an older version to a new one
- In case your computer gets corrupted with a virus
- If your computer or device doesn’t the right sound drivers
So how do you fix distorted audio in Windows 10? There are several ways you can fix distorted audio in Windows 10. Here is how to fix distorted audio using some of the best ways.
1. Reinstall drivers
- Right-click the start button and choose device manager.
- Navigate through sound, video, and game controllers.
- Click on the Details tab.
- Select hardware Ids from the drop-down menu.
- Copy and first the first value of drivers in your browser and search the internet.
- Open the official site and download the correct driver。
- Install and restart your PC。
2. Update drivers
- Right-click on the start button.
- Scroll to the sound, video, and game controllers option.
- Right-click on the sound device and select uninstall the device.
- Restart your PC after the uninstall process is finished.
- Open the device manager.
- Select and click on the scan for hardware changes option.
Windows will automatically install a new version of sound drivers
3. Run Windows Audio Troubleshooter
- To use this method, open Start and click the cog-like icon. This will open the Settings app.
- Select Update & security.
- Choose Troubleshoot in the left pane.
- Expand the Playing Audio by clicking it.
- Hit the Run the troubleshooter button, then follow the further instructions.
4. Take Exclusive Control of Your Device Option by Disabling Allow Applications
- Navigate to the notification area and right-click on the sound icon. Open Playback devices.
- Next, right-click on the default Playback Device, then open Properties.
- Choose the Advanced tab option.
- Navigate to the Exclusive mode section and check the box that says disable Allow applications to control your device.
When it comes to editing or performing audio editing in the video, Wondershare Filmora is a powerful video editing software that can help you with reducing the voiceover volume, mute the audio in the video, or cut, copy, paste or insert your audio files. Learn more about the audio editing features of Filmora from the below video & download Filmora to try!
For Win 7 or later (64-bit)
For macOS 10.12 or later
Conclusion
● Whether you’re an amateur audio enthusiast or produce a podcast with thousands of listeners, the quality of your audio can “make or break” your results. When your audience is listening to an audio recording, the last thing they want to notice or hear is a distortion because it is very distracting. When recording, it is almost impossible to find an environment that removes audio distortion without access to a recording studio. Luckily, you can use the above methods to fix distorted audio and make it look professional.
Also read:
- In 2024, 13+ Accessible No-Cost Audio Engineering Applications for All Platforms
- New Cutting-Edge Audio Tools for iPhone and iPad Enthusiasts
- Updated In 2024, Top 8 Downloaded Audio Tracks Capturing Natural Precipitation Sounds
- Updated How to Remove Audio From MOV Files on Windows or Mac for 2024
- Updated Clarity in Capture State-of-the-Art Techniques for Dampening Sound Distortion for 2024
- Updated 2024 Approved Stylish Soundscape for Social Media and Blogging Videos
- New In 2024, The Ultimate Guide to Audio Treasures for Podcast Production
- Updated What Is Google Podcast App?
- Updated 2024 Approved Premier Audio Narrators Discovering the Best Tools for Your Projects
- Enhancing Audio Quality Techniques for Distraction-Free Sounds with Wondershare Filmora
- Updated 2024 Approved Uncover Jarring Scream Ambiance
- 2024 Approved Mastering Your Soundtrack A Methodical Approach to Choosing a Digital Audio Recorder Beyond Apowersoft
- Updated Pioneering the Silent Echo Techniques and Tools for Gradual Audio Fading Released for 2024
- Sound Control Software Showdown Best Vocal Reduction Options
- Updated 2024 Approved The Best in Class A Top 10 Roundup of Cutting-Edge Instant Voice Alteration Technologies
- New Premier Female Voice Transformation Service Online, 2024 Release
- In 2024, Enhancing Video Experience The Role of Background Music Integration
- In 2024, Cherished Websites Presenting Fee-Free Acoustic Guitar Lyrics & Illustrations
- The Professionals Method for Removing Unwanted Sounds From Media Projects Using Premiere Pro
- New 2024S Premier Selection The Top 8 Online Voice Capture Software for Free Use
- Optimized Audio Equalization Achieving Consistent Volume Levels
- New In 2024, Powerful Set of Male to Female Voice Change Technologies Enhancing Eloquence with Higher Pitches
- New 2024 Approved Customizing Your Siri A Guide to Altering Siris Voice Across iOS Devices
- New Professional Insights on Separating Soundtracks From Visual Media on Apple Technology
- The Sound Engineers Playbook Strategies for Eradicating Background Noise in Filmor Videos
- New Mastering Samsung S10/S9s Voice Memo Feature for 2024
- New 2024 Approved The Ultimate Guide to Affordable Video Making Combining Visuals and Sound
- New Essential MP3 Transcription Solutions A Compilation for 2024
- Updated Unmissable Web-Based MP3 Metadata Manipulators – Heres the List
- Updated In 2024, How to Remove Audio From a Video in iMovie?
- Updated 2024 Approved Bringing High-Quality Sound to Your Fingers on the Keyboard Audacity Installation for Ubuntu Users
- 2024 Approved Slowing Down Music Rhythmically Without Affecting Pitch Perception
- Synthetic Soundscape Pioneers Unveiling the Top AI Composers
- Updated 2024 Approved Infuse Harmonies Into Motion Picture Sequences Using Media Encrypter
- Updated Discover the Ultimate List of Podcast-Friendly Free Recording Apps
- New 2024 Approved No-Charge Audiophiles Choice Premium Conversion Software for MPA to MP3 Transition
- New In 2024, The Art of Auditory Alignment Selecting Ideal Frequency Filters
- New Mastering Audio Book Publishing with Ease A Modern Guide for 2024
- In 2024, Leveraging Free Audio Sources in Your Photos A Guide for Windows and iOS Users
- Updated EchoTunes Mapper Revolutionary Tag Management Software for Windows & Mac Users, 2024 Model
- Updated Stepping Up the Game How to Tweak Audio Levels in Audacity
- 2024 Approved Elevate Your Podcasts Production Value with These Top 10 Editing Applications (Free/Paid)
- New Step-by-Step Guide Swapping Out the Soundtrack in Your Movie File
- New 2024 Approved Pioneering the Silent Echo Techniques and Tools for Gradual Audio Fading Released
- New In 2024, MP3 Optimization 101 Top Editing Practices for Sound Quality
- New 2024 Approved Mastering Silence A Comprehensive Tutorial on Stripping Audio From iOS Videos
- Essential List of Cost-Free Audio to Transcription Tools for the Modern User for 2024
- Updated Essential Android Apps Unveiling the Top 7 Voice Restoration and Amplification Options
- New Androids Premier Voice Recorders A Ranked Selection of 10 Apps
- Updated 2024 Approved The Ultimate List of Video Combining Tools 10 Easy Video Joiner Alternatives
- Whats Rigging Animation and Why It Matters
- In 2024, AddROM Bypass An Android Tool to Unlock FRP Lock Screen For your Samsung Galaxy A05
- New 2024 Approved Mastering Motion Blur A Step-by-Step FCP Tutorial
- How To Change Your Apple ID on Apple iPhone 12 Pro Max With or Without Password | Dr.fone
- How to Transfer Photos from Tecno Spark Go (2023) to New Android? | Dr.fone
- 2024 Approved Translate Any Hindi Video Into English With AI
- In 2024, How to Change Location on TikTok to See More Content On your Oppo A78 | Dr.fone
- Ways To Find Unlocking Codes For Samsung Galaxy S24 Phones
- In 2024, How to Fix when Apple Account Locked On iPhone 12?
- 3 Ways to Change Location on Facebook Marketplace for Oppo Reno 11F 5G | Dr.fone
- Unlock Apple ID without Phone Number On Apple iPhone 14
- In 2024, How to Transfer Data After Switching From Nokia G22 to Latest Samsung | Dr.fone
- In 2024, How to Track Realme GT Neo 5 Location by Number | Dr.fone
- Prank Your Friends! Easy Ways to Fake and Share Google Maps Location On Nokia G310 | Dr.fone
- In 2024, 6 Ways To Transfer Contacts From Nubia Red Magic 8S Pro+ to iPhone | Dr.fone
- New How to Fade in Text in Adobe Premiere Pro
- Want to Make a Meme GIF for 2024
- Updated Up-to-Date Guide to Social Media Aspect Ratio
- In 2024, 4 Feasible Ways to Fake Location on Facebook For your Realme V30T | Dr.fone
- In 2024, Best 3 Samsung Galaxy A14 5G Emulator for Mac to Run Your Wanted Android Apps | Dr.fone
- In 2024, List of Supported iPhone Video Formats and Best iPhone Video Editor
- In 2024, Why does the pokemon go battle league not available On Nokia C32 | Dr.fone
- Here are Some of the Best Pokemon Discord Servers to Join On Oppo F23 5G | Dr.fone
- In 2024, How to Access Your iPhone 14 Pro Max When You Forget the Passcode?
- In 2024, No-Cost Dailymotion Video Downloader and Converter
- The Ultimate Guide How to Bypass Swipe Screen to Unlock on Oppo Find N3 Device
- How To Stream Anything From Xiaomi 13T Pro to Apple TV | Dr.fone
- 10 Free Location Spoofers to Fake GPS Location on your Realme Narzo N55 | Dr.fone
- Pattern Locks Are Unsafe Secure Your Samsung Galaxy S23 Phone Now with These Tips
- How to Change Spotify Location After Moving to Another Country On Oppo Reno 8T | Dr.fone
- In 2024, The Complete Guide to Infinix Hot 30 5G FRP Bypass Everything You Need to Know
- This is how you can recover deleted pictures from Itel A60.
- Read This Guide to Find a Reliable Alternative to Fake GPS On Realme C67 4G | Dr.fone
- How to use Pokemon Go Joystick on Samsung Galaxy A25 5G? | Dr.fone
- New The Art of Speech-to-Text Conversion Tips and Tools for 2024
- Title: Advanced Audio Manipulation in Adobe Premiere Pro (Windows Platform) for 2024
- Author: Kate
- Created at : 2024-05-20 02:42:19
- Updated at : 2024-05-21 02:42:19
- Link: https://audio-editing.techidaily.com/advanced-audio-manipulation-in-adobe-premiere-pro-windows-platform-for-2024/
- License: This work is licensed under CC BY-NC-SA 4.0.
