
:max_bytes(150000):strip_icc():format(webp)/Nightbooks-93aa15da6f37406fa34e8c155b1067b3.jpg)
2024 Approved The Art of Auditory Alignment Fusing Audio to Video in Adobe Premiere Pro
The Art of Auditory Alignment: Fusing Audio to Video in Adobe Premiere Pro
Versatile Video Editor - Wondershare Filmora
An easy yet powerful editor
Numerous effects to choose from
Detailed tutorials provided by the official channel
Look at any of the spot commercials, wedding videos, or even some family candid videos. Adding audio makes them appealing and likable. To catch a potential customer or create an emotional connection with the viewer combination of audio and video is a must. This makes the footage attractive and exceptional.
Read on to know more about the step-by-step approach how to add audio to video in Adobe Premiere Pro.
In this article
01 [How to add audio to video in Premiere Pro](#Part 1)
02 [How to adjust audio in Premiere Pro](#Part 2)
03 [Adding Audio to Video files](#Part 3)
Part 1 How to add audio to video in Premiere Pro
Some essential pointers for all would-be videographers are:
● Before you add audio to video in Premiere Pro, be ready to see your file size increase to a large extent. If you add a background score of 15MB, your total video file size will increase by the same amount of 15MB. The best way to take care of such a problem is to use additional compression techniques to get a suitable file size.
● Most videographers use lots of software tools to add audio to video professionally. One such trending software tool is the Adobe Premiere Pro. Its simple to add audio to video in Premiere Pro, edit your audio and video, and fine-tune the audio volume of each video project.
Let’s learn how.

Step1 Find out the Audio option
Navigate to the Audio workspace, select Audio at the top on the tools bar
Step2 Choose the Workspace
Click Window select Workspace click on Audio
Step3 Check toolbar
Within Audio, click on Choose Window Media Browser to show the Media Browser toolbar.
Step4 Select audio files
Go to your audio file; for Windows OS, right-click or control-click the selected audio file for macOS.
Step5 Import and add
Please select the desired audio file, then click import to add it to your Project.
An important tip is to keep the Ingest box selected if you want to copy your audio file concurrently to your project folder.
Adding audio to your series

Step1 Go to the Project panel
Select Window, click on Project to open the Project panel.
Step2 Select audio file
Click on the audio file you imported to select it.
Step3 Check the waveform
Double click the file to open it in the Source panel to check the sound and waveform.
Step4 Check sounds
Play the audio file if you want to check the audio quality, volume, and overall sound.
Step5 Add audio to the video track
Hold the left click on your mouse to drag the audio file to the series in the Timeline panel. You can add any audio file to the video track listed in the panel window in this step.
Step6 Trim audio file
Select the Trim option to trim your audio file the same way you will edit the video file in the final step.
Part 2 How to adjust audio in Premiere Pro
Now that you have understood how to add audio to video in Adobe Premier Pro. Let’s know how to adjust audio in Premier Pro.

Step1 Activate the series
Press on the spacebar to activate your series in the Program panel (appears in the top right of the panel)
Step2 Stop playback
To stop the playback, press the space bar again.
Step3 Choose starting point of playback
Press down the left mouse button to hold and drag the Blue colored play head to wherever you desire the playback to start.
If you feel the audio track is mild or too harsh compared to the rest of the audio series, change each audio track’s volume separately.
Step1 Select Audio Track Mixer
Click Window selects Audio Track Mixer from the menu.
Step2 Click the series name to see the audio mixer
Click the series name of your audio file to show the audio mixer for your series.
Step3 Choose playback to play the audio
At the bottom of the panel is the Audio Track Mixer. Click on playback to star, pause or play your audio in-ring sequence.
Step4 Click on the slider
When your audio file plays or loops, click on the slider to move up or down. It will increase or reduce the volume of each separate audio track in your audio series.
Step5 Adjust the volume
Use the slider to adjust the overall audio volume
Tips
Always keep the audio projects within the -6 to 3 dB volume range to get the best quality of the audio effect. Any lower you won’t be able to hear the sound, or if it’s higher, the sound will hurt the listeners’ ears.
Professional advice to all beginner-level videographers is that as Premiere Pro is complex so you need more straightforward tools like Filmora for all your video editing work. Filmora is easy to use and much cheaper than Premiere Pro.
You may think now why or how Filmora can be the best as an alternative on how to add audio to video using Premiere Pro. Well! It will help you to transform your video into a piece of art incredibly by offering simple drag and drop options, including an easy-to-use interface and powerful editing tools. You can:
● Edit and create your videos with minimal effort
● Get a Music Library to add comedy, fear, tension, and love to every scene
● Get several royalty-free songs and sound effects
● Create videos with up to 800 stunning effects
● Unleash your creativity with its offered Hollywood effects
● Import and export in almost any type of video format
How to use Filmora to add audio to video
Adding sound to any video file enhances its viewability and the whole experience of watching any video. To do this, you need to add audio to video. The same can be done quickly in Filmora, a 3rd-party video editing software tool now the hot favorite of amateur and professional video editors. Below we describe how to add audio to video in Filmora.
Import Media
To start the process of adding audio to video follow these steps.
Step1 Select the audio, add using the Import option or drag and select
Import selected audio using the Filmora Media Panel and add it to your timeline. You can also choose and drag the audio file from the source folder to the Media Panel. Filmora supports multiple audio file formats to ease adding audio to video. The supported audio files are MP3, M4V, MPA, WAV, WMA.

Step2 Add and make the audio file
Adding the audio file to Filmora Media Panel makes it a media asset and can now be used multiple times in future projects. The original file remains as Filmora doesn’t change the original audio file.
Step3 Copying or deleting an audio file
In Filmora, using the feature of copying or deleting an audio file, you can work on the audio and video from any computer or remote PC.
Part 3 Adding Audio to Video files
Using Filmora, it is easy to sync or add audio to the video, which is separately recorded and stored on your device.
Using Filmora, it is easy to sync or add audio to the video, which is separately recorded and stored on your device.
Step1 Click on Import in the Media Panel
Select the audio and video files to import them into Filmora.
Step2 Click on the video file to add audio
Press the Ctrl key (Windows) or Cmd key (Mac OS) and click on the audio file.
Step3 Add audio to video
Right-click on the files selected and choose the Merge audio & video option to add audio to the video.
Filmora analyzes audio and video files and replaces the existing audio with the newly selected audio file. Once the synchronization process is over, the new merged file will be available in the Media Panel for future processing.
The synchronized file will have the same terminology as the original video file with a difference. It will get an extension Merged to its name.
The original file will not get affected in Filmora. This software tool only references the files to generate a new file. The new file created when you add audio to the video can now be added to the timeline and exported.
Wondershare Filmora
Get started easily with Filmora’s powerful performance, intuitive interface, and countless effects!
Try It Free Try It Free Try It Free Learn More about Filmora>

Conclusion
So, this article listed how to add audio to video in Premiere Pro via a step-by-step guide. The guide lets you know the easy method of adding audio to video in Adobe Premiere Pro to all potential videographers. Thus, you can now start your journey of video edition by putting your best click forward!
Look at any of the spot commercials, wedding videos, or even some family candid videos. Adding audio makes them appealing and likable. To catch a potential customer or create an emotional connection with the viewer combination of audio and video is a must. This makes the footage attractive and exceptional.
Read on to know more about the step-by-step approach how to add audio to video in Adobe Premiere Pro.
In this article
01 [How to add audio to video in Premiere Pro](#Part 1)
02 [How to adjust audio in Premiere Pro](#Part 2)
03 [Adding Audio to Video files](#Part 3)
Part 1 How to add audio to video in Premiere Pro
Some essential pointers for all would-be videographers are:
● Before you add audio to video in Premiere Pro, be ready to see your file size increase to a large extent. If you add a background score of 15MB, your total video file size will increase by the same amount of 15MB. The best way to take care of such a problem is to use additional compression techniques to get a suitable file size.
● Most videographers use lots of software tools to add audio to video professionally. One such trending software tool is the Adobe Premiere Pro. Its simple to add audio to video in Premiere Pro, edit your audio and video, and fine-tune the audio volume of each video project.
Let’s learn how.
Step1 Find out the Audio option
Navigate to the Audio workspace, select Audio at the top on the tools bar
Step2 Choose the Workspace
Click Window select Workspace click on Audio
Step3 Check toolbar
Within Audio, click on Choose Window Media Browser to show the Media Browser toolbar.
Step4 Select audio files
Go to your audio file; for Windows OS, right-click or control-click the selected audio file for macOS.
Step5 Import and add
Please select the desired audio file, then click import to add it to your Project.
An important tip is to keep the Ingest box selected if you want to copy your audio file concurrently to your project folder.
Adding audio to your series
Step1 Go to the Project panel
Select Window, click on Project to open the Project panel.
Step2 Select audio file
Click on the audio file you imported to select it.
Step3 Check the waveform
Double click the file to open it in the Source panel to check the sound and waveform.
Step4 Check sounds
Play the audio file if you want to check the audio quality, volume, and overall sound.
Step5 Add audio to the video track
Hold the left click on your mouse to drag the audio file to the series in the Timeline panel. You can add any audio file to the video track listed in the panel window in this step.
Step6 Trim audio file
Select the Trim option to trim your audio file the same way you will edit the video file in the final step.
Part 2 How to adjust audio in Premiere Pro
Now that you have understood how to add audio to video in Adobe Premier Pro. Let’s know how to adjust audio in Premier Pro.
Step1 Activate the series
Press on the spacebar to activate your series in the Program panel (appears in the top right of the panel)
Step2 Stop playback
To stop the playback, press the space bar again.
Step3 Choose starting point of playback
Press down the left mouse button to hold and drag the Blue colored play head to wherever you desire the playback to start.
If you feel the audio track is mild or too harsh compared to the rest of the audio series, change each audio track’s volume separately.
Step1 Select Audio Track Mixer
Click Window selects Audio Track Mixer from the menu.
Step2 Click the series name to see the audio mixer
Click the series name of your audio file to show the audio mixer for your series.
Step3 Choose playback to play the audio
At the bottom of the panel is the Audio Track Mixer. Click on playback to star, pause or play your audio in-ring sequence.
Step4 Click on the slider
When your audio file plays or loops, click on the slider to move up or down. It will increase or reduce the volume of each separate audio track in your audio series.
Step5 Adjust the volume
Use the slider to adjust the overall audio volume
Tips
Always keep the audio projects within the -6 to 3 dB volume range to get the best quality of the audio effect. Any lower you won’t be able to hear the sound, or if it’s higher, the sound will hurt the listeners’ ears.
Professional advice to all beginner-level videographers is that as Premiere Pro is complex so you need more straightforward tools like Filmora for all your video editing work. Filmora is easy to use and much cheaper than Premiere Pro.
You may think now why or how Filmora can be the best as an alternative on how to add audio to video using Premiere Pro. Well! It will help you to transform your video into a piece of art incredibly by offering simple drag and drop options, including an easy-to-use interface and powerful editing tools. You can:
● Edit and create your videos with minimal effort
● Get a Music Library to add comedy, fear, tension, and love to every scene
● Get several royalty-free songs and sound effects
● Create videos with up to 800 stunning effects
● Unleash your creativity with its offered Hollywood effects
● Import and export in almost any type of video format
How to use Filmora to add audio to video
Adding sound to any video file enhances its viewability and the whole experience of watching any video. To do this, you need to add audio to video. The same can be done quickly in Filmora, a 3rd-party video editing software tool now the hot favorite of amateur and professional video editors. Below we describe how to add audio to video in Filmora.
Import Media
To start the process of adding audio to video follow these steps.
Step1 Select the audio, add using the Import option or drag and select
Import selected audio using the Filmora Media Panel and add it to your timeline. You can also choose and drag the audio file from the source folder to the Media Panel. Filmora supports multiple audio file formats to ease adding audio to video. The supported audio files are MP3, M4V, MPA, WAV, WMA.
Step2 Add and make the audio file
Adding the audio file to Filmora Media Panel makes it a media asset and can now be used multiple times in future projects. The original file remains as Filmora doesn’t change the original audio file.
Step3 Copying or deleting an audio file
In Filmora, using the feature of copying or deleting an audio file, you can work on the audio and video from any computer or remote PC.
Part 3 Adding Audio to Video files
Using Filmora, it is easy to sync or add audio to the video, which is separately recorded and stored on your device.
Using Filmora, it is easy to sync or add audio to the video, which is separately recorded and stored on your device.
Step1 Click on Import in the Media Panel
Select the audio and video files to import them into Filmora.
Step2 Click on the video file to add audio
Press the Ctrl key (Windows) or Cmd key (Mac OS) and click on the audio file.
Step3 Add audio to video
Right-click on the files selected and choose the Merge audio & video option to add audio to the video.
Filmora analyzes audio and video files and replaces the existing audio with the newly selected audio file. Once the synchronization process is over, the new merged file will be available in the Media Panel for future processing.
The synchronized file will have the same terminology as the original video file with a difference. It will get an extension Merged to its name.
The original file will not get affected in Filmora. This software tool only references the files to generate a new file. The new file created when you add audio to the video can now be added to the timeline and exported.
Wondershare Filmora
Get started easily with Filmora’s powerful performance, intuitive interface, and countless effects!
Try It Free Try It Free Try It Free Learn More about Filmora>
Conclusion
So, this article listed how to add audio to video in Premiere Pro via a step-by-step guide. The guide lets you know the easy method of adding audio to video in Adobe Premiere Pro to all potential videographers. Thus, you can now start your journey of video edition by putting your best click forward!
“Voice-Tracking Vaults: Discover the Top 10 Free Sound Resource Pages of Today”
FREE Top 10 Best Websites to Download Sound Clips for Videos

Liza Brown
Mar 27, 2024• Proven solutions


Are you working on animation , video, game, music, or maybe some other media file? Sound is a vital factor for all. It is the effect of the sound that can make or break a project.
But it can be difficult to find perfect and quality free sound clips. There are thousands of software for creating excellent videos, adding sounds , titles, overlays, tracks, and more. But what if you don’t wish to create a piece for just jazzing up your already existing video?
Free sound clips are great resources to download for videos if you don’t want to create sound effects.
Many people want to know the source of high-quality free audio for videos. These free sound samples are easy to find on the Internet.
In this article, you will get to know the 10 best websites to download free sound clips.
10 Best Free Sound Samples to Use
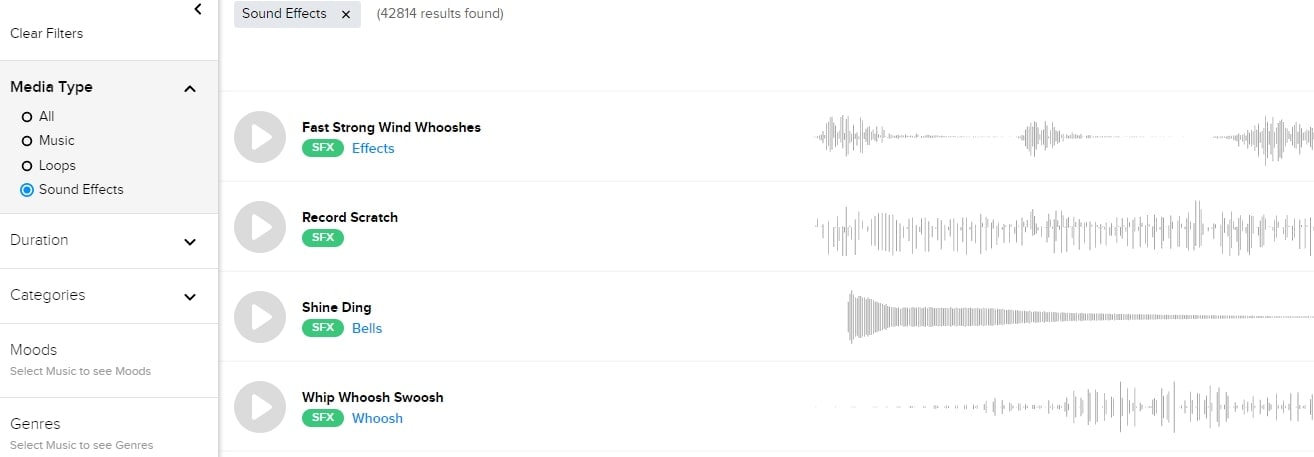
1. Freesound
Licensed under the Creative Commons License , the Freesound comprises of a large sound database. You can choose from the huge collection of sounds and decide which one is free and which sound needs attribution.
You can ensure if the sound can be used in commercial products or not. If you are not a professional and just need free sound samples for personal use, you may use free sound download from any site. The features of Freesound include-
- You can search for sounds or browse by tags or geotags
- The pack feature helps you to find a bunch of similar sounds very easily
- Preview the sound without logging in
- For downloading the sound, you need to log in
- Add your audio samples to contribute to the database
- You get 5 free sound clips download
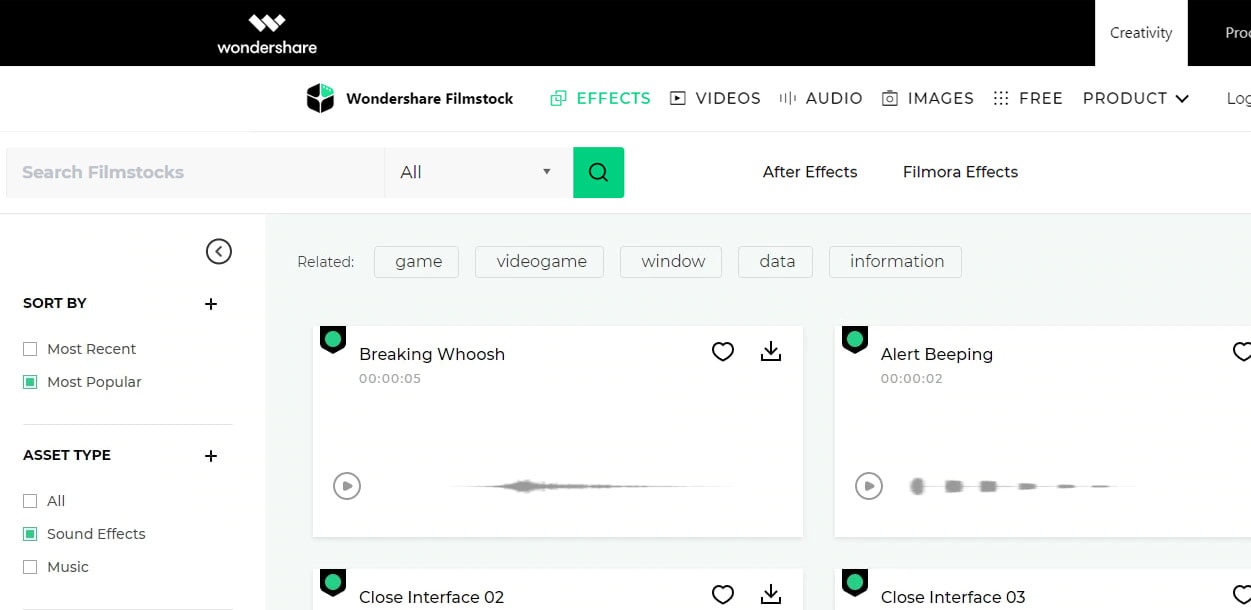
2. Filmstock
Filmstock from the house of Wondershare is one of the greatest libraries for free sound clips.
Any budget filmmaker would love to have this invaluable resource not just for free audio clips for videos but also for royalty-free sound clips.
You can bring your cinematic video to life from the Filmstock free-stuff one-stop-shop. The features of Filmstock include-
- Royalty-free video effects, audio, and stock media
- There are genres like science fiction, sci-fi, ufo, technology games
- Huge selection of curated quality stock images
- Filmstock library is continuously updated
- No attribution required for any project on Filmstock
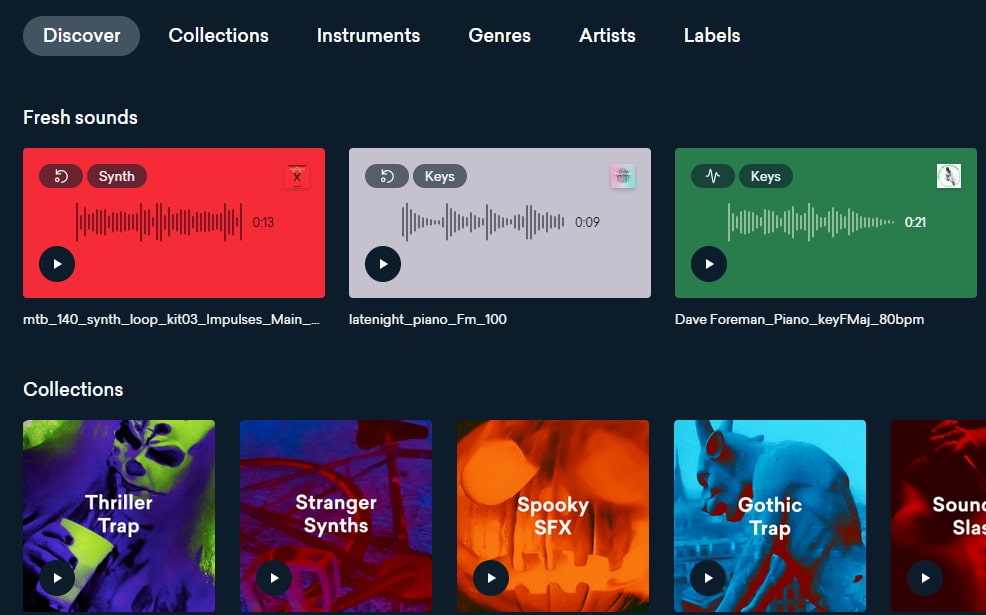
3. Landr
With a simple interface, Landr offers the best loops, packs, and samples to you. Make use of powerful Artificial Intelligence (AI) and you can spend lesser time searching and browsing. The features of Landr includes-
- You can browse free sound clips from the various collection of instruments
- Quickly find the right sound from the millions of free sound samples
- Get access to Selector tool powered by AI to make your browsing session faster
- Nourish your ideas with the curated collection and smart browsing
- The filter sounds by instrument, mood, BPM or key
- Go pro with your sampling
- Royalty-free sounds from today’s best artists, producers, and labels
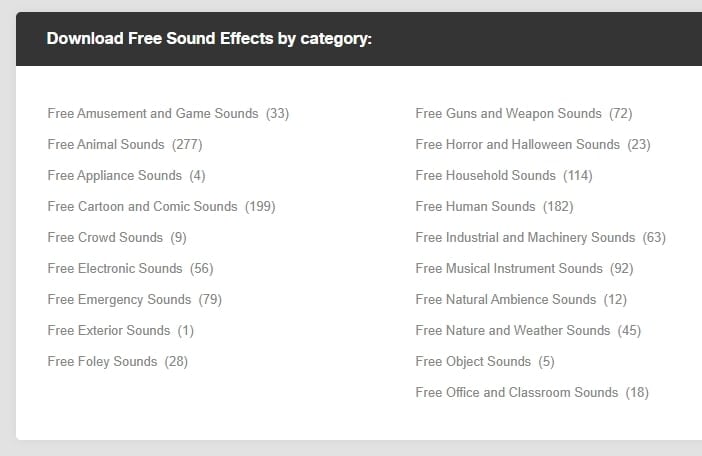
4. Audio Micro
Audio Micro is one of the best tools for downloading horror-based free sound clips. Once you register with Audio Micro, you can easily download free audio clips for videos.
For downloading sound for commercial uses like TV or mass reproduction, you must be a paid subscriber. The features of Audio Micro are-
- Get access to the collection of royalty-free music and 2000 free good quality sound effects
- High-quality audio content for commercial use, available at competitive prices without any hidden cost
- Research, locate, purchase, and download stock audio
- Easy and fast search option with free sound collection visible from the navigation bar on the homepage
5. Audio Blocks
It is an intuitive platform to download loops, sound effects, and music. It has a low-cost subscription model and the content is constantly updated based on the search results. The features of Audio Blocks are-
- Unlimited royalty-free audio
- Loop, sound effects, and music download
- Low-cost subscription offers more content at a nominal price
- There are flexible plans for every budget
- Use content multiple times for commercial and personal projects
6. Free Stock Music
Whether YouTube project or your personal Vlog, Free Stock Music offers royalty-free music for a range of media platforms.
For any non-copyrighted sound clips free download, always feel free to reach Free Stock Music. The features are-
- Free access to non-copyrighted music
- Just put the attribution in credits to use the sound clips
- Unlimited royalty-free music in all moods, lengths, tempos, and categories
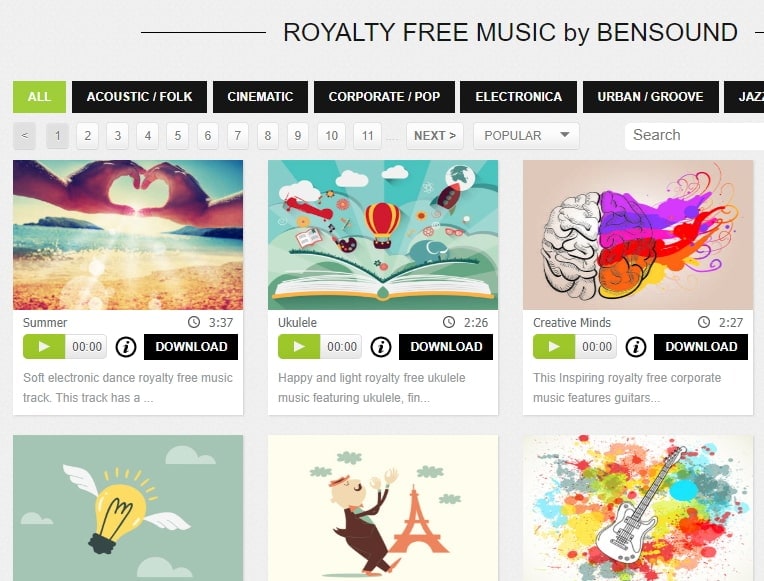
7. Bensound
Available under the Creative Common License, Bensound is used for multimedia projects like web applications or videos.
You can use the free tracks available with Bensound stock music in the various website background score, animations, web adverts, slideshows, etc. The features of Bensound include-
- Royalty-free stock music in various genres like electronica, urban, cinematic, jazz, rock, etc.
- Download free sound clips from the huge collection and add attributions in credits
- If you don’t wish to give credits and use the high-quality premium tracks, get the Bensound Pro License
8. Sounds Crate
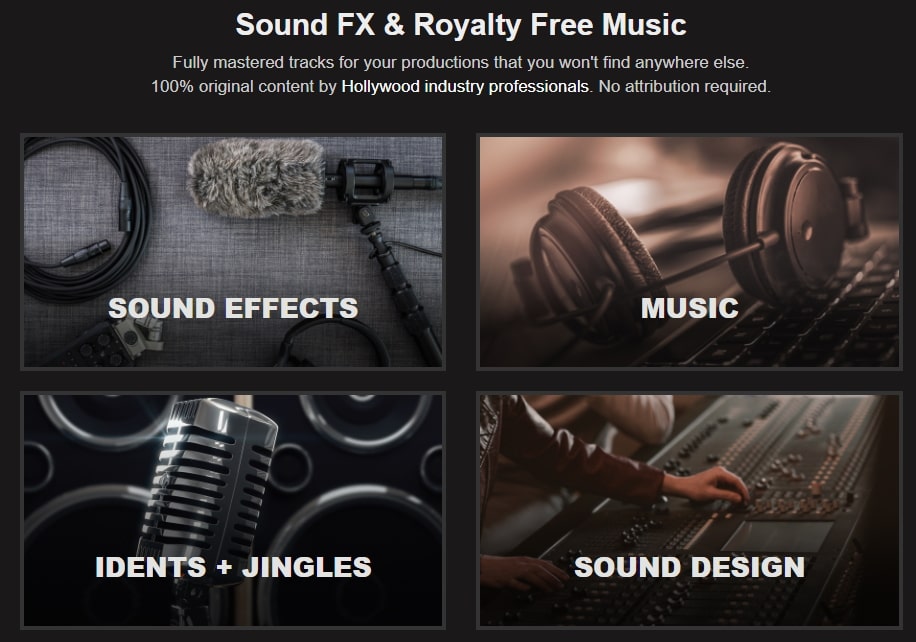
Are you looking for the best soundtrack for your video? Sounds Crate offers some of the best royalty-free music and sound FX.
With the tracks completely mastered for your production, Sound Crate offers 100% quality content created by industry professionals from Hollywood. The Sound Crate features include-
- Sound FX for electricity, gun, explosion, weapons, sci-fi, vehicles, movements, etc.
- Royalty-free music in diverse genres
- You can also use idents for corporate, news jingles, holiday idents, etc.
- Download and use the royalty-free sound clips easily
- Over 10000 plus HD assets
- No attribution required
- Browse from unlimited music, sound effects, etc.
9. ZapSlat
Do your audio and video editing projects need some cool soundtracks to jazz it up? Look no further. ZapSlat is one of the best free sound download sites to make your project successful. The features of ZapSlat are-
- Comprises over 54,000 professional free sound effects and royalty-free music files
- Variety of free sound effect packs
- Download royalty-free music from a variety of genres
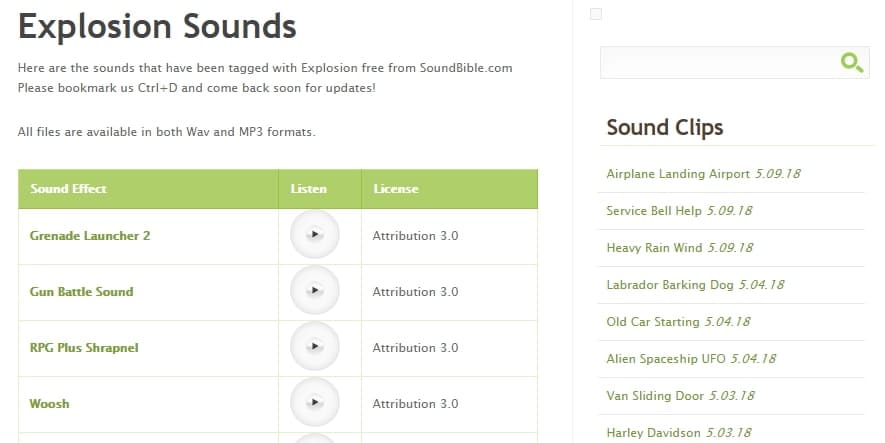
10. Sound Bible
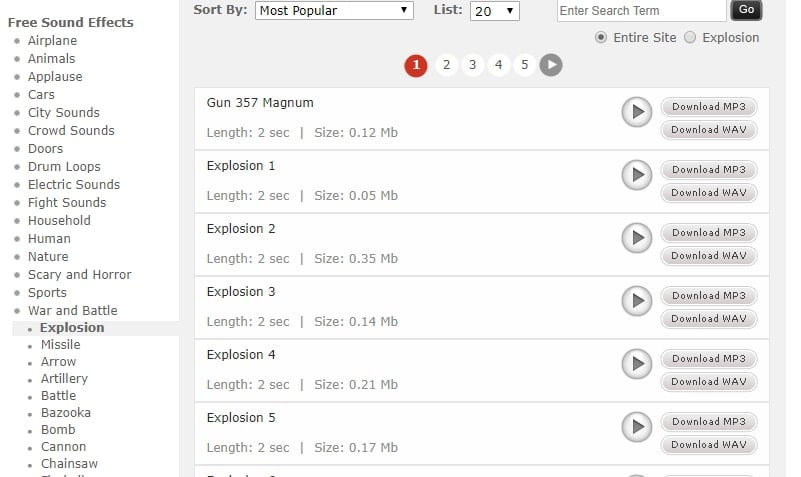
Choose the best from 2000 free sound clips licensed under Creative Commons. To use the sound effect for commercial video, you can select from the royalty-free sounds. The features of SoundBible are-
- Download free sound clips without logging in or creating an account
- 2000 free sounds
- Copyright-free sound resources are weekly updated
Conclusion
Now that you know the best 10 free sound clip download sites, make use of it in your videos. Without worrying about the expense, you can use these sites to download free sound clips.
Liza Brown
Liza Brown is a writer and a lover of all things video.
Follow @Liza Brown
Liza Brown
Mar 27, 2024• Proven solutions
Are you working on animation , video, game, music, or maybe some other media file? Sound is a vital factor for all. It is the effect of the sound that can make or break a project.
But it can be difficult to find perfect and quality free sound clips. There are thousands of software for creating excellent videos, adding sounds , titles, overlays, tracks, and more. But what if you don’t wish to create a piece for just jazzing up your already existing video?
Free sound clips are great resources to download for videos if you don’t want to create sound effects.
Many people want to know the source of high-quality free audio for videos. These free sound samples are easy to find on the Internet.
In this article, you will get to know the 10 best websites to download free sound clips.
10 Best Free Sound Samples to Use
1. Freesound
Licensed under the Creative Commons License , the Freesound comprises of a large sound database. You can choose from the huge collection of sounds and decide which one is free and which sound needs attribution.
You can ensure if the sound can be used in commercial products or not. If you are not a professional and just need free sound samples for personal use, you may use free sound download from any site. The features of Freesound include-
- You can search for sounds or browse by tags or geotags
- The pack feature helps you to find a bunch of similar sounds very easily
- Preview the sound without logging in
- For downloading the sound, you need to log in
- Add your audio samples to contribute to the database
- You get 5 free sound clips download
2. Filmstock
Filmstock from the house of Wondershare is one of the greatest libraries for free sound clips.
Any budget filmmaker would love to have this invaluable resource not just for free audio clips for videos but also for royalty-free sound clips.
You can bring your cinematic video to life from the Filmstock free-stuff one-stop-shop. The features of Filmstock include-
- Royalty-free video effects, audio, and stock media
- There are genres like science fiction, sci-fi, ufo, technology games
- Huge selection of curated quality stock images
- Filmstock library is continuously updated
- No attribution required for any project on Filmstock
3. Landr
With a simple interface, Landr offers the best loops, packs, and samples to you. Make use of powerful Artificial Intelligence (AI) and you can spend lesser time searching and browsing. The features of Landr includes-
- You can browse free sound clips from the various collection of instruments
- Quickly find the right sound from the millions of free sound samples
- Get access to Selector tool powered by AI to make your browsing session faster
- Nourish your ideas with the curated collection and smart browsing
- The filter sounds by instrument, mood, BPM or key
- Go pro with your sampling
- Royalty-free sounds from today’s best artists, producers, and labels
4. Audio Micro
Audio Micro is one of the best tools for downloading horror-based free sound clips. Once you register with Audio Micro, you can easily download free audio clips for videos.
For downloading sound for commercial uses like TV or mass reproduction, you must be a paid subscriber. The features of Audio Micro are-
- Get access to the collection of royalty-free music and 2000 free good quality sound effects
- High-quality audio content for commercial use, available at competitive prices without any hidden cost
- Research, locate, purchase, and download stock audio
- Easy and fast search option with free sound collection visible from the navigation bar on the homepage
5. Audio Blocks
It is an intuitive platform to download loops, sound effects, and music. It has a low-cost subscription model and the content is constantly updated based on the search results. The features of Audio Blocks are-
- Unlimited royalty-free audio
- Loop, sound effects, and music download
- Low-cost subscription offers more content at a nominal price
- There are flexible plans for every budget
- Use content multiple times for commercial and personal projects
6. Free Stock Music
Whether YouTube project or your personal Vlog, Free Stock Music offers royalty-free music for a range of media platforms.
For any non-copyrighted sound clips free download, always feel free to reach Free Stock Music. The features are-
- Free access to non-copyrighted music
- Just put the attribution in credits to use the sound clips
- Unlimited royalty-free music in all moods, lengths, tempos, and categories
7. Bensound
Available under the Creative Common License, Bensound is used for multimedia projects like web applications or videos.
You can use the free tracks available with Bensound stock music in the various website background score, animations, web adverts, slideshows, etc. The features of Bensound include-
- Royalty-free stock music in various genres like electronica, urban, cinematic, jazz, rock, etc.
- Download free sound clips from the huge collection and add attributions in credits
- If you don’t wish to give credits and use the high-quality premium tracks, get the Bensound Pro License
8. Sounds Crate
Are you looking for the best soundtrack for your video? Sounds Crate offers some of the best royalty-free music and sound FX.
With the tracks completely mastered for your production, Sound Crate offers 100% quality content created by industry professionals from Hollywood. The Sound Crate features include-
- Sound FX for electricity, gun, explosion, weapons, sci-fi, vehicles, movements, etc.
- Royalty-free music in diverse genres
- You can also use idents for corporate, news jingles, holiday idents, etc.
- Download and use the royalty-free sound clips easily
- Over 10000 plus HD assets
- No attribution required
- Browse from unlimited music, sound effects, etc.
9. ZapSlat
Do your audio and video editing projects need some cool soundtracks to jazz it up? Look no further. ZapSlat is one of the best free sound download sites to make your project successful. The features of ZapSlat are-
- Comprises over 54,000 professional free sound effects and royalty-free music files
- Variety of free sound effect packs
- Download royalty-free music from a variety of genres
10. Sound Bible
Choose the best from 2000 free sound clips licensed under Creative Commons. To use the sound effect for commercial video, you can select from the royalty-free sounds. The features of SoundBible are-
- Download free sound clips without logging in or creating an account
- 2000 free sounds
- Copyright-free sound resources are weekly updated
Conclusion
Now that you know the best 10 free sound clip download sites, make use of it in your videos. Without worrying about the expense, you can use these sites to download free sound clips.
Liza Brown
Liza Brown is a writer and a lover of all things video.
Follow @Liza Brown
Your Guide to Android’s Favorite Voice Modification Applications
Voice Editors are used to modify and manipulate your voices. With such applications, you can play with the speed, pitch, length, etc., of the voices and change them to an unrecognizable level. If you are looking for good voice editing apps, we might have something for you.
The article understudy will share 7 great voice editors for Android users. If you are excited to learn about these apps, then let’s begin!
Part 1. 7 Best Voice Editing Apps for Android Users
If you wish to change your voice and modify it so that you can sound different, try some good voice editing apps. If you don’t know much about voice editors, let’s help you out. We are about to introduce the 7 best voice editing apps along with their key features; let’s start!
1. AndroSound Audio Editor
Overall Rating: 4.3/5
Do you know, AndroSound Audio Editor is a great option for editing your voice on your phone with a handy interface. This Android application lets you trim the voice, add cool voice effects to it, and also produce ringtones. Not just this, users can record voice on the app and make ringtones from it. With AndroSound Audio Editor, you can also sort the audio files by date, duration, title, artist, etc.

Key Features
- This voice editing application allows users to extract sound from video files. Moreover, adjusting the volume of the audio is also offered.
- With AndroSound audio editor, you can add Fade in and Fade Out effects. Also, you can add Echo to your voice.
- This voice editing app lets the user export files in different formats, for instance, MP3, WAV, and FLAC formats.
2. Audio Evolution Mobile
Overall Rating: 4.2/5
Audio Evolution Mobile is the coolest application when we talk about voice editors. This is because the app offers drum pattern editors that include triplets. With this voice editor, you can add real-time effects like reverb, compressor, chorus, delays, and much more. Another amazing thing you can get from this editing app, it features parallel effects on a grid.

Key Features
- This voice editing app allows an unlimited number of tracks and groups. Along with that, features like Normalize, Audio Split, time-stretch, etc., are also offered.
- The projects created with this Android version are interchangeable with the iOS version. Audio Evolution Mobile also offers cloud sync with Google Drive.
- This editing app supports the following audio formats: MP3, WAV, FLAC, AIFF, MIDI, and also OGG.
3. Music Editor
Overall Rating: 4.4/5
Should we talk about the next voice editing app? Its Music Editor. The all-in-one kind of Android app that offers tools like MP3 Cutter, Ringtone Maker, Voice Editor, Song Editor, and whatnot. Do you know what a volume booster is? Music Editor offers a volume booster feature where you can change and adjust the volume level of your voice while editing it.

Key Features
- Music Editor, the voice editing app, lets the user remove a certain part from the audio file that they want by using the Remove Part feature.
- If you wish to connect multiple files of your voice, try the Merge Audio feature. Moreover, the Trim feature could be used to trim the files.
- What voice editor can compress the audio? Music Editor can change the sample rate, bit rate, and also channel to compress the voice file.
4. Voice PRO – HQ Audio Editor
Overall Rating: 3.7/5
Voice PRO – HQ Audio Editor promises to deliver high-quality recordings along with many interesting editing features. This voice editor allows the users to modify their voices and share on platforms like Facebook, VoicePro Cloud, Twitter. Do you know that the voice editing app can convert your recordings to text? It supports more than 40 languages.

Key Features
- This voice editor allows you to record your voice. It supports different file formats, including WAV, MP3, OGG, FLAC, etc.
- Voice PRO – HQ Audio Editor application supports both internal and external players to operate playback.
- With this voice editor, you can merge and mix any records, regardless of the file format. The app also offers an Auto Gain feature to reduce noises during recording.
5. MixPad Multitrack Mixer
Overall Rating: 4.4/5
MixPad Multitrack Mixer is an Android application widely used as a voice recorder and also as a mixing studio. This voice editor offers some great tools, useful for modifying voices. It is used by both novice and also professionals because of its powerful mixing equipment. MixPad Multitrack Mixer supports sample rates ranging from 6 kHz to 96 kHz.

Key Features
- With MixPad Multitrack Mixer, you can mix an unlimited number of music files, voices, and also audio tracks.
- This voice editing app offers great features like trimming, cutting, splitting and even copying tracks that have been made easy with the app.
- Do you know about the sound library MixPad has? This application has a royalty-free sound effect and music library, loaded with cool effects.
6. WaveEditor for Android – Audio Editor & Recorder
Overall Rating: 4.0/5
Do you know about any voice editor that offers visual tools? Well, the WaveEditor application does support visual tools like spectrogram, oscilloscope, etc. This application is a professional tool for editing, recording, and mastering your voices. It extends support to different file formats for media playback. WaveEditor for Android app also offers a Recorder Widget.

Key Features
- This voice editor supports a long list of file formats that include AIF, 3GP, FLAC, MP3, MP4, OGG, WAV, and many others.
- This voice editing app offers features like zooming, panning, selection functions, etc. Moreover, the application allows single sample editing.
- WaveEditor for Android also provides features like an Amplitude Meter, Auto Pitch Tune Effect, Reverse, Invert, Fade, etc.
7. Mstudio
Another easy-to-use and easy-to-understand voice editing app is Mstudio. Do you have any idea what the app can do? It can cut, mix, record, merge, extract and even convert files. This application is great for creating a remix, ringtones, and also mashups.

Key Features
- The Converter feature of the voice editor supports various file formats, for instance, MP3, WAV, M4A, and many others.
- With Mstudio, you can easily change the speed of the voice from the Change Tempo option. It also lets you change the pitch etc.
- This voice editing app offers an Audio Split feature where you can break the audio file into small chunks. It also has features like Audio Recorder, Audio Omitter, etc.
Bottom Line
Voice Editors are used widely across the globe both by professionals and newbies. The only factor that makes some difference in the quality of the voice is the voice editor that you have used. For this reason, we have discussed the 7 best voice editing apps.
Do you have a pending video to edit? If yes, then try Wondershare Filmora Video Editor . The video editor offers a wide range of features, video effects, transitions, and a lot more than this to create a stunning video. What do you prefer more, Motion Tracking or Key Framing? Just a fun fact, Filmora offers both features and much more than this.
You get a long list of Basic as well as Advanced features. Filmora also offers sound effects, editing elements, titles, etc.
For Win 7 or later (64-bit)
For macOS 10.12 or later
Overall Rating: 4.2/5
Audio Evolution Mobile is the coolest application when we talk about voice editors. This is because the app offers drum pattern editors that include triplets. With this voice editor, you can add real-time effects like reverb, compressor, chorus, delays, and much more. Another amazing thing you can get from this editing app, it features parallel effects on a grid.
Key Features
- This voice editing app allows an unlimited number of tracks and groups. Along with that, features like Normalize, Audio Split, time-stretch, etc., are also offered.
- The projects created with this Android version are interchangeable with the iOS version. Audio Evolution Mobile also offers cloud sync with Google Drive.
- This editing app supports the following audio formats: MP3, WAV, FLAC, AIFF, MIDI, and also OGG.
3. Music Editor
Overall Rating: 4.4/5
Should we talk about the next voice editing app? Its Music Editor. The all-in-one kind of Android app that offers tools like MP3 Cutter, Ringtone Maker, Voice Editor, Song Editor, and whatnot. Do you know what a volume booster is? Music Editor offers a volume booster feature where you can change and adjust the volume level of your voice while editing it.
Key Features
- Music Editor, the voice editing app, lets the user remove a certain part from the audio file that they want by using the Remove Part feature.
- If you wish to connect multiple files of your voice, try the Merge Audio feature. Moreover, the Trim feature could be used to trim the files.
- What voice editor can compress the audio? Music Editor can change the sample rate, bit rate, and also channel to compress the voice file.
4. Voice PRO – HQ Audio Editor
Overall Rating: 3.7/5
Voice PRO – HQ Audio Editor promises to deliver high-quality recordings along with many interesting editing features. This voice editor allows the users to modify their voices and share on platforms like Facebook, VoicePro Cloud, Twitter. Do you know that the voice editing app can convert your recordings to text? It supports more than 40 languages.
Key Features
- This voice editor allows you to record your voice. It supports different file formats, including WAV, MP3, OGG, FLAC, etc.
- Voice PRO – HQ Audio Editor application supports both internal and external players to operate playback.
- With this voice editor, you can merge and mix any records, regardless of the file format. The app also offers an Auto Gain feature to reduce noises during recording.
5. MixPad Multitrack Mixer
Overall Rating: 4.4/5
MixPad Multitrack Mixer is an Android application widely used as a voice recorder and also as a mixing studio. This voice editor offers some great tools, useful for modifying voices. It is used by both novice and also professionals because of its powerful mixing equipment. MixPad Multitrack Mixer supports sample rates ranging from 6 kHz to 96 kHz.
Key Features
- With MixPad Multitrack Mixer, you can mix an unlimited number of music files, voices, and also audio tracks.
- This voice editing app offers great features like trimming, cutting, splitting and even copying tracks that have been made easy with the app.
- Do you know about the sound library MixPad has? This application has a royalty-free sound effect and music library, loaded with cool effects.
6. WaveEditor for Android – Audio Editor & Recorder
Overall Rating: 4.0/5
Do you know about any voice editor that offers visual tools? Well, the WaveEditor application does support visual tools like spectrogram, oscilloscope, etc. This application is a professional tool for editing, recording, and mastering your voices. It extends support to different file formats for media playback. WaveEditor for Android app also offers a Recorder Widget.
Key Features
- This voice editor supports a long list of file formats that include AIF, 3GP, FLAC, MP3, MP4, OGG, WAV, and many others.
- This voice editing app offers features like zooming, panning, selection functions, etc. Moreover, the application allows single sample editing.
- WaveEditor for Android also provides features like an Amplitude Meter, Auto Pitch Tune Effect, Reverse, Invert, Fade, etc.
7. Mstudio
Another easy-to-use and easy-to-understand voice editing app is Mstudio. Do you have any idea what the app can do? It can cut, mix, record, merge, extract and even convert files. This application is great for creating a remix, ringtones, and also mashups.
Key Features
- The Converter feature of the voice editor supports various file formats, for instance, MP3, WAV, M4A, and many others.
- With Mstudio, you can easily change the speed of the voice from the Change Tempo option. It also lets you change the pitch etc.
- This voice editing app offers an Audio Split feature where you can break the audio file into small chunks. It also has features like Audio Recorder, Audio Omitter, etc.
Bottom Line
Voice Editors are used widely across the globe both by professionals and newbies. The only factor that makes some difference in the quality of the voice is the voice editor that you have used. For this reason, we have discussed the 7 best voice editing apps.
Do you have a pending video to edit? If yes, then try Wondershare Filmora Video Editor . The video editor offers a wide range of features, video effects, transitions, and a lot more than this to create a stunning video. What do you prefer more, Motion Tracking or Key Framing? Just a fun fact, Filmora offers both features and much more than this.
You get a long list of Basic as well as Advanced features. Filmora also offers sound effects, editing elements, titles, etc.
For Win 7 or later (64-bit)
For macOS 10.12 or later
Also read:
- Updated 2024 Approved News Beats Unplugged Top 15 Background Music Selections
- 2024 Approved Innovations in Noise Suppression Applying Artificial Intelligence to Improve Sound Quality
- New 2024 Approved Audio Formats Guide How to Choose Best Audio Formats Solved
- 2024 Approved ChorusCraft The Premier Digital Voice Transformer for Singers
- New 2024 Approved Complete List of Podcast Directories
- In 2024, Becoming the Next Star How to Utilize Voice Changer Plus App for iPhones Effectively
- New Removing Background Sound From Your iPhone Recordings - Step-by-Step for 2024
- 3 Key Approaches to Efficiently Change Your Podcast Audio to MP3
- Where Can I Find Wolf Howling Sound Effect for 2024
- 2024 Approved Highest-Rated Audio-to-Text Conversion Software
- Essential Audiophile Gear Top 9 Tools to Boost Your Podcast and Broadcast Clarity for 2024
- Updated Unveiling the Rhythm Discovering Song Titles via iPhones Sound Analysis
- Updated 2024 Approved Mastering Microphone Use in Microsoft PowerPoint Windows & macOS Guide
- Updated In 2024, The Ultimate Checklist 10 High-Quality Websites Streaming Free HD Wallpaper Videos
- New Introduction to LexiEdit A Starters Guide for Novice Editors
- The Ultimate Guide Seamless MP4 Audio Extraction Techniques for 2024
- How to Track Motorola Edge 2023 by Phone Number | Dr.fone
- How To Revive Your Bricked Motorola Moto G14 in Minutes | Dr.fone
- How to Reset your Oppo A38 Lock Screen Password
- Beyond GoPro Quik Top PC Video Editing Software Options for 2024
- Wondering How to Create a Stunning Intro Video with KineMaster? Here Are the Simple Steps to Use KineMaster to Design Your Intro Video in Simple Steps
- In 2024, What is the best Pokemon for pokemon pvp ranking On Honor 90 GT? | Dr.fone
- Get Your Glitch On The Best Video Editing Apps for iOS and Android
- In 2024, Change Location on Yik Yak For your HTC U23 to Enjoy More Fun | Dr.fone
- CatchEmAll Celebrate National Pokémon Day with Virtual Location On Xiaomi Redmi Note 13 5G | Dr.fone
- How to Update Apple iPhone 15 Plus without iTunes? | Dr.fone
- How To Enable USB Debugging on a Locked Poco Phone
- In 2024, Unlocking an iCloud Locked iPad and Apple iPhone 6s
- Gmail Not Working on Itel S23 7 Common Problems & Fixes | Dr.fone
- In 2024, Fake Android Location without Rooting For Your Poco X6 Pro | Dr.fone
- In 2024, How To Stream Anything From Vivo V30 Pro to Apple TV | Dr.fone
- Updated In 2024, The Best Free Video Editing Tools for Chromebooks in Year
- Title: 2024 Approved The Art of Auditory Alignment Fusing Audio to Video in Adobe Premiere Pro
- Author: Kate
- Created at : 2024-05-05 08:16:46
- Updated at : 2024-05-06 08:16:46
- Link: https://audio-editing.techidaily.com/2024-approved-the-art-of-auditory-alignment-fusing-audio-to-video-in-adobe-premiere-pro/
- License: This work is licensed under CC BY-NC-SA 4.0.
