
:max_bytes(150000):strip_icc():format(webp)/social-media-text-588a94263df78caebc620f05.jpg)
2024 Approved Online Auditory Hygiene Methods to Purify Sound Recordings of Digital Transmission
Online Auditory Hygiene: Methods to Purify Sound Recordings of Digital Transmission
In most cases, the most typical request you’ll get from video makers is to eliminate the unpleasant noises like rumble or hum from the completed piece of video. When filming, it’s tough to get good audio since the dialogue is often muffled by ambient noise, such as the dreaded whir of an air conditioning unit or fans. When combining and filming sound effects or other design aspects for the video, background noise is often removed.
Fortunately, there are a few approaches that you can take to remove noise from audio Online. You can denoise your video or audio by adding some background music or using audio or video editing software to reduce noise. If you’re looking for a technique to get rid of background noise, this article will serve you well in your quest. Let’s get started!
In this article
01 What Is Audio Noise And Why Is It Harmful?
02 How to Remove Background Noise Online
03 Tips For Removing Background Noise From Audio BEFORE You Record
04 FAQs About Removing Audio Noise From Video Online
Part 1: What Is Audio Noise And Why Is It Harmful?
No definition exists for audio noise; however, it is often defined as background noises such as fans, people chatting, automobiles or trucks going by, buzzing from broken audio wiring, or other ambient sounds that should not be included in your film. Your viewers will be distracted from the crucial information provided by the individual speaking in your video if the audio is too noisy.
Compared to that, noisy audios tend to damage the experience you’re looking for. Consider this: if you’re listening to a voice recording of your manager at work and it’s noisy to a point, you’re unable to make sense of it, you would most probably end up missing out on crucial details.
When it comes to creating a decent video, clear audio goes a long way. But that’s not all there is to it. A clear audio track could be heard in almost all of the videos that received four or five stars for “how correctly did the film accomplish its purpose” and “how did you personally assess the video,” according to the submissions.
Part 2: How to Remove Background Noise Online
There are various ways to eliminate all the background noise from the audio. Below is a list of the best online background noise removers to help you do that.2. Veed.io
Website: https://www.veed.io/
VEED is one of the most super-simple online video editors that cleans up background interference with a single click of the mouse, making it an excellent choice for beginners. There is no need to re-record your audio. There is no need for pricey sound-blocking microphones.
You can quickly eliminate all undesirable background noise from your audio files by using VEED’s background noise remover. VEED can help you remove background noise from any audio file, including MP3, WMA, and more.
No matter what type of audio file you have - MP3, WMA, or more - and no matter what type of background noise you have - wind conditions, vehicular, static, white fan sound - VEED can assist you in wiping clean your audio in a couple of moments.
How to remove background noise from video audio with Veed online?
Step 1: Click on the Choose Audio option to upload your audio file.

Step 2: Click on the audio track to bring up the Settings menu, and then choose ‘Clean Audio.’ Background noise will be eliminated in a matter of seconds by itself.

Step 3: That’s all there is to it; you are finished. When you click on ‘Export,’ your new file will be rendered in seconds.
Pros
- Simple to use
- Offers multiple features (add background music, cut, trim, etc.)
- Three-step process
Cons
- Not too user-friendly
3. Audio Denoise
Website: https://audiodenoise.com/
The number second on our list is the Audiodenoise online noise removal tool. Similar to the first one, it’s time to use, supports multiple files, and most importantly, helps you get rid of the unwanted noise from your audio.
Other than that, the tool offers plenty of customization options, such as time soothing of noise reduction filter, model noise based on noise modulation tracking, analysis block size, etc. So, how can you get rid of the background noise? Follow the steps here!
How to remove background noise online with Audio Denoise?
Step 1: Click on the Choose File option to begin with. You can also select the video from the Demo files option.

Step 2: After uploading the file, press on the Process option to get rid of the unwanted noise from the audio.

Step 3: After the audio is done processing, click on the Download option to export your video to your PC.
Pros
- The straightforward noise reduction process
- Any file of your choice
- Plenty of options to customize audio
Cons
- Takes time to process the video
- Limited to 40MB
4. Audiotoolset
Website: https://audiotoolset.com/noise-reduction
The third one on our list is the Audio Toolset. With its help, this tool may make audio recordings with less background noise. You need to click a few times, and the audio file will be processed for you instantly.
Voice recordings may benefit from using this program, which is designed to remove undesirable noises while maintaining a high level of audio quality.
This program employs a generic noise-reduction method that should operate without any further adjustment for most recordings.
How to reduce background noise from video audio with Audio Tool Set?
Step 1: Click on the Browse Computer or Drag and Drop files to the website to begin the process.

Step 2: After your file has been uploaded, click on the Process option to reduce the noise.
Step 3: Listen to the audio carefully and click on the Download option to export the file to your PC.
Pros
- Excellent user-interface
- Straightforward process
- Great many audio editing features
Cons
- Takes time to process the video
- Limited to 50MB and MP3, WAV, FLAC and oGG format
5. Weet
Website: https://weet.co/remove-background-noise-from-video/
Weet is a video chat solution built for remote teams. It is available for free. Background noise or echoes may interfere with your live meetings, but with Weet asynchronous video, clean audio recording is achievable without sacrificing quality.
If you want to eliminate background noise from your recording, weet is now a tool that can help you accomplish precisely that.
How to remove background noise from video online with Weet?
Step 1: Click “Create Weet“ after you’ve logged in to get started.
Step 2: To access your recording preferences, click the Gear symbol in the lower-left corner of the screen.
Step 3: It’s as simple as clicking the “Activate Noise Cancellation“ switch! Once you begin recording your weet, their AI technology will automatically remove any background noise.

Pros
- Excellent features for professionals
- Straightforward process
- Al tool to eliminate noise from the audio
Cons
- Beginners may find it challenging to use
You may also like: How to reduce audio noise during recording
Part 3: Tips For Removing Background Noise From Audio BEFORE You Record
We all want to get rid of the noisy background from our audio. Follow these tips below to get clean and supreme audio quality:
Tip 1: Avoid Noisy Places
The easiest method to avoid having noisy audio in the first place is to avoid having noisy elements and surroundings in the first place. Recording in a peaceful area is essential for this to be accomplished.
A professional recording studio is not required to get excellent results, but you should choose the quietest room or place that you can locate.
After that, you should get acquainted with the normal ambient noises heard in that location. Is there any outside noise, such as heavy trucks or other traffic? What about the heating and air conditioning systems, for that matter? Is there a sound of the fan turning on and off?
Does it seem like you can hear your co-workers or people conversing in the adjacent rooms? Is there a buzzing sound coming from the fluorescent lighting? Those are just a few examples of the kind of sounds that might appear on your voice-over recording when you record it yourself.
Tip 2: Record A Test
After that, make a practice tape of your room. You do not need to talk. However, it would help if you used the same microphone you will be using for your voice-over recording.
Take 10-20 seconds of the ambient noise in the room and save it to your computer. This is referred to as recording the room tone.
Tip 3: Analyze the Test Recording
After that, put on your headphones and listen to your room tone recording. What sounds do you hear that you can quickly remove from your environment? Suppose you can hear the fan from your heating/cooling system running. You may turn it off while you are recording.
Alternatively, if you hear individuals conversing in the background, you might respectfully request that they transfer their discussion to a more appropriate location. If at all feasible, you should switch off any buzzing lights.
Your room tone recording will also assist you in reducing audio noise once you have completed your recording session. Your room tone recording may serve as a baseline for your audio program, which can then be used to eliminate noise.
Part 4: FAQs About Removing Audio Noise From Video Online
1.Can Background Noise Be Removed From Audio
Yes, the background can be removed from audio easily nowadays, whether it’s after you’ve done recording or before recording audio; there are plenty of online software and applications, both available for your PC and smartphones.
These can help you get rid of the unwanted noise from your audio—some of the best online websites that can help you achieve that have been reviewed above. Choose the one that meets your needs!
2. Is There Anything I Can Do To Prevent Noisy Audio Before I Record?
Prior to recording, it is essential to reduce any acoustic noise sources if at all feasible. During recording, airflow may cause havoc on microphone preamplifiers, resulting in artifacts that may be difficult to remove.
Be careful to utilize adequate windscreens on your microphones, mainly when recording outside. Sound sources such as wind noise, for example, may frequently be discovered and appropriately eliminated by giving them a cursory listen via headphones.
02 How to Remove Background Noise Online
03 Tips For Removing Background Noise From Audio BEFORE You Record
04 FAQs About Removing Audio Noise From Video Online
Part 1: What Is Audio Noise And Why Is It Harmful?
No definition exists for audio noise; however, it is often defined as background noises such as fans, people chatting, automobiles or trucks going by, buzzing from broken audio wiring, or other ambient sounds that should not be included in your film. Your viewers will be distracted from the crucial information provided by the individual speaking in your video if the audio is too noisy.
Compared to that, noisy audios tend to damage the experience you’re looking for. Consider this: if you’re listening to a voice recording of your manager at work and it’s noisy to a point, you’re unable to make sense of it, you would most probably end up missing out on crucial details.
When it comes to creating a decent video, clear audio goes a long way. But that’s not all there is to it. A clear audio track could be heard in almost all of the videos that received four or five stars for “how correctly did the film accomplish its purpose” and “how did you personally assess the video,” according to the submissions.
Part 2: How to Remove Background Noise Online
There are various ways to eliminate all the background noise from the audio. Below is a list of the best online background noise removers to help you do that.2. Veed.io
Website: https://www.veed.io/
VEED is one of the most super-simple online video editors that cleans up background interference with a single click of the mouse, making it an excellent choice for beginners. There is no need to re-record your audio. There is no need for pricey sound-blocking microphones.
You can quickly eliminate all undesirable background noise from your audio files by using VEED’s background noise remover. VEED can help you remove background noise from any audio file, including MP3, WMA, and more.
No matter what type of audio file you have - MP3, WMA, or more - and no matter what type of background noise you have - wind conditions, vehicular, static, white fan sound - VEED can assist you in wiping clean your audio in a couple of moments.
How to remove background noise from video audio with Veed online?
Step 1: Click on the Choose Audio option to upload your audio file.
Step 2: Click on the audio track to bring up the Settings menu, and then choose ‘Clean Audio.’ Background noise will be eliminated in a matter of seconds by itself.
Step 3: That’s all there is to it; you are finished. When you click on ‘Export,’ your new file will be rendered in seconds.
Pros
- Simple to use
- Offers multiple features (add background music, cut, trim, etc.)
- Three-step process
Cons
- Not too user-friendly
3. Audio Denoise
Website: https://audiodenoise.com/
The number second on our list is the Audiodenoise online noise removal tool. Similar to the first one, it’s time to use, supports multiple files, and most importantly, helps you get rid of the unwanted noise from your audio.
Other than that, the tool offers plenty of customization options, such as time soothing of noise reduction filter, model noise based on noise modulation tracking, analysis block size, etc. So, how can you get rid of the background noise? Follow the steps here!
How to remove background noise online with Audio Denoise?
Step 1: Click on the Choose File option to begin with. You can also select the video from the Demo files option.
Step 2: After uploading the file, press on the Process option to get rid of the unwanted noise from the audio.
Step 3: After the audio is done processing, click on the Download option to export your video to your PC.
Pros
- The straightforward noise reduction process
- Any file of your choice
- Plenty of options to customize audio
Cons
- Takes time to process the video
- Limited to 40MB
4. Audiotoolset
Website: https://audiotoolset.com/noise-reduction
The third one on our list is the Audio Toolset. With its help, this tool may make audio recordings with less background noise. You need to click a few times, and the audio file will be processed for you instantly.
Voice recordings may benefit from using this program, which is designed to remove undesirable noises while maintaining a high level of audio quality.
This program employs a generic noise-reduction method that should operate without any further adjustment for most recordings.
How to reduce background noise from video audio with Audio Tool Set?
Step 1: Click on the Browse Computer or Drag and Drop files to the website to begin the process.
Step 2: After your file has been uploaded, click on the Process option to reduce the noise.
Step 3: Listen to the audio carefully and click on the Download option to export the file to your PC.
Pros
- Excellent user-interface
- Straightforward process
- Great many audio editing features
Cons
- Takes time to process the video
- Limited to 50MB and MP3, WAV, FLAC and oGG format
5. Weet
Website: https://weet.co/remove-background-noise-from-video/
Weet is a video chat solution built for remote teams. It is available for free. Background noise or echoes may interfere with your live meetings, but with Weet asynchronous video, clean audio recording is achievable without sacrificing quality.
If you want to eliminate background noise from your recording, weet is now a tool that can help you accomplish precisely that.
How to remove background noise from video online with Weet?
Step 1: Click “Create Weet“ after you’ve logged in to get started.
Step 2: To access your recording preferences, click the Gear symbol in the lower-left corner of the screen.
Step 3: It’s as simple as clicking the “Activate Noise Cancellation“ switch! Once you begin recording your weet, their AI technology will automatically remove any background noise.
Pros
- Excellent features for professionals
- Straightforward process
- Al tool to eliminate noise from the audio
Cons
- Beginners may find it challenging to use
You may also like: How to reduce audio noise during recording
Part 3: Tips For Removing Background Noise From Audio BEFORE You Record
We all want to get rid of the noisy background from our audio. Follow these tips below to get clean and supreme audio quality:
Tip 1: Avoid Noisy Places
The easiest method to avoid having noisy audio in the first place is to avoid having noisy elements and surroundings in the first place. Recording in a peaceful area is essential for this to be accomplished.
A professional recording studio is not required to get excellent results, but you should choose the quietest room or place that you can locate.
After that, you should get acquainted with the normal ambient noises heard in that location. Is there any outside noise, such as heavy trucks or other traffic? What about the heating and air conditioning systems, for that matter? Is there a sound of the fan turning on and off?
Does it seem like you can hear your co-workers or people conversing in the adjacent rooms? Is there a buzzing sound coming from the fluorescent lighting? Those are just a few examples of the kind of sounds that might appear on your voice-over recording when you record it yourself.
Tip 2: Record A Test
After that, make a practice tape of your room. You do not need to talk. However, it would help if you used the same microphone you will be using for your voice-over recording.
Take 10-20 seconds of the ambient noise in the room and save it to your computer. This is referred to as recording the room tone.
Tip 3: Analyze the Test Recording
After that, put on your headphones and listen to your room tone recording. What sounds do you hear that you can quickly remove from your environment? Suppose you can hear the fan from your heating/cooling system running. You may turn it off while you are recording.
Alternatively, if you hear individuals conversing in the background, you might respectfully request that they transfer their discussion to a more appropriate location. If at all feasible, you should switch off any buzzing lights.
Your room tone recording will also assist you in reducing audio noise once you have completed your recording session. Your room tone recording may serve as a baseline for your audio program, which can then be used to eliminate noise.
Part 4: FAQs About Removing Audio Noise From Video Online
1.Can Background Noise Be Removed From Audio
Yes, the background can be removed from audio easily nowadays, whether it’s after you’ve done recording or before recording audio; there are plenty of online software and applications, both available for your PC and smartphones.
These can help you get rid of the unwanted noise from your audio—some of the best online websites that can help you achieve that have been reviewed above. Choose the one that meets your needs!
2. Is There Anything I Can Do To Prevent Noisy Audio Before I Record?
Prior to recording, it is essential to reduce any acoustic noise sources if at all feasible. During recording, airflow may cause havoc on microphone preamplifiers, resulting in artifacts that may be difficult to remove.
Be careful to utilize adequate windscreens on your microphones, mainly when recording outside. Sound sources such as wind noise, for example, may frequently be discovered and appropriately eliminated by giving them a cursory listen via headphones.
Audio Post-Production for Podcasters: Utilizing Audacity Effectively
Free audio recording & editing software audacity for podcasts is available for Windows, Linux, & macOS. Even though it’s not expressly built for podcasts, it is a popular option for recording podcasts. If you don’t mind a steep learning curve, you can easily record, edit, & export a high-quality podcast with this software.
How to Record a Podcast using Audacity
Despite its complexity, audacity for podcasts doesn’t need a detailed understanding of the software’s internals to begin using it. As a beginner, we explain all of the initial settings and basic editing choices you’ll need to know and how to output in a format that can be used for podcasting.
Here’s how to get started recording your podcast using Audacity for Podcasts:
- By selecting the box to the left of your microphone, you may choose your audio host. Select MME for Windows and Core Audio for Mac OS X.

- Select the audio interface or microphone from the menu to the right of the microphone icon. In order to record your Audacity for Podcasts, Audacity utilizes the device that you pick from this menu.

- Select your headphones by checking the box to the right of a speaker symbol. To playback, the audio files, Audacity for Podcasts utilizes the device you specify from this option.

What you need to know about Audacity’s Input Tester
Test your input before you begin recording your podcast. This helps you to make totally clear that everything is set up properly and that your podcast is recorded.
- The monitor meter may be found on the menu bar at the very top, at the very center. “Click to begin monitoring” is what it says.

- Speak normally into the microphone you’ve placed on your computer.

- Ensure that the Microphone Volume meter doesn’t go over -12dB by adjusting the volume controls.

Audacity for Podcasts Recording Tutorial
Audacity recording is simple after you’ve set up all of the settings you need. Make sure to pick just one (Mono) Recording Channel while you’re recording with a single microphone.
Each microphone is assigned a separate audio channel if you have numerous microphones connected to an audio interface or mixer. There must be a separate microphone and channel for each participant on your podcast so that you can edit them separately and make sure they all sound well together.
Each of these mono channels will be blended into stereo when you export your podcast later.
There is nothing complicated about the actual recording procedure.
- To begin recording your podcast, press the red Record button.

- When you’ve finished recording your podcast, press the black Stop button.

- Once you’ve finished recording, use Ctrl+S to save the project. If Audacity crashes or you shut it by mistake, you won’t be able to recover your edited audio file.
Using Audacity to Edit Your Podcast
Audacity for Podcasts not only allows you to record your podcast, but it also allows you to edit it afterward. It is possible to send your raw podcast to the internet as soon as you complete the recording, but editing may add a degree of polish that makes it more pleasurable for the listener.
You may use Audacity to re-arrange your podcast’s flow by cutting and relocating portions, reducing clipping, and even deleting background noise if one of your mics was too near or someone was talking too loudly. Audacity can even alter the levels of individual recordings.
Some of these editing chores are more difficult than others, but if you just have high-quality equipment & have your settings ideal, the podcast may not need a lot of effort. Check over a few different portions of your podcast to get a sense of how much work has to be done on it before publishing.
In Audacity, you may add music, clips, & sound effects to your podcast intro and outro.
In Audacity, add music, clips, & sound effects for the podcast intro and outro
In Audacity, you may add & move sound clips, such as intro music.
- Click File > Import > Audio or press Ctrl+Shift+I to import your podcast audio into Audacity.

- Make your choice of music for the opening, outro, or anything else you’d want to include.

- It is possible to go back and forth between the past and future by clicking on the top toolbar’s time shift function.

- When your opening music stops, click and drag the main podcast audio track so that it begins when the music ends.

- Add an outro or other sound effects & music that play throughout your podcast by following these similar instructions. There should be a separate channel for each sound file so that they may be easily moved across devices.
- Using the time shift tool, you may relocate an outro to the conclusion of your podcast if necessary. If you wish to add sound effects or music to your podcast, use the time shift tool to move them around.
- To test whether your audio tracks are positioned appropriately, just click the green Play button at any moment. The cursor icon in the toolbar may be used to start listening to a podcast at a different place in the track.
In Audacity, here’s how to export your podcast
After you’ve finished editing your podcast, listen to it one more time to ensure you’re satisfied with the outcome, then save it to ensure you don’t lose your work if anything goes wrong during the export process. When you export your podcast, you’re creating an audio file that you can publish to your podcast host and share with others.
Here’s how to export the Audacity podcast:
- Select File > Export > Export as… from the File menu.
- After giving your podcast a name, click Save.
- If you wish to add metadata, you may do so now, or just hit OK to begin the exporting process.
- This procedure may take a long time if the podcast is lengthy or your machine is sluggish. During this procedure, keep your computer turned on & prevent it from sleeping and hibernating.
- You’re ready to publish your podcast to the podcast host once it’s finished exporting.
Conclusions
For recording, editing, & mixing your own podcast, an Audacity is a great option. And, like many podcasters, you could discover it meets your long-term requirements. With regard to voice effects, we talk about how people may use Filmora to modify and improve their voices. Filmora has the ability to re-speak video and audio, as well as previously recorded voiceovers. Video, audio, and voiceover files may all benefit from the Timeline’s Pitch feature. Change the tonality of a video or recording to give it a unique sound. It’s easy to replace the voices in the videos using Filmora. A video or narrative should accompany your viral in order for it to be effective. Changing Pitch allows you to alter the pitch of your voice. You may modify the pace of the video to alter the voice (Optional). Make a backup copy of the altered media.
For Win 7 or later (64-bit)
For macOS 10.12 or later
- Select the audio interface or microphone from the menu to the right of the microphone icon. In order to record your Audacity for Podcasts, Audacity utilizes the device that you pick from this menu.
- Select your headphones by checking the box to the right of a speaker symbol. To playback, the audio files, Audacity for Podcasts utilizes the device you specify from this option.
What you need to know about Audacity’s Input Tester
Test your input before you begin recording your podcast. This helps you to make totally clear that everything is set up properly and that your podcast is recorded.
- The monitor meter may be found on the menu bar at the very top, at the very center. “Click to begin monitoring” is what it says.
- Speak normally into the microphone you’ve placed on your computer.
- Ensure that the Microphone Volume meter doesn’t go over -12dB by adjusting the volume controls.
Audacity for Podcasts Recording Tutorial
Audacity recording is simple after you’ve set up all of the settings you need. Make sure to pick just one (Mono) Recording Channel while you’re recording with a single microphone.
Each microphone is assigned a separate audio channel if you have numerous microphones connected to an audio interface or mixer. There must be a separate microphone and channel for each participant on your podcast so that you can edit them separately and make sure they all sound well together.
Each of these mono channels will be blended into stereo when you export your podcast later.
There is nothing complicated about the actual recording procedure.
- To begin recording your podcast, press the red Record button.
- When you’ve finished recording your podcast, press the black Stop button.
- Once you’ve finished recording, use Ctrl+S to save the project. If Audacity crashes or you shut it by mistake, you won’t be able to recover your edited audio file.
Using Audacity to Edit Your Podcast
Audacity for Podcasts not only allows you to record your podcast, but it also allows you to edit it afterward. It is possible to send your raw podcast to the internet as soon as you complete the recording, but editing may add a degree of polish that makes it more pleasurable for the listener.
You may use Audacity to re-arrange your podcast’s flow by cutting and relocating portions, reducing clipping, and even deleting background noise if one of your mics was too near or someone was talking too loudly. Audacity can even alter the levels of individual recordings.
Some of these editing chores are more difficult than others, but if you just have high-quality equipment & have your settings ideal, the podcast may not need a lot of effort. Check over a few different portions of your podcast to get a sense of how much work has to be done on it before publishing.
In Audacity, you may add music, clips, & sound effects to your podcast intro and outro.
In Audacity, add music, clips, & sound effects for the podcast intro and outro
In Audacity, you may add & move sound clips, such as intro music.
- Click File > Import > Audio or press Ctrl+Shift+I to import your podcast audio into Audacity.
- Make your choice of music for the opening, outro, or anything else you’d want to include.
- It is possible to go back and forth between the past and future by clicking on the top toolbar’s time shift function.
- When your opening music stops, click and drag the main podcast audio track so that it begins when the music ends.
- Add an outro or other sound effects & music that play throughout your podcast by following these similar instructions. There should be a separate channel for each sound file so that they may be easily moved across devices.
- Using the time shift tool, you may relocate an outro to the conclusion of your podcast if necessary. If you wish to add sound effects or music to your podcast, use the time shift tool to move them around.
- To test whether your audio tracks are positioned appropriately, just click the green Play button at any moment. The cursor icon in the toolbar may be used to start listening to a podcast at a different place in the track.
In Audacity, here’s how to export your podcast
After you’ve finished editing your podcast, listen to it one more time to ensure you’re satisfied with the outcome, then save it to ensure you don’t lose your work if anything goes wrong during the export process. When you export your podcast, you’re creating an audio file that you can publish to your podcast host and share with others.
Here’s how to export the Audacity podcast:
- Select File > Export > Export as… from the File menu.
- After giving your podcast a name, click Save.
- If you wish to add metadata, you may do so now, or just hit OK to begin the exporting process.
- This procedure may take a long time if the podcast is lengthy or your machine is sluggish. During this procedure, keep your computer turned on & prevent it from sleeping and hibernating.
- You’re ready to publish your podcast to the podcast host once it’s finished exporting.
Conclusions
For recording, editing, & mixing your own podcast, an Audacity is a great option. And, like many podcasters, you could discover it meets your long-term requirements. With regard to voice effects, we talk about how people may use Filmora to modify and improve their voices. Filmora has the ability to re-speak video and audio, as well as previously recorded voiceovers. Video, audio, and voiceover files may all benefit from the Timeline’s Pitch feature. Change the tonality of a video or recording to give it a unique sound. It’s easy to replace the voices in the videos using Filmora. A video or narrative should accompany your viral in order for it to be effective. Changing Pitch allows you to alter the pitch of your voice. You may modify the pace of the video to alter the voice (Optional). Make a backup copy of the altered media.
For Win 7 or later (64-bit)
For macOS 10.12 or later
“Sonic Resource Hub: A Curated List of Premium Websites with a Stockpile of Free Sound Scores
FREE Top 10 Best Websites to Download Sound Clips for Videos

Liza Brown
Mar 27, 2024• Proven solutions


Are you working on animation , video, game, music, or maybe some other media file? Sound is a vital factor for all. It is the effect of the sound that can make or break a project.
But it can be difficult to find perfect and quality free sound clips. There are thousands of software for creating excellent videos, adding sounds , titles, overlays, tracks, and more. But what if you don’t wish to create a piece for just jazzing up your already existing video?
Free sound clips are great resources to download for videos if you don’t want to create sound effects.
Many people want to know the source of high-quality free audio for videos. These free sound samples are easy to find on the Internet.
In this article, you will get to know the 10 best websites to download free sound clips.
10 Best Free Sound Samples to Use
1. Freesound
Licensed under the Creative Commons License , the Freesound comprises of a large sound database. You can choose from the huge collection of sounds and decide which one is free and which sound needs attribution.
You can ensure if the sound can be used in commercial products or not. If you are not a professional and just need free sound samples for personal use, you may use free sound download from any site. The features of Freesound include-
- You can search for sounds or browse by tags or geotags
- The pack feature helps you to find a bunch of similar sounds very easily
- Preview the sound without logging in
- For downloading the sound, you need to log in
- Add your audio samples to contribute to the database
- You get 5 free sound clips download
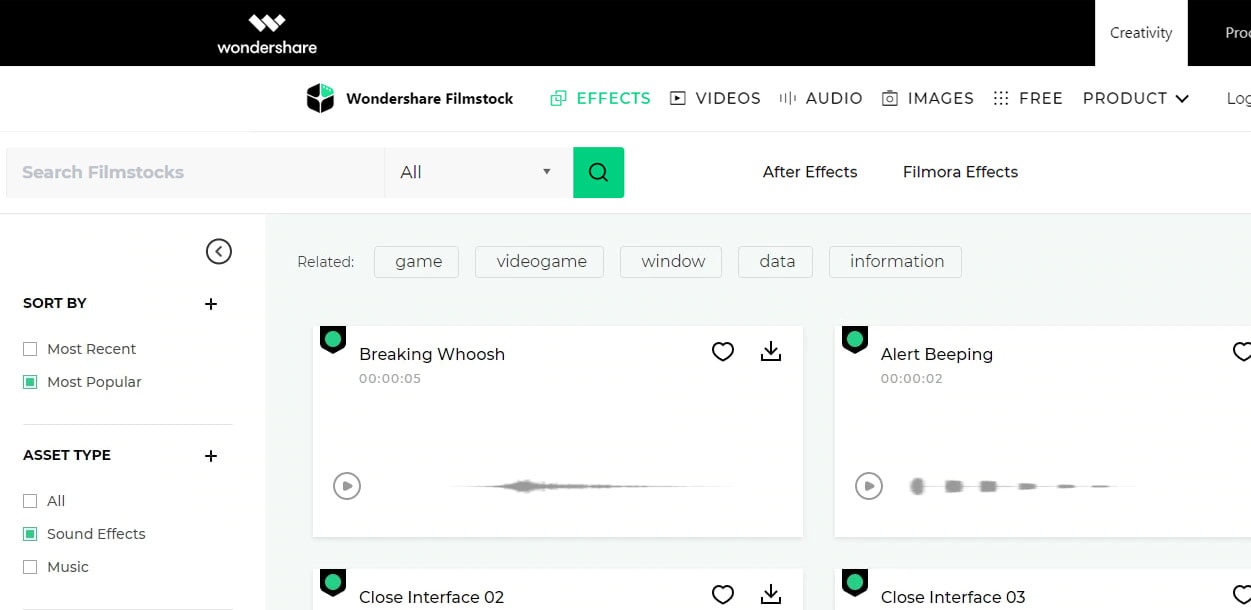
2. Filmstock
Filmstock from the house of Wondershare is one of the greatest libraries for free sound clips.
Any budget filmmaker would love to have this invaluable resource not just for free audio clips for videos but also for royalty-free sound clips.
You can bring your cinematic video to life from the Filmstock free-stuff one-stop-shop. The features of Filmstock include-
- Royalty-free video effects, audio, and stock media
- There are genres like science fiction, sci-fi, ufo, technology games
- Huge selection of curated quality stock images
- Filmstock library is continuously updated
- No attribution required for any project on Filmstock
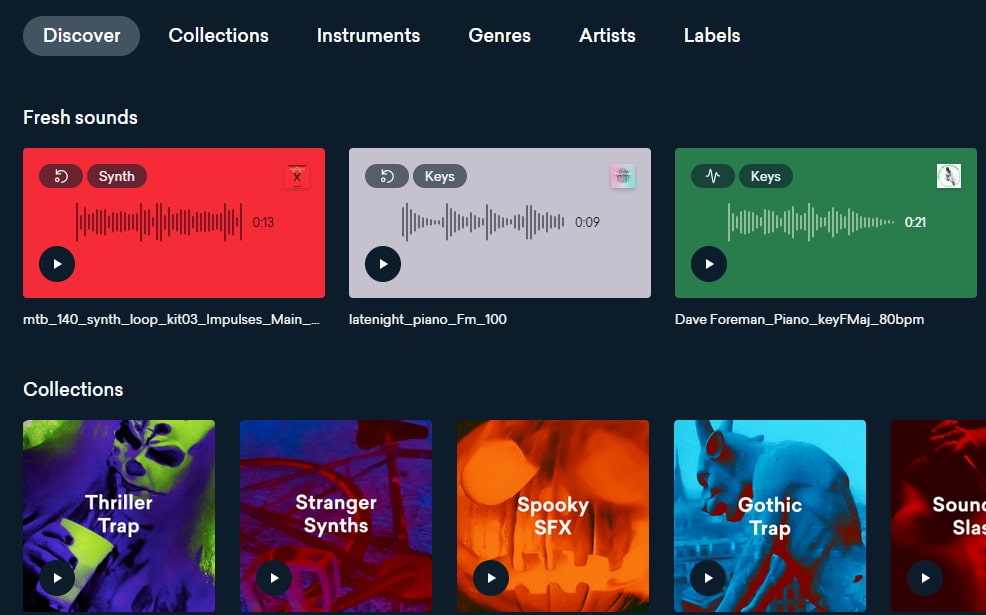
3. Landr
With a simple interface, Landr offers the best loops, packs, and samples to you. Make use of powerful Artificial Intelligence (AI) and you can spend lesser time searching and browsing. The features of Landr includes-
- You can browse free sound clips from the various collection of instruments
- Quickly find the right sound from the millions of free sound samples
- Get access to Selector tool powered by AI to make your browsing session faster
- Nourish your ideas with the curated collection and smart browsing
- The filter sounds by instrument, mood, BPM or key
- Go pro with your sampling
- Royalty-free sounds from today’s best artists, producers, and labels
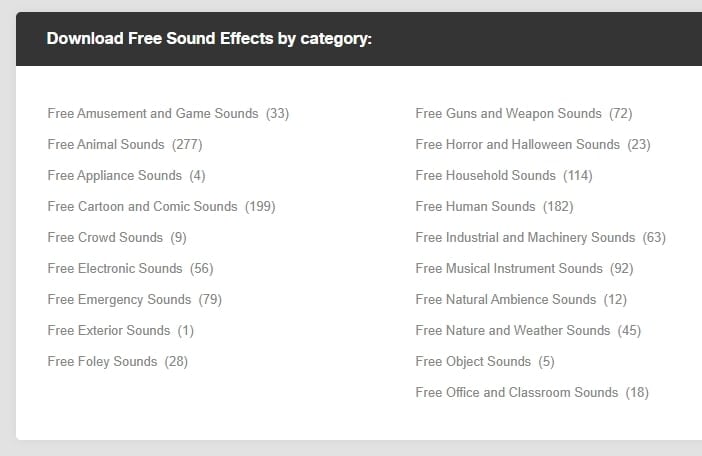
4. Audio Micro
Audio Micro is one of the best tools for downloading horror-based free sound clips. Once you register with Audio Micro, you can easily download free audio clips for videos.
For downloading sound for commercial uses like TV or mass reproduction, you must be a paid subscriber. The features of Audio Micro are-
- Get access to the collection of royalty-free music and 2000 free good quality sound effects
- High-quality audio content for commercial use, available at competitive prices without any hidden cost
- Research, locate, purchase, and download stock audio
- Easy and fast search option with free sound collection visible from the navigation bar on the homepage
5. Audio Blocks
It is an intuitive platform to download loops, sound effects, and music. It has a low-cost subscription model and the content is constantly updated based on the search results. The features of Audio Blocks are-
- Unlimited royalty-free audio
- Loop, sound effects, and music download
- Low-cost subscription offers more content at a nominal price
- There are flexible plans for every budget
- Use content multiple times for commercial and personal projects
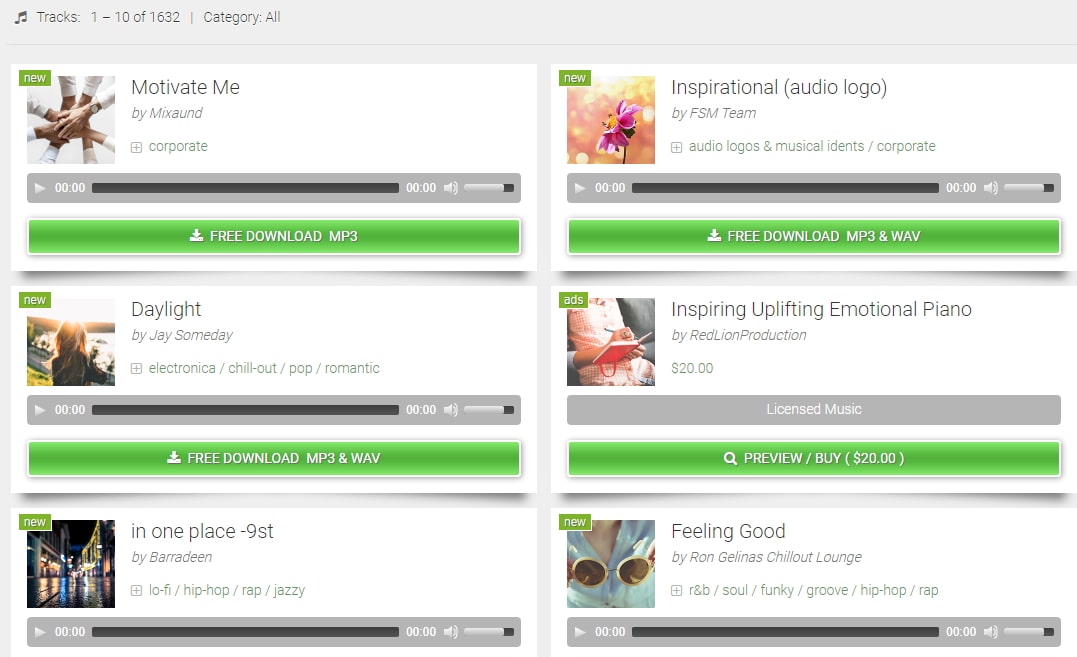
6. Free Stock Music
Whether YouTube project or your personal Vlog, Free Stock Music offers royalty-free music for a range of media platforms.
For any non-copyrighted sound clips free download, always feel free to reach Free Stock Music. The features are-
- Free access to non-copyrighted music
- Just put the attribution in credits to use the sound clips
- Unlimited royalty-free music in all moods, lengths, tempos, and categories
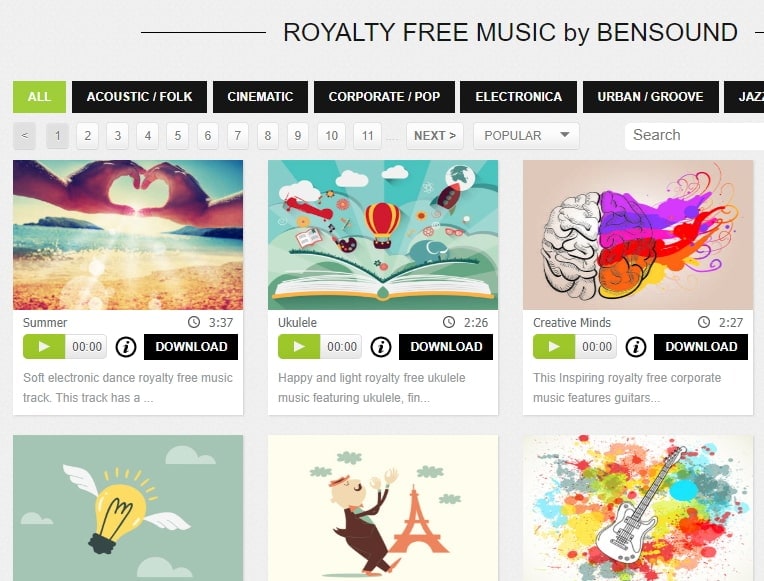
7. Bensound
Available under the Creative Common License, Bensound is used for multimedia projects like web applications or videos.
You can use the free tracks available with Bensound stock music in the various website background score, animations, web adverts, slideshows, etc. The features of Bensound include-
- Royalty-free stock music in various genres like electronica, urban, cinematic, jazz, rock, etc.
- Download free sound clips from the huge collection and add attributions in credits
- If you don’t wish to give credits and use the high-quality premium tracks, get the Bensound Pro License
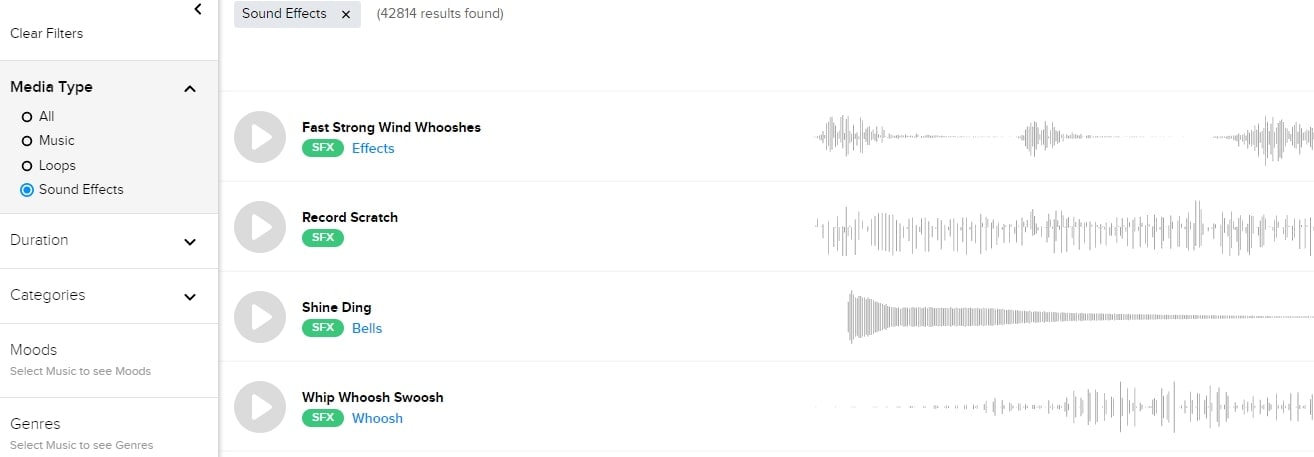
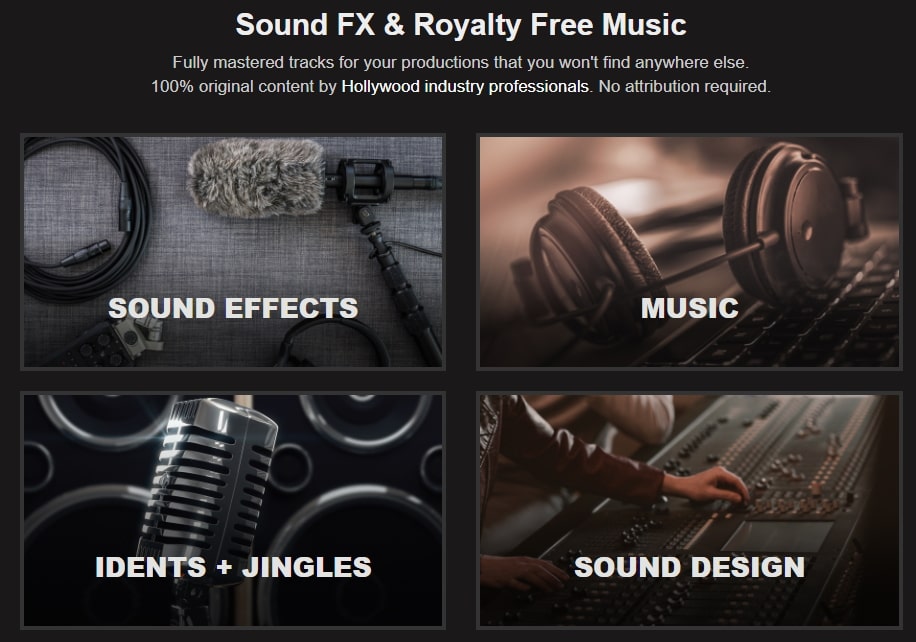
8. Sounds Crate
Are you looking for the best soundtrack for your video? Sounds Crate offers some of the best royalty-free music and sound FX.
With the tracks completely mastered for your production, Sound Crate offers 100% quality content created by industry professionals from Hollywood. The Sound Crate features include-
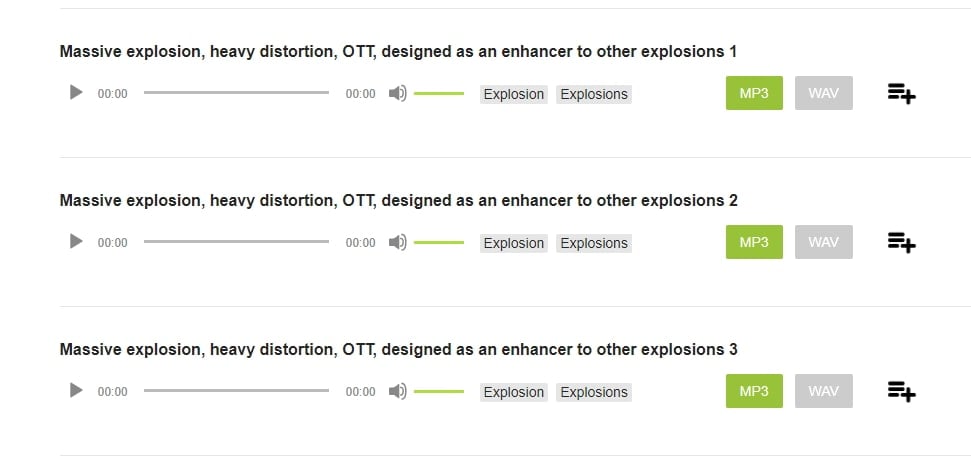
- Sound FX for electricity, gun, explosion, weapons, sci-fi, vehicles, movements, etc.
- Royalty-free music in diverse genres
- You can also use idents for corporate, news jingles, holiday idents, etc.
- Download and use the royalty-free sound clips easily
- Over 10000 plus HD assets
- No attribution required
- Browse from unlimited music, sound effects, etc.
9. ZapSlat
Do your audio and video editing projects need some cool soundtracks to jazz it up? Look no further. ZapSlat is one of the best free sound download sites to make your project successful. The features of ZapSlat are-
- Comprises over 54,000 professional free sound effects and royalty-free music files
- Variety of free sound effect packs
- Download royalty-free music from a variety of genres
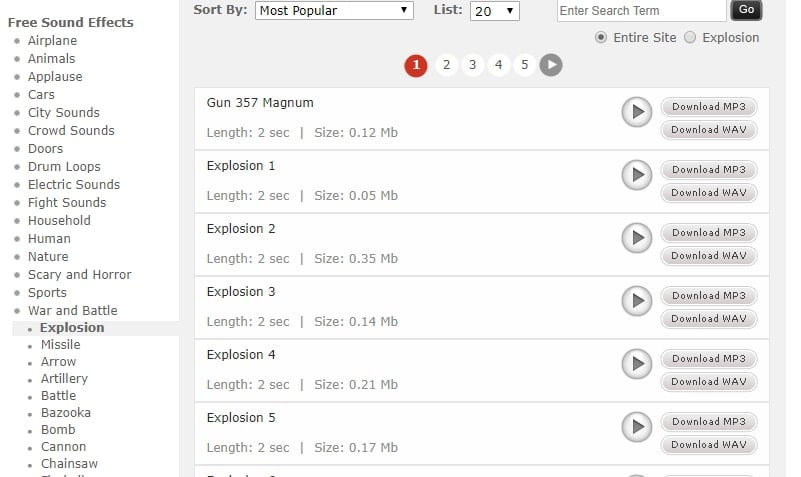
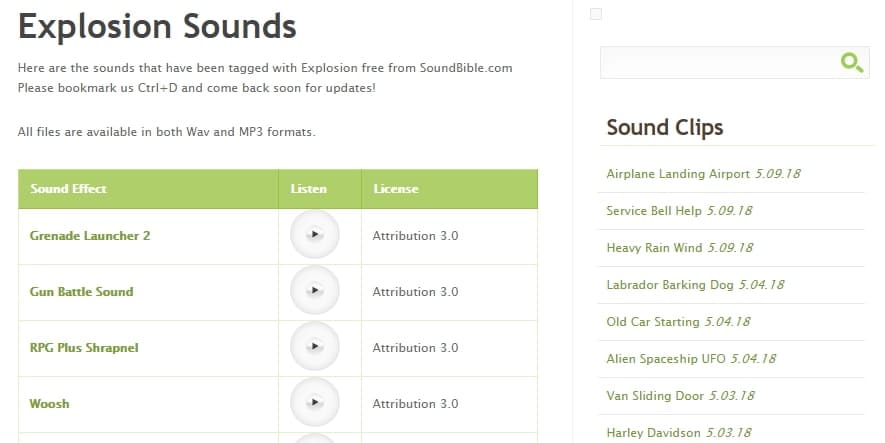
10. Sound Bible
Choose the best from 2000 free sound clips licensed under Creative Commons. To use the sound effect for commercial video, you can select from the royalty-free sounds. The features of SoundBible are-
- Download free sound clips without logging in or creating an account
- 2000 free sounds
- Copyright-free sound resources are weekly updated
Conclusion
Now that you know the best 10 free sound clip download sites, make use of it in your videos. Without worrying about the expense, you can use these sites to download free sound clips.
Liza Brown
Liza Brown is a writer and a lover of all things video.
Follow @Liza Brown
Liza Brown
Mar 27, 2024• Proven solutions
Are you working on animation , video, game, music, or maybe some other media file? Sound is a vital factor for all. It is the effect of the sound that can make or break a project.
But it can be difficult to find perfect and quality free sound clips. There are thousands of software for creating excellent videos, adding sounds , titles, overlays, tracks, and more. But what if you don’t wish to create a piece for just jazzing up your already existing video?
Free sound clips are great resources to download for videos if you don’t want to create sound effects.
Many people want to know the source of high-quality free audio for videos. These free sound samples are easy to find on the Internet.
In this article, you will get to know the 10 best websites to download free sound clips.
10 Best Free Sound Samples to Use
1. Freesound
Licensed under the Creative Commons License , the Freesound comprises of a large sound database. You can choose from the huge collection of sounds and decide which one is free and which sound needs attribution.
You can ensure if the sound can be used in commercial products or not. If you are not a professional and just need free sound samples for personal use, you may use free sound download from any site. The features of Freesound include-
- You can search for sounds or browse by tags or geotags
- The pack feature helps you to find a bunch of similar sounds very easily
- Preview the sound without logging in
- For downloading the sound, you need to log in
- Add your audio samples to contribute to the database
- You get 5 free sound clips download
2. Filmstock
Filmstock from the house of Wondershare is one of the greatest libraries for free sound clips.
Any budget filmmaker would love to have this invaluable resource not just for free audio clips for videos but also for royalty-free sound clips.
You can bring your cinematic video to life from the Filmstock free-stuff one-stop-shop. The features of Filmstock include-
- Royalty-free video effects, audio, and stock media
- There are genres like science fiction, sci-fi, ufo, technology games
- Huge selection of curated quality stock images
- Filmstock library is continuously updated
- No attribution required for any project on Filmstock
3. Landr
With a simple interface, Landr offers the best loops, packs, and samples to you. Make use of powerful Artificial Intelligence (AI) and you can spend lesser time searching and browsing. The features of Landr includes-
- You can browse free sound clips from the various collection of instruments
- Quickly find the right sound from the millions of free sound samples
- Get access to Selector tool powered by AI to make your browsing session faster
- Nourish your ideas with the curated collection and smart browsing
- The filter sounds by instrument, mood, BPM or key
- Go pro with your sampling
- Royalty-free sounds from today’s best artists, producers, and labels
4. Audio Micro
Audio Micro is one of the best tools for downloading horror-based free sound clips. Once you register with Audio Micro, you can easily download free audio clips for videos.
For downloading sound for commercial uses like TV or mass reproduction, you must be a paid subscriber. The features of Audio Micro are-
- Get access to the collection of royalty-free music and 2000 free good quality sound effects
- High-quality audio content for commercial use, available at competitive prices without any hidden cost
- Research, locate, purchase, and download stock audio
- Easy and fast search option with free sound collection visible from the navigation bar on the homepage
5. Audio Blocks
It is an intuitive platform to download loops, sound effects, and music. It has a low-cost subscription model and the content is constantly updated based on the search results. The features of Audio Blocks are-
- Unlimited royalty-free audio
- Loop, sound effects, and music download
- Low-cost subscription offers more content at a nominal price
- There are flexible plans for every budget
- Use content multiple times for commercial and personal projects
6. Free Stock Music
Whether YouTube project or your personal Vlog, Free Stock Music offers royalty-free music for a range of media platforms.
For any non-copyrighted sound clips free download, always feel free to reach Free Stock Music. The features are-
- Free access to non-copyrighted music
- Just put the attribution in credits to use the sound clips
- Unlimited royalty-free music in all moods, lengths, tempos, and categories
7. Bensound
Available under the Creative Common License, Bensound is used for multimedia projects like web applications or videos.
You can use the free tracks available with Bensound stock music in the various website background score, animations, web adverts, slideshows, etc. The features of Bensound include-
- Royalty-free stock music in various genres like electronica, urban, cinematic, jazz, rock, etc.
- Download free sound clips from the huge collection and add attributions in credits
- If you don’t wish to give credits and use the high-quality premium tracks, get the Bensound Pro License
8. Sounds Crate
Are you looking for the best soundtrack for your video? Sounds Crate offers some of the best royalty-free music and sound FX.
With the tracks completely mastered for your production, Sound Crate offers 100% quality content created by industry professionals from Hollywood. The Sound Crate features include-
- Sound FX for electricity, gun, explosion, weapons, sci-fi, vehicles, movements, etc.
- Royalty-free music in diverse genres
- You can also use idents for corporate, news jingles, holiday idents, etc.
- Download and use the royalty-free sound clips easily
- Over 10000 plus HD assets
- No attribution required
- Browse from unlimited music, sound effects, etc.
9. ZapSlat
Do your audio and video editing projects need some cool soundtracks to jazz it up? Look no further. ZapSlat is one of the best free sound download sites to make your project successful. The features of ZapSlat are-
- Comprises over 54,000 professional free sound effects and royalty-free music files
- Variety of free sound effect packs
- Download royalty-free music from a variety of genres
10. Sound Bible
Choose the best from 2000 free sound clips licensed under Creative Commons. To use the sound effect for commercial video, you can select from the royalty-free sounds. The features of SoundBible are-
- Download free sound clips without logging in or creating an account
- 2000 free sounds
- Copyright-free sound resources are weekly updated
Conclusion
Now that you know the best 10 free sound clip download sites, make use of it in your videos. Without worrying about the expense, you can use these sites to download free sound clips.
Liza Brown
Liza Brown is a writer and a lover of all things video.
Follow @Liza Brown
Also read:
- New 2024 Approved A-List Singers Exploring Innovative Vocal Modification Tools and Resources
- Updated The Role of Dissonant Harmonies and Pacing in Creating Film Music Suspense
- 2024 Approved First Edition of LexiEdit Training Building Your Base in Audio Editing
- Updated In 2024, 25 Best Real-Time Voice Changers Full Review
- New From Novice to Pro Exploring the Depths of REAPERs Recording Software for 2024
- New 2024 Approved The Essential Techniques for Embedding Soundtracks Into Photographs
- New In 2024, Detecting Crystalline Collision Audio
- Updated How To Add & Edit A Song To Video For Free, In 2024
- Updated Discovering the Best 8 DAW Apps on Android A Production Boost
- Updated Locating the Sound of Tinkling Metal Instruments
- New Harmonious Soundscape Selection for Modern Matrimonial Cinematography for 2024
- Audacity to MP3 Conversion A Comprehensive Tutorial
- New Ultimate Selection The Top 7 DAWs Excelling in Guitar Track Production (Updated ) for 2024
- Updated In 2024, 5 Leading Voice Modification Software for Instant Impact ( Rankings)
- New The Ultimate Guide Seamless MP4 Audio Extraction Techniques for 2024
- Updated In 2024, Best Mp3 Music Mixer for Mac
- New In 2024, The Ultimate List Best Voice Modification Tools to Enhance Your Google Meet Experience
- Updated In 2024, Detect Subtle Moan Vocalizations
- New Fighting the Frenzy of Wind Vibration in Multimedia Capture Across OSes and Devices for 2024
- In 2024, Melodic Accompaniment to Frame the 24 Birthday Spectacle
- Updated In 2024, Mastering the Art of Spotify Downloads A Comprehensive Guide for Music Lovers
- Updated 2024 Approved Song Selection Guide Copyright-Free Melodies for Montages
- New Find Wolf Howling Sound Effect for 2024
- Guide to Visualizing Sound Integrating Audio Waves and Enhancing Them with Motion Effects in Adobe Premiere Pro for 2024
- Updated Simple Voice Changer Features, Guidelines, and Alternatives for 2024
- New In 2024, Bypassing iPhones In-App Audio Limitation Feature
- New Top Online And Offline MP3 To Karaoke Converters Compared for 2024
- In 2024, Mastering the Art of Audio Modulation Speed & Pitch Online Guide
- In 2024, Exploring the Cricket Soundscape A Guide to Field Recording
- Updated 2024 Approved Exploring Premium Voice Alteration Software Without Pay Mastering Sound Changes in Filmora Videos
- New Fine-Tuning Film Soundtracks Strategies for Precise Audio Timing with Keyframes in Final Cut Pro X
- Updated In 2024, Premium Waveform Transformer Quick, Accurate MP3 File Generation From AIFF & More
- Identify Disturbing Sound Waves for 2024
- New Siri Voice Changer How to Change Siri Voice on iPhone, iPad or Mac?
- Updated In 2024, Anthology of Gargantuan Groans and Howls
- Enhance Your Visual Storytelling with Music The Top 15 Online Tools for a Harmonious Blend of Sounds and Images
- 2024 Approved Elevate Your Calls with These Top 6 Audio Enhancement Apps (Android & iOS)
- The Ultimate Guide to Get the Rare Candy on Pokemon Go Fire Red On Oppo A79 5G | Dr.fone
- 10 Free Location Spoofers to Fake GPS Location on your Lava Blaze 2 5G | Dr.fone
- Best 10 Mock Location Apps Worth Trying On Oppo A58 4G | Dr.fone
- Updated 4 Things You Should Know About Pinterest GIF for 2024
- Stuck at Android System Recovery Of Xiaomi Redmi K70E ? Fix It Easily | Dr.fone
- How to Perform Hard Reset on Realme C33 2023? | Dr.fone
- In 2024, Learn Easy Blender Rigging in Only 2 Minutes
- 4 Feasible Ways to Fake Location on Facebook For your HTC U23 | Dr.fone
- Updated In 2024, Make Animated Magic Happen Top 5 Online Stop Motion Makers
- In 2024, Does Airplane Mode Turn off GPS Location On Infinix Hot 40i? | Dr.fone
- In 2024, Pokemon Go No GPS Signal? Heres Every Possible Solution On Samsung Galaxy M34 5G | Dr.fone
- In 2024, Here Are Some Reliable Ways to Get Pokemon Go Friend Codes For Tecno Pova 5 | Dr.fone
- Why Your Itel P40+ Screen Might be Unresponsive and How to Fix It | Dr.fone
- In 2024, The Ultimate Guide How to Bypass Swipe Screen to Unlock on Oppo Find N3 Device
- 5 Solutions For Realme GT 5 Unlock Without Password
- Updated Want to Learn More About the AIFF File Format? Read This Article, Where We Tell You Everything You Need to Know
- Three Solutions to Hard Reset Infinix Smart 8 HD? | Dr.fone
- How To Transfer WhatsApp From iPhone X to other iPhone 15 Pro Max devices? | Dr.fone
- Most Asked Questions about Pokemon Go Battle League Rewards On Apple iPhone 7 Plus | Dr.fone
- New 2024 Approved Uncover the Best Audio Conversion Tools Top 12 Ranked
- How to Unlock Apple ID From your Apple iPhone 13 mini without Security Questions?
- In 2024, Full Guide on Mirroring Your Samsung Galaxy XCover 6 Pro Tactical Edition to Your PC/Mac | Dr.fone
- How to fix iCloud lock from your iPhone 11 Pro and iPad
- Guide How To Unbrick a Bricked Samsung Galaxy A05s Phone | Dr.fone
- In 2024, Planning to Use a Pokemon Go Joystick on Samsung Galaxy F15 5G? | Dr.fone
- 2024 Approved Top 8 Free Online Video Stabilization Tools for Smoother Footage
- Solved Warning Camera Failed on Oppo A78 | Dr.fone
- New The Most Popular Android Apps You Need to Try
- Tips and Tricks for Apple ID Locked Issue On Apple iPhone 7
- Updated Effortless Video Editing A Guide to Speeding Up and Slowing Down in Camtasia
- In 2024, How to Use Google Assistant on Your Lock Screen Of Infinix Note 30i Phone
- In 2024, Everything You Need to Know about Lock Screen Settings on your Nubia Red Magic 9 Pro
- Title: 2024 Approved Online Auditory Hygiene Methods to Purify Sound Recordings of Digital Transmission
- Author: Kate
- Created at : 2024-05-05 08:16:27
- Updated at : 2024-05-06 08:16:27
- Link: https://audio-editing.techidaily.com/2024-approved-online-auditory-hygiene-methods-to-purify-sound-recordings-of-digital-transmission/
- License: This work is licensed under CC BY-NC-SA 4.0.
