

10+ Free Online Audio to Text Converters
“Unlocking Free Speech-to-Text Services: A Selection of Top Apps for Audio Transcription, 2023 Edition”
10+ Free Online Audio to Text Converters 
Shanoon Cox
Mar 27, 2024• Proven solutions
An audio-to-text converter is a tool that can convert audio files to texts or even record any audio and produce the text of it simultaneously. Audio files are one of the most used methods of storing information. From online classes and long lectures to big business meetings and product information, audio is being shared a lot across the world.
But accessing information from a long audio file can be difficult and time-consuming, which is why there is a need to convert audio to text. Information in the form of text can easily be fully or partly accessed and edited whenever needed. And texts can also easily be shared with whomever you want.
So let’s have a look at some of the best audio-to-text converters that might be of use to you.


10+ Free Online Audio to Text Converters
There is number of audio text converters available in the online market that can help you while studying, researching, or even in your business. Some of these recorders can convert any audio file to texts while some others can record and convert to text at the same time. Here we will talk about the top 11 free applications that can be used to convert audio to text.
| 1 - Filmora | 2 - Audext | 3 - Sonix.ai |
|---|---|---|
| 4 - Virtualspeech.com | 5 - Speechnotes | 6 - SpeechTexter |
| 7 - Textfromtospeech.com | 8 - Dictation.io | 9 - Voice Note |
| 10 - Voice Notebook | 11 - NaturalReaders |
1. Wondershare Filmora
Filmora’s Speech To Text (STT) function allows you to transcript audio/voice to subtitles/text in one click. it can save your plenty of time on transcribing subtitles and boost your editing efficiency by applying speech-to-text.
What you need to do is download the software and subsribe for its plan.
Features
- Built-in function to transcribe subtitles and captions for your video
- High accuracy in generating text, allows you to edit text by yourself
- Supports up to 26 languages of transcription to engage more users all around the world
- Offers various tools for editing your videos and audio
2. Audext
Audext is a free online application that can help you to save a lot of time while transcribing any audio to text. The transcription to text is done with the use of an advanced AI and hence produces faster and more accurate results.
Audext is used by people from different sectors like education, marketing, media, consulting, healthcare, etc. for their work purposes.

Features
- An inbuilt editor for editing the text while transcribing
- Identifies the speaker easily
- Supports a variety of audio and video formats like MP3, WAV, MP4, etc.
- Offers an option of easy upload and export of files
Pricing
- Free
- Transcription costs for one hour are $12
- Or with the subscription $5
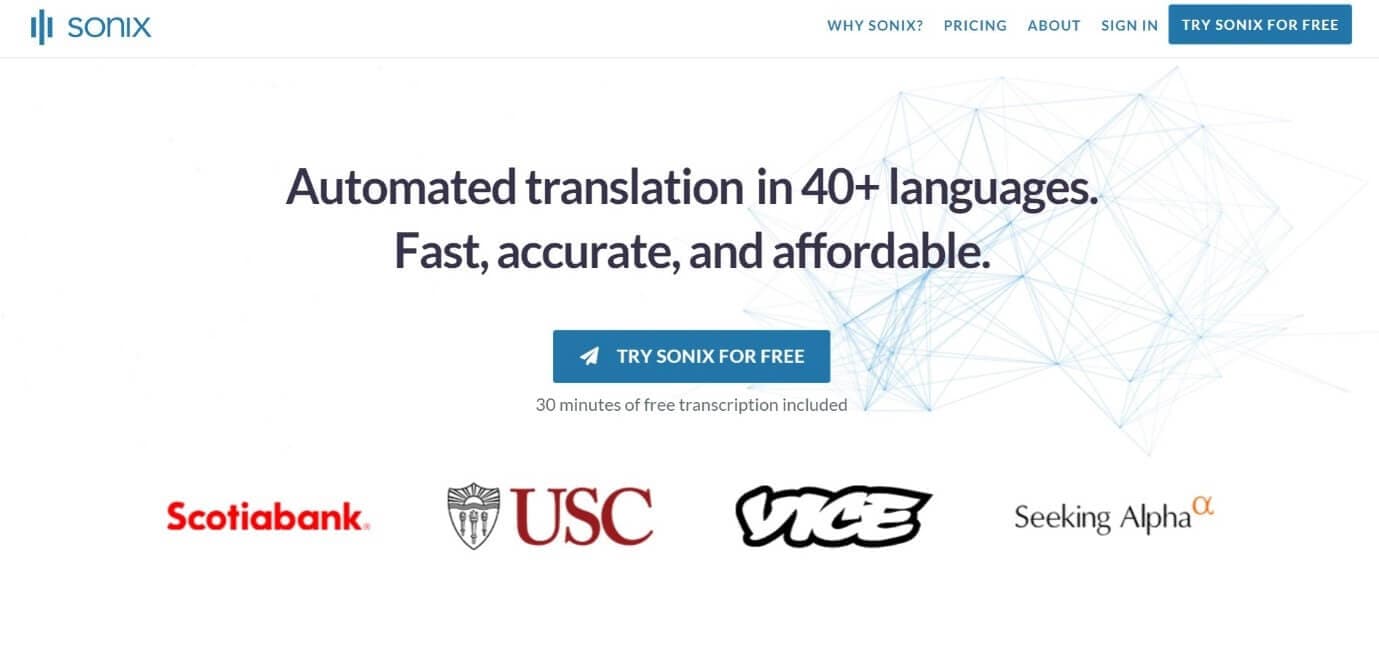
3. Sonix.ai
Sonix is a fast and accurate application that can be used to convert audio to text for any purpose. This application offers a 30-minute free transcription after which an affordable amount may be charged.
Features
- Automatic transcription of files and accessibility of these files from any device
- Advanced translation of these devices into 30 different languages
- Addition of subtitles into any video for easy understanding
- A Sonix media player that allows to share and publish files easily
Pricing
- Free
- Standard subscription - $10 per hour
- Premium subscription - $5 per hour, and an addition of $22 per month
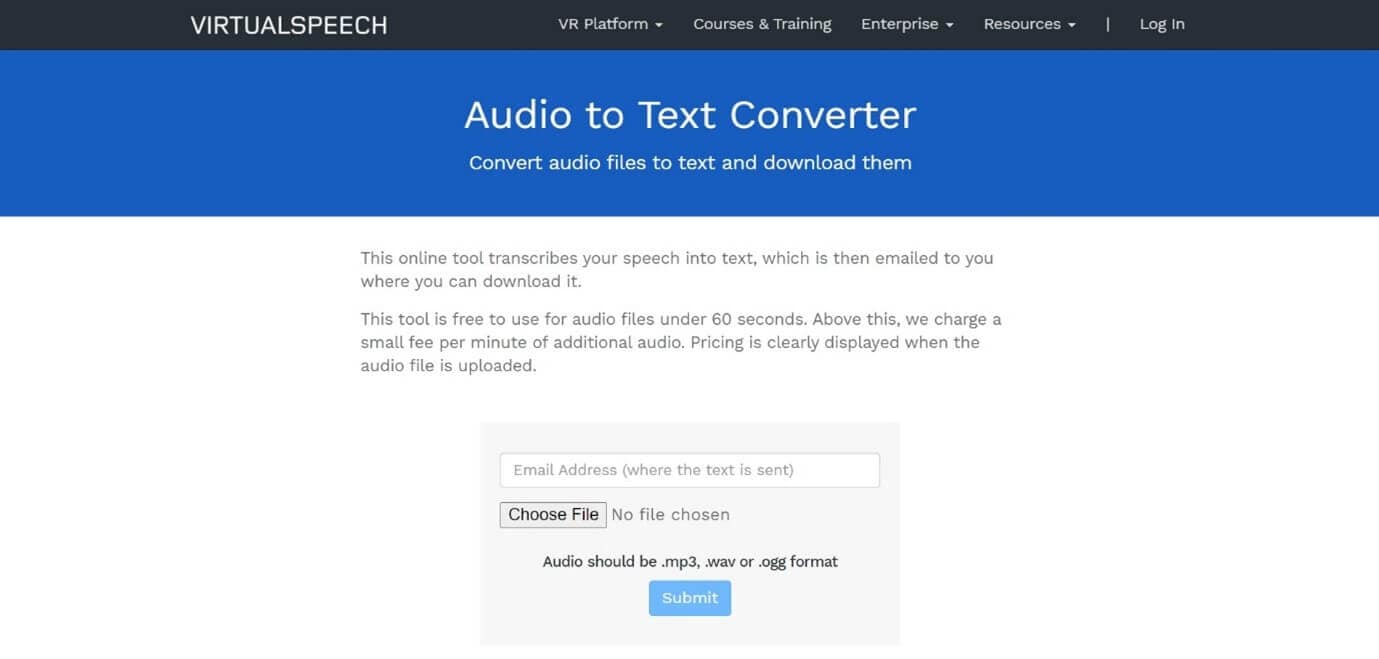
4. Virtualspeech.com
Virtualspeech is an online tool that can transcribe audio to text free. It is a very simple application that allows fats conversion of audio files to texts. After conversion, the file will be emailed to the user from where it can be downloaded and saved.
Features
- Free conversion of any audio files under 1 minute.
- Conversion of audio files of formats Mp3, Wav, or Ogg.
- Provides security as the no files are stored on the server and the site is secured with a b SSL
- Speech to text converter within the site
Pricing
- $0.50 per minute after the free minute

Filmora Audio to Text Converter
Filmora - Audio to Text Converter
• Enables you to convert video speech to text in one click
• Extremely accurate in video speech recognition
• Cross-platform supported - (Windows, Mac, iOS, Android)
Transcribe Audio to Text Free Transcribe Audio to Text Free Transcribe Audio to Text Free Learn More >
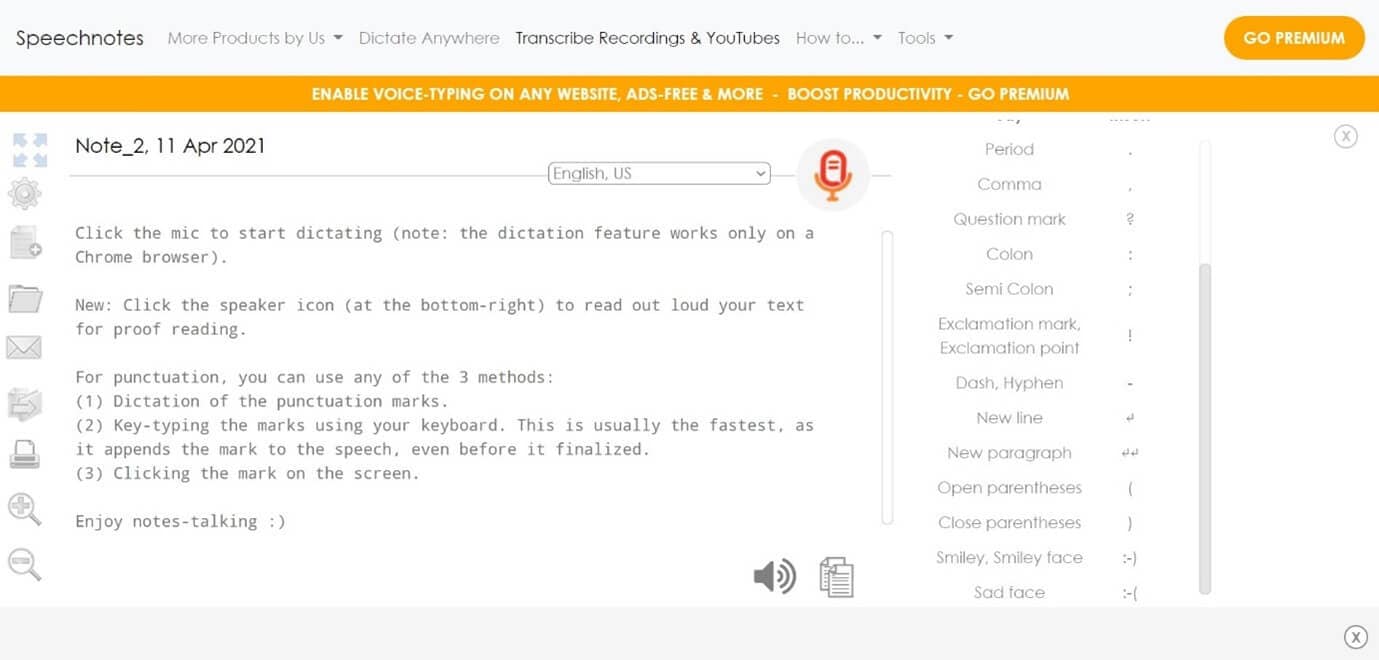
5. Speechnotes
Speechnotes is a powerful online notepad that can easily convert audio to text. This tool has implemented an efficient and clean design that makes conversion and editing very easy.
Features
- Best results with an advanced speech recognition technology
- Built-in tools that allow easy editing and correction of the converted text
- Fast working on any web browser and no installation apps required
- Autosave feature that ensures that your data is not lost
- Export to Google Drive option for easy accessibility from any device
Pricing
- Free
- Premium version with the addition of some extra features
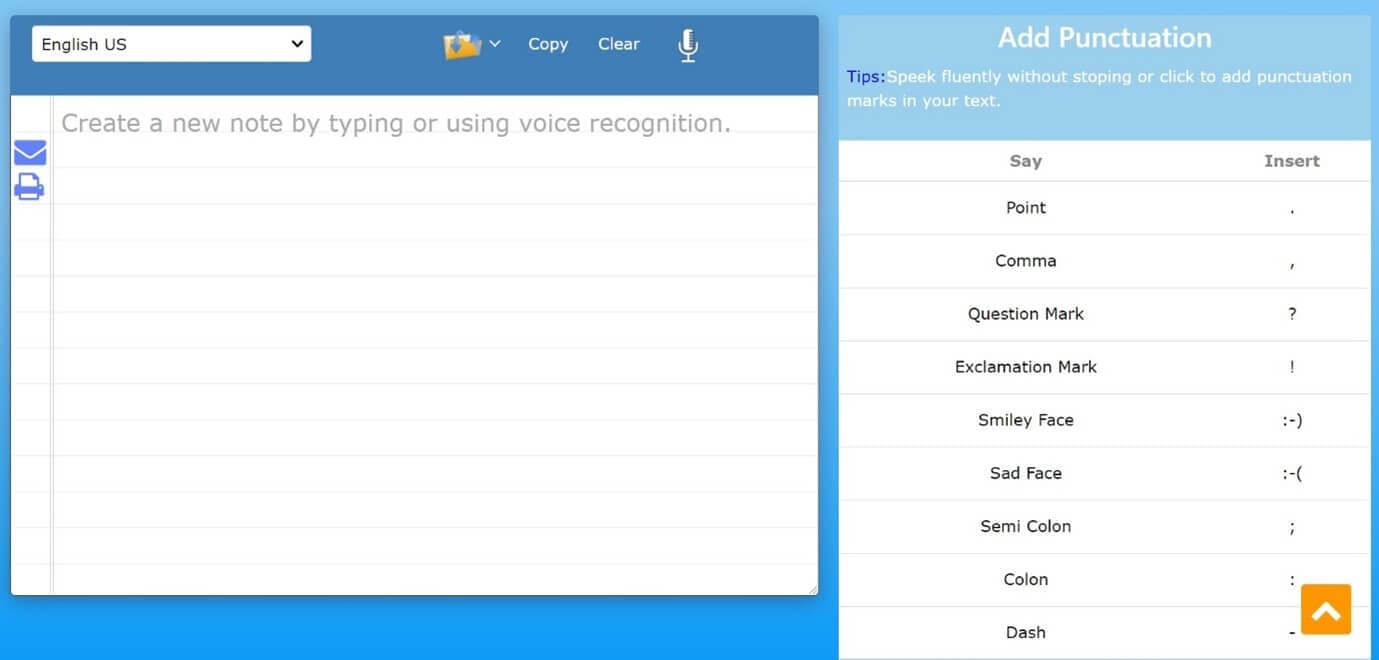
6. SpeechTexter
SpeechTexter is a multilingual application that can help you transcribe any type of book, document, blog posts, etc. by using your audio. This tool has a custom dictionary that allows adding short commands for adding frequently used data like phone numbers, punctuation marks, addresses, etc.

Features
- Offers accuracy rate of 90 to 95% percent
- Can be used to increase your fluency in English
- Offers powerful real-time speech recognition
- Easy creation of emails, text notes, blog posts, etc.
- A custom dictionary that can be customized according to the individual use
- Supports more than 60 languages
- Available on both chrome browser and android
Pricing
- Free
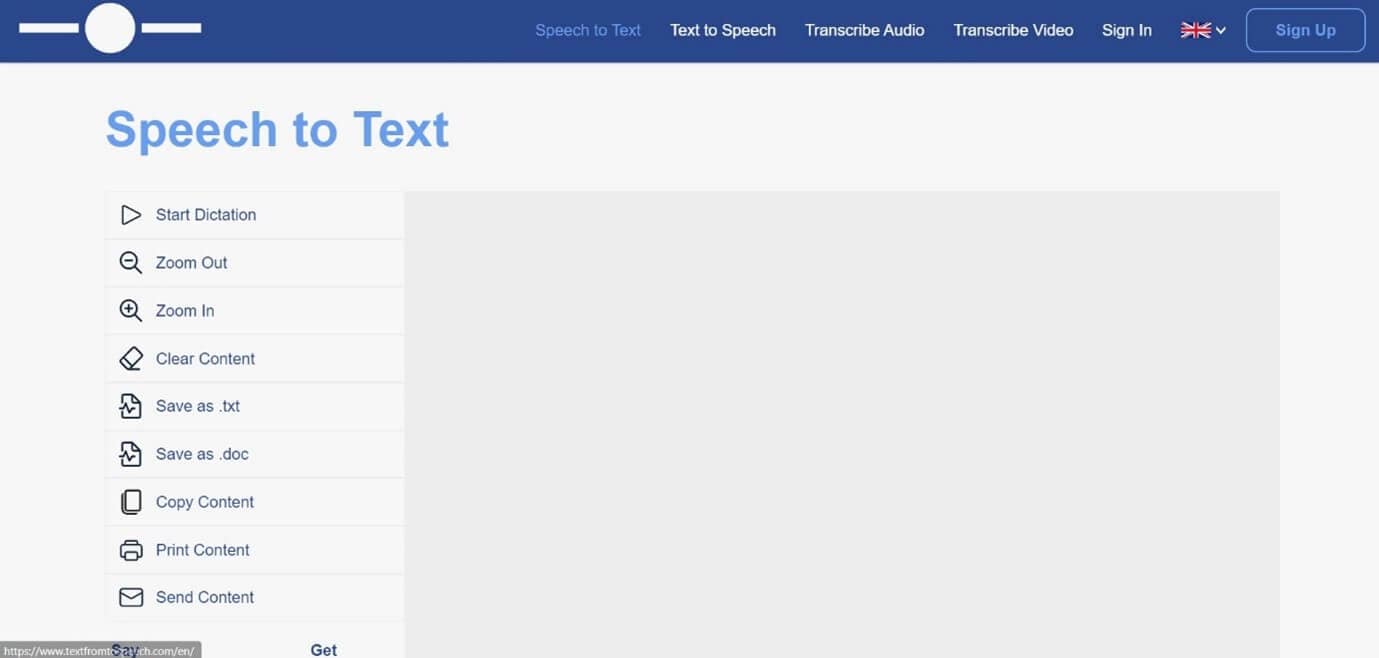
7. Textfromtospeech.com
Textfromtospeech is a free online tool that allows you to easily convert audio to text without the need for registration downloading or installation. It has a very simple interface that can record and convert your speech into text with a single click.
Features
- Free and online text recognition and transcription
- Supports many languages
- Pause and record option while converting large files
- Can use voice commands for insertion of symbols like “comma”, “full stop”, etc.
- Smart capitalization
- Easy saving, copying, and sharing of the dictated text
- Available on mobile devices, tablet, and computer
Pricing
- Free
A cross-platform for making videos anywhere for all creators

Why your video editing isn’t good enough? How about some creative inspo?
- 100 Million+ Users
- 150+ Countries and Regions
- 4 Million+ Social Media Followers
- 5 Million+ Stock Media for Use
* Secure Download 
8. Dictation.io
Dictation is a free and simple tool that offers fast conversion of audio to text. Its interface is like that of a very simple notepad and allows the conversion of audio to text for a number of languages including English, Español, Français, Italiano, Português, and more.

Features
- Advanced speech recognition
- Easy editing within the notes
- Easy sharing to mail, tweets, etc.
- No storing of any data and hence offers the necessary security
Pricing
- Free
9. Voice Note
Voice Note is an online speech recognition tool that can automatically record and type anything including speech, interview, etc. This tool can convert any audio file into text format which can easily be opened in Microsoft Word.
Features
- No saving of data in any servers
- Customizable options for audio and text
- A number of languages to choose from while converting audio to text
- Easy copying and exporting options
- Direct Print option from the site
Price
- Free
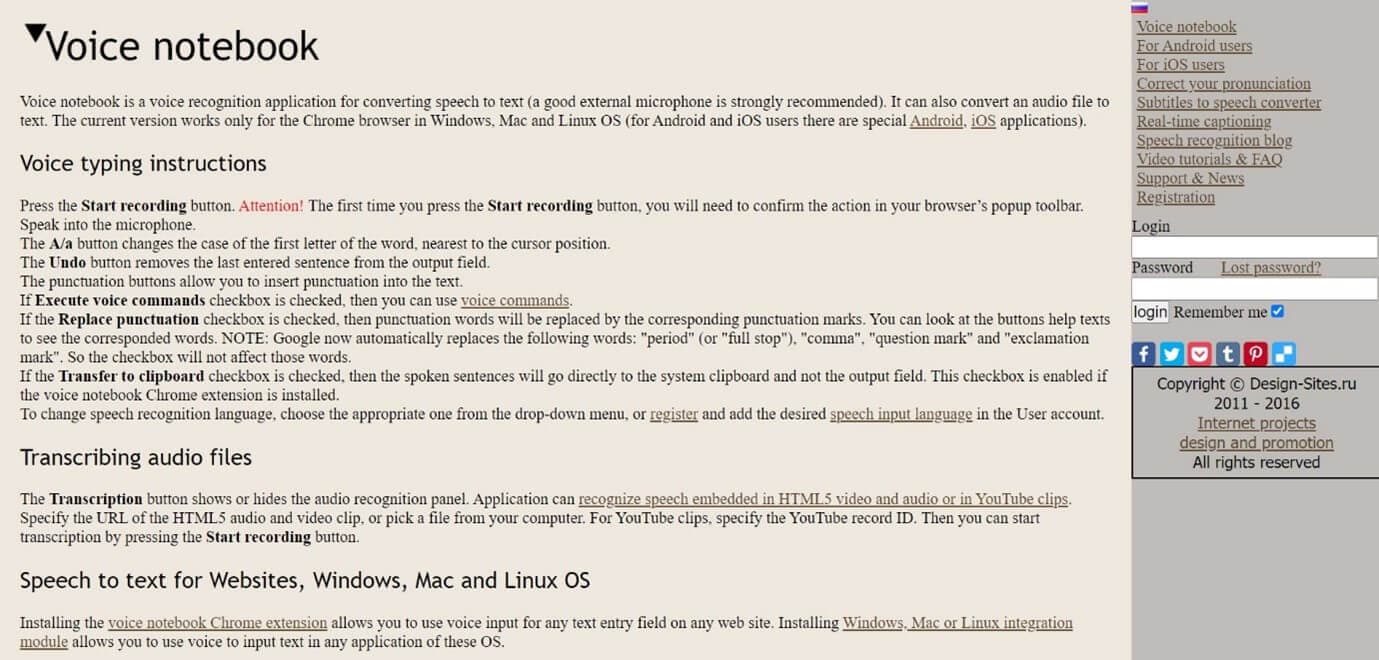
10. Voice Notebook
Voice Notebook is a speech recognition app that can also convert audio files to text. This application is compatible with a wide range of devices like Mac, Windows, Linux OS, Android, and iOS.
Features
- Voice commands are available when you transcribe audio to text
- Has the ability to recognize any speech embedded in YouTube clips or HTML5 audio or video
- Simple interface and easy editing of text
- An option to download into TXT format is available
Price
- Free
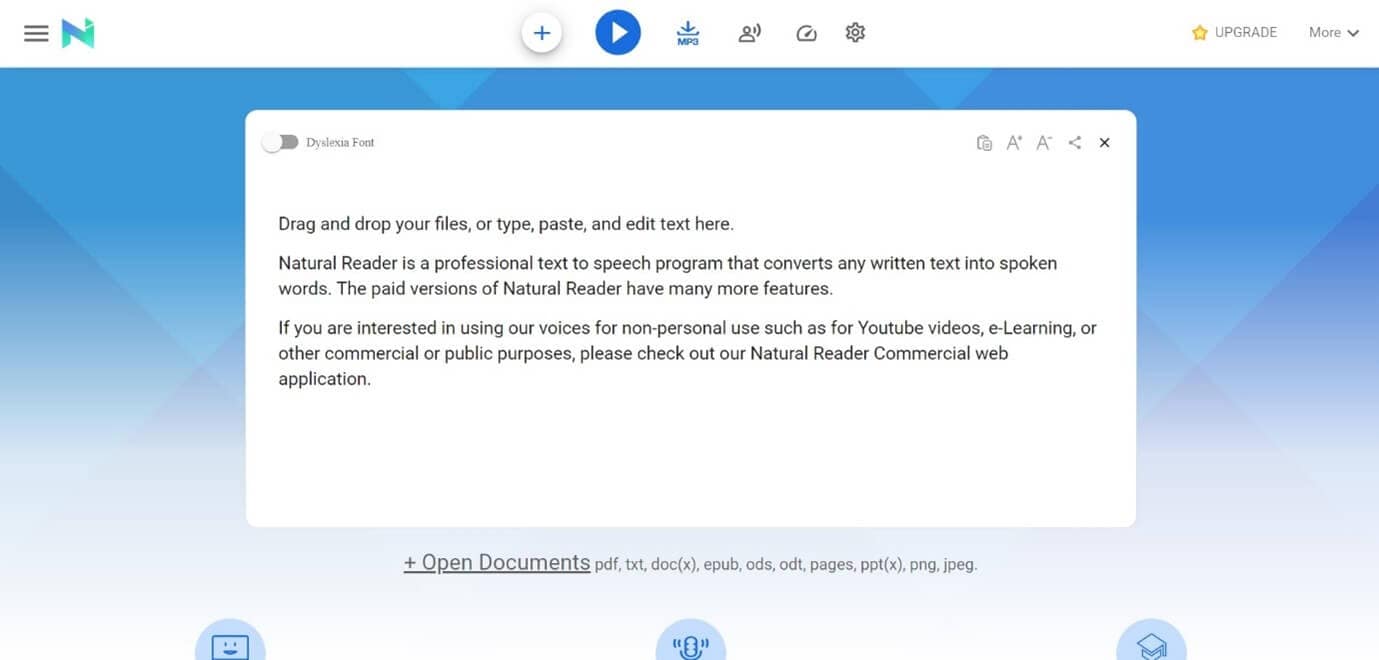
11. NaturalReaders
Natural Readers is a professional program that can convert any text into spoken words. This program offers a lot of features like adjusting the speed of audio, conversion into mp3, selection of voice, etc.
Features
- A font option available for dyslexic people
- Supports formats like pdf, txt, docs, epub, ods, ppt, png, jpeg
- App versions of this online tool are available both for android and apple devices
Pricing
- Free
- Premium plan - $9.99 per month, $59.88 per year
- Plus plan - $19.00 per month, $110.00 per year
Filmora Audio to Text Converter
Filmora - Audio to Text Converter
• Enables you to convert video speech to text in one click
• Extremely accurate in video speech recognition
• Cross-platform supported - (Windows, Mac, iOS, Android)
Transcribe Audio to Text Free Transcribe Audio to Text Free Transcribe Audio to Text Free Learn More >
Conclusion
We have listed above the top 11 tools that can be used to convert audio to text on any device using a browser. Converting audio to text allows you to easily access the required information, edit it, or even share it fully or partially with anyone you wish,
The applications we have listed are free and some of them might charge for the extra features they provide. So no matter what your profession is if you are looking for an app to convert audio to text or record and produce the text of the recordings, choose any one of the listed above applications.
We hope our suggestions help you reduce effort and save time. Please leave your valuable feedback in the comment box below, thank you.
Transform Long Videos into Short Ones Instantly
Turn long videos into viral clips. Effortlessly transform lengthy videos into engaging, shareable clips.


Shanoon Cox
Shanoon Cox is a writer and a lover of all things video.
Follow @Shanoon Cox
Shanoon Cox
Mar 27, 2024• Proven solutions
An audio-to-text converter is a tool that can convert audio files to texts or even record any audio and produce the text of it simultaneously. Audio files are one of the most used methods of storing information. From online classes and long lectures to big business meetings and product information, audio is being shared a lot across the world.
But accessing information from a long audio file can be difficult and time-consuming, which is why there is a need to convert audio to text. Information in the form of text can easily be fully or partly accessed and edited whenever needed. And texts can also easily be shared with whomever you want.
So let’s have a look at some of the best audio-to-text converters that might be of use to you.
10+ Free Online Audio to Text Converters
There is number of audio text converters available in the online market that can help you while studying, researching, or even in your business. Some of these recorders can convert any audio file to texts while some others can record and convert to text at the same time. Here we will talk about the top 11 free applications that can be used to convert audio to text.
| 1 - Filmora | 2 - Audext | 3 - Sonix.ai |
|---|---|---|
| 4 - Virtualspeech.com | 5 - Speechnotes | 6 - SpeechTexter |
| 7 - Textfromtospeech.com | 8 - Dictation.io | 9 - Voice Note |
| 10 - Voice Notebook | 11 - NaturalReaders |
1. Wondershare Filmora
Filmora’s Speech To Text (STT) function allows you to transcript audio/voice to subtitles/text in one click. it can save your plenty of time on transcribing subtitles and boost your editing efficiency by applying speech-to-text.
What you need to do is download the software and subsribe for its plan.
Features
- Built-in function to transcribe subtitles and captions for your video
- High accuracy in generating text, allows you to edit text by yourself
- Supports up to 26 languages of transcription to engage more users all around the world
- Offers various tools for editing your videos and audio
2. Audext
Audext is a free online application that can help you to save a lot of time while transcribing any audio to text. The transcription to text is done with the use of an advanced AI and hence produces faster and more accurate results.
Audext is used by people from different sectors like education, marketing, media, consulting, healthcare, etc. for their work purposes.
Features
- An inbuilt editor for editing the text while transcribing
- Identifies the speaker easily
- Supports a variety of audio and video formats like MP3, WAV, MP4, etc.
- Offers an option of easy upload and export of files
Pricing
- Free
- Transcription costs for one hour are $12
- Or with the subscription $5
3. Sonix.ai
Sonix is a fast and accurate application that can be used to convert audio to text for any purpose. This application offers a 30-minute free transcription after which an affordable amount may be charged.
Features
- Automatic transcription of files and accessibility of these files from any device
- Advanced translation of these devices into 30 different languages
- Addition of subtitles into any video for easy understanding
- A Sonix media player that allows to share and publish files easily
Pricing
- Free
- Standard subscription - $10 per hour
- Premium subscription - $5 per hour, and an addition of $22 per month
4. Virtualspeech.com
Virtualspeech is an online tool that can transcribe audio to text free. It is a very simple application that allows fats conversion of audio files to texts. After conversion, the file will be emailed to the user from where it can be downloaded and saved.
Features
- Free conversion of any audio files under 1 minute.
- Conversion of audio files of formats Mp3, Wav, or Ogg.
- Provides security as the no files are stored on the server and the site is secured with a b SSL
- Speech to text converter within the site
Pricing
- $0.50 per minute after the free minute
Filmora Audio to Text Converter
Filmora - Audio to Text Converter
• Enables you to convert video speech to text in one click
• Extremely accurate in video speech recognition
• Cross-platform supported - (Windows, Mac, iOS, Android)
Transcribe Audio to Text Free Transcribe Audio to Text Free Transcribe Audio to Text Free Learn More >
5. Speechnotes
Speechnotes is a powerful online notepad that can easily convert audio to text. This tool has implemented an efficient and clean design that makes conversion and editing very easy.
Features
- Best results with an advanced speech recognition technology
- Built-in tools that allow easy editing and correction of the converted text
- Fast working on any web browser and no installation apps required
- Autosave feature that ensures that your data is not lost
- Export to Google Drive option for easy accessibility from any device
Pricing
- Free
- Premium version with the addition of some extra features
6. SpeechTexter
SpeechTexter is a multilingual application that can help you transcribe any type of book, document, blog posts, etc. by using your audio. This tool has a custom dictionary that allows adding short commands for adding frequently used data like phone numbers, punctuation marks, addresses, etc.
Features
- Offers accuracy rate of 90 to 95% percent
- Can be used to increase your fluency in English
- Offers powerful real-time speech recognition
- Easy creation of emails, text notes, blog posts, etc.
- A custom dictionary that can be customized according to the individual use
- Supports more than 60 languages
- Available on both chrome browser and android
Pricing
- Free
7. Textfromtospeech.com
Textfromtospeech is a free online tool that allows you to easily convert audio to text without the need for registration downloading or installation. It has a very simple interface that can record and convert your speech into text with a single click.
Features
- Free and online text recognition and transcription
- Supports many languages
- Pause and record option while converting large files
- Can use voice commands for insertion of symbols like “comma”, “full stop”, etc.
- Smart capitalization
- Easy saving, copying, and sharing of the dictated text
- Available on mobile devices, tablet, and computer
Pricing
- Free
A cross-platform for making videos anywhere for all creators
Why your video editing isn’t good enough? How about some creative inspo?
- 100 Million+ Users
- 150+ Countries and Regions
- 4 Million+ Social Media Followers
- 5 Million+ Stock Media for Use
* Secure Download
8. Dictation.io
Dictation is a free and simple tool that offers fast conversion of audio to text. Its interface is like that of a very simple notepad and allows the conversion of audio to text for a number of languages including English, Español, Français, Italiano, Português, and more.
Features
- Advanced speech recognition
- Easy editing within the notes
- Easy sharing to mail, tweets, etc.
- No storing of any data and hence offers the necessary security
Pricing
- Free
9. Voice Note
Voice Note is an online speech recognition tool that can automatically record and type anything including speech, interview, etc. This tool can convert any audio file into text format which can easily be opened in Microsoft Word.
Features
- No saving of data in any servers
- Customizable options for audio and text
- A number of languages to choose from while converting audio to text
- Easy copying and exporting options
- Direct Print option from the site
Price
- Free
10. Voice Notebook
Voice Notebook is a speech recognition app that can also convert audio files to text. This application is compatible with a wide range of devices like Mac, Windows, Linux OS, Android, and iOS.
Features
- Voice commands are available when you transcribe audio to text
- Has the ability to recognize any speech embedded in YouTube clips or HTML5 audio or video
- Simple interface and easy editing of text
- An option to download into TXT format is available
Price
- Free
11. NaturalReaders
Natural Readers is a professional program that can convert any text into spoken words. This program offers a lot of features like adjusting the speed of audio, conversion into mp3, selection of voice, etc.
Features
- A font option available for dyslexic people
- Supports formats like pdf, txt, docs, epub, ods, ppt, png, jpeg
- App versions of this online tool are available both for android and apple devices
Pricing
- Free
- Premium plan - $9.99 per month, $59.88 per year
- Plus plan - $19.00 per month, $110.00 per year
Filmora Audio to Text Converter
Filmora - Audio to Text Converter
• Enables you to convert video speech to text in one click
• Extremely accurate in video speech recognition
• Cross-platform supported - (Windows, Mac, iOS, Android)
Transcribe Audio to Text Free Transcribe Audio to Text Free Transcribe Audio to Text Free Learn More >
Conclusion
We have listed above the top 11 tools that can be used to convert audio to text on any device using a browser. Converting audio to text allows you to easily access the required information, edit it, or even share it fully or partially with anyone you wish,
The applications we have listed are free and some of them might charge for the extra features they provide. So no matter what your profession is if you are looking for an app to convert audio to text or record and produce the text of the recordings, choose any one of the listed above applications.
We hope our suggestions help you reduce effort and save time. Please leave your valuable feedback in the comment box below, thank you.
Transform Long Videos into Short Ones Instantly
Turn long videos into viral clips. Effortlessly transform lengthy videos into engaging, shareable clips.
Shanoon Cox
Shanoon Cox is a writer and a lover of all things video.
Follow @Shanoon Cox
How to Add Photos to Audio
How to Add Photos to Audio
Shanoon Cox
Mar 27, 2024• Proven solutions
Want to add photos to audio so that you can upload it to YouTube? Or want to turn your photo albums into a stunning slideshow? You can do it quickly in the video editing software like Wondershare Filmora (originally Wondershare Video Editor) . This powerful tool will help you easily make a creative creation on your own. Follow the simple five-step instructions below to learn how to add photos to audio with just three simple steps.
Simply free download filmora video editor if you don’t have it yet.
Download Mac Version ](https://tools.techidaily.com/wondershare/filmora/download/ )
How to add photos to audio step by step guide
1Import your photo and audio files
Install and run Video Editor. Choose from “16:9” or “4:3” ratio rate. Then click the “Import” button to import your photo and audio files. You can also directly drag and drop the files to the program.

2Add photos to audio and rearrange them
Then select these added files and move them to the corresponding tracks on the timeline panel below. The photos should be placed on the video track and the audio file on the music track. Then put the photos in the order you want them to appear in your creation. After that, adjust timing by highlighting and target file and moving the red slider.
Besides that, you can also improve the quality of your photos and even apply special effects to them. To review the list of available filters and effects, click the “Effects” button in the tool bar to display the menu. Here is a detailed guide about how to apply effects to video.
If the audio file needs editing, double click it and adjust the volume and pitch or add fade in or fade out effect in the pop up window.

3Share or save our own creation
After adding photos to audio, you can save the creation in different ways. In the “Format” tab, you can save the file in any popular media format. If you want the file be played on mobile devices, go to the “Device” tab and choose one of the devices from the list.
Of course, publish it in social media like Facebook and YouTube is also another good choice if you want to share the video with your friend. To do this, click the “Create” button and go to the “YouTube” tab. Fill in the information and this program will publish your creation to the social media pages - it will be uploaded promptly and properly. You can also burn a DVD and present your family or friends with a beautifully packaged disk.

Download Mac Version ](https://tools.techidaily.com/wondershare/filmora/download/ )
Shanoon Cox
Shanoon Cox is a writer and a lover of all things video.
Follow @Shanoon Cox
Shanoon Cox
Mar 27, 2024• Proven solutions
Want to add photos to audio so that you can upload it to YouTube? Or want to turn your photo albums into a stunning slideshow? You can do it quickly in the video editing software like Wondershare Filmora (originally Wondershare Video Editor) . This powerful tool will help you easily make a creative creation on your own. Follow the simple five-step instructions below to learn how to add photos to audio with just three simple steps.
Simply free download filmora video editor if you don’t have it yet.
Download Mac Version ](https://tools.techidaily.com/wondershare/filmora/download/ )
How to add photos to audio step by step guide
1Import your photo and audio files
Install and run Video Editor. Choose from “16:9” or “4:3” ratio rate. Then click the “Import” button to import your photo and audio files. You can also directly drag and drop the files to the program.
2Add photos to audio and rearrange them
Then select these added files and move them to the corresponding tracks on the timeline panel below. The photos should be placed on the video track and the audio file on the music track. Then put the photos in the order you want them to appear in your creation. After that, adjust timing by highlighting and target file and moving the red slider.
Besides that, you can also improve the quality of your photos and even apply special effects to them. To review the list of available filters and effects, click the “Effects” button in the tool bar to display the menu. Here is a detailed guide about how to apply effects to video.
If the audio file needs editing, double click it and adjust the volume and pitch or add fade in or fade out effect in the pop up window.
3Share or save our own creation
After adding photos to audio, you can save the creation in different ways. In the “Format” tab, you can save the file in any popular media format. If you want the file be played on mobile devices, go to the “Device” tab and choose one of the devices from the list.
Of course, publish it in social media like Facebook and YouTube is also another good choice if you want to share the video with your friend. To do this, click the “Create” button and go to the “YouTube” tab. Fill in the information and this program will publish your creation to the social media pages - it will be uploaded promptly and properly. You can also burn a DVD and present your family or friends with a beautifully packaged disk.
Download Mac Version ](https://tools.techidaily.com/wondershare/filmora/download/ )
Shanoon Cox
Shanoon Cox is a writer and a lover of all things video.
Follow @Shanoon Cox
Syncing Audiovisual Elements: Adding Soundtracks to Video in Adobe Premiere
Versatile Video Editor - Wondershare Filmora
An easy yet powerful editor
Numerous effects to choose from
Detailed tutorials provided by the official channel
Look at any of the spot commercials, wedding videos, or even some family candid videos. Adding audio makes them appealing and likable. To catch a potential customer or create an emotional connection with the viewer combination of audio and video is a must. This makes the footage attractive and exceptional.
Read on to know more about the step-by-step approach how to add audio to video in Adobe Premiere Pro.
In this article
01 [How to add audio to video in Premiere Pro](#Part 1)
02 [How to adjust audio in Premiere Pro](#Part 2)
03 [Adding Audio to Video files](#Part 3)
Part 1 How to add audio to video in Premiere Pro
Some essential pointers for all would-be videographers are:
● Before you add audio to video in Premiere Pro, be ready to see your file size increase to a large extent. If you add a background score of 15MB, your total video file size will increase by the same amount of 15MB. The best way to take care of such a problem is to use additional compression techniques to get a suitable file size.
● Most videographers use lots of software tools to add audio to video professionally. One such trending software tool is the Adobe Premiere Pro. Its simple to add audio to video in Premiere Pro, edit your audio and video, and fine-tune the audio volume of each video project.
Let’s learn how.

Step1 Find out the Audio option
Navigate to the Audio workspace, select Audio at the top on the tools bar
Step2 Choose the Workspace
Click Window select Workspace click on Audio
Step3 Check toolbar
Within Audio, click on Choose Window Media Browser to show the Media Browser toolbar.
Step4 Select audio files
Go to your audio file; for Windows OS, right-click or control-click the selected audio file for macOS.
Step5 Import and add
Please select the desired audio file, then click import to add it to your Project.
An important tip is to keep the Ingest box selected if you want to copy your audio file concurrently to your project folder.
Adding audio to your series

Step1 Go to the Project panel
Select Window, click on Project to open the Project panel.
Step2 Select audio file
Click on the audio file you imported to select it.
Step3 Check the waveform
Double click the file to open it in the Source panel to check the sound and waveform.
Step4 Check sounds
Play the audio file if you want to check the audio quality, volume, and overall sound.
Step5 Add audio to the video track
Hold the left click on your mouse to drag the audio file to the series in the Timeline panel. You can add any audio file to the video track listed in the panel window in this step.
Step6 Trim audio file
Select the Trim option to trim your audio file the same way you will edit the video file in the final step.
Part 2 How to adjust audio in Premiere Pro
Now that you have understood how to add audio to video in Adobe Premier Pro. Let’s know how to adjust audio in Premier Pro.

Step1 Activate the series
Press on the spacebar to activate your series in the Program panel (appears in the top right of the panel)
Step2 Stop playback
To stop the playback, press the space bar again.
Step3 Choose starting point of playback
Press down the left mouse button to hold and drag the Blue colored play head to wherever you desire the playback to start.
If you feel the audio track is mild or too harsh compared to the rest of the audio series, change each audio track’s volume separately.
Step1 Select Audio Track Mixer
Click Window selects Audio Track Mixer from the menu.
Step2 Click the series name to see the audio mixer
Click the series name of your audio file to show the audio mixer for your series.
Step3 Choose playback to play the audio
At the bottom of the panel is the Audio Track Mixer. Click on playback to star, pause or play your audio in-ring sequence.
Step4 Click on the slider
When your audio file plays or loops, click on the slider to move up or down. It will increase or reduce the volume of each separate audio track in your audio series.
Step5 Adjust the volume
Use the slider to adjust the overall audio volume
Tips
Always keep the audio projects within the -6 to 3 dB volume range to get the best quality of the audio effect. Any lower you won’t be able to hear the sound, or if it’s higher, the sound will hurt the listeners’ ears.
Professional advice to all beginner-level videographers is that as Premiere Pro is complex so you need more straightforward tools like Filmora for all your video editing work. Filmora is easy to use and much cheaper than Premiere Pro.
You may think now why or how Filmora can be the best as an alternative on how to add audio to video using Premiere Pro. Well! It will help you to transform your video into a piece of art incredibly by offering simple drag and drop options, including an easy-to-use interface and powerful editing tools. You can:
● Edit and create your videos with minimal effort
● Get a Music Library to add comedy, fear, tension, and love to every scene
● Get several royalty-free songs and sound effects
● Create videos with up to 800 stunning effects
● Unleash your creativity with its offered Hollywood effects
● Import and export in almost any type of video format
How to use Filmora to add audio to video
Adding sound to any video file enhances its viewability and the whole experience of watching any video. To do this, you need to add audio to video. The same can be done quickly in Filmora, a 3rd-party video editing software tool now the hot favorite of amateur and professional video editors. Below we describe how to add audio to video in Filmora.
Import Media
To start the process of adding audio to video follow these steps.
Step1 Select the audio, add using the Import option or drag and select
Import selected audio using the Filmora Media Panel and add it to your timeline. You can also choose and drag the audio file from the source folder to the Media Panel. Filmora supports multiple audio file formats to ease adding audio to video. The supported audio files are MP3, M4V, MPA, WAV, WMA.

Step2 Add and make the audio file
Adding the audio file to Filmora Media Panel makes it a media asset and can now be used multiple times in future projects. The original file remains as Filmora doesn’t change the original audio file.
Step3 Copying or deleting an audio file
In Filmora, using the feature of copying or deleting an audio file, you can work on the audio and video from any computer or remote PC.
Part 3 Adding Audio to Video files
Using Filmora, it is easy to sync or add audio to the video, which is separately recorded and stored on your device.
Using Filmora, it is easy to sync or add audio to the video, which is separately recorded and stored on your device.
Step1 Click on Import in the Media Panel
Select the audio and video files to import them into Filmora.
Step2 Click on the video file to add audio
Press the Ctrl key (Windows) or Cmd key (Mac OS) and click on the audio file.
Step3 Add audio to video
Right-click on the files selected and choose the Merge audio & video option to add audio to the video.
Filmora analyzes audio and video files and replaces the existing audio with the newly selected audio file. Once the synchronization process is over, the new merged file will be available in the Media Panel for future processing.
The synchronized file will have the same terminology as the original video file with a difference. It will get an extension Merged to its name.
The original file will not get affected in Filmora. This software tool only references the files to generate a new file. The new file created when you add audio to the video can now be added to the timeline and exported.
Wondershare Filmora
Get started easily with Filmora’s powerful performance, intuitive interface, and countless effects Try It Free Try It Free Learn More about Filmora>

Conclusion
So, this article listed how to add audio to video in Premiere Pro via a step-by-step guide. The guide lets you know the easy method of adding audio to video in Adobe Premiere Pro to all potential videographers. Thus, you can now start your journey of video edition by putting your best click forward Try It Free
Look at any of the spot commercials, wedding videos, or even some family candid videos. Adding audio makes them appealing and likable. To catch a potential customer or create an emotional connection with the viewer combination of audio and video is a must. This makes the footage attractive and exceptional.
Read on to know more about the step-by-step approach how to add audio to video in Adobe Premiere Pro.
In this article
01 [How to add audio to video in Premiere Pro](#Part 1)
02 [How to adjust audio in Premiere Pro](#Part 2)
03 [Adding Audio to Video files](#Part 3)
Part 1 How to add audio to video in Premiere Pro
Some essential pointers for all would-be videographers are:
● Before you add audio to video in Premiere Pro, be ready to see your file size increase to a large extent. If you add a background score of 15MB, your total video file size will increase by the same amount of 15MB. The best way to take care of such a problem is to use additional compression techniques to get a suitable file size.
● Most videographers use lots of software tools to add audio to video professionally. One such trending software tool is the Adobe Premiere Pro. Its simple to add audio to video in Premiere Pro, edit your audio and video, and fine-tune the audio volume of each video project.
Let’s learn how.
Step1 Find out the Audio option
Navigate to the Audio workspace, select Audio at the top on the tools bar
Step2 Choose the Workspace
Click Window select Workspace click on Audio
Step3 Check toolbar
Within Audio, click on Choose Window Media Browser to show the Media Browser toolbar.
Step4 Select audio files
Go to your audio file; for Windows OS, right-click or control-click the selected audio file for macOS.
Step5 Import and add
Please select the desired audio file, then click import to add it to your Project.
An important tip is to keep the Ingest box selected if you want to copy your audio file concurrently to your project folder.
Adding audio to your series
Step1 Go to the Project panel
Select Window, click on Project to open the Project panel.
Step2 Select audio file
Click on the audio file you imported to select it.
Step3 Check the waveform
Double click the file to open it in the Source panel to check the sound and waveform.
Step4 Check sounds
Play the audio file if you want to check the audio quality, volume, and overall sound.
Step5 Add audio to the video track
Hold the left click on your mouse to drag the audio file to the series in the Timeline panel. You can add any audio file to the video track listed in the panel window in this step.
Step6 Trim audio file
Select the Trim option to trim your audio file the same way you will edit the video file in the final step.
Part 2 How to adjust audio in Premiere Pro
Now that you have understood how to add audio to video in Adobe Premier Pro. Let’s know how to adjust audio in Premier Pro.
Step1 Activate the series
Press on the spacebar to activate your series in the Program panel (appears in the top right of the panel)
Step2 Stop playback
To stop the playback, press the space bar again.
Step3 Choose starting point of playback
Press down the left mouse button to hold and drag the Blue colored play head to wherever you desire the playback to start.
If you feel the audio track is mild or too harsh compared to the rest of the audio series, change each audio track’s volume separately.
Step1 Select Audio Track Mixer
Click Window selects Audio Track Mixer from the menu.
Step2 Click the series name to see the audio mixer
Click the series name of your audio file to show the audio mixer for your series.
Step3 Choose playback to play the audio
At the bottom of the panel is the Audio Track Mixer. Click on playback to star, pause or play your audio in-ring sequence.
Step4 Click on the slider
When your audio file plays or loops, click on the slider to move up or down. It will increase or reduce the volume of each separate audio track in your audio series.
Step5 Adjust the volume
Use the slider to adjust the overall audio volume
Tips
Always keep the audio projects within the -6 to 3 dB volume range to get the best quality of the audio effect. Any lower you won’t be able to hear the sound, or if it’s higher, the sound will hurt the listeners’ ears.
Professional advice to all beginner-level videographers is that as Premiere Pro is complex so you need more straightforward tools like Filmora for all your video editing work. Filmora is easy to use and much cheaper than Premiere Pro.
You may think now why or how Filmora can be the best as an alternative on how to add audio to video using Premiere Pro. Well! It will help you to transform your video into a piece of art incredibly by offering simple drag and drop options, including an easy-to-use interface and powerful editing tools. You can:
● Edit and create your videos with minimal effort
● Get a Music Library to add comedy, fear, tension, and love to every scene
● Get several royalty-free songs and sound effects
● Create videos with up to 800 stunning effects
● Unleash your creativity with its offered Hollywood effects
● Import and export in almost any type of video format
How to use Filmora to add audio to video
Adding sound to any video file enhances its viewability and the whole experience of watching any video. To do this, you need to add audio to video. The same can be done quickly in Filmora, a 3rd-party video editing software tool now the hot favorite of amateur and professional video editors. Below we describe how to add audio to video in Filmora.
Import Media
To start the process of adding audio to video follow these steps.
Step1 Select the audio, add using the Import option or drag and select
Import selected audio using the Filmora Media Panel and add it to your timeline. You can also choose and drag the audio file from the source folder to the Media Panel. Filmora supports multiple audio file formats to ease adding audio to video. The supported audio files are MP3, M4V, MPA, WAV, WMA.
Step2 Add and make the audio file
Adding the audio file to Filmora Media Panel makes it a media asset and can now be used multiple times in future projects. The original file remains as Filmora doesn’t change the original audio file.
Step3 Copying or deleting an audio file
In Filmora, using the feature of copying or deleting an audio file, you can work on the audio and video from any computer or remote PC.
Part 3 Adding Audio to Video files
Using Filmora, it is easy to sync or add audio to the video, which is separately recorded and stored on your device.
Using Filmora, it is easy to sync or add audio to the video, which is separately recorded and stored on your device.
Step1 Click on Import in the Media Panel
Select the audio and video files to import them into Filmora.
Step2 Click on the video file to add audio
Press the Ctrl key (Windows) or Cmd key (Mac OS) and click on the audio file.
Step3 Add audio to video
Right-click on the files selected and choose the Merge audio & video option to add audio to the video.
Filmora analyzes audio and video files and replaces the existing audio with the newly selected audio file. Once the synchronization process is over, the new merged file will be available in the Media Panel for future processing.
The synchronized file will have the same terminology as the original video file with a difference. It will get an extension Merged to its name.
The original file will not get affected in Filmora. This software tool only references the files to generate a new file. The new file created when you add audio to the video can now be added to the timeline and exported.
Wondershare Filmora
Get started easily with Filmora’s powerful performance, intuitive interface, and countless effects Try It Free Try It Free Learn More about Filmora>
Conclusion
So, this article listed how to add audio to video in Premiere Pro via a step-by-step guide. The guide lets you know the easy method of adding audio to video in Adobe Premiere Pro to all potential videographers. Thus, you can now start your journey of video edition by putting your best click forward!
Also read:
- 2024 Approved Vocal Vanishing Act How to Seamlessly Remove Singers Voice From an Audio Track Using Audacity Tools
- Updated Harmonizing Words Into Sounds Top Choices in Online Text-to-Speech Services
- Updated In 2024, Optimizing Your Streams Sound Advanced Tips for Using OBS Audio Ducking
- Updated Harnessing Your iPhones Capabilities Mastering the Art of Speech Savings for 2024
- Updated In 2024, Advanced Techniques for Audio-Video Detachment in Adobe Premiere Pro Projects
- Updated How to Add Audio Fade In Effect, In 2024
- New In 2024, Audiovisual Vocal Transformations at No Charge Expert Techniques for Voice Changes in Filmora Projects
- 2024 Approved The Audio-Visual Connection Step-by-Step Tutorial for Video Editors
- Audiophiles Handbook Advanced iMovie Audio Editing Mastery
- New The 10 Leading Free Online DAW Platforms You Must Check Out
- The Complete Voice Memo Manual for Samsung Galaxy S10/S9 Users for 2024
- 2024 Approved Top 10 Premium Audio Editors for PCs and Macs Beyond Audacity
- Updated Harmonizing Hardware and Software The Ultimate Review of Audio Editing Platforms
- In 2024, Unearth Haunting Audio Tones
- Updated 8 Popular Streaming Audio Recorder That You Cant Miss
- Updated In 2024, Navigating the Voice Recorder App Samsung S10/S9 Edition
- In 2024, Acquiring Crush and Shatter Effects for Sound Design Projects
- Top Free Resources for Acoustic Guitar Chords and Visual Inspiration for 2024
- New Top 10 Complimentary iOS & Android Music-to-Visual Applications for 2024
- New In 2024, The Leading Software Solutions for Separating Sound From Video
- Updated Mastering Audio Clarity Simplified Techniques for Noise Elimination in Audacity & FilmoraPro for 2024
- In 2024, Syncopation Spotlight The Top Video Editing Software for Pairing Sound and Visuals
- Updated Uncovering the Best Methods to Enrich Your Soundscape for 2024
- New Searching for Dynamic Echoes From Breaking Containers for 2024
- Updated In 2024, The Premier List of Windows-Compatible Automatic Speech Recognition Systems
- Comprehensive Vimeo Video Breakdown Including Aspect Ratio for 2024
- Updated In 2024, The Elite Tone Tweaker Guidebook Top-Notch Tools, User Guides & Backup Voice Alteration Techniques
- In 2024, The Ultimate Guide to MP3 Conversion for Your Podcast Episodes
- Updated In 2024, Cinematic Chords An Enriched Repository of Free Royalty-Free Piano Tracks for Video and Movie Audio Design
- Enhancing Accessibility Documenting Computer Audio in Audacity for 2024
- Updated Demystifying Clubhouse Understanding the Social Networks Foundation, Purpose, and Potential Impact
- New SonicCraft User Guide Detailed Product Details, Significant Features, Perspectives From Users
- In 2024, Enhancing Sound Quality From Anywhere A Guide to Modifying Speed and Pitch Through the Web
- In 2024, Mastering Text-to-Speech Proven Conversion Strategies
- Proven Ways to Fix There Was A Problem Parsing the Package on Honor Magic 6 Lite | Dr.fone
- How To Transfer Data From iPhone 15 To Other iPhone 14 Pro devices? | Dr.fone
- How to Change Location on TikTok to See More Content On your Motorola Moto G13 | Dr.fone
- How Can I Catch the Regional Pokémon without Traveling On Honor 100 | Dr.fone
- In 2024, How To Make Transparent Background On Picsart
- In 2024, Unlocking iPhone XS Max Passcode without a Computer | Dr.fone
- In 2024, Forgot Pattern Lock? Heres How You Can Unlock Xiaomi Redmi Note 12R Pattern Lock Screen
- Read This Article to Learn How to Convert Your Slow-Motion Videos Into Normal-Speed Videos in a Few Simple Steps and Methods. So, Stick to the End
- Easy Steps to Create Intro Video with After Effects for 2024
- Will Pokémon Go Ban the Account if You Use PGSharp On Tecno Pova 6 Pro 5G | Dr.fone
- How to Unlock iCloud Activation Lock and iCloud Account From Apple iPhone 8?
- Fake Android Location without Rooting For Your Oppo A78 5G | Dr.fone
- New Making Slow Motion Videos in Premiere Pro A Review on The Best Method
- How to Create Vintage Film Effect 1920S for 2024
- Easy Tutorial for Activating iCloud on iPhone 7 Safe and Legal
- In 2024, How to Remove a Previously Synced Google Account from Your Vivo Y100t
- Updated The Top 10 Most Impressive 4K Video Examples for 2024
- Why Your Xiaomi Redmi Note 12T Pro Screen Might be Unresponsive and How to Fix It | Dr.fone
- Remove Google FRP Lock on Poco C65
- How to Fix the Soft Bricked Tecno Spark 10C? | Dr.fone
- Full Guide to Discord Boost
- Title: 10+ Free Online Audio to Text Converters
- Author: Kate
- Created at : 2024-06-26 11:42:15
- Updated at : 2024-06-27 11:42:15
- Link: https://audio-editing.techidaily.com/10plus-free-online-audio-to-text-converters/
- License: This work is licensed under CC BY-NC-SA 4.0.
